New Project: Reading LOb

Reading Company photo – G Losse collection

Well over the last year or two I have mostly worked on simple projects, changing out trucks on a cars, converting 3-rail bolsters or painting/lettering projects. I think that has been because it is hard to focus on a longer term project with all that has been going on with work, life and the world.

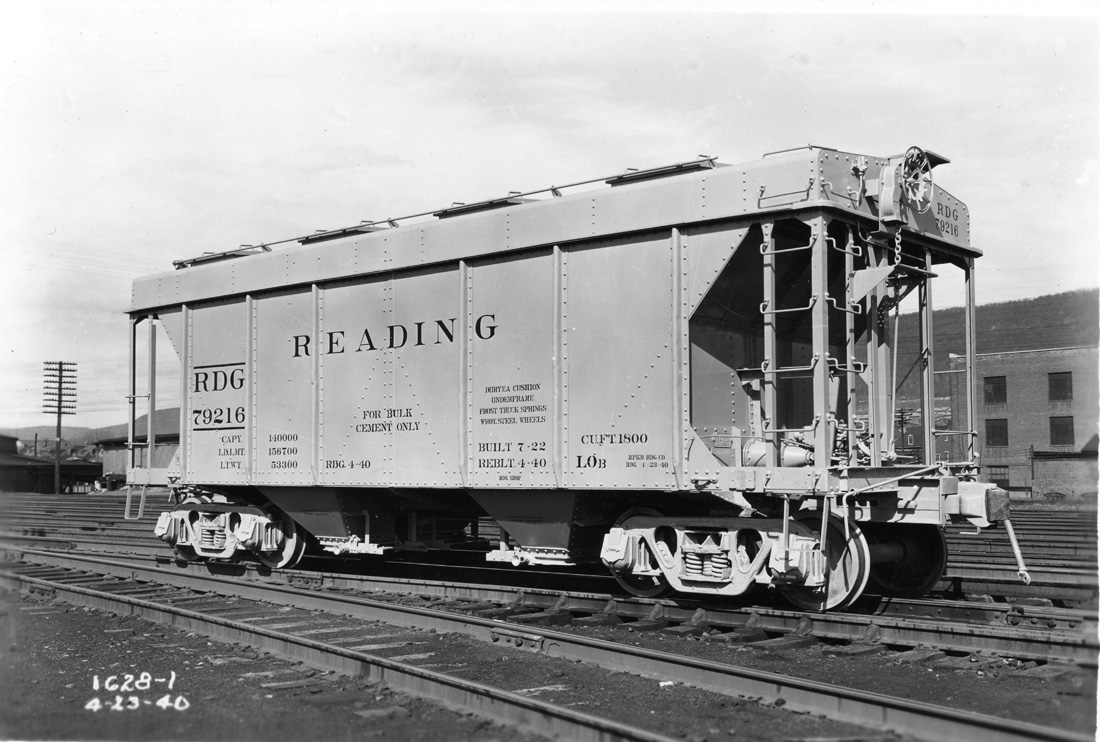
This past weekend, I was looking through different scans for a photo and I found this scan of a diagram the Reading Company had prepared comparing the Class LOb the an ACF car built for the LNE. It should be noted that the drawing is dated November 25, 1939 and the RDG Lob builder’s photo shows a date of April 23, 1940.

The drawing clearly shows the two cars are very close in major dimensions and locations of major components. They ocupy mostly the same space.

Reading Company Drawing – Dated November 25, 1939
LNE Covered Hopper similar to the car in the drawing
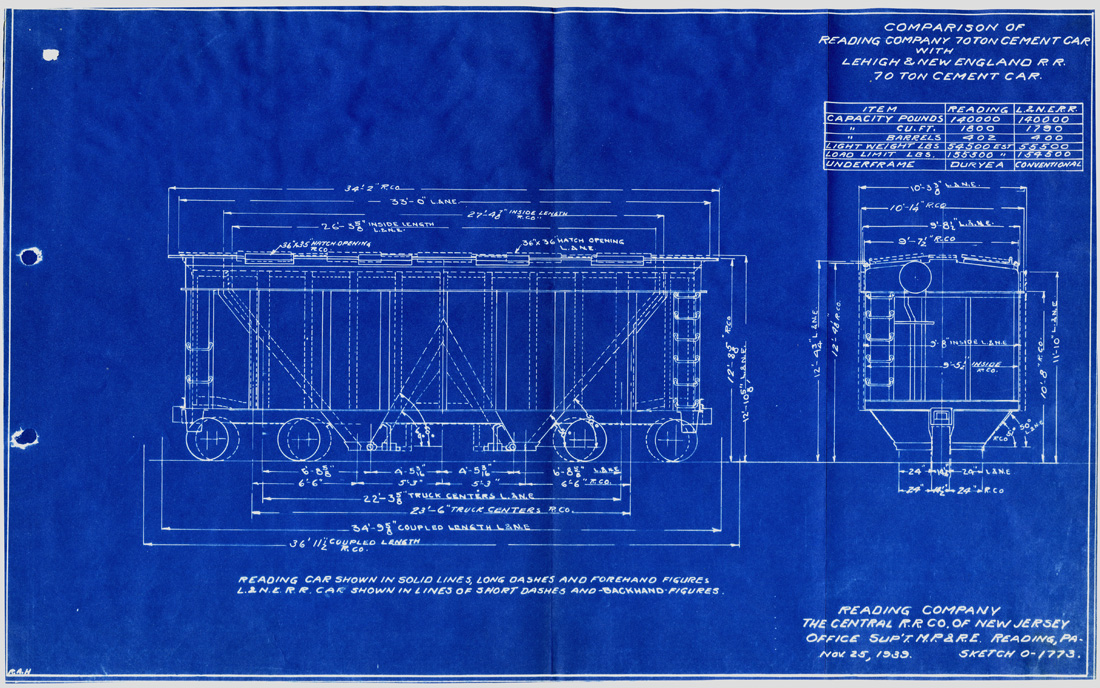
Photo Bob Losse collection

Long ago I had thought that the weaver car had a lot of similarities to the Reading car but beyond having to remove ribs it also required a number of other adjustments to the car body. I dismissed that as an option but thought the concept a good approach, I just wanted a better starting point.

This got me thinking, Atlas O made an ACF 70 ton covered hopper that is a later design, more of a late ’40’s early ’50’s car. The idea is to remove the ribs and add a wrapper around the shell.

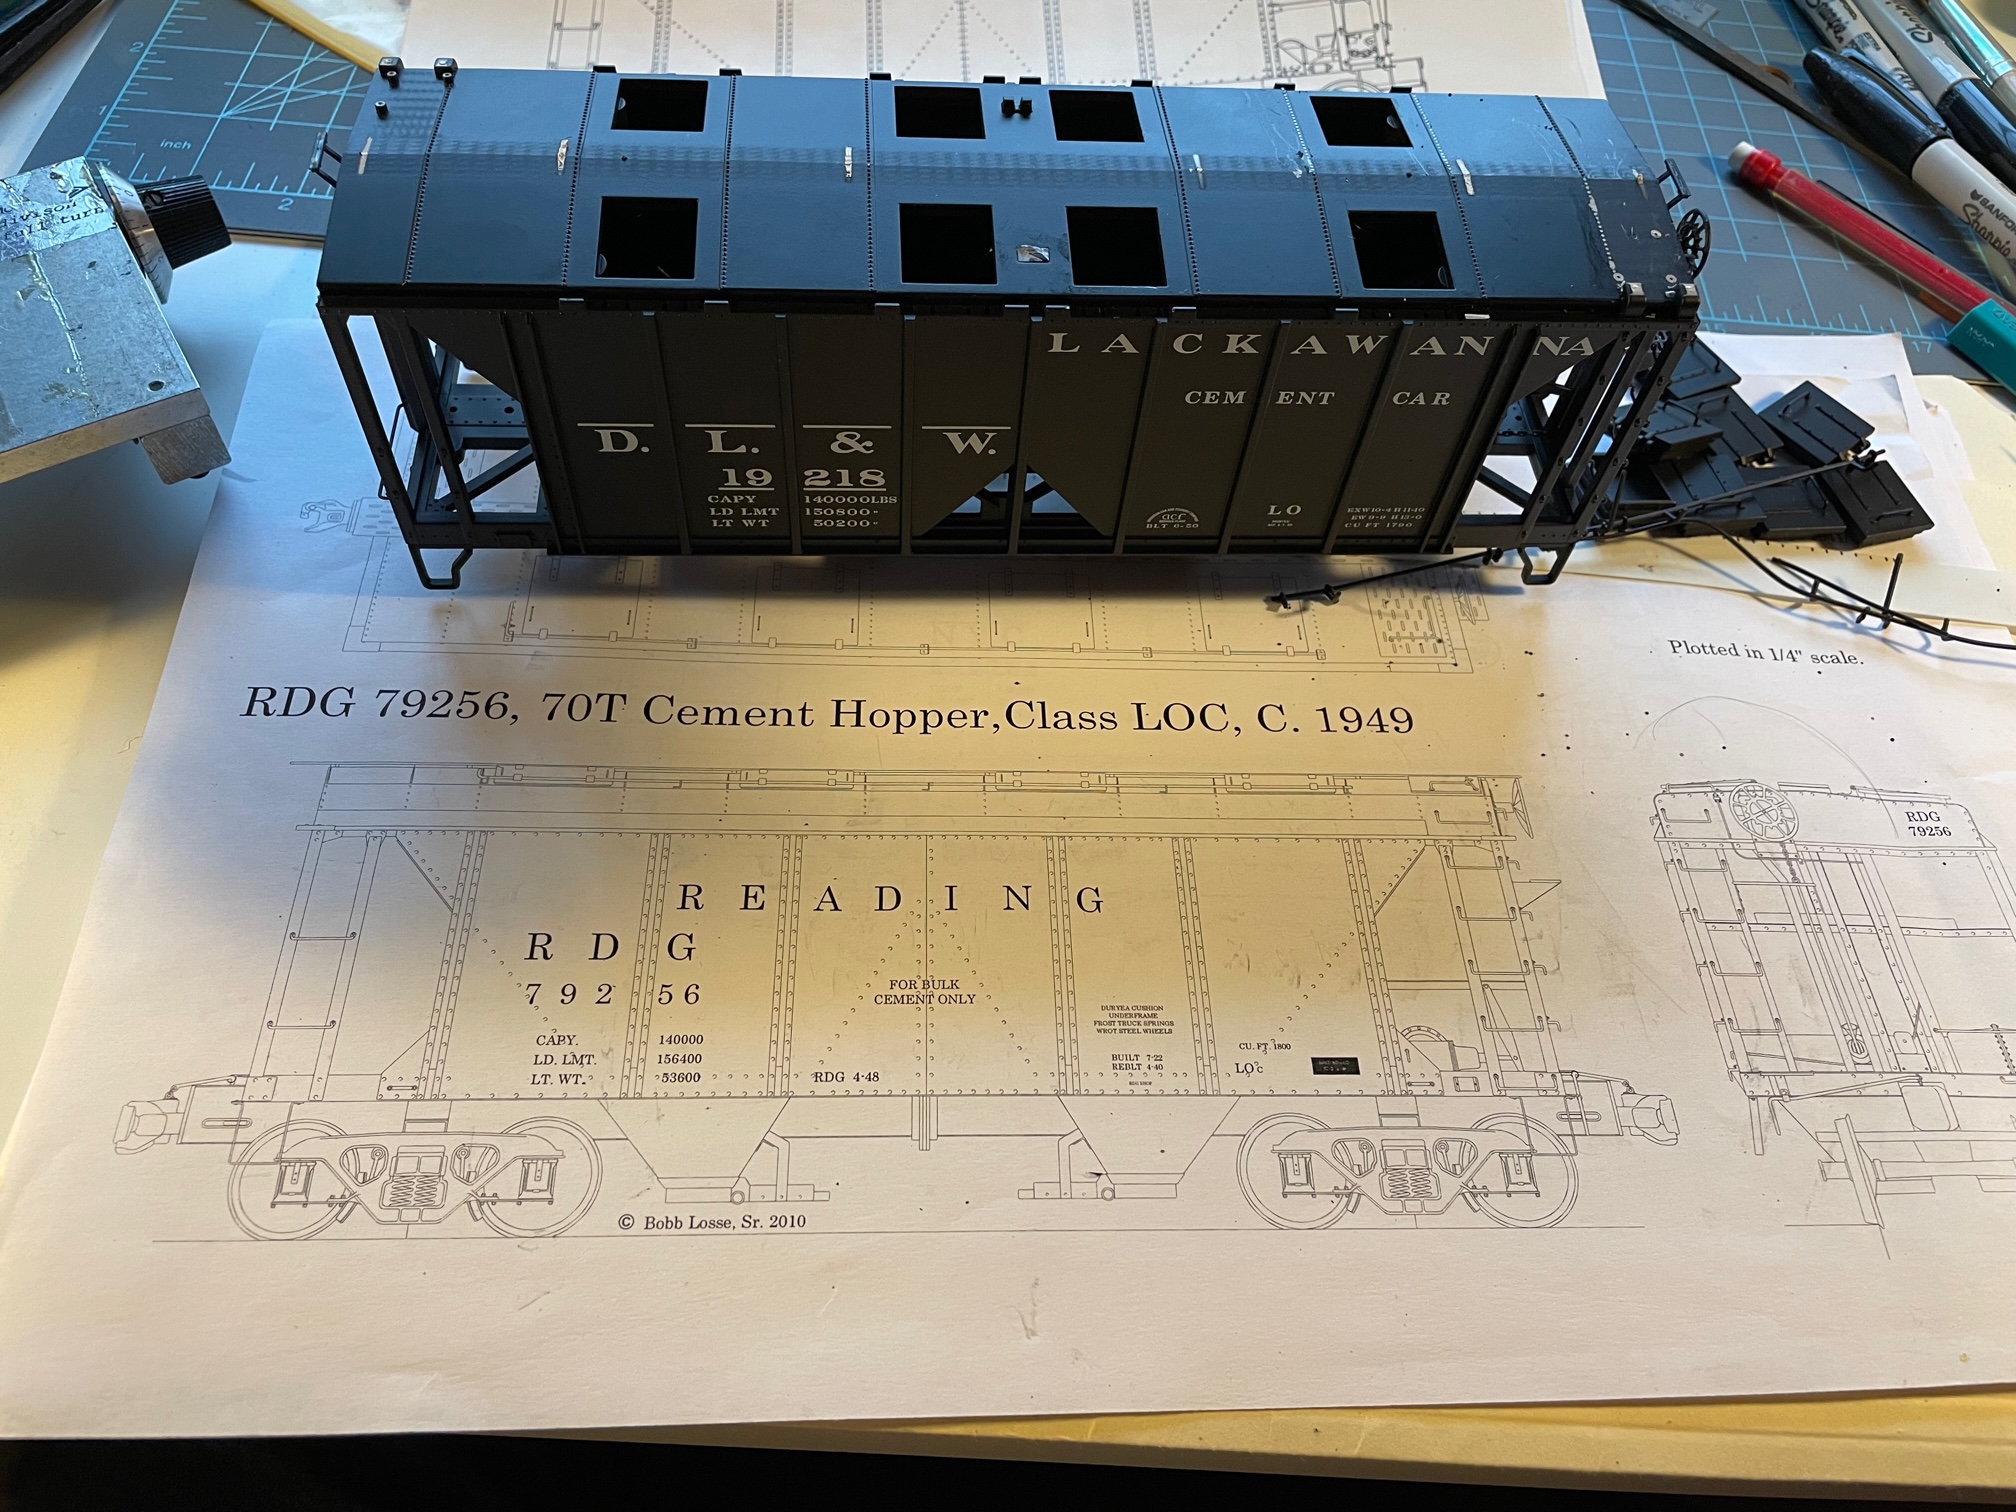
My drawings for this car appeared in RMC back in the 1980’s. I also had an updated set of drawings that my brother Bob had drawn and plotted in O scale for me. I compared the Atlas car to the drawings. The Atlas car is a more modern car and the car body is about scale 18 inches longer but the height and shape of the car is about right.

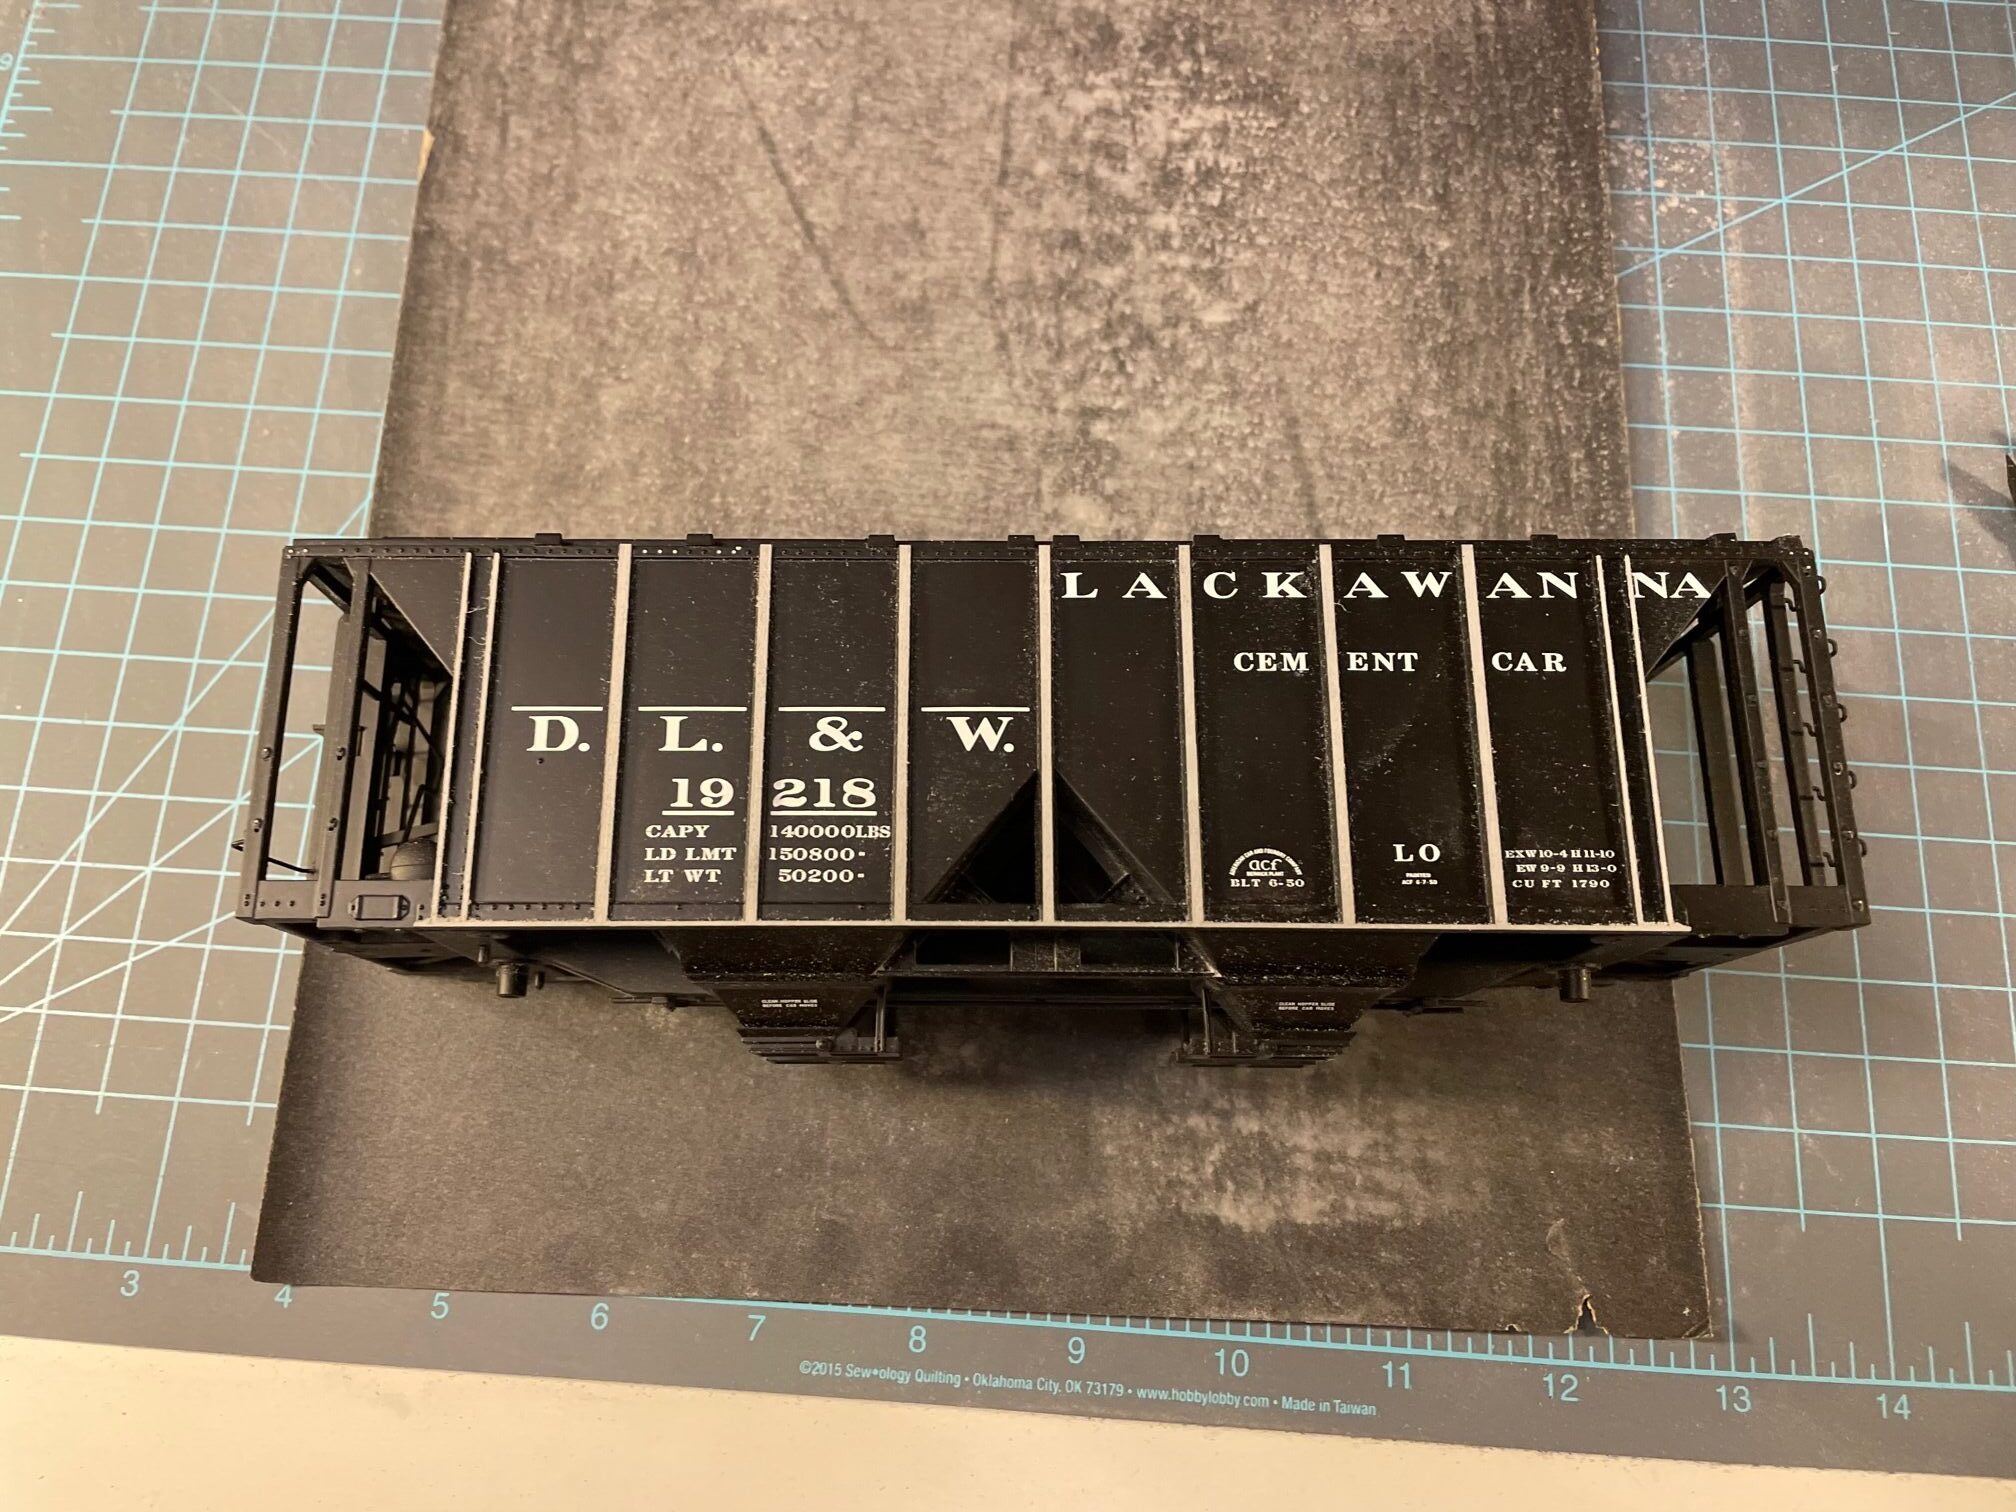
I started prepping the shell by removing the details. The grab irons on the side and the hatches on the roof. I did disassemble the car but ended up putting it back together because I felt the weight being inside would help stiffen the plastic car body while sanding the ribs down.

I took my time and slowly removed the ribs. I tried to be careful with the sanding to remove the details at the same rate overall to try to keep from sanding the body out of square.

You can see that different details begin to get sanded as you get down further on the the side.

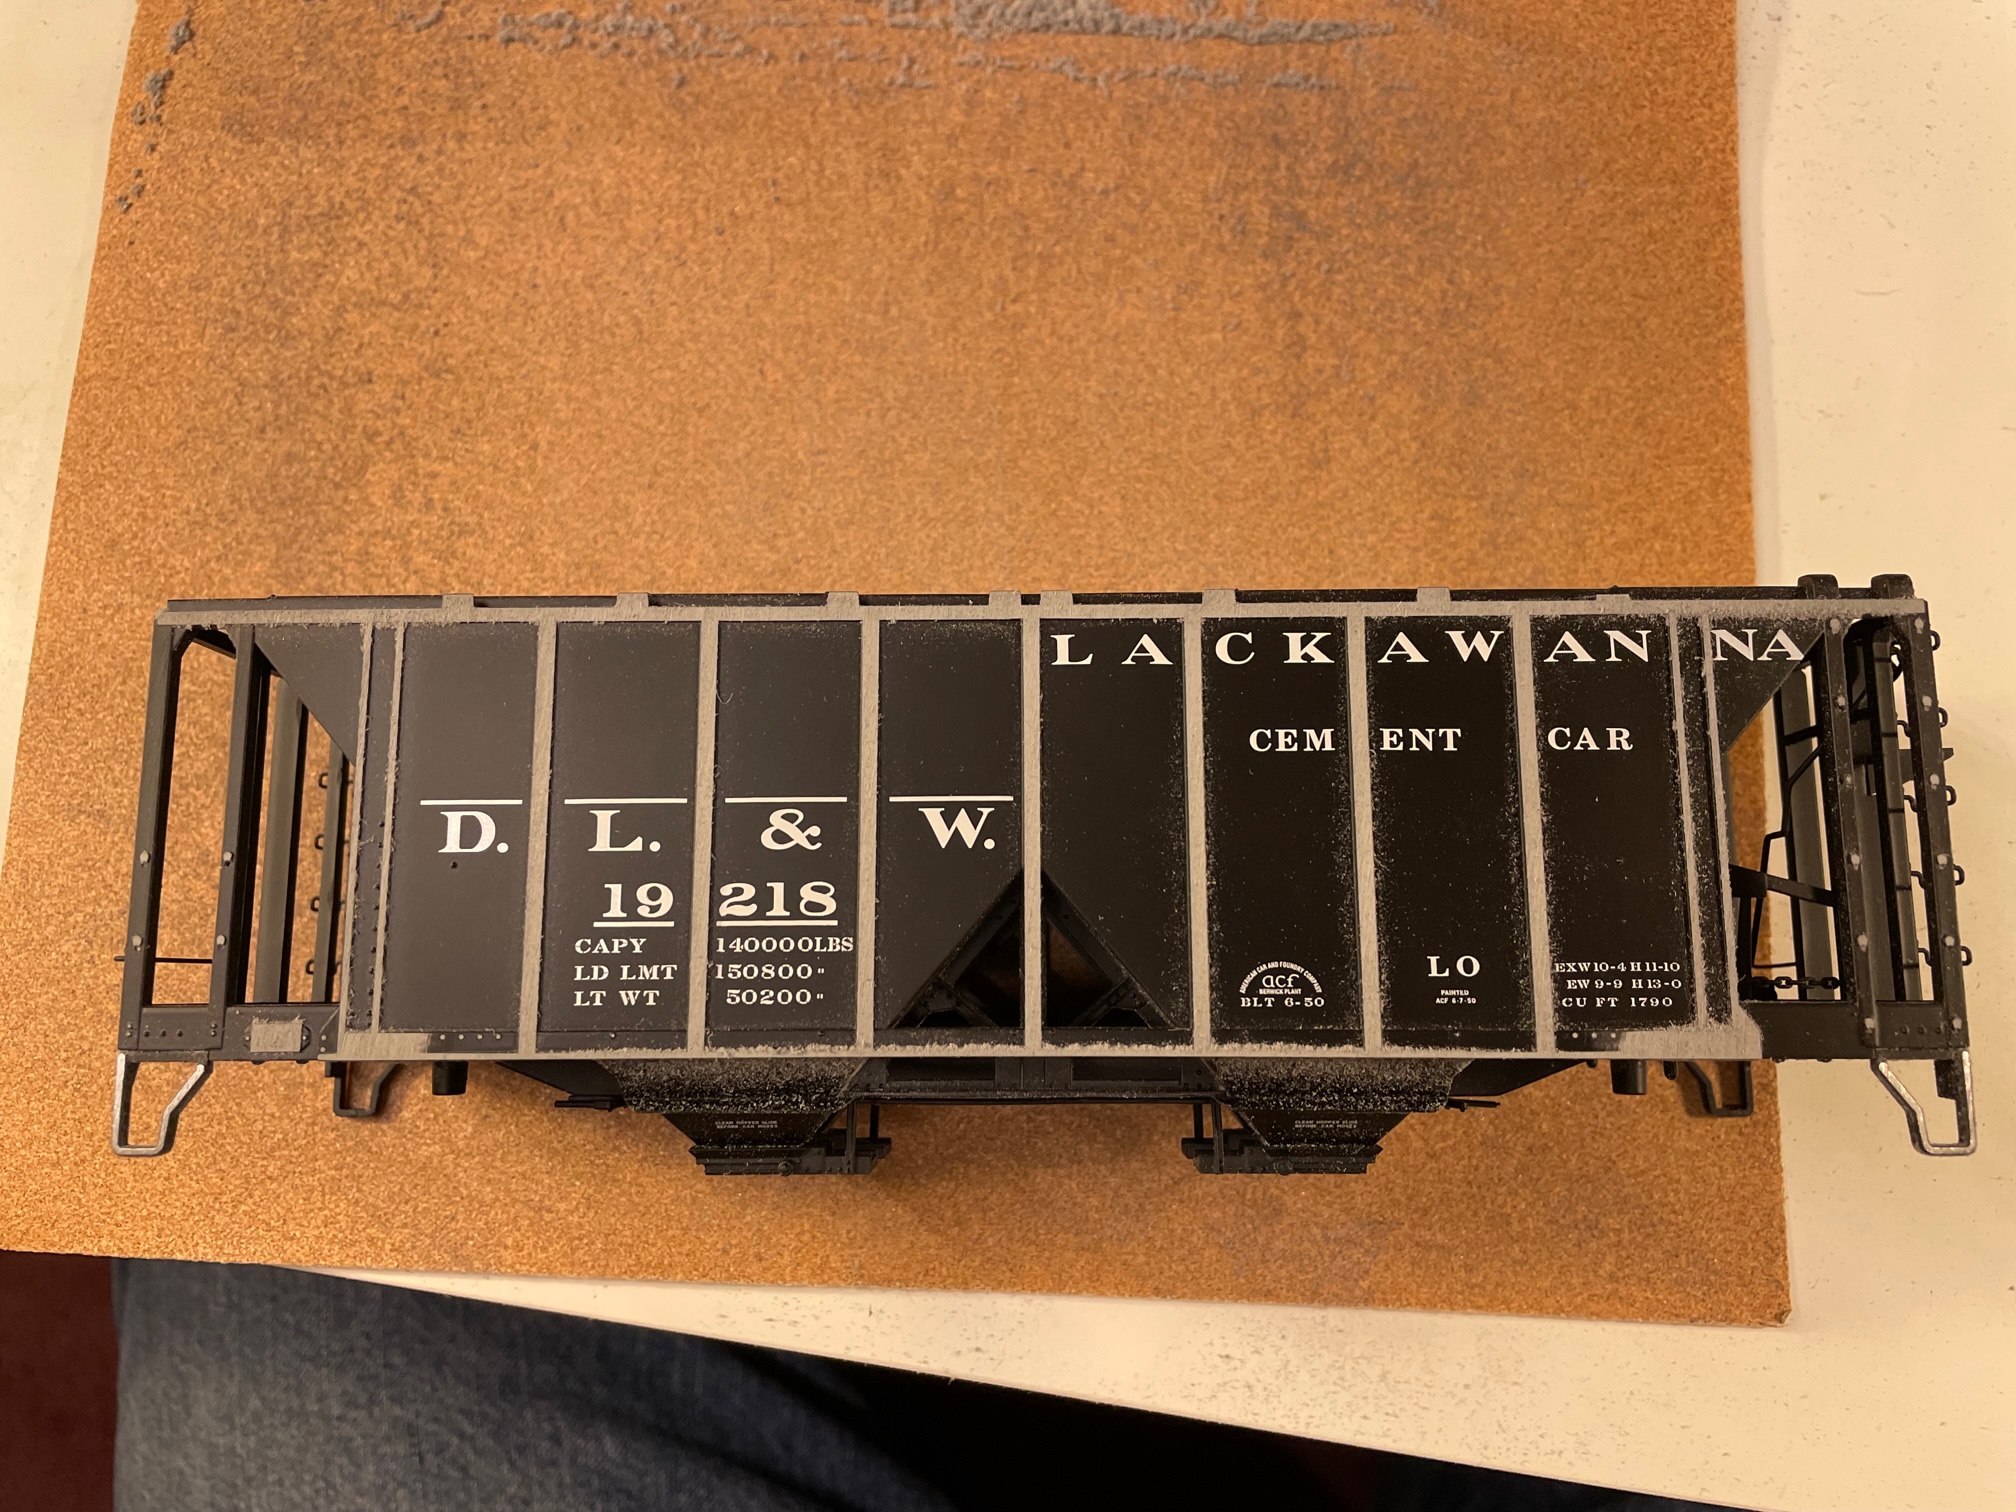
Some people might ask why I didn’t remove the paint first before working on the shell. I found it was useful to keep me sanding evenly. If you are applying to much pressure in one direction you can see if the detail which are at the same height on the car side come off at the same time. If you are uneven they show.

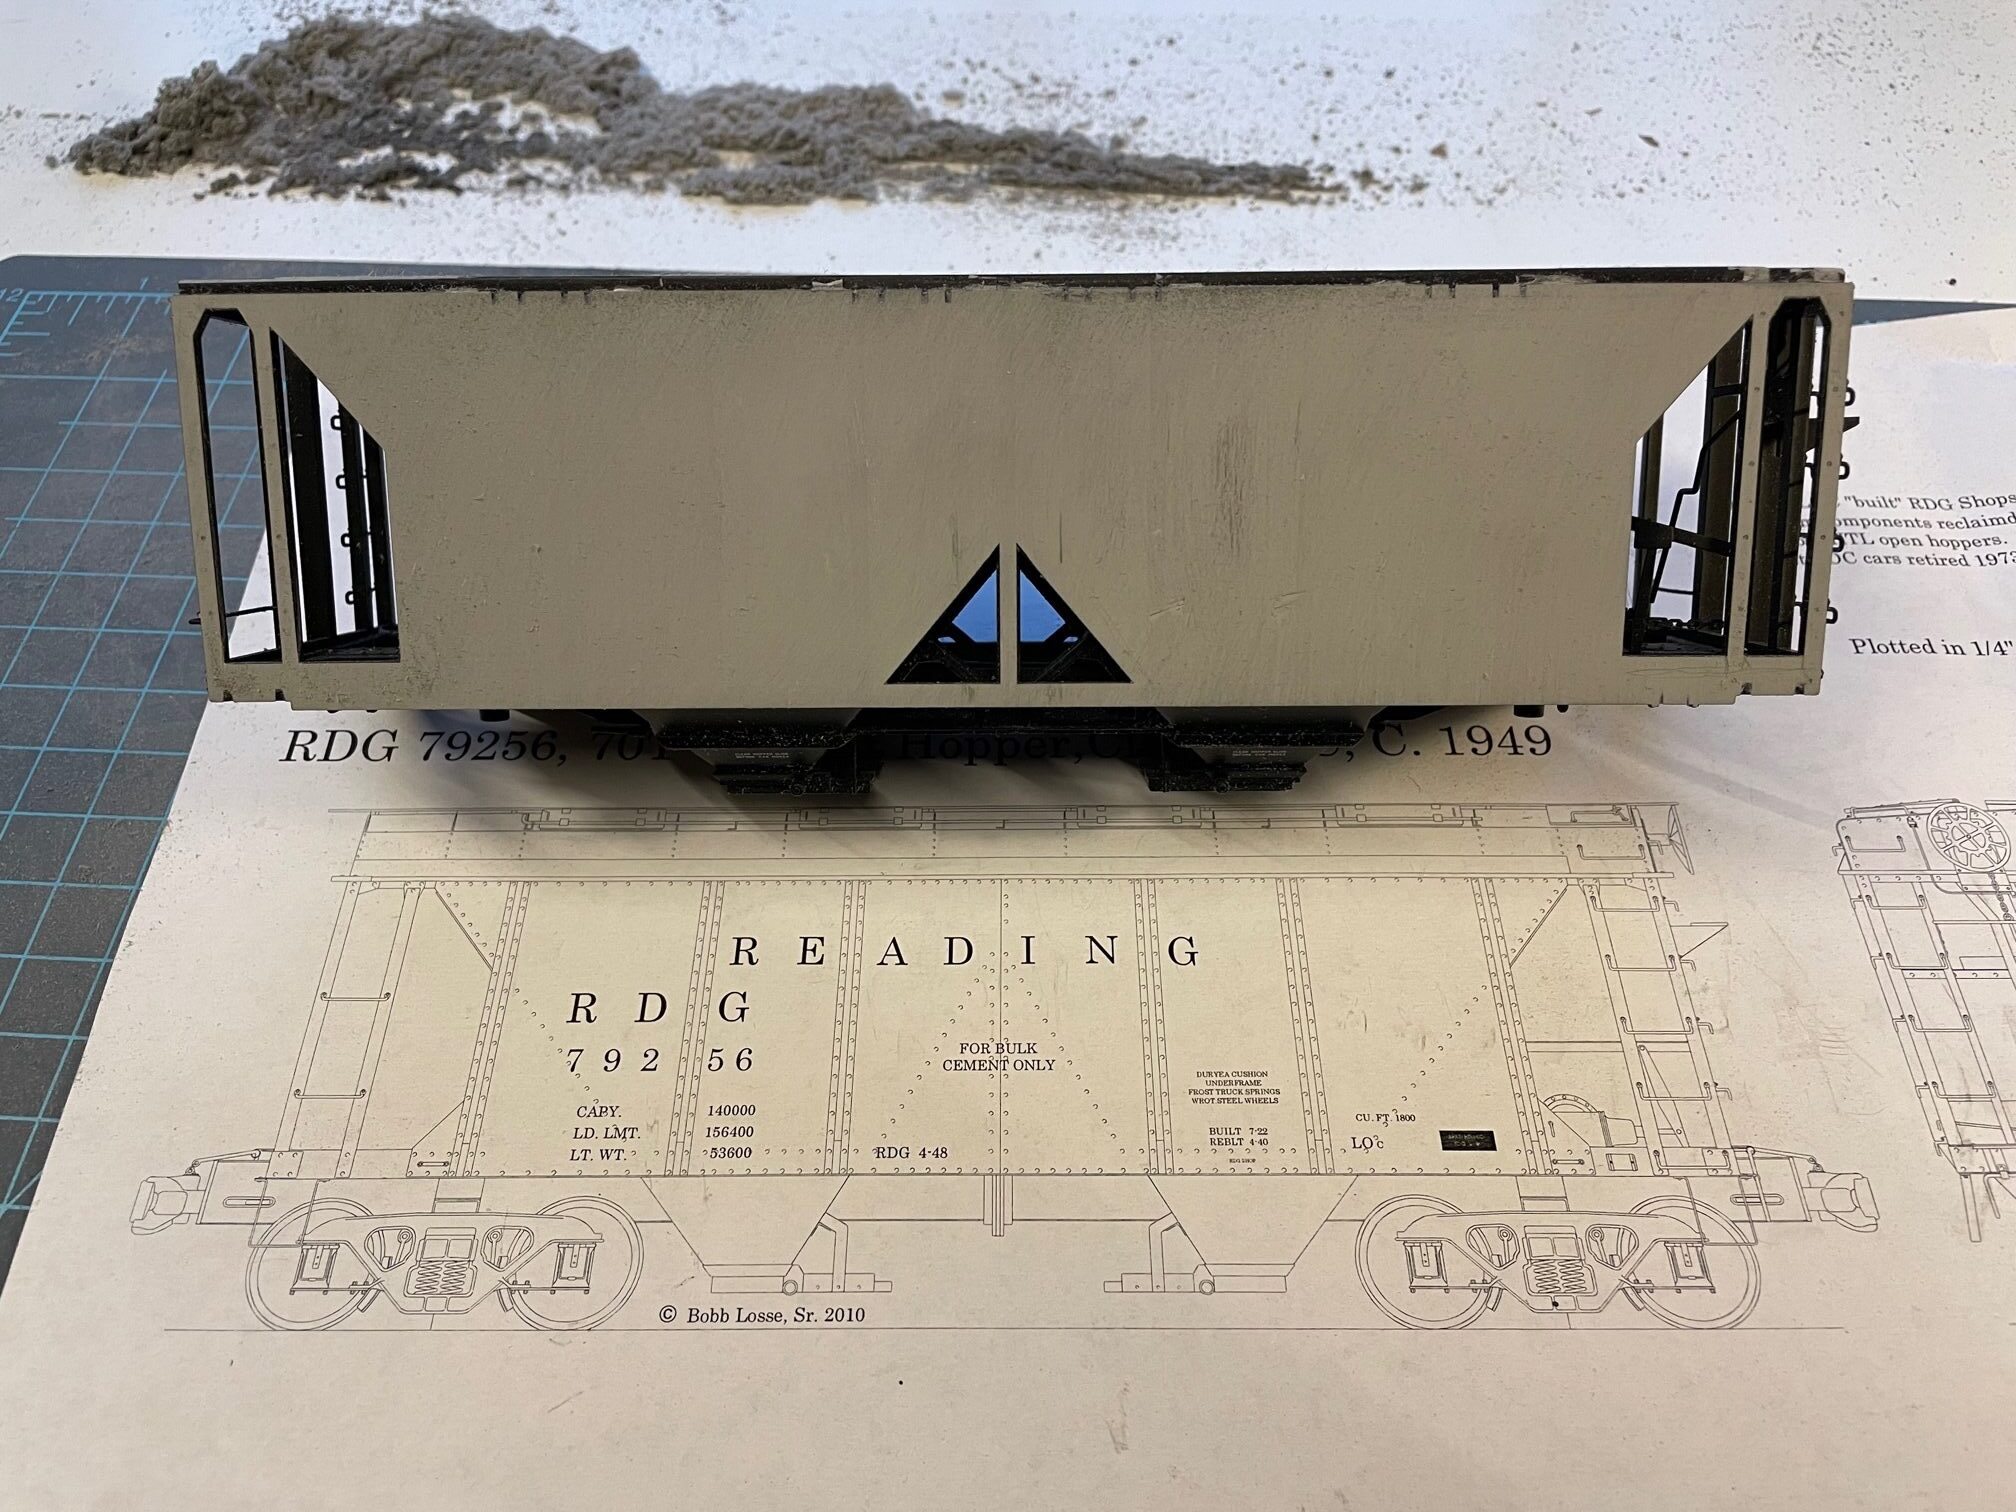
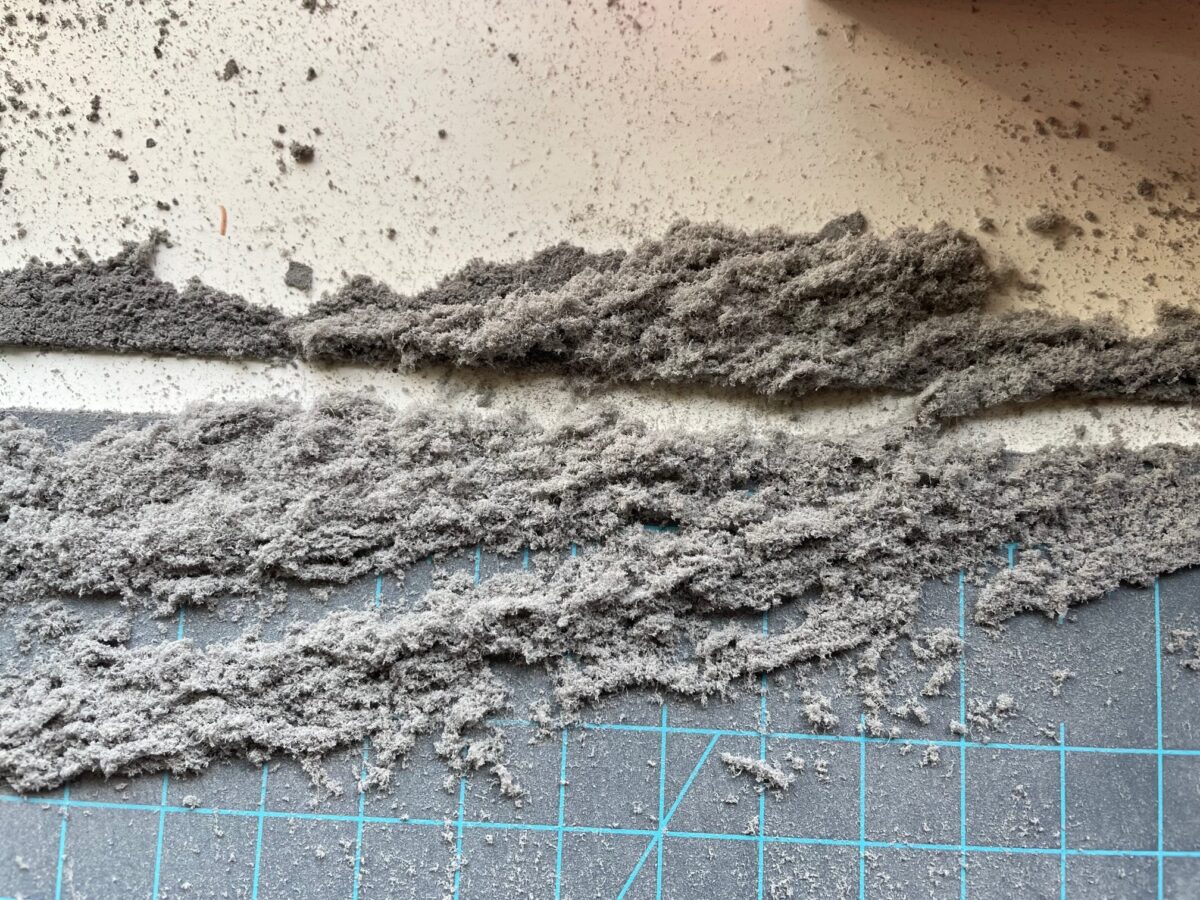
Car sides here show all the detail removed. It doesn’t take that long to sand down the car sides. You just need go slow and keep the car level as you sand. But it does create a mess of the plastic you sand off.

Next time, I need to mark the shell for where I plan to cut it to remove the 18 inches out of the center of the car. Then I’ll add a wrapper and begin to built up the car sides. Stay tuned that will be the next post.

Model: Reading HTn 70476

Here is a model of a Reading HTn 70476.

I built this model about 10 years ago using an Intermountain USRA twin as the starting point. The second set of hoppers came from a donor car. The car sides between the bolster ribs were built up from styrene.

I was experimenting with this car using the magnetic air hoses. It got new formed brass stirrups at the same time. The experiment sort of worked OK. I have some new brass parts coming in shortly and there will be a new round of experiments with the magnetic air hoses. More on that later.

Atlas SW-8/9 into an NW-2 – Progress….

The NW-2 So Far
The NW-2 So Far

This is where I stopped last on the NW-2.

The long hood has been fully cut off and fitted. The sand fills were cut from an extra cab and then thinned down. I hate doing that, it not hard, I just hate sanding tiny parts. The Atlas couplers were thrown in the TRASH where they belong, and Kadees have been installed.

I still have to attach the handrails, cut the front window arch in the cab windows, add a frame shim and attach the cab/hood/rear step to the frame.

Maybe I’ll get a chance to work on it this weekend. It’s not looking like it. Besides I was thinking about starting to work on the K-1 by turning the twin sand domes.

Reading NW-2 #102 – The Cutting Starts

One walkway still to cut

One walkway still to cut - Bottom View of the All-Nation Shell

I started by cutting the ends platforms off the shell. Since the cab was not going to stay it was also cut off the body through the doors.

The Cab, and walkways have been removed.

The Cab, and walkways have been removed.

This photo is from the same time as the last. You can see the opposite fuel tank still below the walkway. Also you can see where I rough cut through the walkway floor and the cab walls. The finish cuts will be just inside those walls.

Here is the Mock-up with half of the engineer's side finish cut made.

Here is the Mock-up with half of the engineer

I stopped an put the cab and shell on the Atlas frame. I was checking to see if I needed to shorten the fram at the cab wall area. It did need that cut also. You can see that about half of the rough-cut material has been removed from this side.

NW2 hood with two of the three finish cut made.

NW2 hood with two of the three finish cut made.

This view shows the finish cut on the engineer’s side and along the cab wall. I still have to make the Fireman’s side cut. This view also show the roof line clean up that has been done so far.

Reading NW-2 #102

The beginning of the project.

The beginning of the project.

As with any project you build at some point you lay out the parts and see if they can be made into what you are thinking. Here we see the All-Nation NW-2 body. I bought this shell second hand at a meet. It shows signs of being striped of paint at least two different layers. Yet, if you look closely at this photo, the modelers never bothered to clean up the center seem on the body casting.

I had disassembled the NW-2 into its parts, the main body, cab front, cab rear and grill front. Before I could just start cutting, I had to see if I wanted to keep the All-Nation Cab that was on the shell. The All-Nation Cab has the correct windows for an NW-2 but it is crude compaired to teh Atlas cab. I’d rather cut the window arch into the Atlas cab than try to bring the All-Nation Cab up to the Atlas level of detail.

Cab Fronts showing what changes will need to be made to the Atlas cab.

Cab Fronts showing what changes will need to be made to the Atlas cab.

Rear Cab Walls

Rear Cab Walls

Rear Deck Details

Rear Deck Details

Reading 103

Reading 103

So I think I will use the Atlas cab in this project. Also I want to reuse the rear deck area of the Atlas model as it more closely represents the prototype.

One That Got Away

MTH SW-1 shell on an Atlas SW-8 frame

MTH SW-1 shell on an Atlas SW-8 frame

I bought this MTH SW-1 shell a couple of years ago. The SW-8 frame has the same wheel spacing as the SW-1 so I thought I could drop the shell on top of the frame. You pretty much can but there are a couple of other thing you need to do to finish up the model. The SW-1 frame top is a different pattern then the longer hood of the SW-8. Atlas did not continue the sapty tread pattern of the deck under the hoo or cab of their SW-8. WHy should they you would never see it. But when the shorter SW-1 hood was placed on top the difference is easy to spot. In the photo it shows up as the unpaited and untextured area in front and behind the shell.

This meant that a new frame deck was needed. I did that and I even cut it slightly wider then the frame deck to take care of the second visual difference in the frames. The SW-1 had a top lip to its frame, the side of the SW-8/9 has a smooth side.

If you have seen this site in the last year you would know that I have been going back and forth about how to model the Elmira branch of the PRR, include Williamsport or Southport wasusualy the hang up. Williamsport did not allow enough Reading to meet my need and Southport gave more interchange but none with the Reading. Anyway, I kept going back and forth about this unit and never finished the conversion because I would need the SW-1 and then the yard would change and I would need an SW-9. Since that is no longer the question and I do not need the SW-1 in this idea of the Shamokin division I decided the shell needed a new home which it now has.

BTW the SW-9 doesn’t fit in the new layout time period. So an All-Nation NW-2 shell is going on top of the Atlas frame. More on that to come.

Upgrades to a Built-up NYC USRA twin

Intermountain NYC USRA Twin - Everything from the box

Intermountain NYC USRA Twin – Everything from the box

Starting from the bottom, the trucks were removed and then the hopper opening mechanism.Parts removed from underfram and the center crossmember on the interior.

Laying out the center brace on .030 styrene

Laying out the center brace on .030 styrene

Center brace is in the car and the interior rivet detail is being fitted. Note the castings in the forground. I built all the parts to detail the interiors and then made a rubber mold and cast the parts.

Center brace is in the car and the interior rivet detail is being fitted. Note the castings in the forground. I built all the parts to detail the interiors and then made a rubber mold and cast the parts.

Details have been added to one side of the model.

Details have been added to one side of the model.

Rivets detail and center braces have been added in theis view.

Rivets detail and center braces have been added in theis view.

Model: Reading HTj 73592 (USRA Twin)

RDG HTj 74170 built from an Intermountain Kit

I started with an undecorated Intermountain USRA Twin Kit to build this Reading class HTj hopper. The lettering was pieced together from the Microscale #48-496 Reading Twin Hopper set. This model represents a car that was painted prior to WW2.

The Reading replaced the as delievered brake ratchet with a power hand brake and upgraded the car to AB brakes by the late thirties. Parts from an Intermountain Boxcar were used to make the changes.

This model is riding on San Juan 50 ton Andrews trucks with PSC wheelsets. They still need to be painted.

Model: Reading HTj 74170 (USRA Twin)

RDG HTj 74170

The Intermountain Kit was used to build this Reading class HTj USRA Twin. The factory lettering was the basis for this model with additional lettering coming from the Microscale #48-496 Reading Twin Hopper set.

The Reading replaced the as delievered brake ratchet with a power hand brake by the late thirties. Parts from an Intermountain Boxcar were used to make the changes. The Kit was built to represent a car that had been upgraded to AB Brakes.

This model is riding on Athern Andrews trucks with Intermountain wheelsets. While this does make an nice rolling truck it will be changed out to the San Juan 50 ton Andrews like it had when it was a Proto48 model.