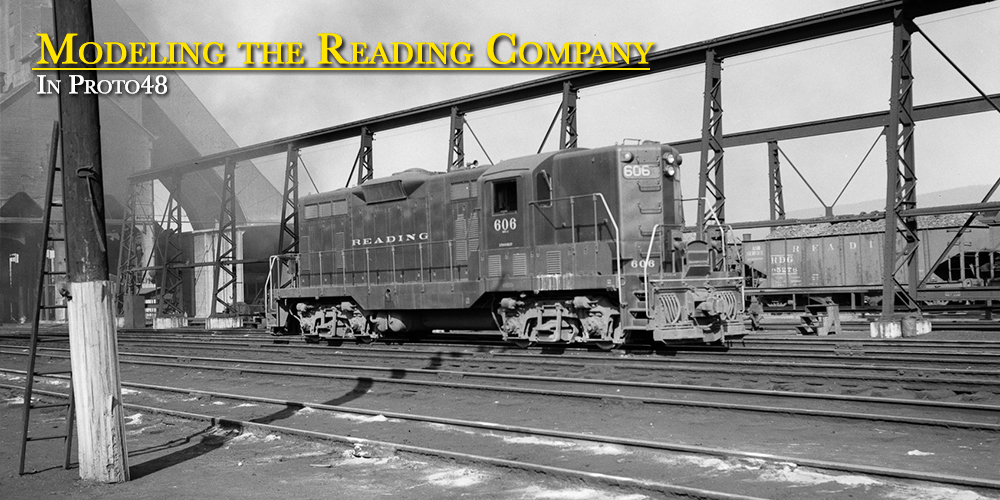
My General American 1928-Design 6000 Gallon 3-Compartment Tank Car from Tangent Scale Models arrived yesterday. This morning I’m enjoying my morning coffee in my dachshund Christmas cup looking it over this fine new model release.
This is Tangent Scale Models first model released in O Scale. The model is offered with either O Scale or Proto48 trucks. They are not the first to do that in O Scale, both RY Models and Protocraft have sold their models that way.
First Impressions: It really is a nice car! It is well engineered, well decorated and a solid model. Handling it on the workbench, I can say it is not as fragile as some highly detailed O Scale models in the past.
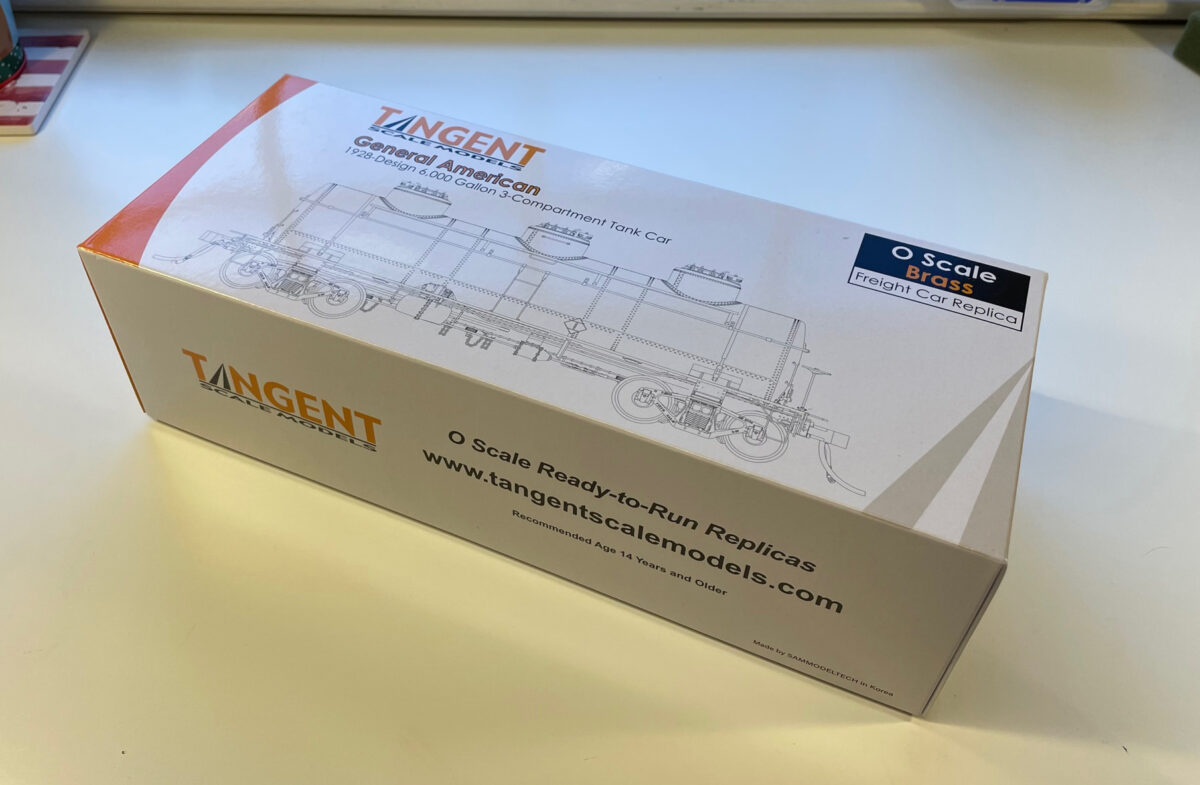
Some things are different from most brass imports. Starting with the box. Much thinner construction than often seen in brass models. Yet strong enough to make the trip to the US and keep the model safe from damage.
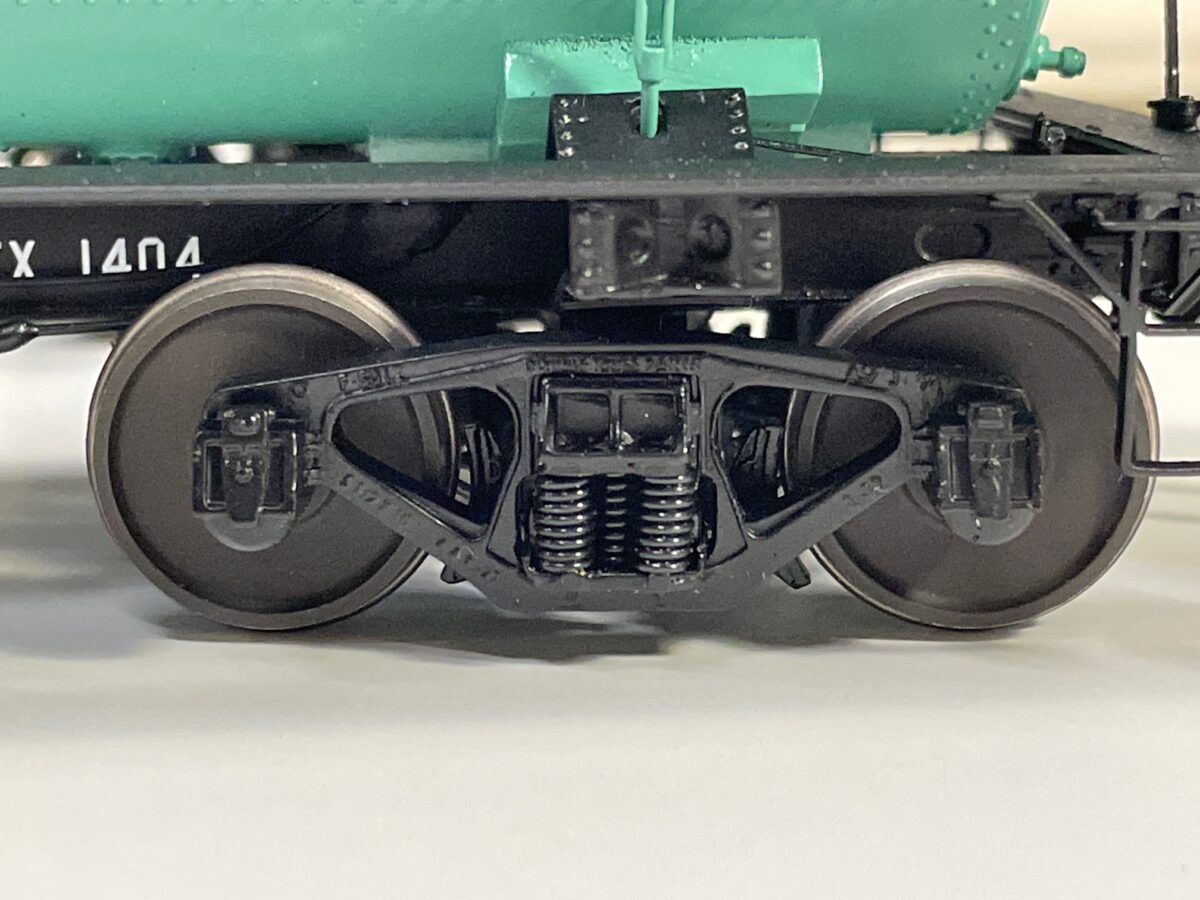
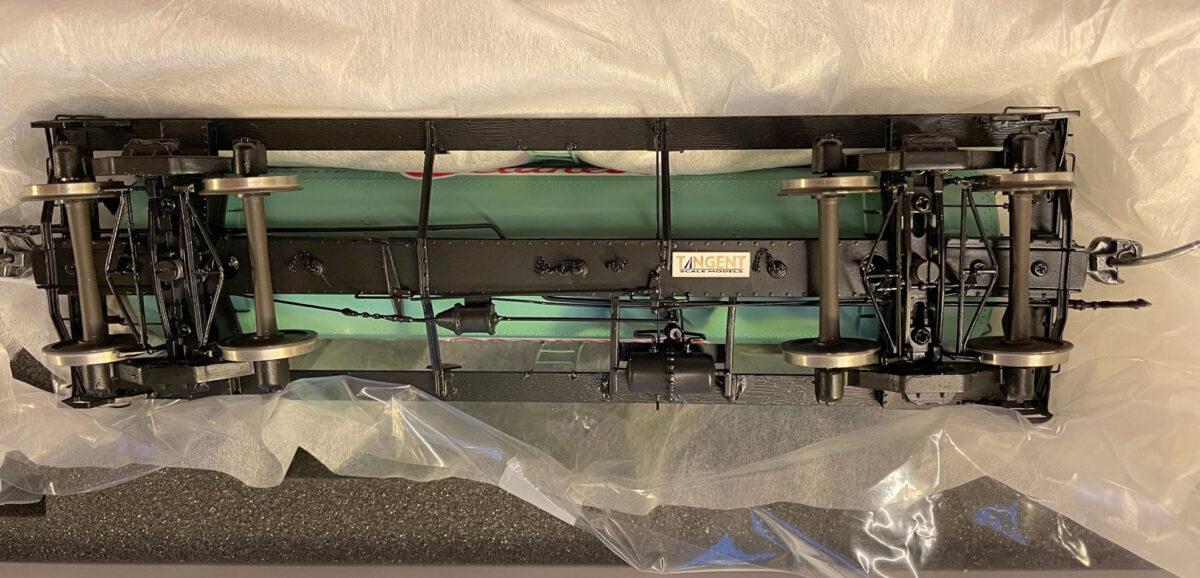
The Proto48 Trucks are nicely done and very free rolling. They have roller bearings in the journals. The spring cluster is nicely modeled compared to the usual ball point pen type springs used on some trucks. You can’t see through the spring cluster on the prototype and you can’t see through it on the model either.
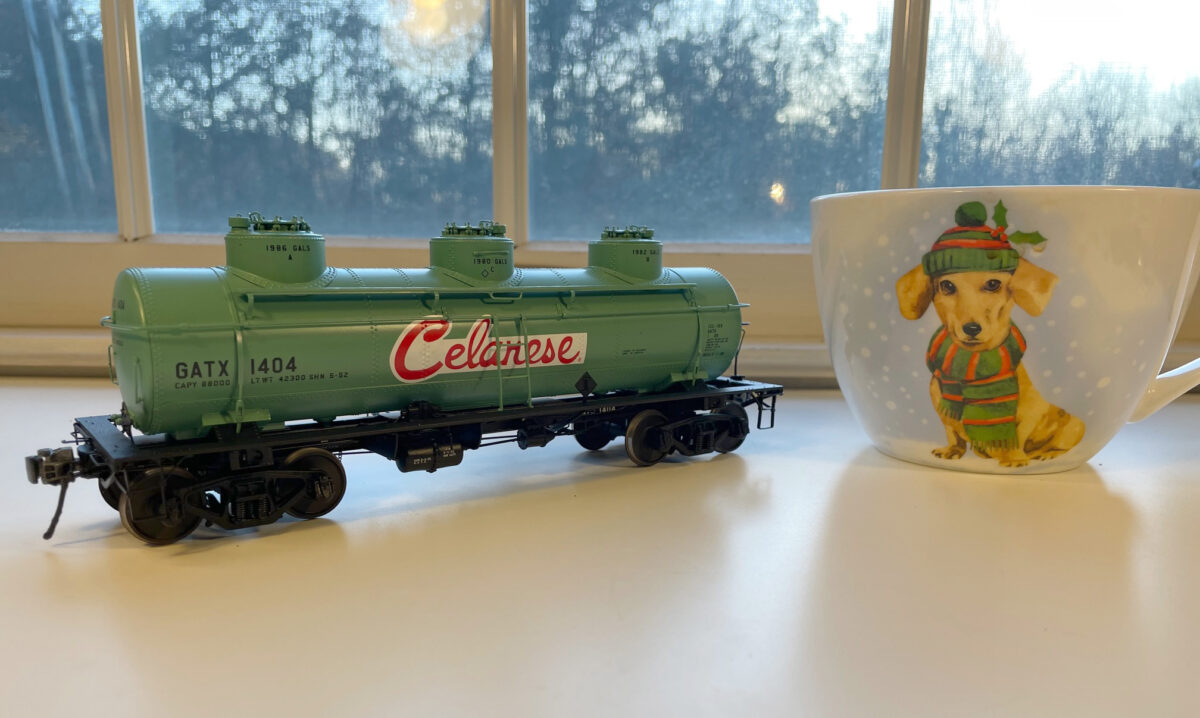
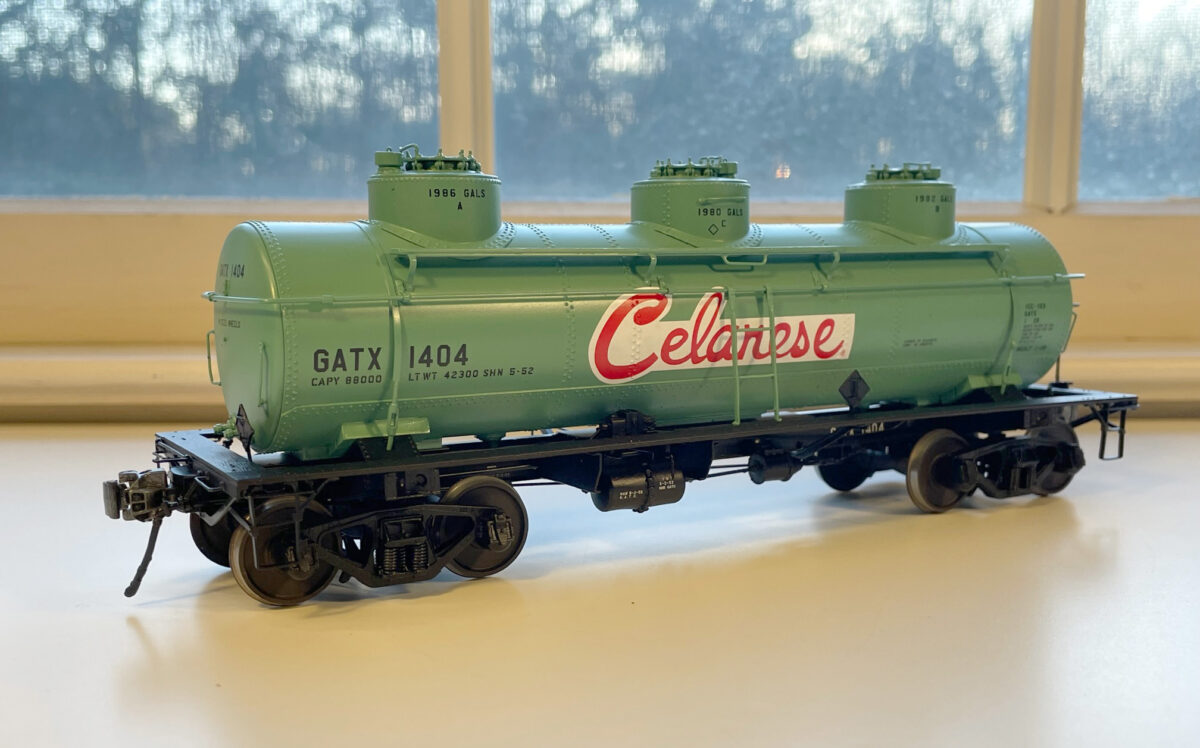
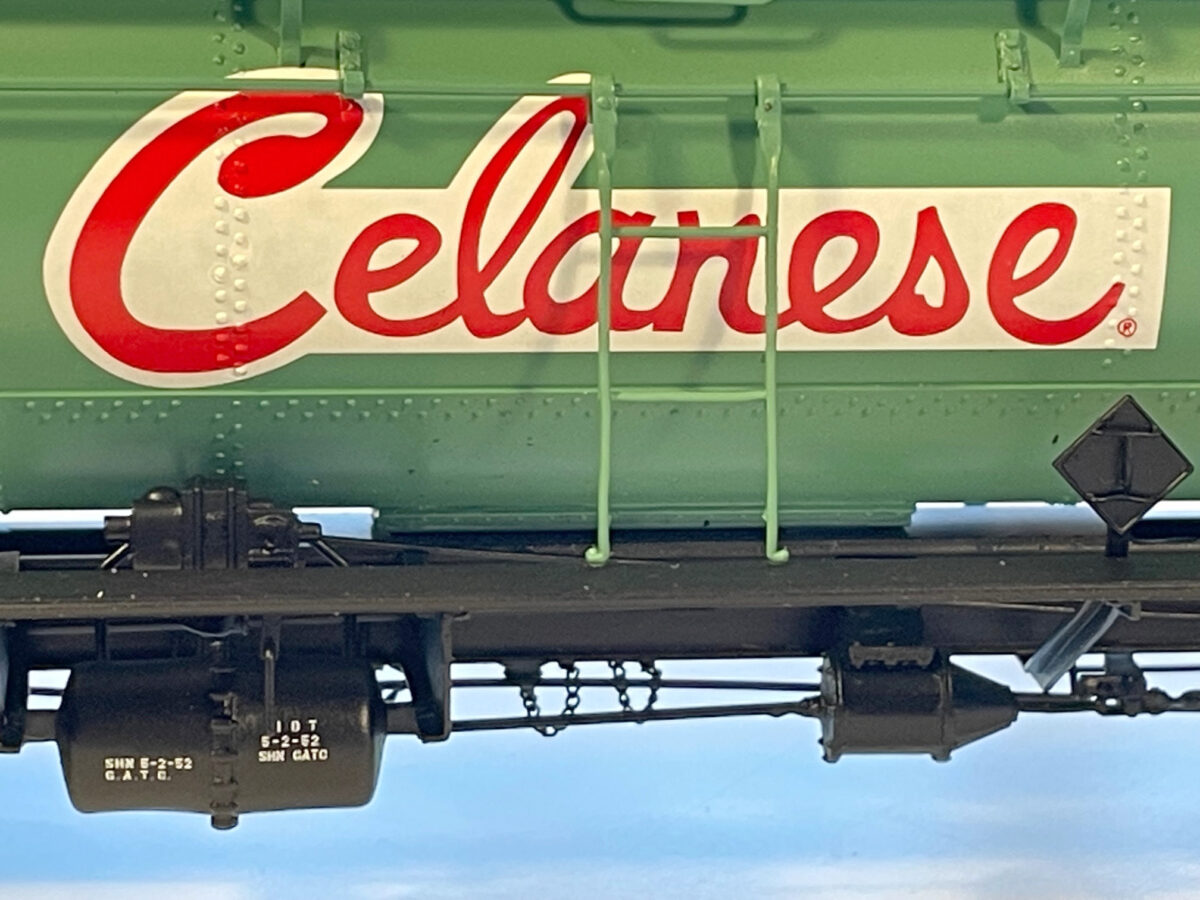
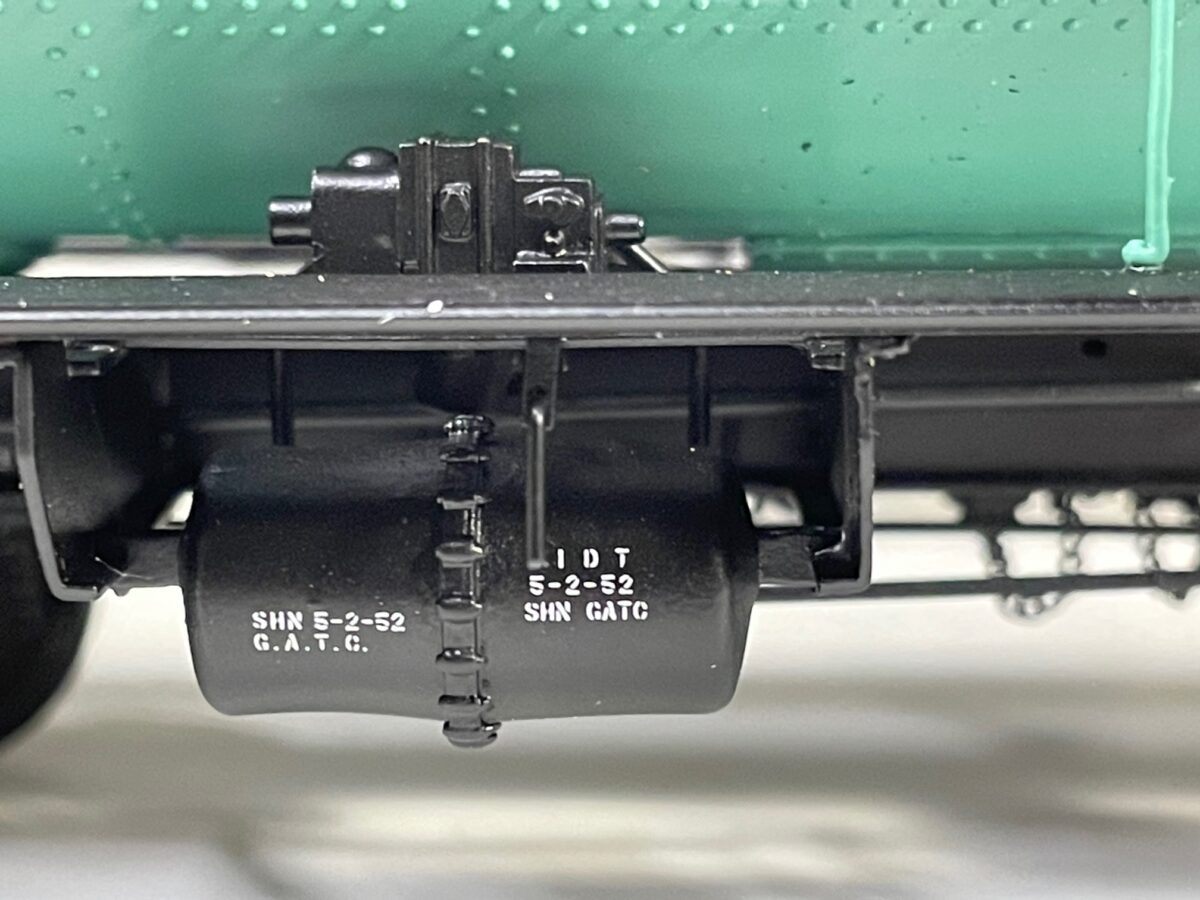
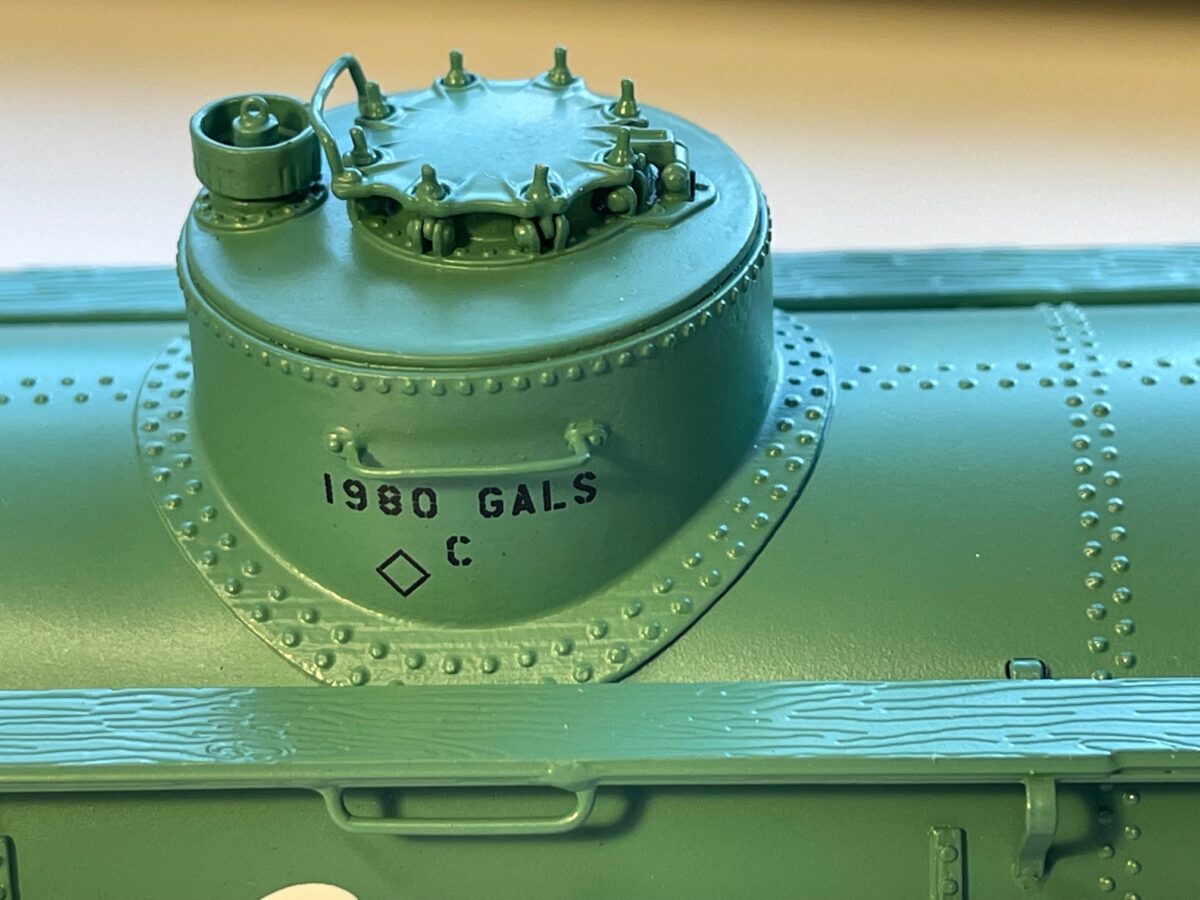
Here you can see the fine decoration on the model.
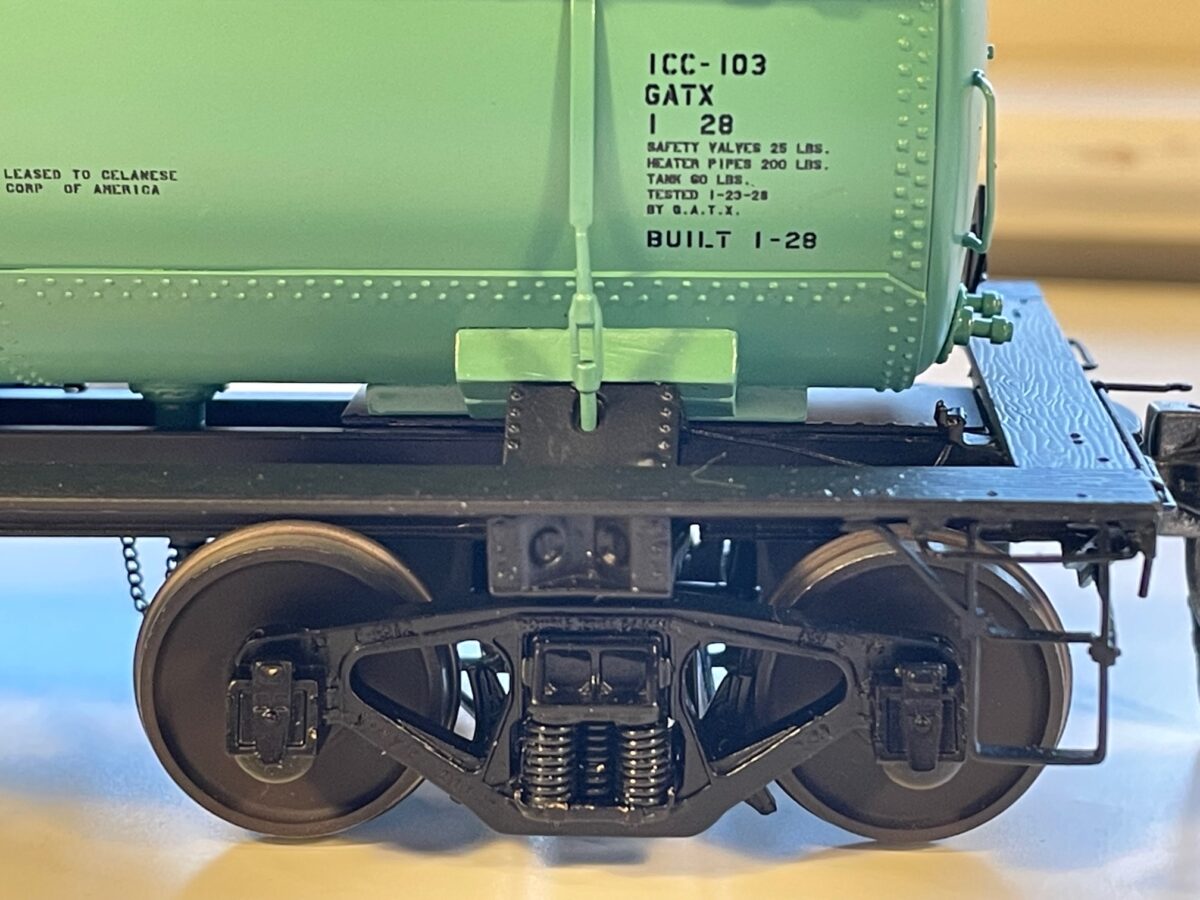
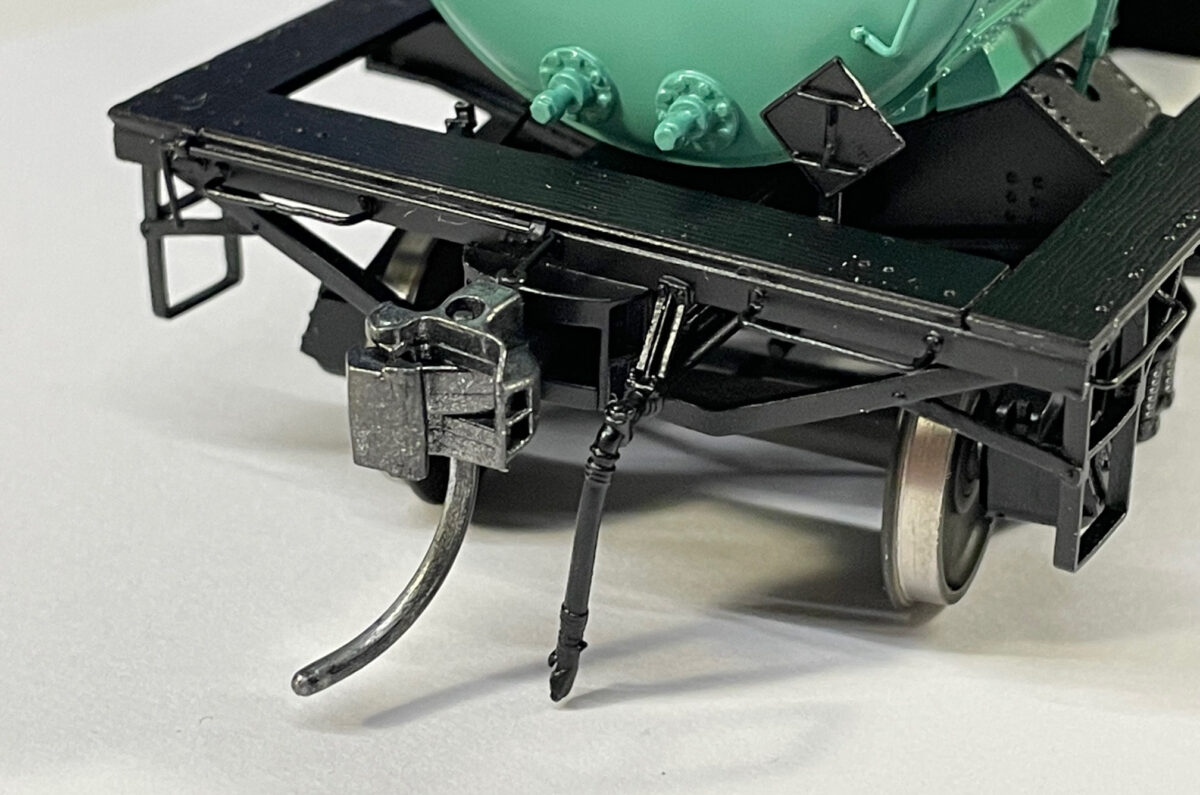
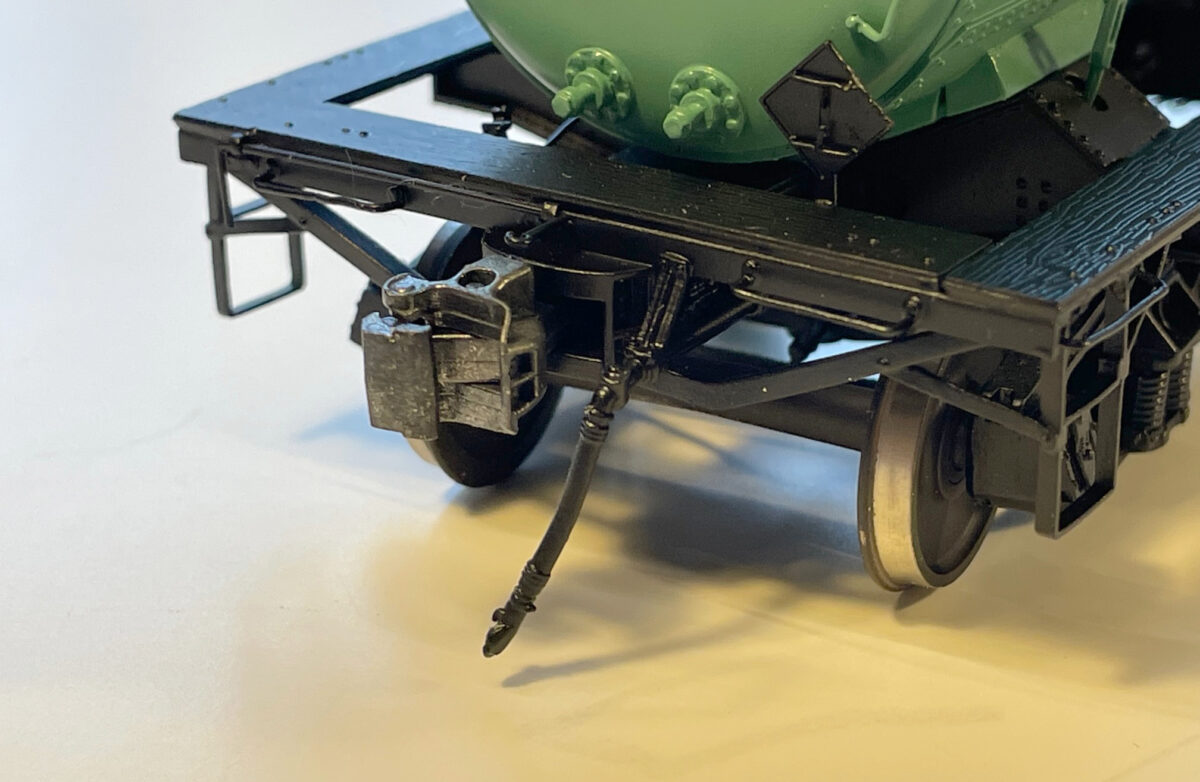
Now to point out some of the engineering standouts. The draft gear is nice. Rather than just leaving a place to mount the oversize Kadee coupler box the box and draft gear are one unit to the bolster.
Here it is from the top.
I think it looks even better without the coupler pin.
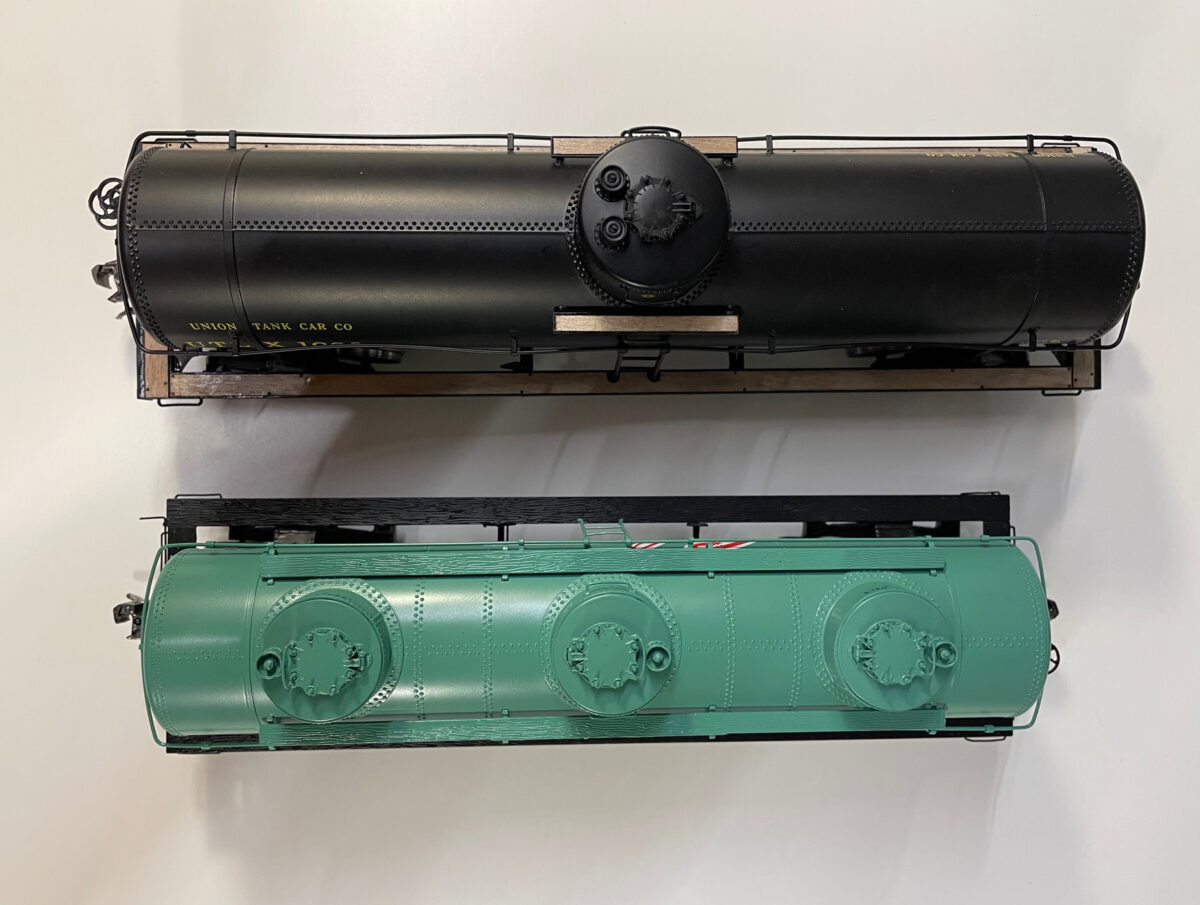
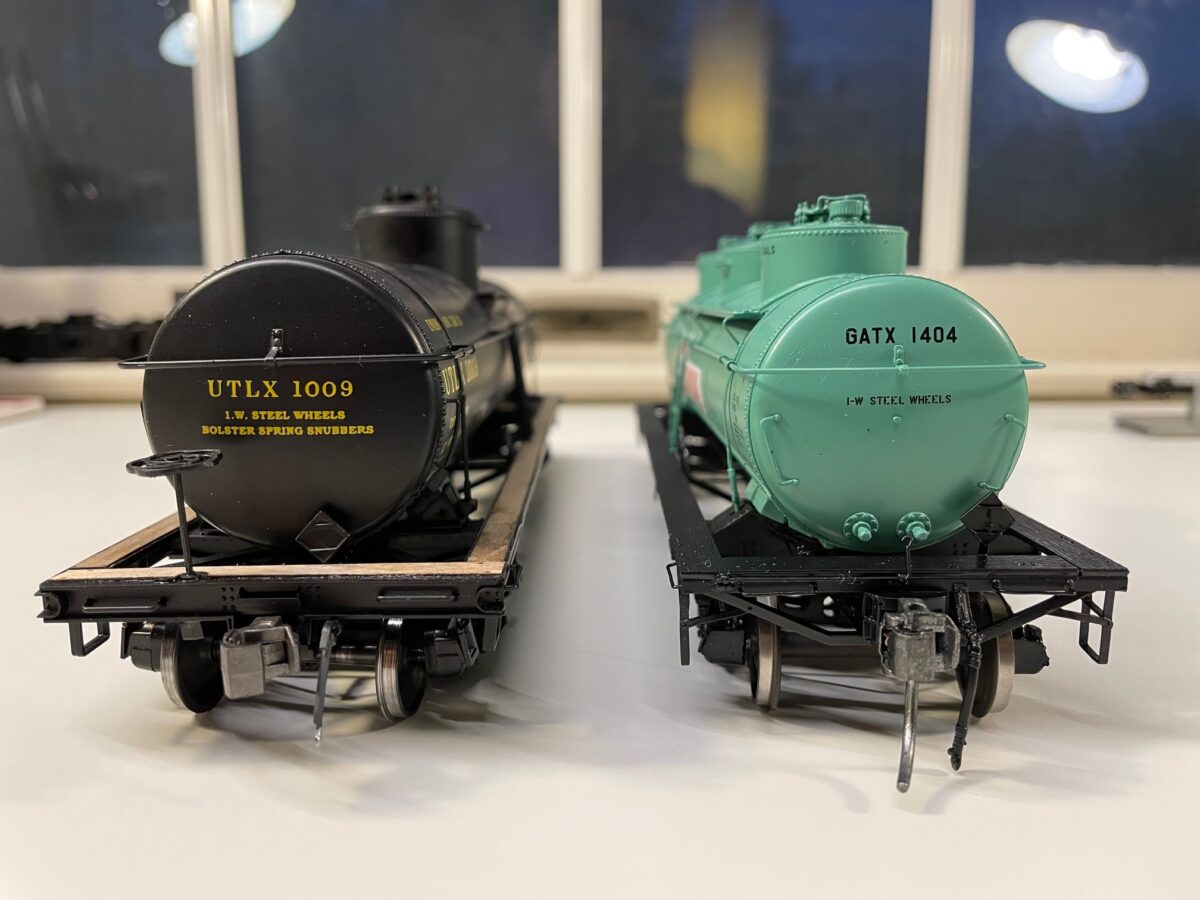
And now just for a comparison, here is the Intermountain ACF 8000 Gal tank car along side the new Tangent Scale model. You can see the Tangent model is shorter ad the tank diameter is smaller.
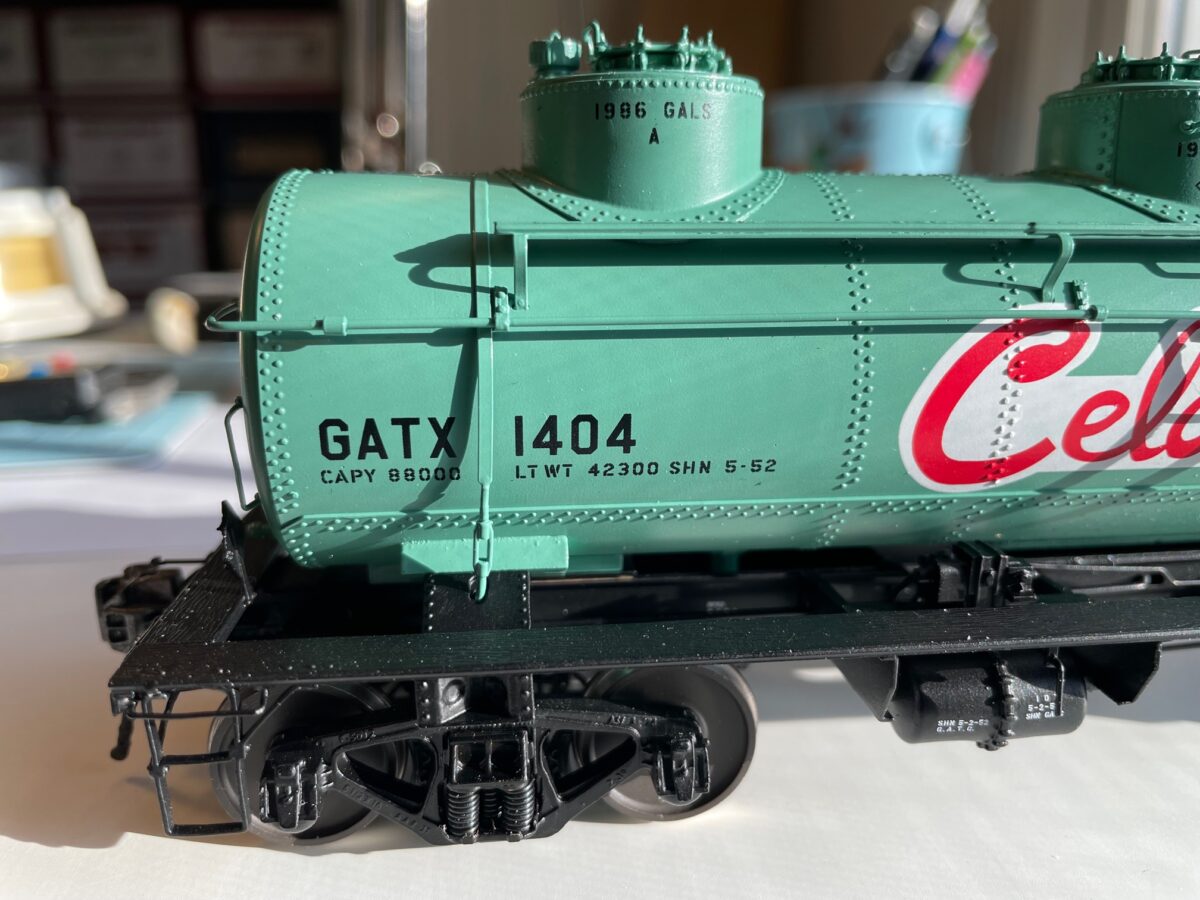
I normally go for more of the Plain-Jane types of freight cars. I almost ordered the 1958 version of the GATX black car. I could have easily backdated the dates to work for my modeling period of 1952. I chose instead to buy a car that I didn’t have to modify at all. Looking at how nice the lettering is applied to the car, I’m glad I did.
Some people might think the the asking price is high. If you consider the added price of a custom paint job and a pair of Proto48 replacement trucks, the price comes in under what some undecorated 30 year old brass cars from Pacific Limited currently sells for. I think this new release from Tangent Scale Models is a bargain.
Since the Tangent Scale Models announcement the other day, a few people have been very vocal that they wanted a different model produced. Well if that is truly the case, they can drop the cash and invest in a new company and produce whatever they want. They don’t seem to do more than just complain anyway. I’m waiting for their announcement of a new company and a new model release.
“Caveat Emptor” is a Latin phrase that means “let the buyer beware.”
I had two years of Latin while in High School, but that is not what I want to talk about. I think I’m going to start a new “Category” for the site called “Caveat Emptor“
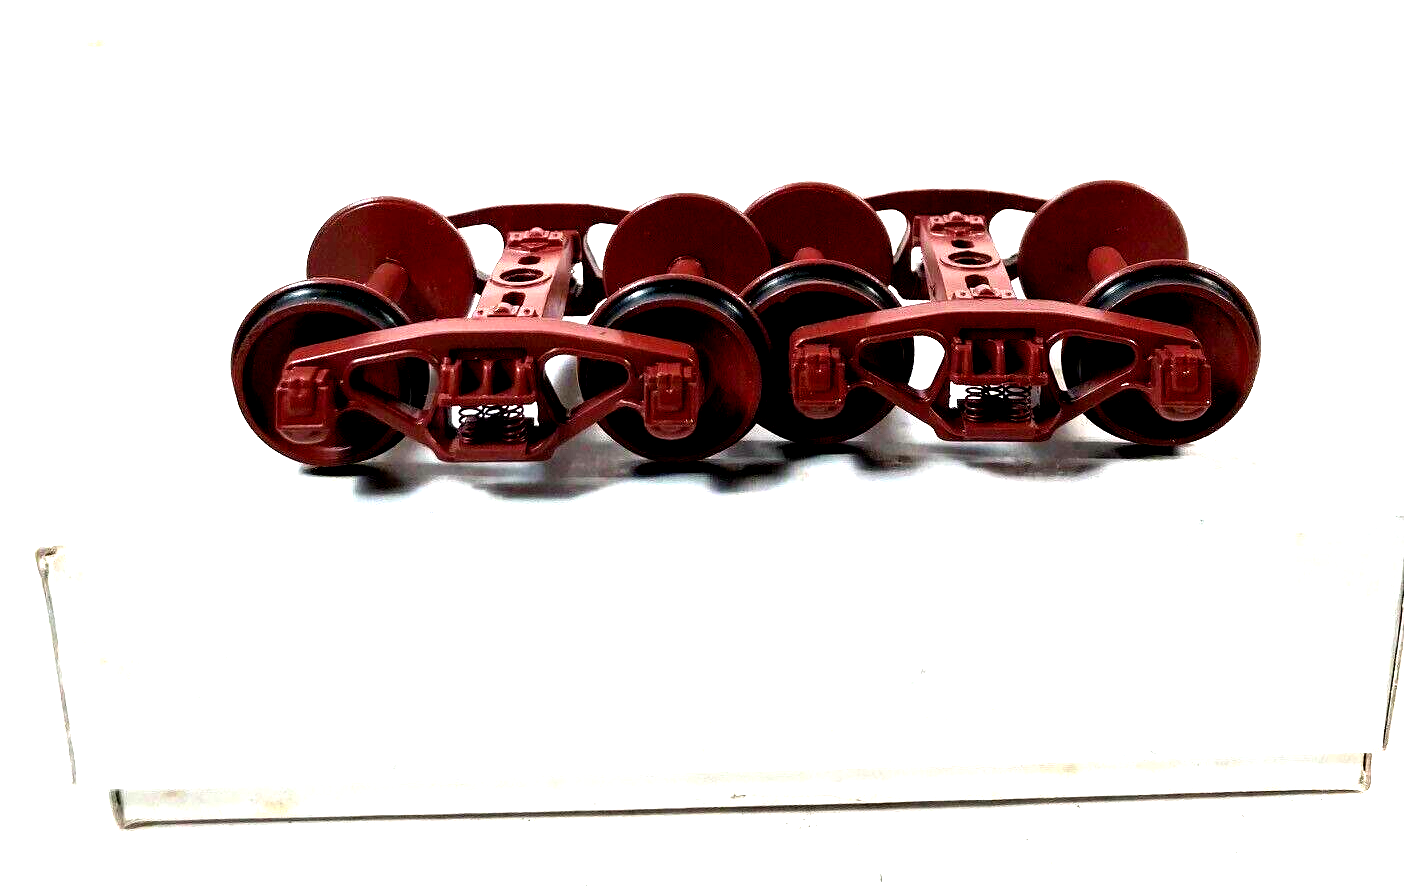
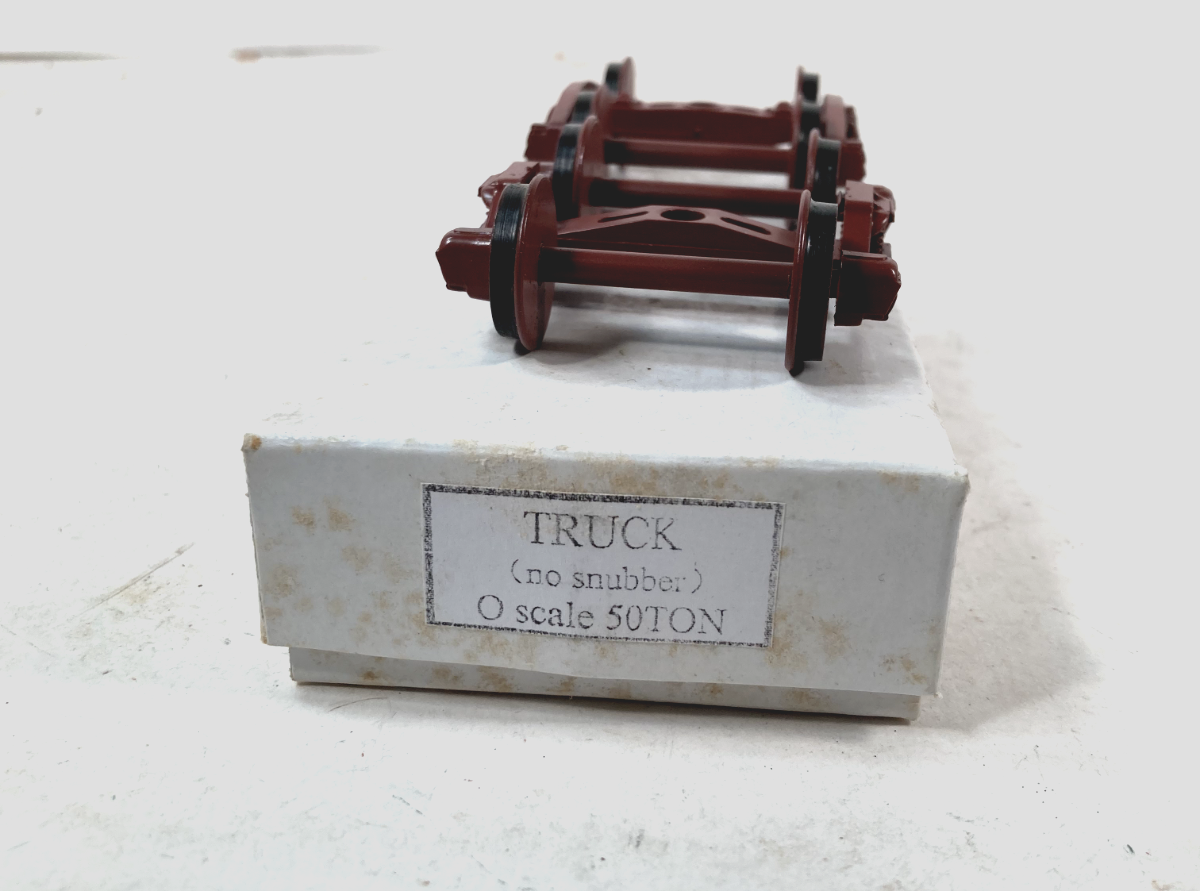
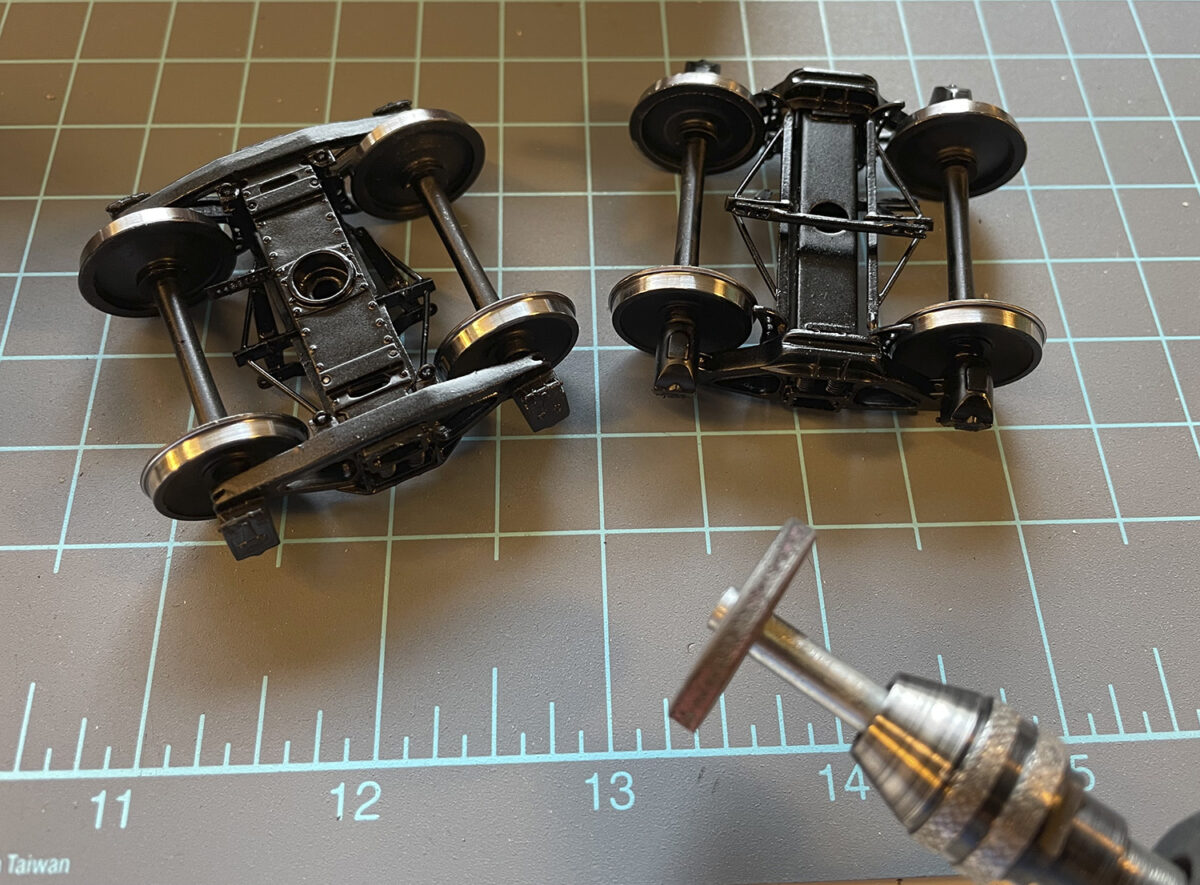
Today, I saw this on the auction site. It was listed as “YODER PRR 50 TON FREIGHT TRUCKS.” It clearly isn’t.
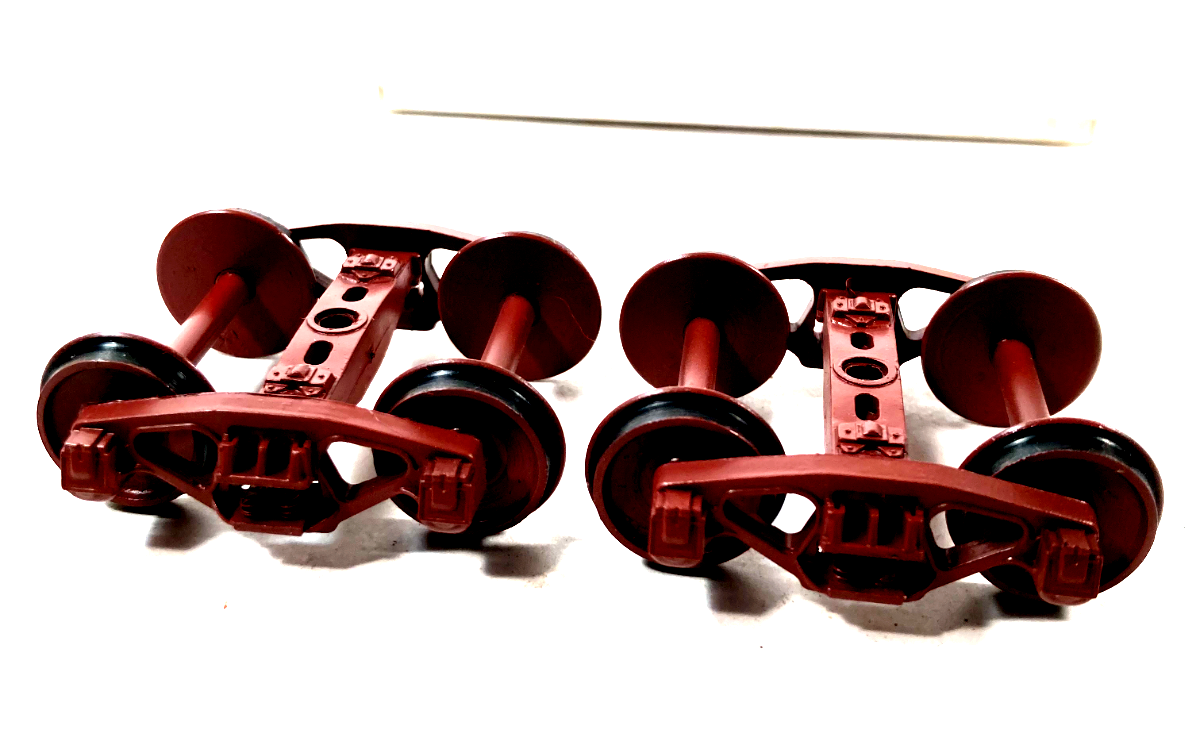
As you can see in the photos, the truck does not have a spring plank, brake beams or brake shoes. Also the wheels appear to be plastic and without any backside relief. This sure looks like an Athearn truck that was painted red.
We have all done this, buy a pair of trucks at a show to replace a pair on a finished car. When you are done installing the new trucks on the car you put the old trucks into the box. It a convenient place to store the old trucks. I know I’ve done it with some trucks.
Trouble is when someone buys a collection and has no idea what these are and they just read the box. They end up listing them as a pair of brass trucks when in reality they are cheap plastic trucks. It’s even worse when they ask more for the plastic trucks than what the imported brass trucks were new from the importer.
Just be careful, not everyone selling stuff knows what they are selling.
Model photos cropped and edited from online images.
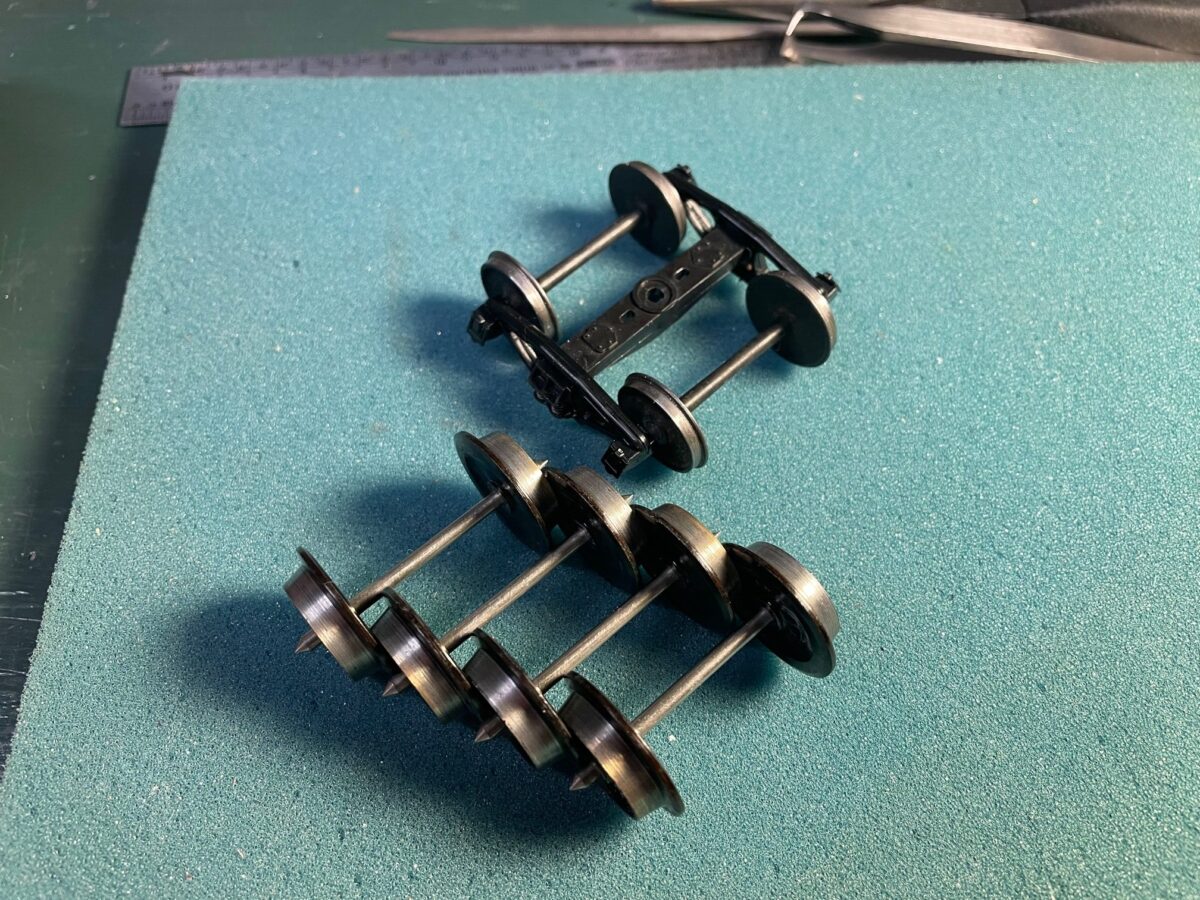
During the Proto48 Meeting at this year’s Chicago show, the topic of the blackened wheel treads came up. I was very surprised by how much talk there was about them and how passionate some of the folks were. It never dawned on me that some folks think it’s difficult to polish the wheel treads.
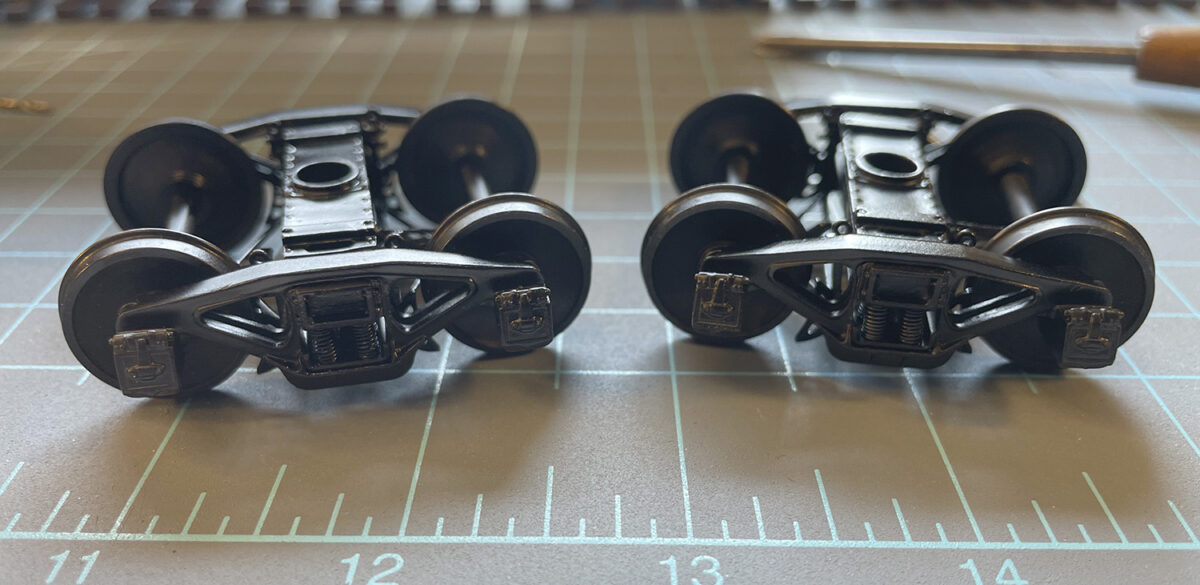
The above image shows a pair of Yoder PRR 2D-F8 50 Ton trucks straight out of the box about to find a home under an Atlas X29. Notice the blackened wheel treads.
I use a small my Dremel with a Rubber Polishing Wheel 320 Xtra Fine grit Silicon carbide. They come 100 in the bag for about $20. I think I found them on ebay a couple of years ago. Since then I may have used a half dozen of the 100 wheels. When they wear down or get a grove in them I just put on a fresh wheel.
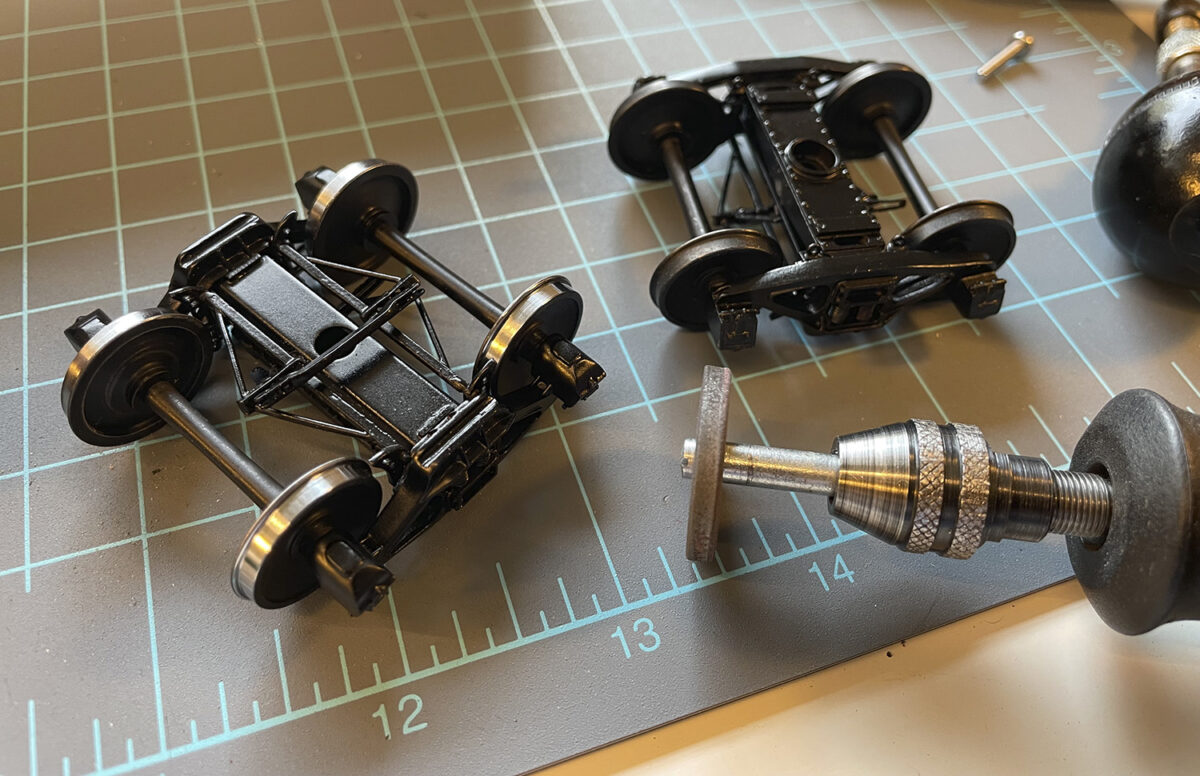
I hold the truck in my hand and work the polishing wheel around the wheel. They can get hot so you have to work out a sequence to be able to continue to hold the truck. After about five minutes work, the wheels are polished.
What’s all the fuss? They talked about this issue longer then it takes to polish the treads on a pair of trucks.
BTW, this also works on loose wheelsets. Just polish the treads before you assemble a truck.
All done, now back to putting these under the X29.
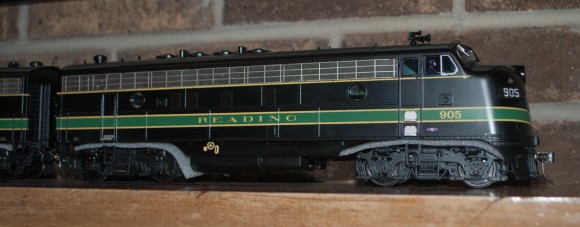
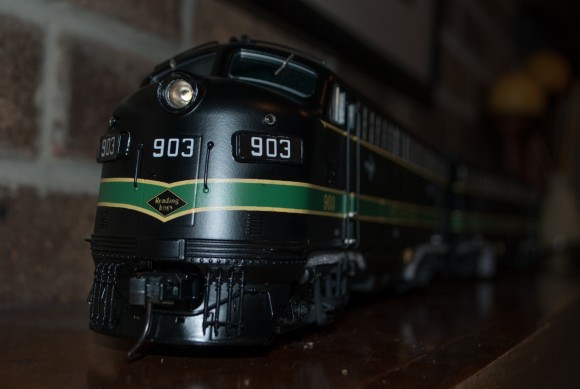
Sunset imported EMD F3 A’s and B’s painted decorated for the Reading a few years ago. I did not order any as I DO NOT like to buy any new model sight unseen. This was the first time they were being built and you have no idea if the model will be accurate.
This weekend I finally saw photos of an actual model that was produced. I was not impressed and I’m VERY GLAD I did not order any.
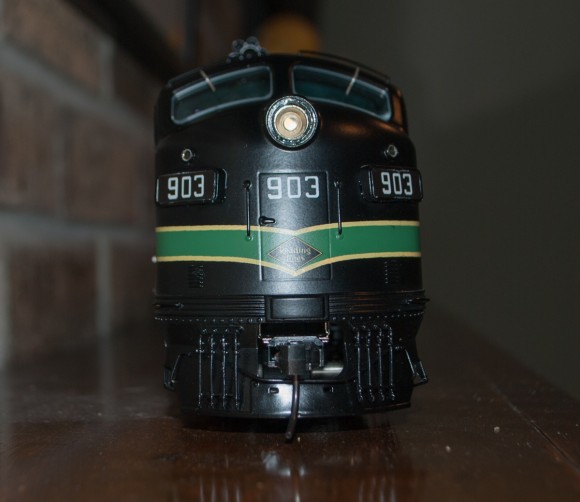
The Reading EMD F3’s were classed as DF-2. They styled very similarly to the later F7’s. The had the later low profile 36 inch fans on the roof. They had the later large angled number boards on the nose. They also had Stainless steel grills on the top of the sides of the locomotives. Outwardly they were often misidentified as F7’s. The only real visual difference is the dynamic brake grid on the roof, they had a pair rectangular roof grids for the Dynamic Brakes instead of the F7’s 36 inch low profile fan.
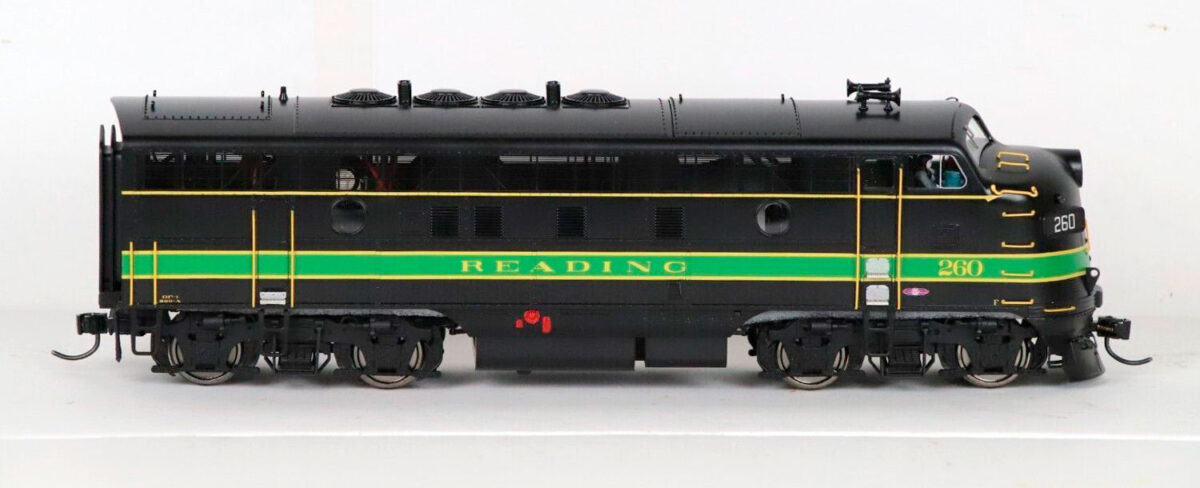
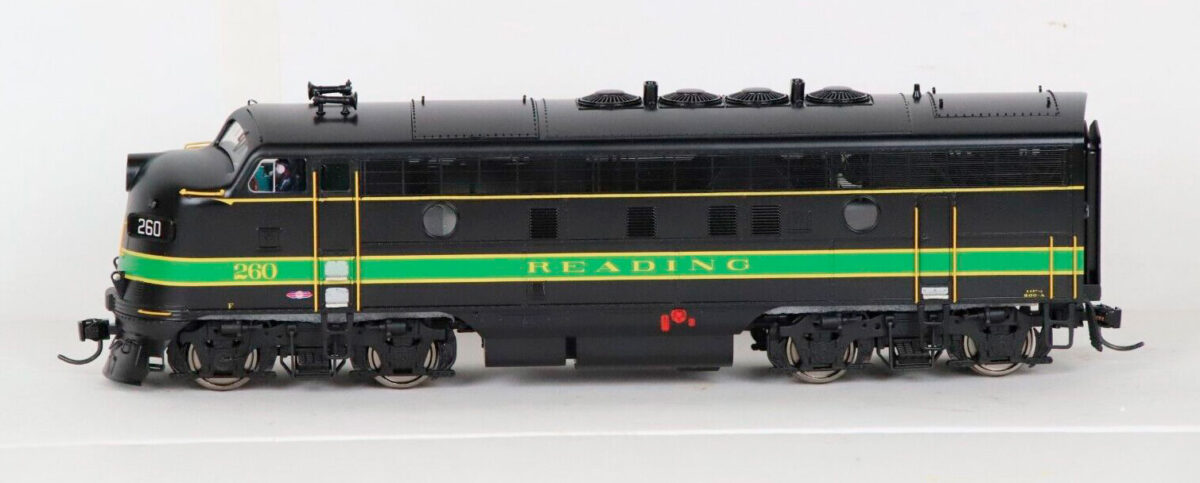
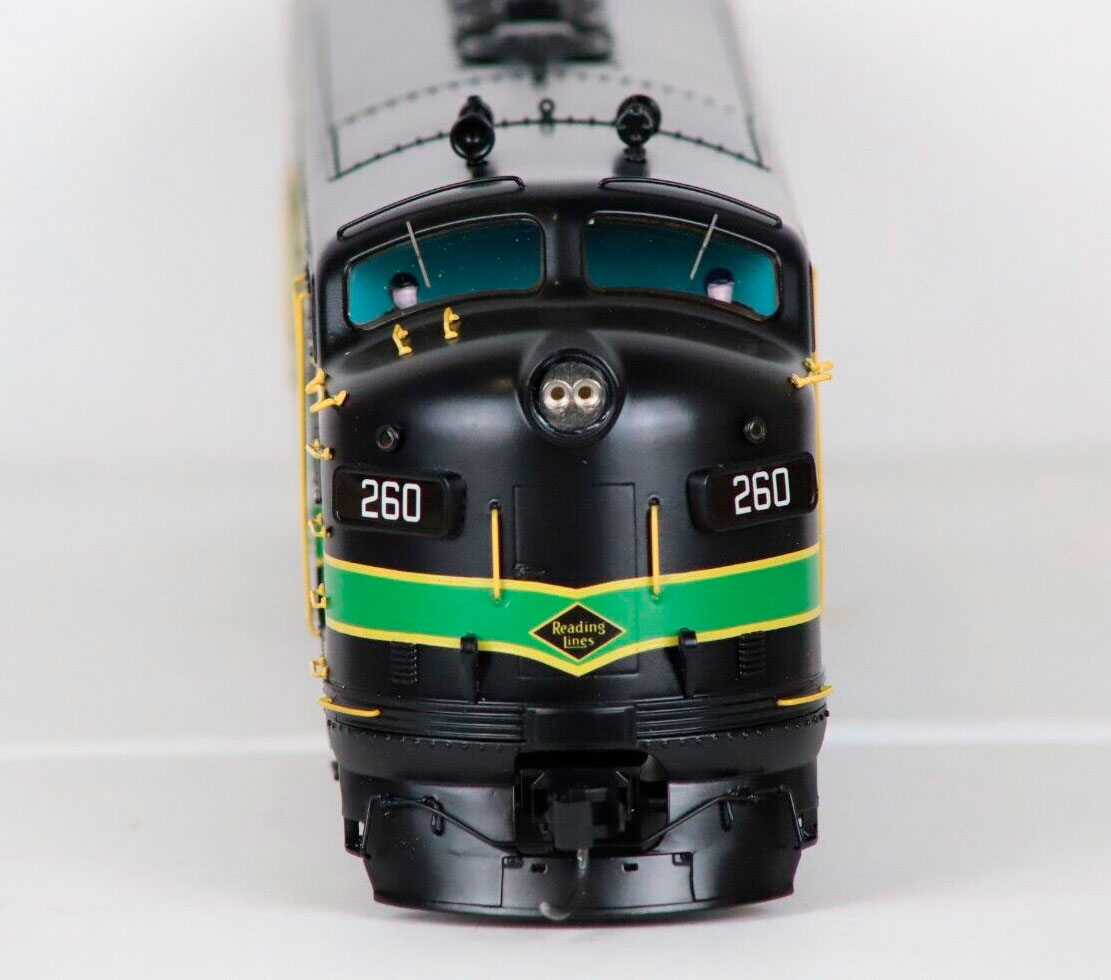
Below are photos of the Sunset 3rd Rail Reading EMD F3 release.
These views of the A unit show what is wrong with the model:
The Dynamic Brake is not modeled correctly on the model. It’s a blank hatch cover. It should be two rectangular screen-covered grids
The Grills at the top of the car body are not modeled correctly. They should be made to look like stainless steel grills like an F7.
There are a pair of PRR style lifting brackets on the nose of the locomotive that should NOT be there.
Missing the number board on the top of the nose door.
Missing nose door handles
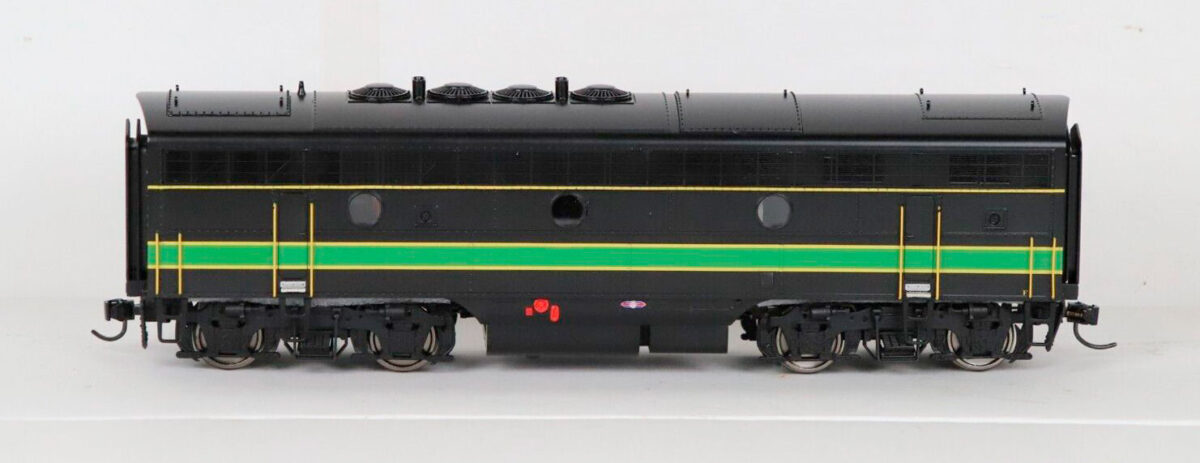
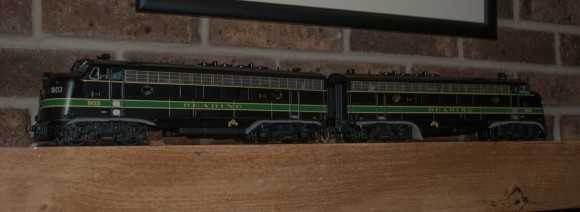
The B Unit also has inaccuracies:
Dynamic Brake not modeled
Missing lettering with unit number and class called out just in front of the rear side door.
Grills at the top of the car body should be like the grills on a F7.
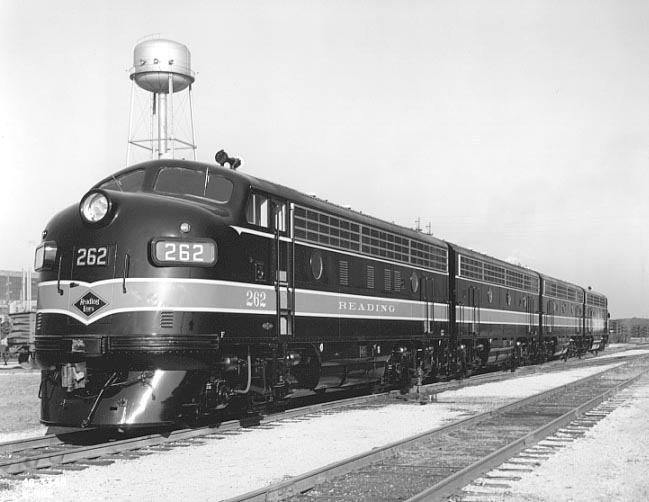
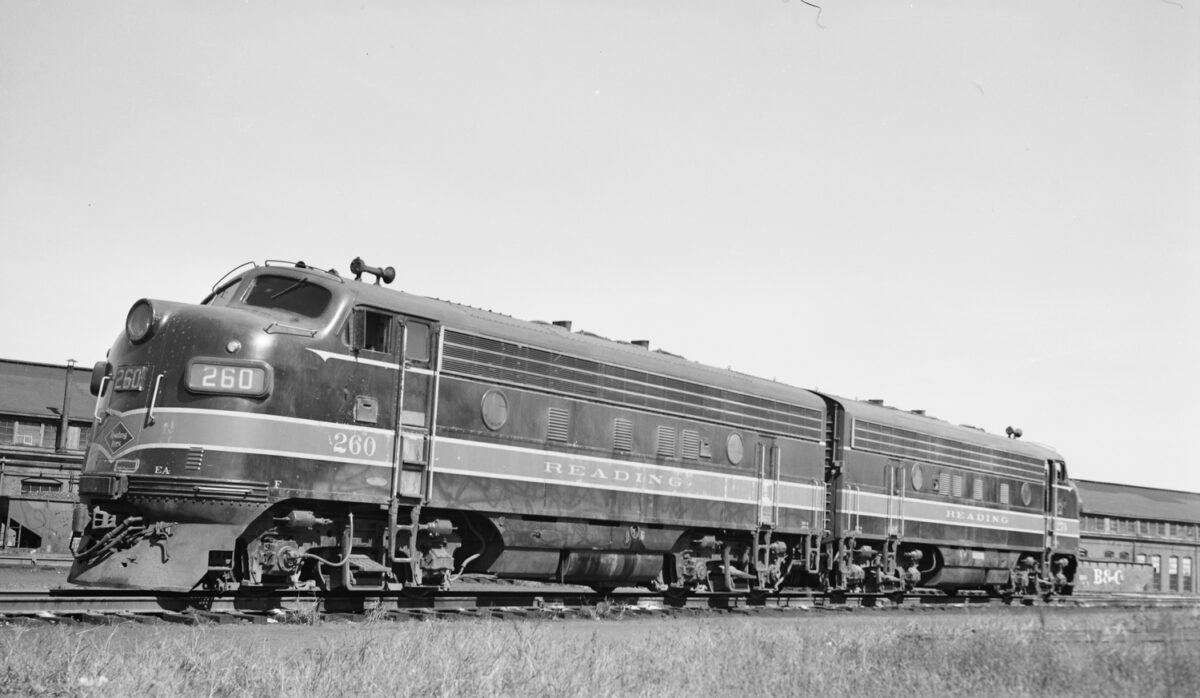
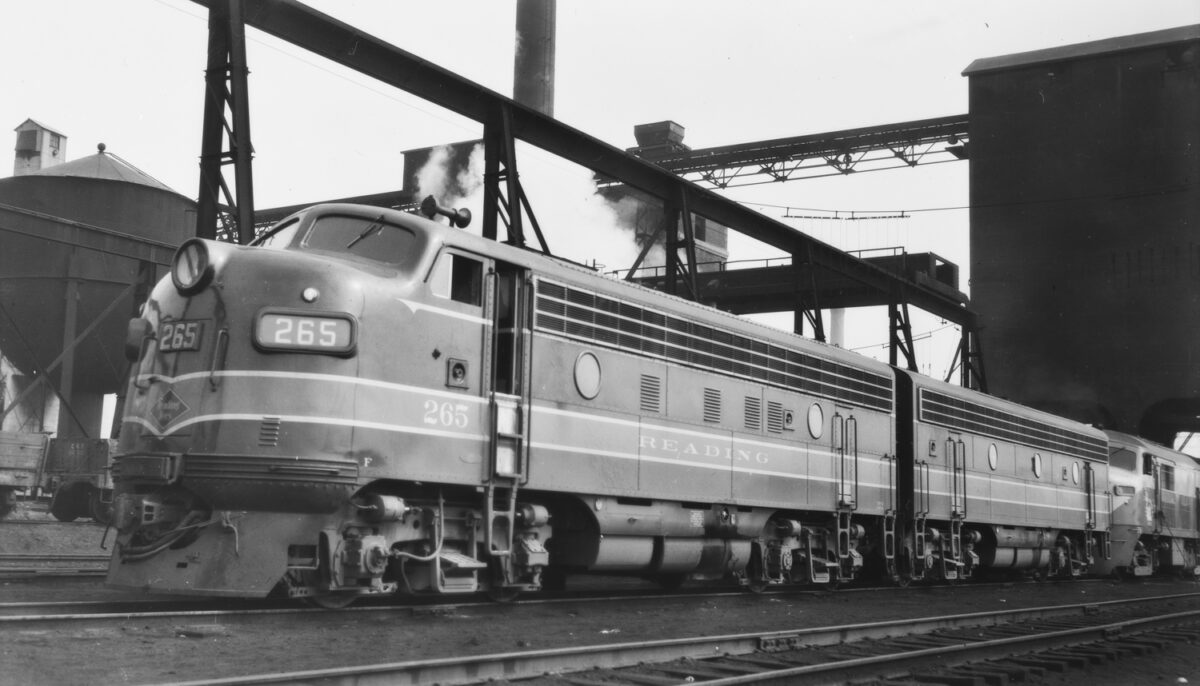
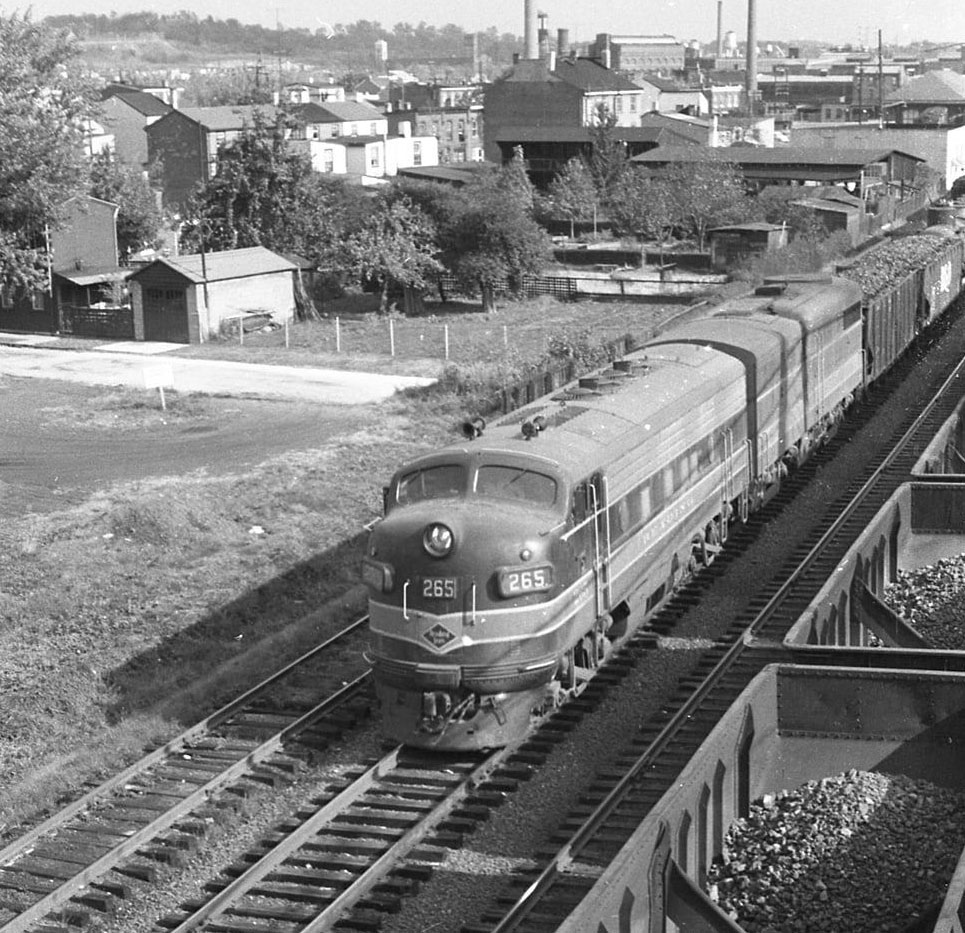
What Reading Company 260 looked like.Reading F3 265 in Bethlehem, PA in 1952.This view shows the dynamic brake grids that are missing on the Sunset model.
I’m not a fan of the model companies current practice of producing a run of a model. They expect you to buy a model sight unseen before ANY photos are released of an actual model. I have only done this one or two times before. Haven’t always been happy with what was produced. And haven’t always been able to sell off the unwanted BAD model.
When you mention this to other modelers they just say order it or don’t, the manufactures don’t really care. Well I care. I’d rather have a correct model than the beginning of an expensive project to add to the project list. My project list is already too large!
Faced with the future options of having to order a model before it’s produced, I think I’ve ordered my last new model for this lifetime.
I did not order any of these models from Sunset 3rd Rail. Now having seen the actual model that was imported, I’m VERY glad I didn’t.
Makes me again say, I will not order any models sight unseen. If that means I don’t get the New Whatever, so what? I have more than enough models here now to keep my project list full for the rest of my lifetime and maybe another lifetime in addition.
Model photos cropped and edited from online images. Prototype images from scanned photos and negatives from my collection.
The title is simple but can mean different things to different people. My own thoughts on standards has evolved over time.
Standards can be as simple as making sure your models meet NMRA standards, so they operate properly. Or it can be how many details are you going to add to each model before you can call a model done.
To me, the NMRA standards are the bare minimum. If it doesn’t meet the Proto48 standards for wheels it will not operate properly. That is the starting point, for some it is the end point. Those modelers don’t care about all the different details. How many times have you heard them say they only break off anyway, why bother? Maybe that is what’s nice about the hobby, every modeler can make that call for themselves. There is no right or wrong answer, just what’s right for you and your modeling.
This post is more about what I am standardizing on now. It’s not a certain level of detail. Today the Standard I’m using is more basic than that.
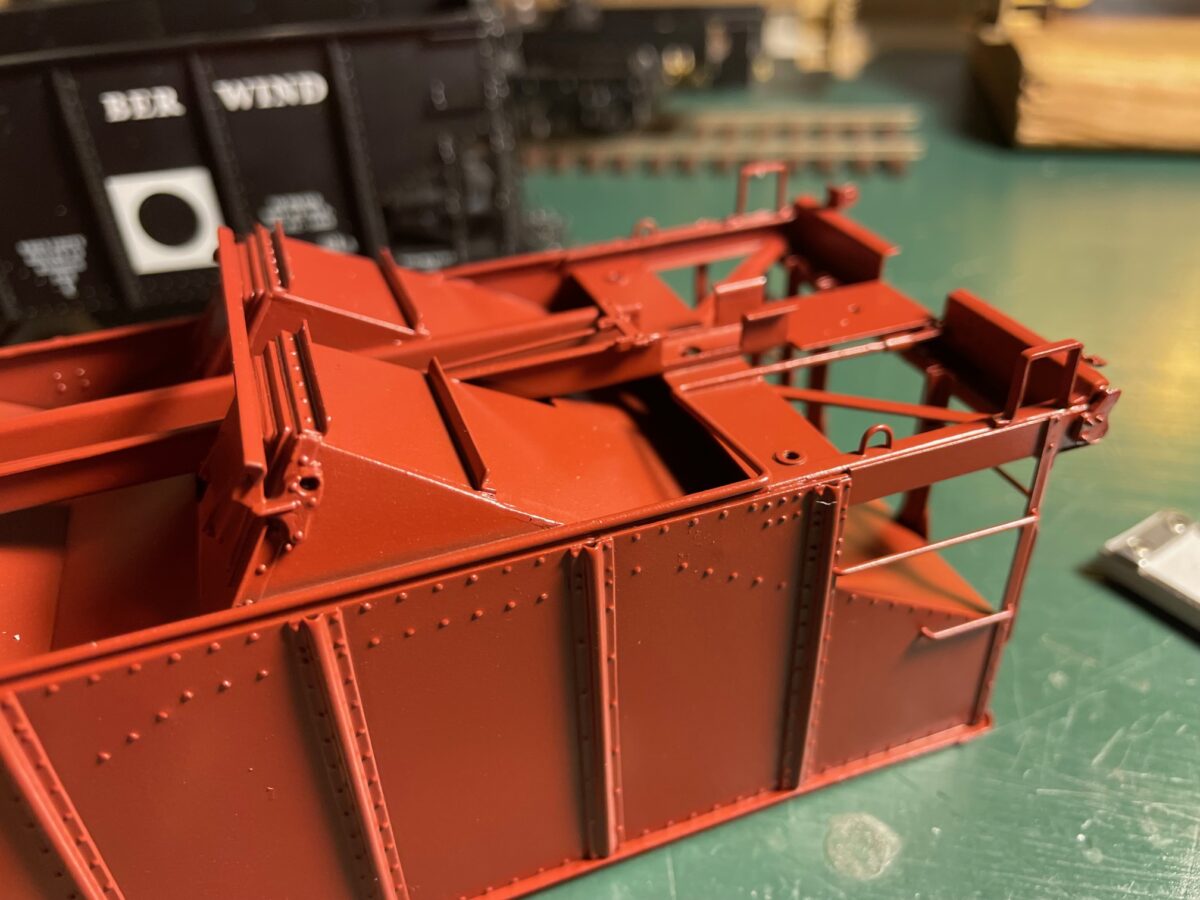
This morning, I was attaching the plastic bolsters to a 40 year old Precision Scale model. The hardware package supplied when the model was imported has disappeared in the years since the model was imported.
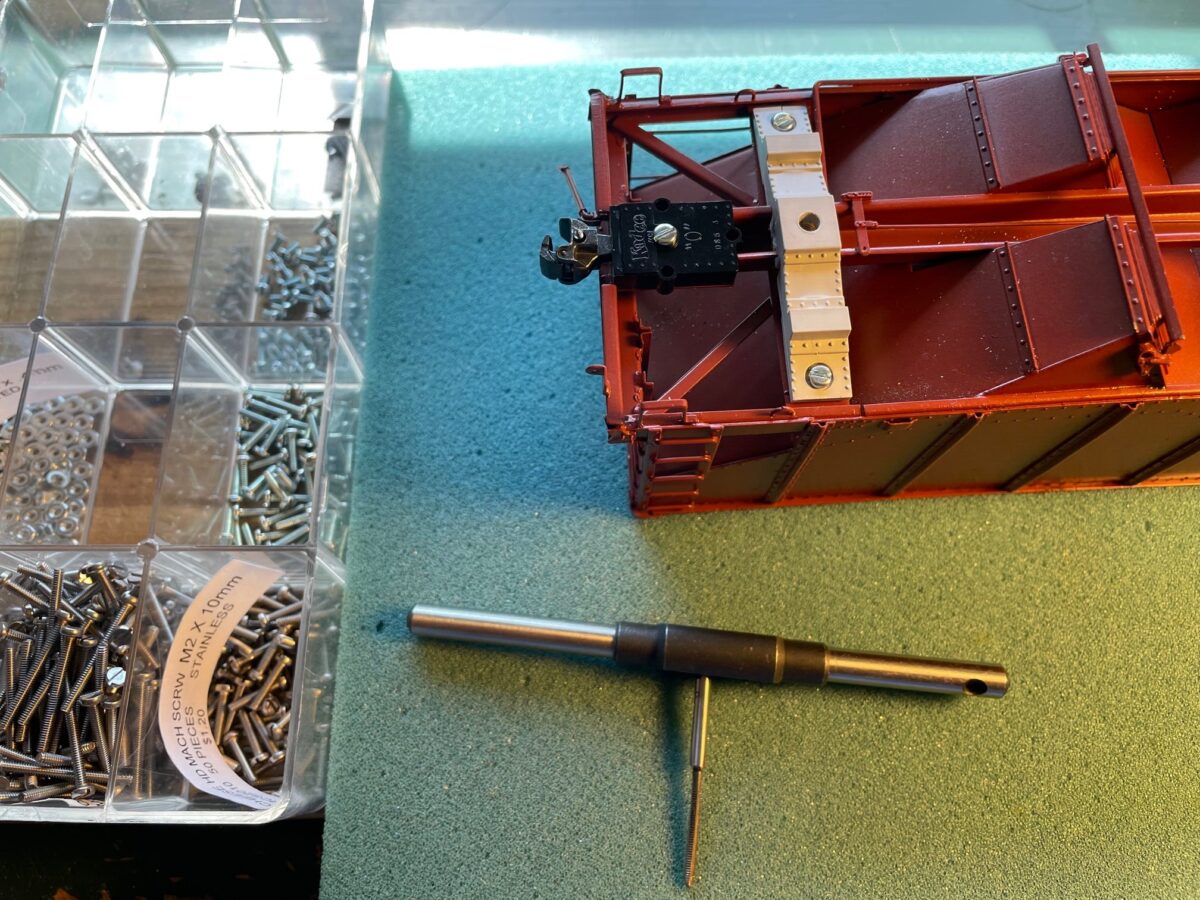
So today, my modeling standards are something as simple as tapping the holes for a 2 mm screw which are my standard for mounting the bolsters to cars. Same thing for mounting of the couplers to the car body. The tiny hole for the coupler on the model (top photo) is tapped for another 2 mm screw.
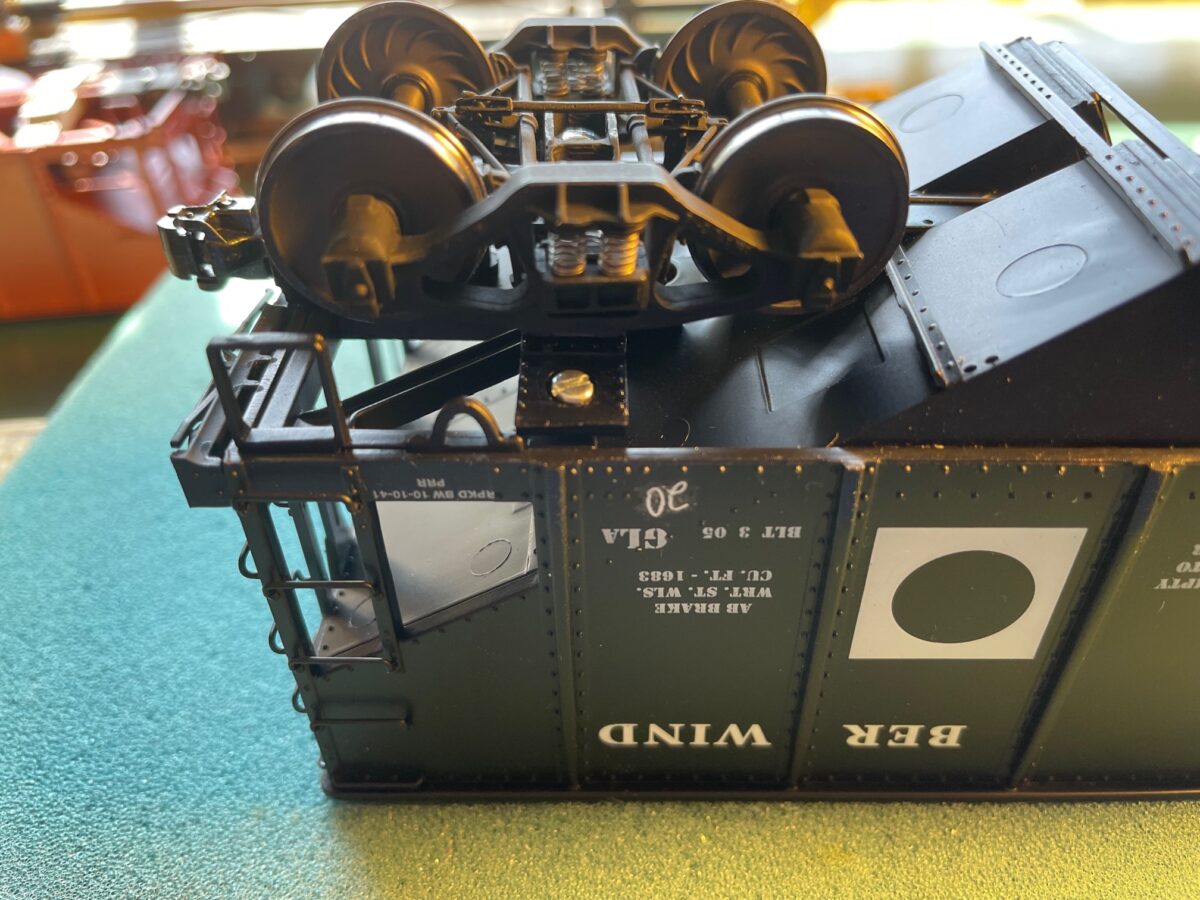
Below shows how the same standard was used to mount the PSC Bolster to a Lionel Berwind GLa. Allowing a pair of Proto48 trucks to be mounted completing that part of the conversion. Now I just need to touch up the screw head with some paint and it all disappears.
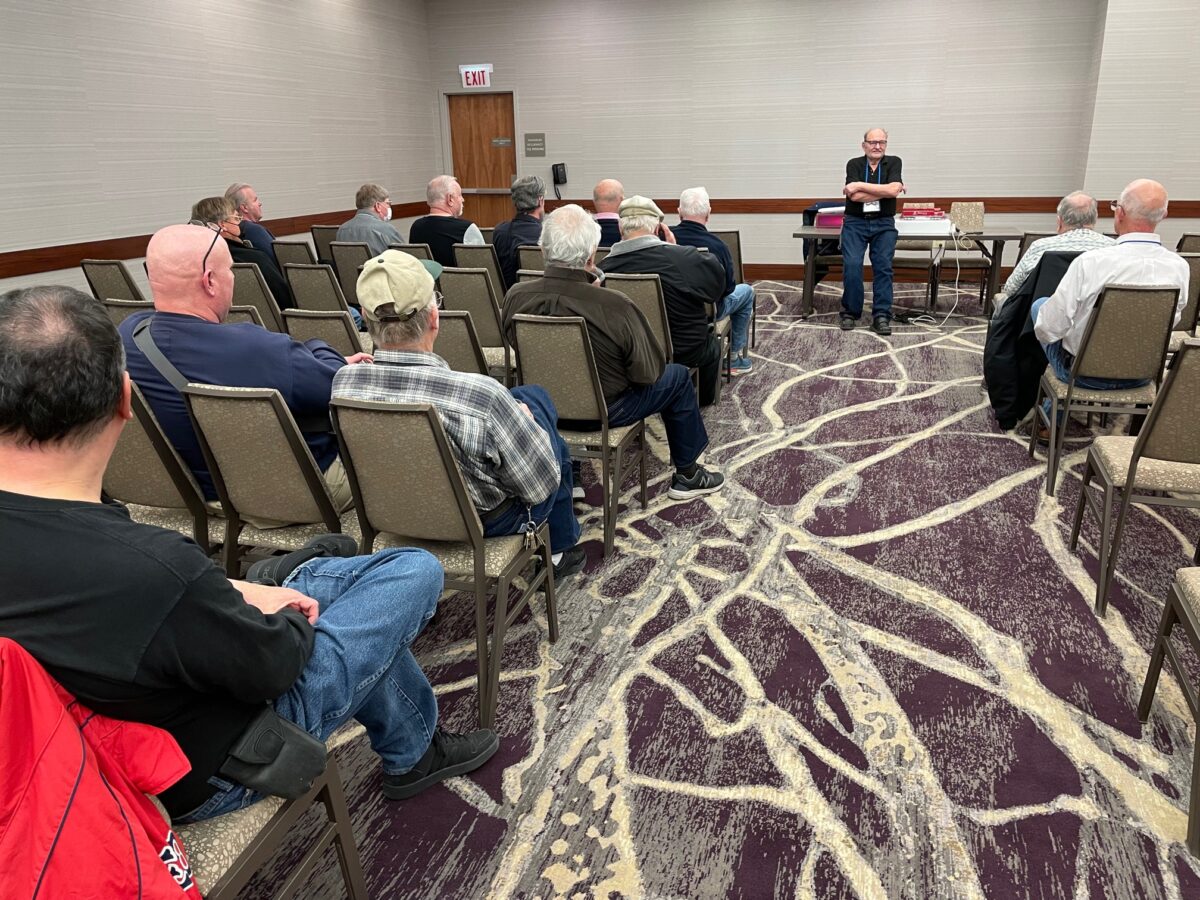
The Proto48 Meeting Paul Hanson hosted the meeting to a packed house.
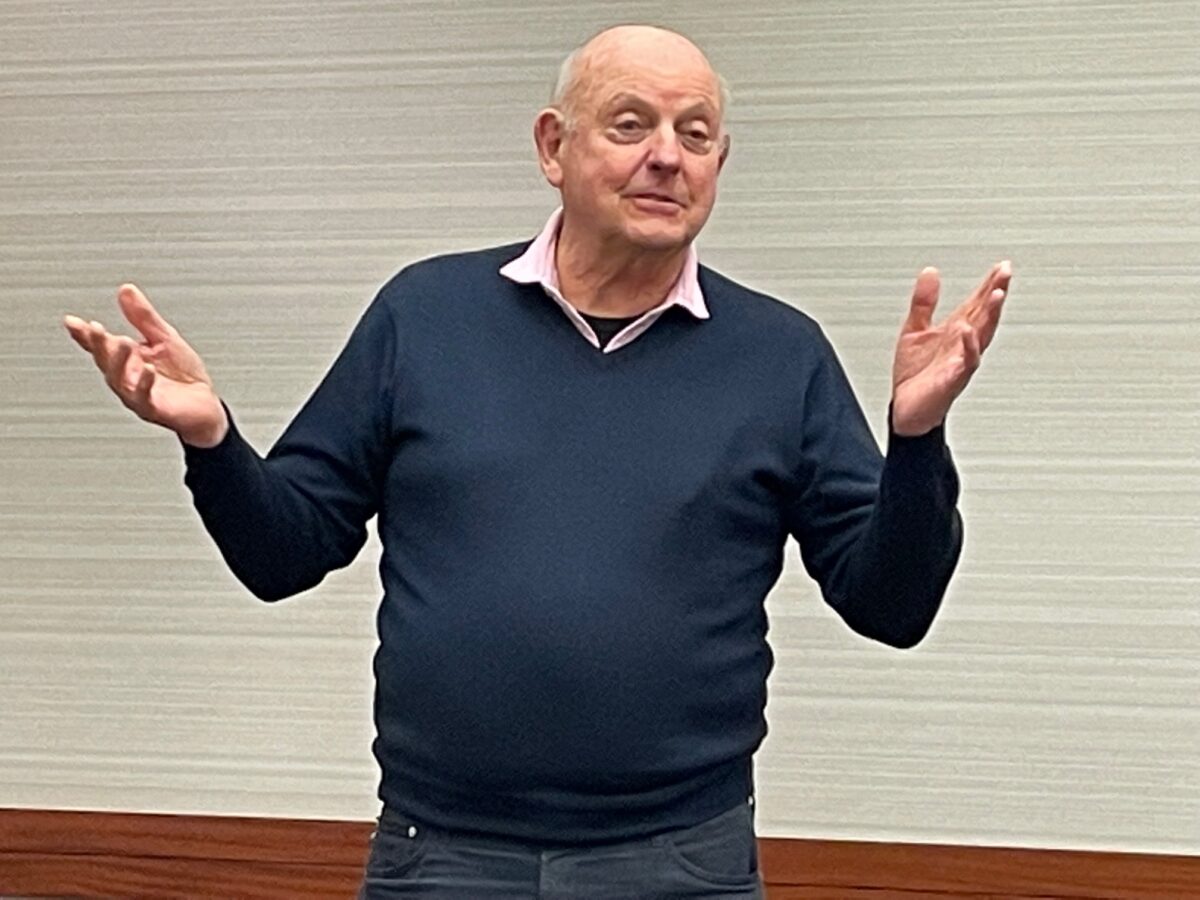
Norm Buckhart was the first speaker. He spoke about his current release of 50 foot boxcars. Norm also spoke about his upcoming run of tank cars which are due in late 2022 or early 2023. This run will consists of multiple varieties of cars, most never having been produce in O Scale before.
Norm also spoke of the next run after the tank cars, round roof box cars. The box cars will be imported in late 2023 or early 2024. The round roof box car run will consist of multiple variations of the PRR class X31 of 40 foot boxcars and the PRR 50 foot boxcars in the X32 and X33 classes. In addition will be two classes of 40 foot cars for the Seaboard. I’m really looking forward to the Seaboard cars.
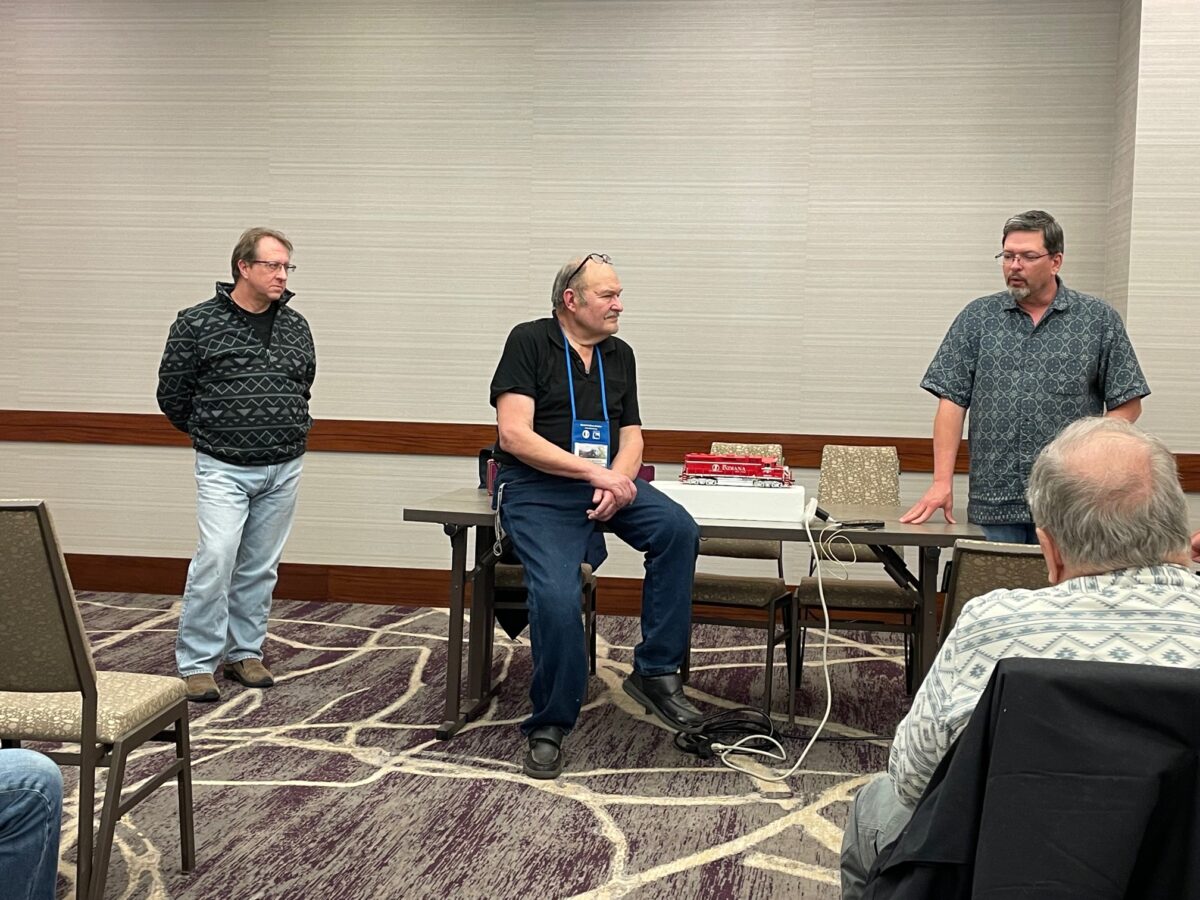
Next to speak were Ross Dando of Twin City Cars (on left) and Jon Cagle of Southern Car & Foundry (on right).
Ross was up first and spoke of his new offerings including a new double etched spike. That brought about some crowd participation and interaction. Ross also mentioned the development of his next release for Twin City Cars, a steel USRA rebuilt car from a USRA double sheathed boxcar. Gene Deimiling wrote about that is his recent blog post. I’m looking forward to that car.
Jon Cagle spoke about his new kit of the Howe Truss boxcar. The new composite side model is similar to the previous release of the steel sided Howe Truss Sand Springs box car. The difference is this is this car is accurate for three or four railroads instead of one shortline railroad with a total of four cars on the roster. Four cars total in 1952 when the were over 800,000 boxcars on the rails, what is the likelihood of one of them going past you trackside?
Jon also mentioned that his tank car kit are back into development. He had samples in the past at shows that looked great and well beyond anything that had been done before. They never became completed kit masters, but it sounds like they will later this year.
As Jon spoke you could hear his passion for what can be done with resin casting. And he also spoke about what others have recently released with resin. How some manufactures need to do more work with their masters BEFORE committing to making molds and casting resin. Without naming names, all that are facing having to sand 3D stepping out of roofs knew exactly what he was talking about.
After the presentations from the three manufactures, Paul Hanson showed off a modern MTH locomotive that had been converted to Proto48. This sparked some discussion about the difference between Finescale modeling and Proto48 modeling.
I have always believed that equating Finescale and Proto48 does more to exclude potential new Proto48 modelers from trying out Proto48. Below is the text of a post I made about the subject in the past on the OGR Board which pretty much sums up my feelings on the subject.
“Proto48 is about correcting the gauge of the rails and running with fine wheel widths and treads. There is nothing in the Proto48 standards about truck widths and there are absolutely no “requirements” beyond the gauge and wheel standards.
Just because some Proto48 modelers build finescale models, doesn’t mean that every Proto48 modeler has to build to that level. And I would point out that there are a lot of O Scale modelers who build models to finescale levels also. A Proto48 model does not have to be a finescale model and a finescale model does not have to be Proto48.“
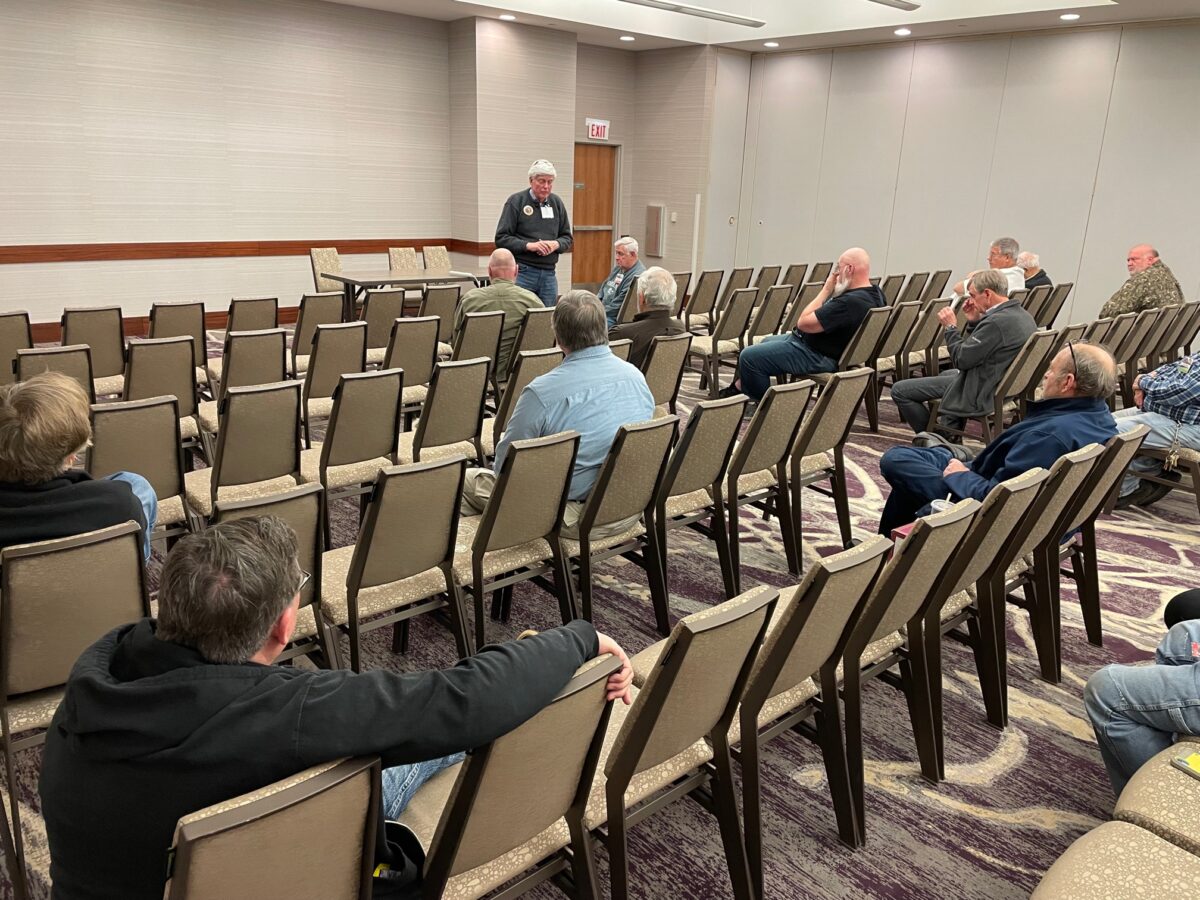
The O Scale Kings Meeting David Vaughn hosted the O Scale Kings meeting. He discussed the current efforts of the group. They working on operating name change to O Scale Central. Acknowledging that some have had issues with the name of the group over the years.
There was discussion of developing new O Scale module standards which would also be inclusive of past modules built to NMRA or Free-Mo standards.
It was also suggested during the meeting that O Scale is positioned to take the lead on developing standards for DeadRail or Power On Board. It was noted that members of the O Scale Kings were working with representatives from the NMRA to help guide that discussion.
While the crowd was thinner than the Proto48 meeting which was held in the same room. I think that was because it was not the Business meeting of the O Scale Kings which was held the next day. I was not able to attend the business meeting.
Last night I was changing out wheelsets on a Weaver N5c cabin car. In about fifteen minutes, I had the trucks off, the three rail wheelsets out, new axels in place and the trucks re-instaled.
Afterwards, I had the old three rail wheels sitting on the workbench next to a Proto48 truck still on the workbench from working on the turnouts from the earlier posts.
Seeing the SIZE of the wheels next to the Proto48 truck explains it all for me. I know why I model in Proto48.
The funny thing is, most Proto48’ers look down their nose at the truck in the photo. It is a Red Caboose truck with no brake shoes and NWSL Proto48 wheelsets with no back of wheel detail installed. All that being said, the truck still looks great next to the three rail wheels and it rolls almost as good as the expensive trucks with roller-bearings on each axel.
You mileage may vary, and that’s fine. Enjoy the hobby.
My first impression is good. I do see a couple of things that I will want to improve.
For now, I just want to look at them and enjoy them.
Follow-up to this post. About two years after this was posted. I was approached by a friend who was regretting not buying a pair of these. I ended up selling these models to him. He did not mind the things I saw wrong with the models at all. These have since been replaced with Overland FP-7’s working their way through the paint shop.
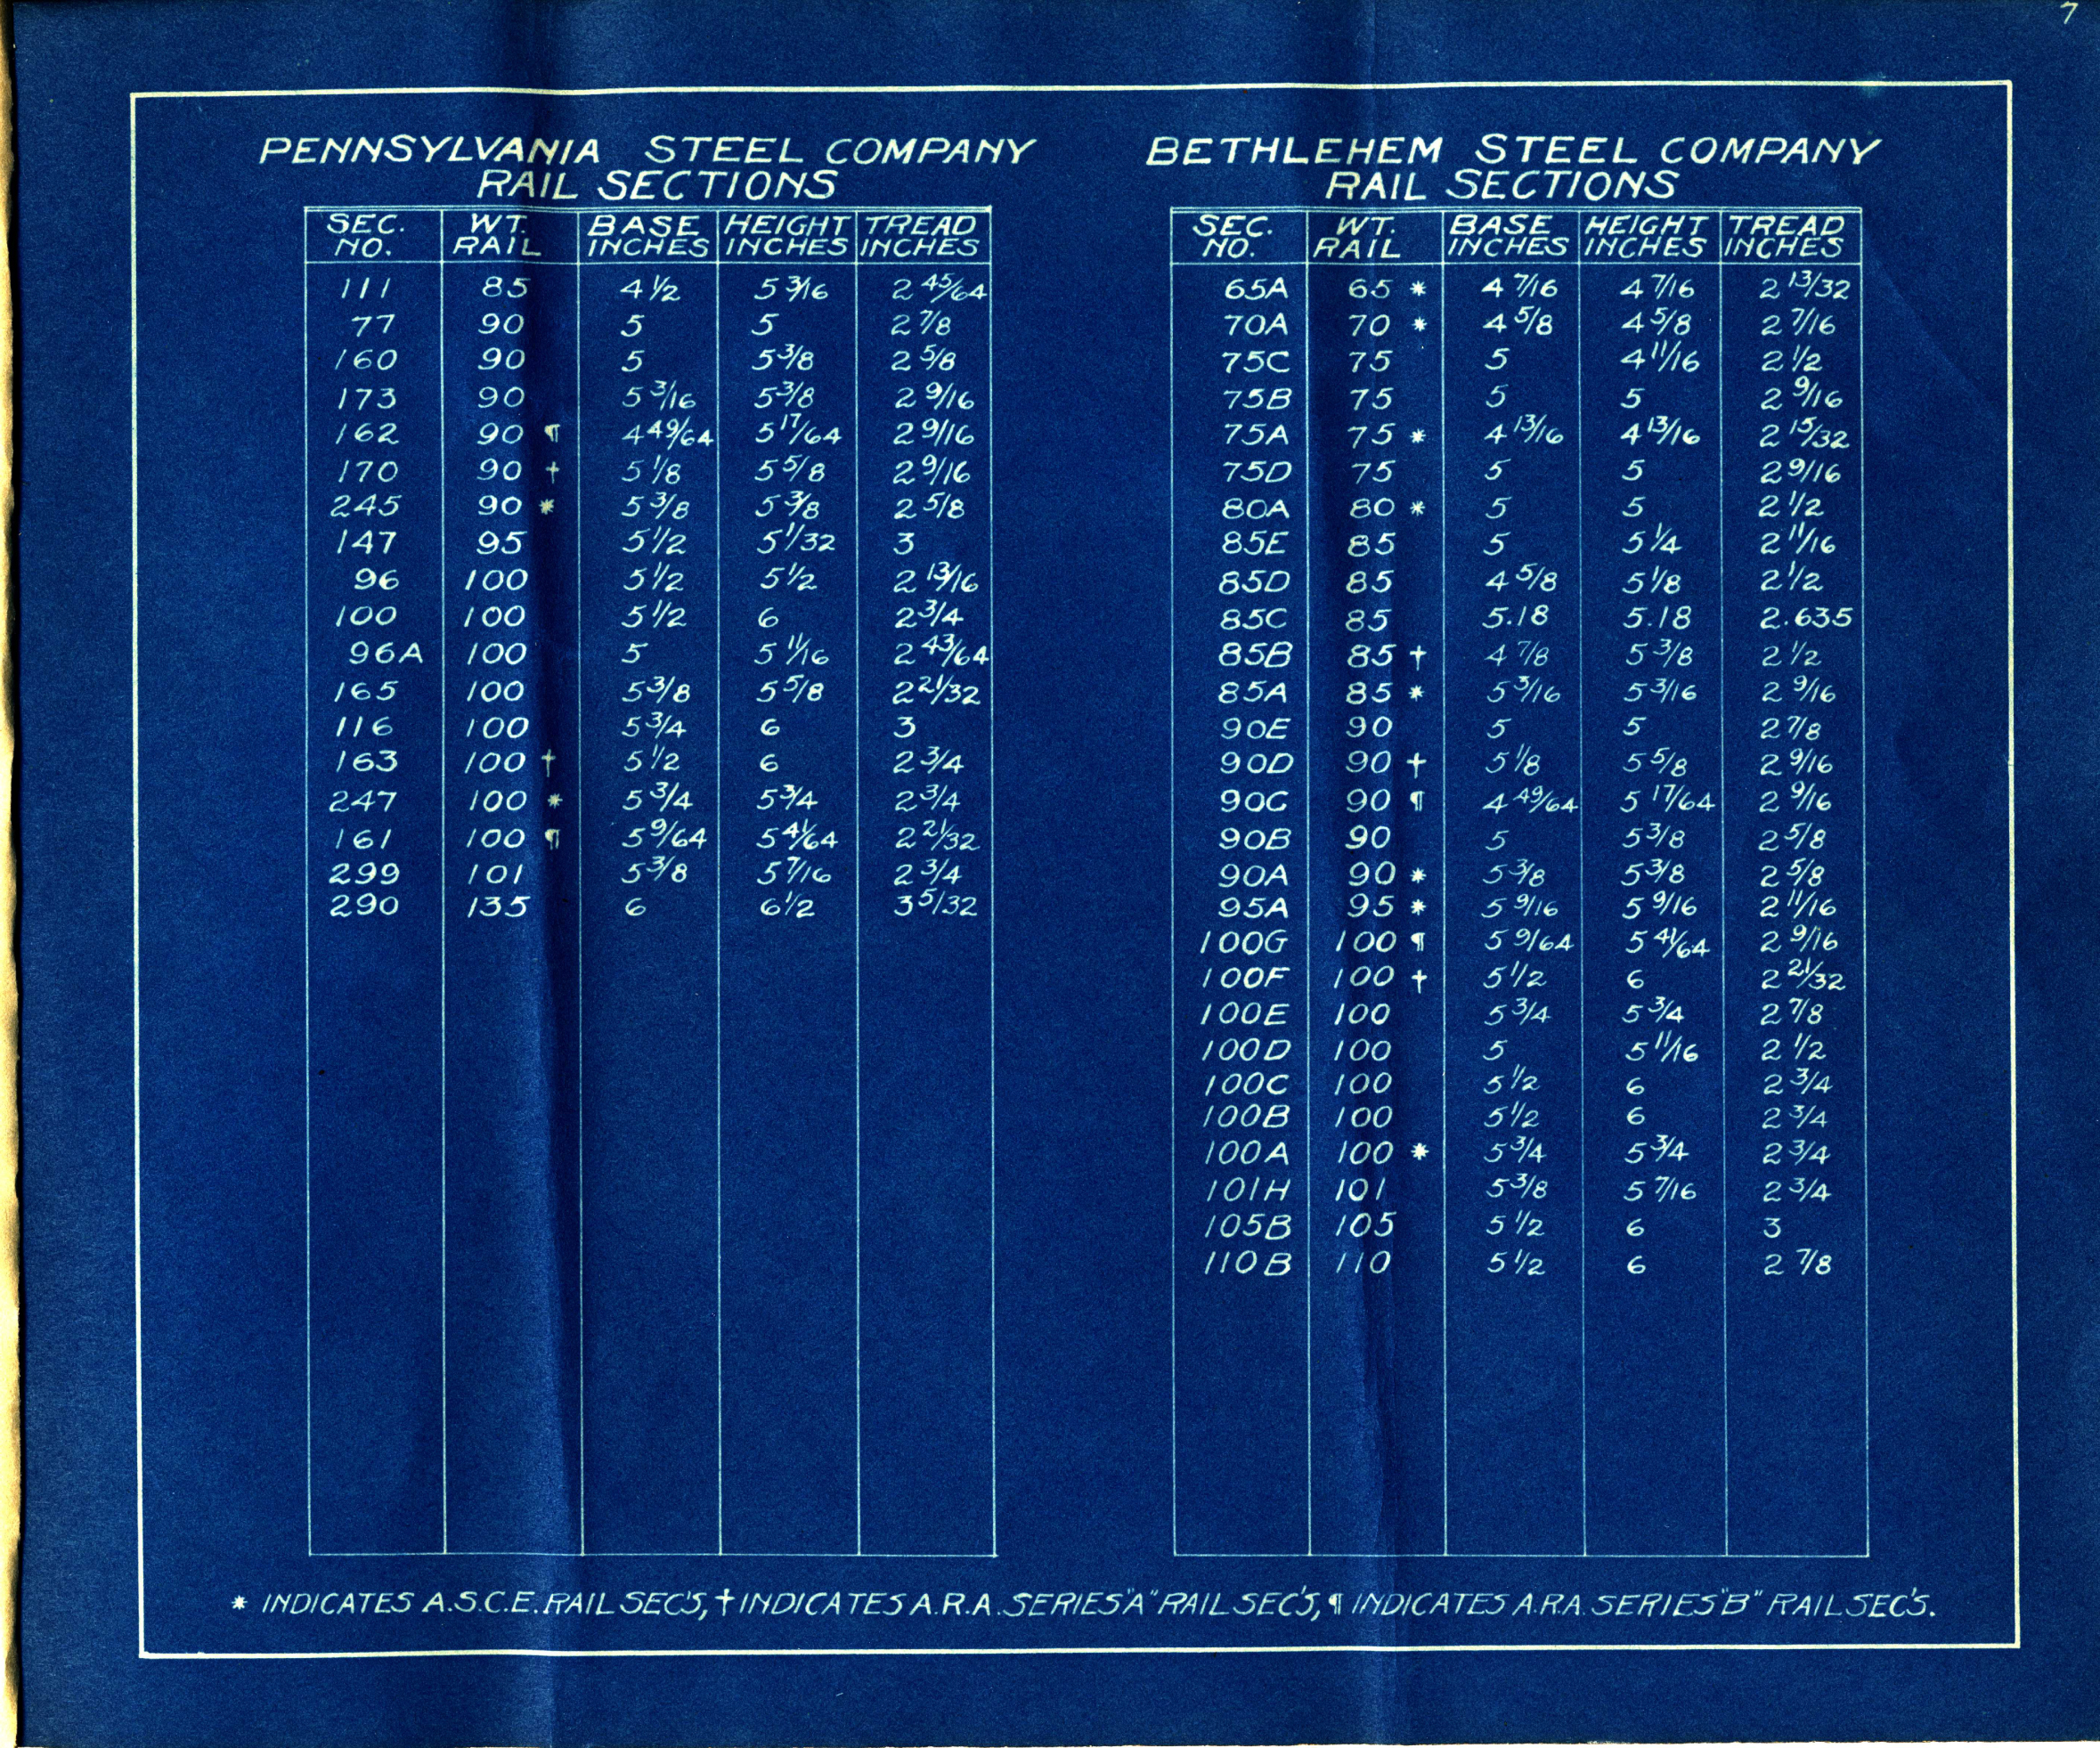
There is always talk about what size rail should be used to model prototype rail of different weights. Some time back, I picked up a document published by the AT&SF Railroad which had different sizes of rail for different manufacturers listed. It contains the dimensions and sizes of rail made by Illinois Steel Company, Carnegie Steel Company, Pennsylvania Steel Company, Bethlehem Steel Company, Lackawanna Steel Company, Cambria Steel Company Colorado Fuel & Iron Company and Dominion Iron & Steel Company.
In page 8 above, the sizes for rail from the Pennsylvania Steel Company are listed in the left hand table. There are eight different lines for 100 pound rail. The base width ranges from 5 inches to 5.5 inches, the height ranges from 5.5 inches to 6 inches and the tread width from 2.75 inches to 3 inches. The one listing for a 135 pound rail has it’s base at 6 inches, it’s height at 6 inches and it’s tread width at 3 5/32 inch.
So how is someone going to tell the difference between 100 pound rail and 135 pound rail when one sample has the same height (6 inches) only a quarter of an inch in base width difference, and 5/32 of an inch difference in tread width?
In my last post “What is Proto48?” I made the following comment:
My modeling belief has always been that no mater what width the gauge, the model should be detailed as accurately as time, prototype information, modeling skills and money permits.
We can all see the improvement of our modeling skills just by looking at some of our old models. While looking at your earlier models can be a nice trip down memory lane, now that the models are to be placed on the layout together with your newer work, some of the warts on the older models might start to show.
I conducted an experiment one night at the club, I placed eight cars in a train. Five of the cars had full brake detail and separate grabs, one car had no brake detail and molded on grabs, the other two were older USH hoppers with their end exposing that they only had the three brake appliances with no piping between them. They were all nicely painted and weathered. I ran them on the layout for a while, everybody who saw the train run thought all the cars were super-detailed. So what does this mean? Most people don’t look carefully enough? Does it mean we don’t need to model these features? It means you need to model to the level that makes you happy and not worry if it’s up to someone else’s standards.
Realize these are my standards that I’m shooting for, not anybody else’s, just mine. Not a Proto48 standard, just a George Standard. For new models, it will set the bench mark for the level of accuracy and detail required. For the older ones, some upgrades might be in order. Of coarse this is a changing list as new products development can bring new levels of detail or realism.
Here is what I have so far:
Prototype of model included in my January 1952 ORER
Painted as the car would have looked in the Summer of 1952
Weathering applied to car for the Summer of 1952
Models to be detailed for the Summer of 1952
Reweigh Dates to comply with Rule 11 AAR Code of Car Service Rules
Brake Equipment and Rigging
Wheels and trucks to comply with NMRA Proto48 specs
Polished tire treads
Weight standards
Kadee couplers, correct height, without trip pins
Prototype of model included in my January 1952 ORER My modeling is set in the Summer of 1952. I arrived at this date because of a couple of reasons. First the major classes of Steam locomotives I wanted to model, K1, N1 and T-1’s were all still running at this time. Also, this was the last Summer that the Reading G-3’s ran on passenger trains in Pennsylvania. At a point in the early Fall they were all shipped over to the PRSL in South Jersey to finish out their service lives. They were replaced with the new GP-7’s that arrived that Summer. Since I acquired a nice SGL G-3 in my trades of surplus PRR models, I’d like to see it pulling my passenger trains.
Painted as the car would have looked in the Summer of 1952 Rather self explanatory but it has meant the selling of some finished models which were painted in paint schemes from 1954. I know I could have stripped the cars and repainted, but it has been easier to sell off the finished cars and buy new unpainted cars. Besides I hate stripping paint off cars.
Weathering applied to car for 1952 Again, a simple idea but think if a car was built in 1952, it’s going to be very clean. Most often we weather the cars too heavy because that’s how we remember them last in the 70’s ready for scrap. On locomotives, the AS-16’s are less than a year old and the DB equipped AS-16’s started arriving in June 1952, they are less than a moth old.
Models to be detailed for 1952 These types of dated details weather they are paint details or appliance details for the equipment help set the time period. Some examples are, the safety grabs on the noses of the EMD F-units. They were changing throughout the 1950’s. They went from not there at first to some there and painted black, more applied and painted yellow.
Reweigh Dates to comply with Rule 11 AAR Code of Car Service Rules These can be found in the ORER’s. I’ve been modeling these since before my club days. They govern how often a cars light weight had to be weighed. Tony Thompson wrote an article in the April 2011 issue of Railroad Model Craftsman (RMC) which he talks about on his blog. He explains the rules well in the article.
Since my modeling efforts prior to this had been set in 1956, this has required the changing of almost all the reweigh dates on my cars.
Brake Equipment and Rigging With my first models, I was happy just to have something under the car. The major appliances were enough. Then I saw what could be done. Full brake piping with equipment positioned as per the prototype. It really does not take too long to build and really sets off the models.
Wheels and Trucks to comply with NMRA Proto48 specs Good running equipment is the difference between having fun operating on the layout or having to force yourself to work on the layout. Good running equipment requires that all specifications for wheels and track are within the NMRA standards.
Polished Tire Treads I always liked the look when I saw other modelers do this. Once I did this to a few of the trucks, I wanted to do this to all of them. I’m not sure if I will have any issue of the treads rusting in the South Jersey humidity. If they start then maybe they just need to be rolled on the layout more.
Weight Standards I’ve always thought the NMRA weight standards were a little on the heavy side. Since I’m running some very heavy diecast hoppers. I can’t have the cars too underweight and still expect them to operate without trouble.
Kadee Couplers, Correct Height, Without Trip Pins The Kadee 700 series couplers are my standard. Most of my models are equipped with the older version with the spring on the outside. A little paint and the spring disappears. When I work on an existing car, I am changing them out for the new couplers. I’ve tried Protocraft couplers, they are beautiful and work nicely. They just aren’t for me.
Air Hoses Air Hoses are on the standards list since all the prototype cars had them and not all the models that have been made over the years have had them.
I tried the magnetic working air hoses that Ben Brown wrote an article about in the Jan/Feb 20009 issue of O Scale Trains explaining how he made working air hoses. I got the air lines to work but I found it to just be an extra point of frustration. They are nice when they work.
All that being said, these are MY standards. They are not meant to be anybody else’s standards. Nor are anybody else’s standards meant to be mine. We are all supposed to be having fun after all.