Kadee released Proto48 trucks last year. I picked some up last year. I recently noticed I never posted anything about them. I had used some of their O scale trucks on conversions for a friend of mine. They are nice trucks. These Proto48 versions are very similiar.
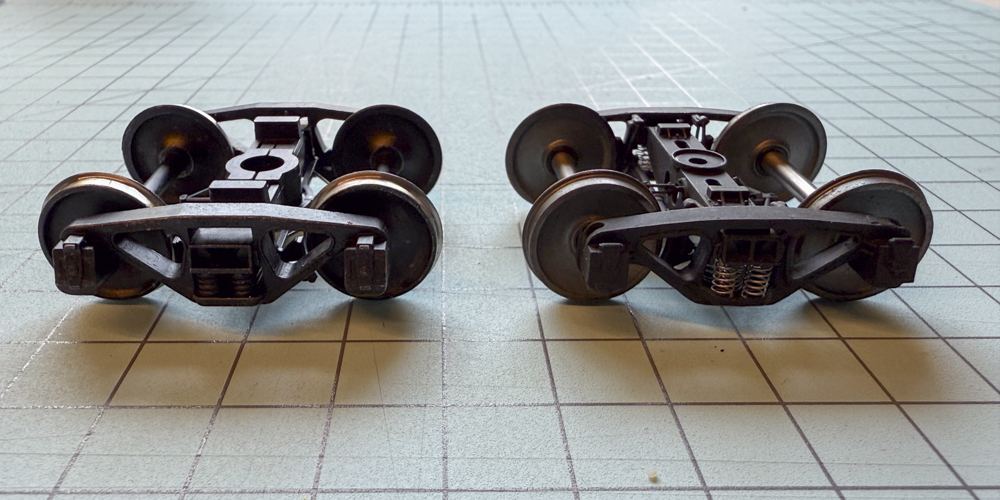
Here is a side by side view of the Kadee ASF A-3 trucks and the Protocraft version of the same style. If you are converting some 3-rail cars or even Atlas-O freight cars these are a nice option. If you are building the museum model, then the Protocraft truck may be more in line with what you are building.
Price is also something to consider. The Kadee trucks are priced just over half the price for the older imported brass trucks. For some of the Roller Bearing versions they are more than a third the costs of the imported trucks. That adds up when thinking about a fleet of cars.
Currently, Kadee is the ONLY manufacture still in production with a Proto48 truck line. Both RY Models and Protocraft are no longer importing Proto48 trucks at this time. Protocraft is still selling from their inventory but RY Models has mostly sold out. These are a very welcomed addition to the Proto48 community.
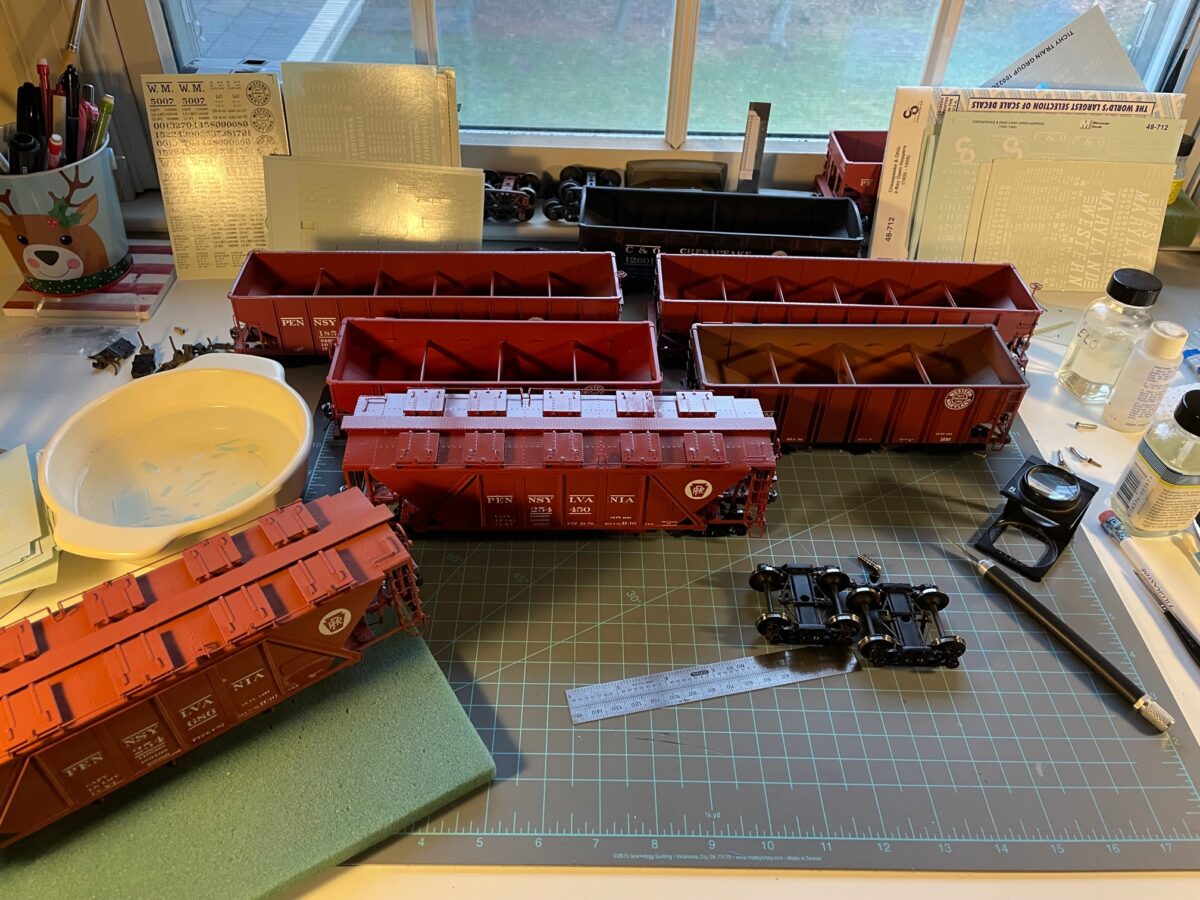
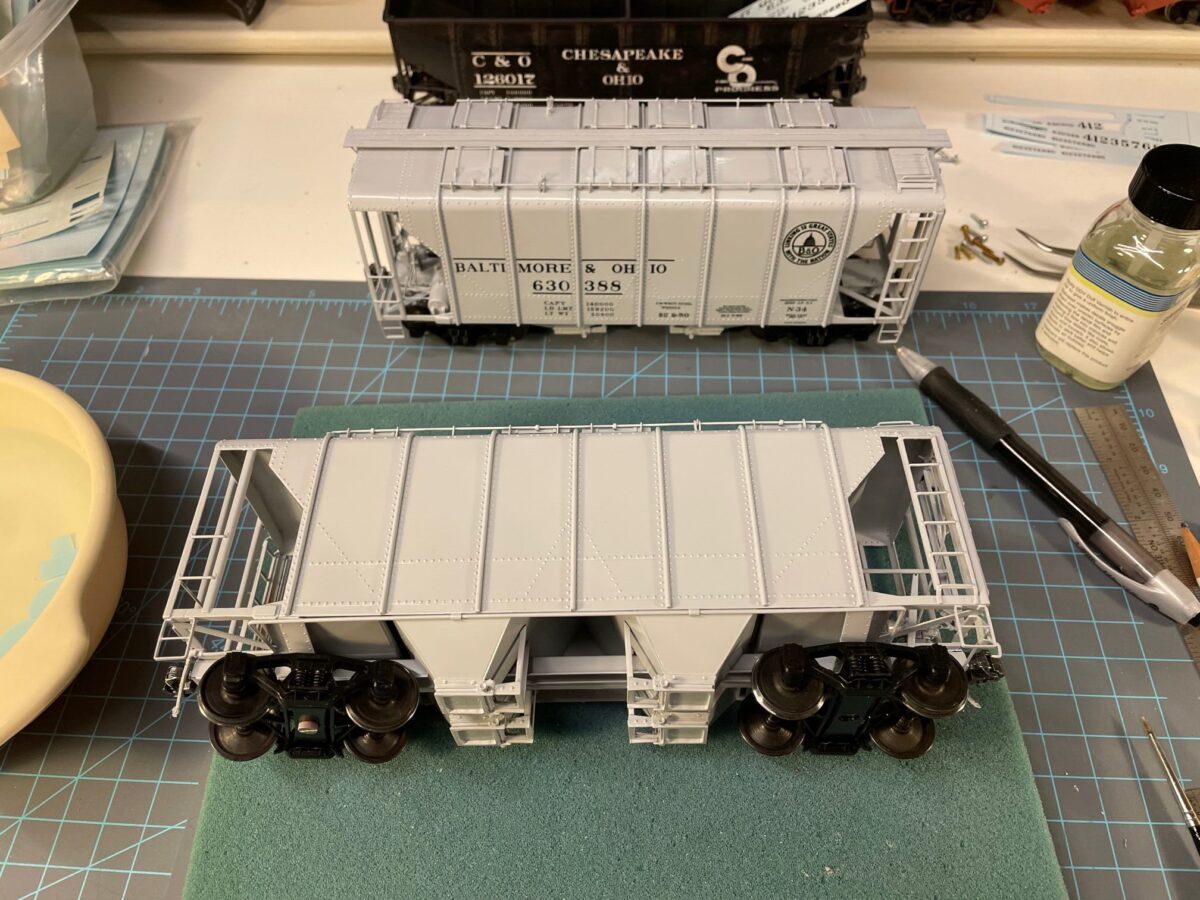
I haven’t been up to that much. Mostly working on some of the cars I painted last Summer. In the above image there is a mixture of cars being decorated and in the case of the two PRR H30’s, they were decorated back when I was modeling a PRR branch set in 1956. So I was changing the weight dates on the two cars to be correct for my summer of 1952 period.
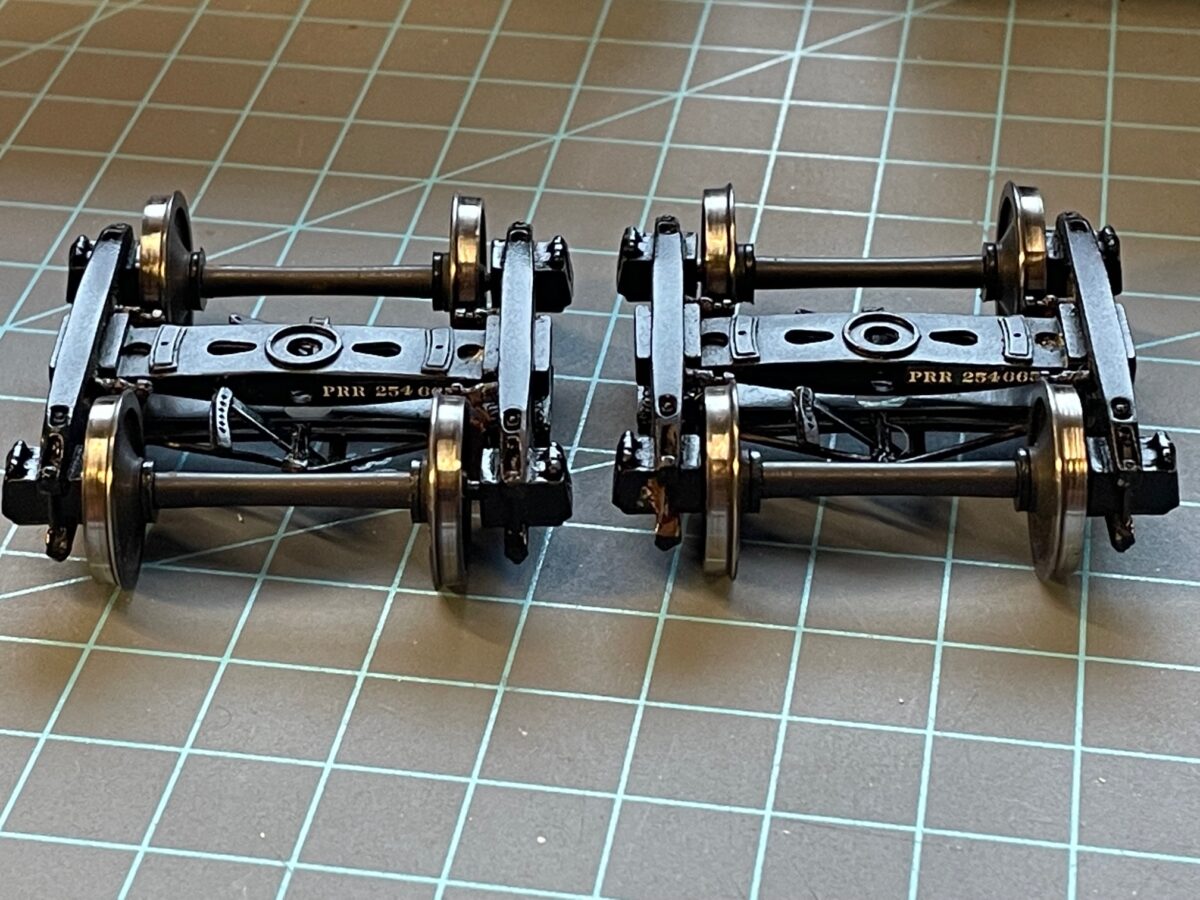
I went to work on the trucks, first thing was to polish the treads. Then, I noticed that they did not have the trucks numbered for the cars. So now they do.
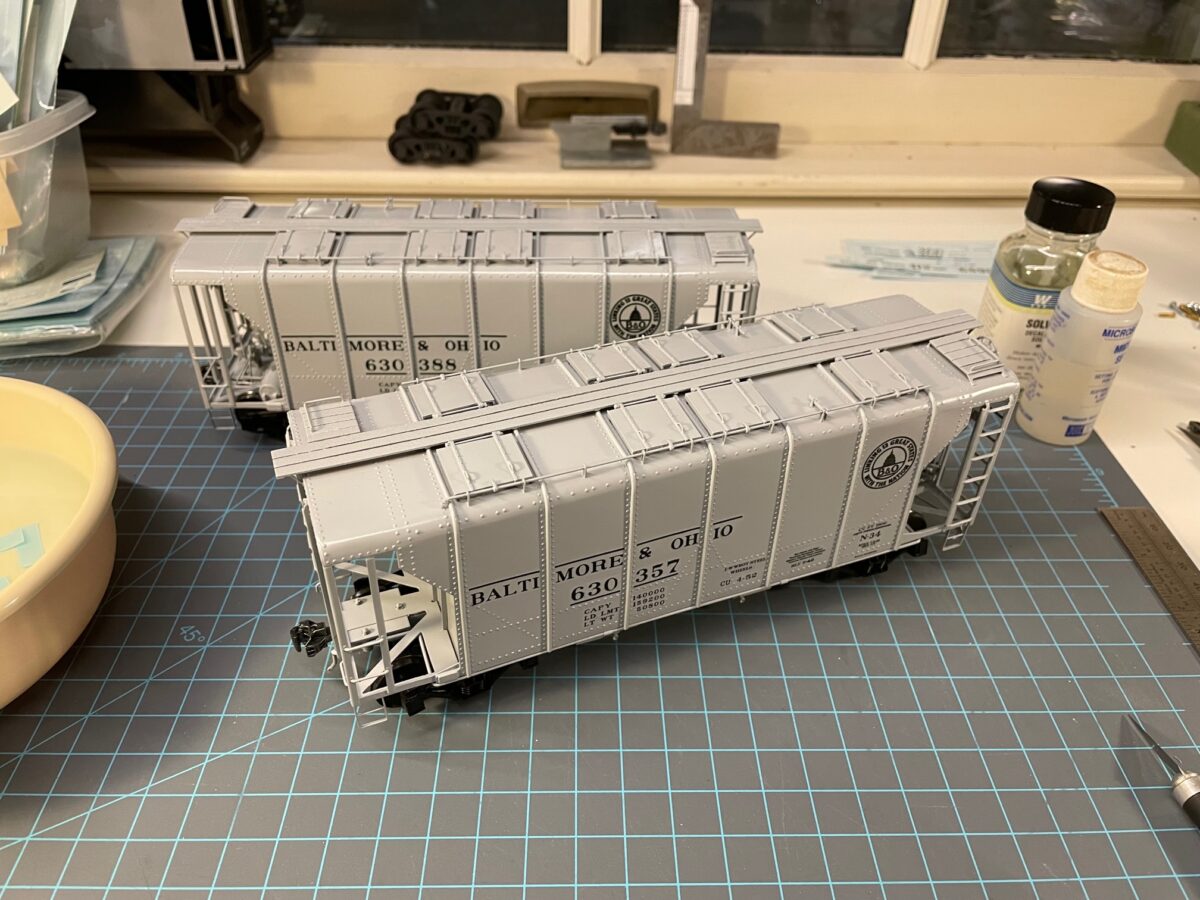
Here are a pair of Hallmark B&O class N34 covered hopper cars that were painted last Summer. They are nice cars but they do show their age a little. I found both of these cars unpainted at two different Cleveland O Scale shows at least ten years ago.
They came out nice. I used a combination of both Tichy decals and also K4 decals for the cars. Both set were not totally complete, together they were fine.
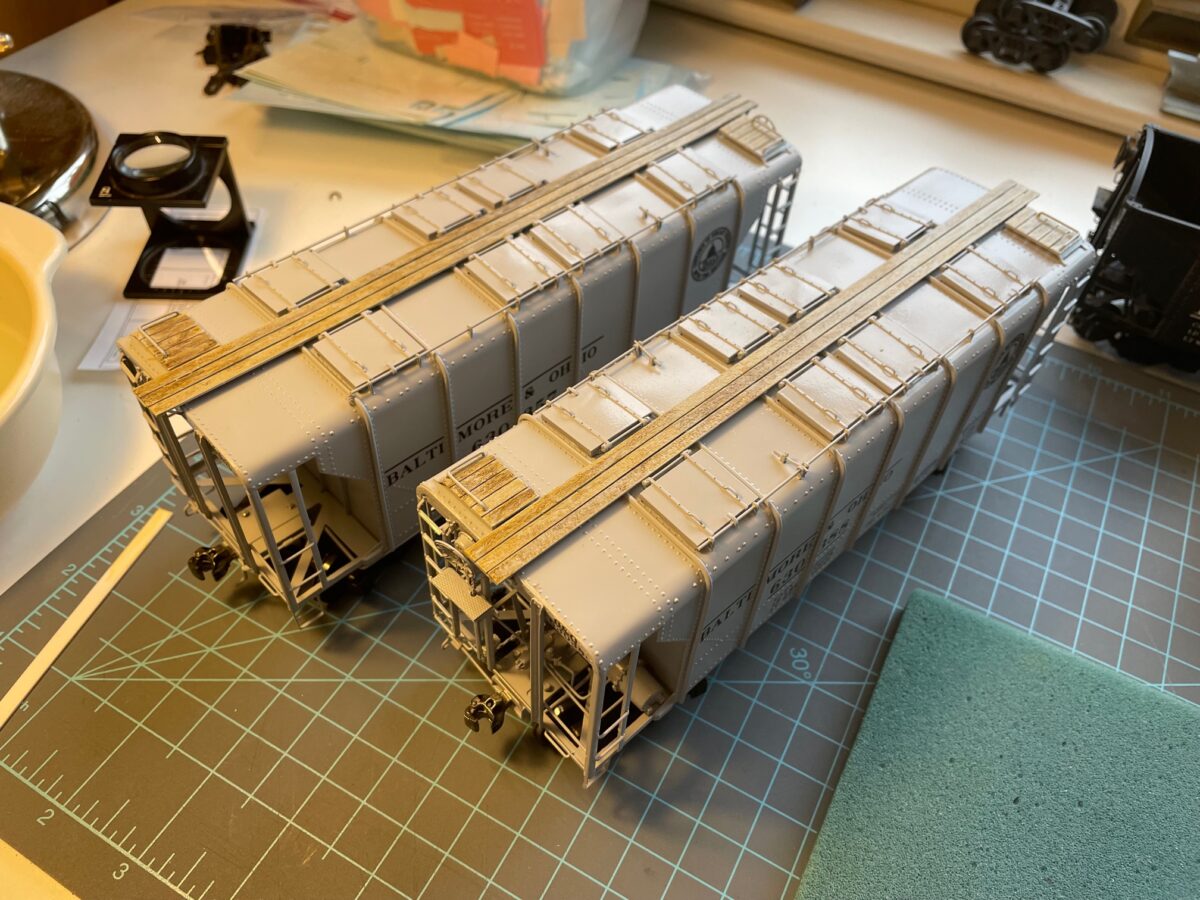
This last image shows a little work on the roof walks. Gene Diemling wrote about a product from AK Interactive in his post NEW PRODUCTS: A Few Good Things & Wood! I thought I’d try it out. After a couple of tests on some scrap plastic, I thought I’d try it on the B&O car. Almost there. I think it could use a thin black wash still. But I’ll wait until I get into some of the weathering on the cars.
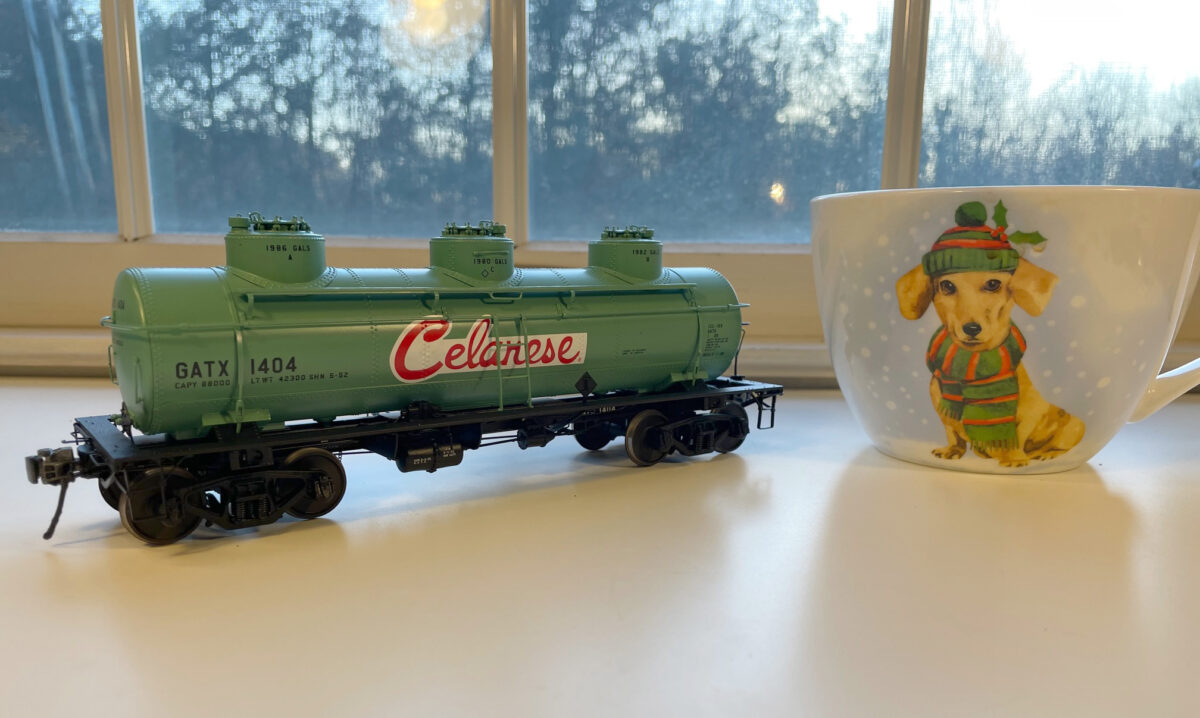
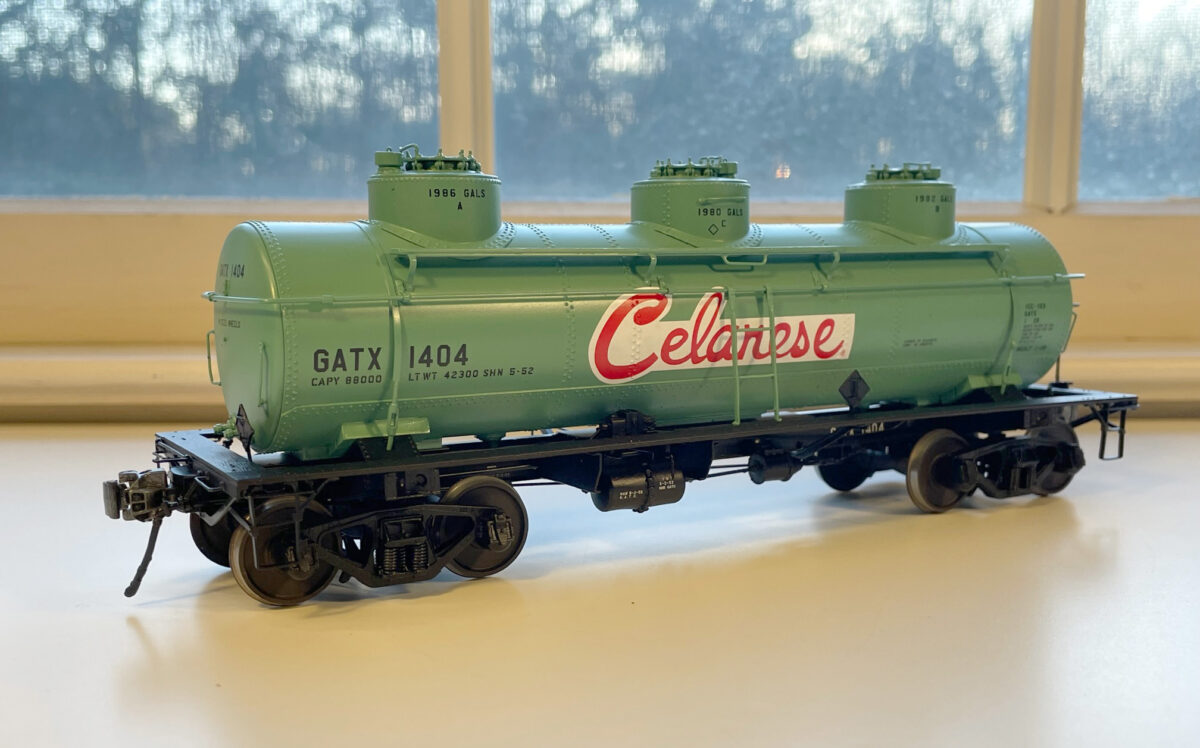
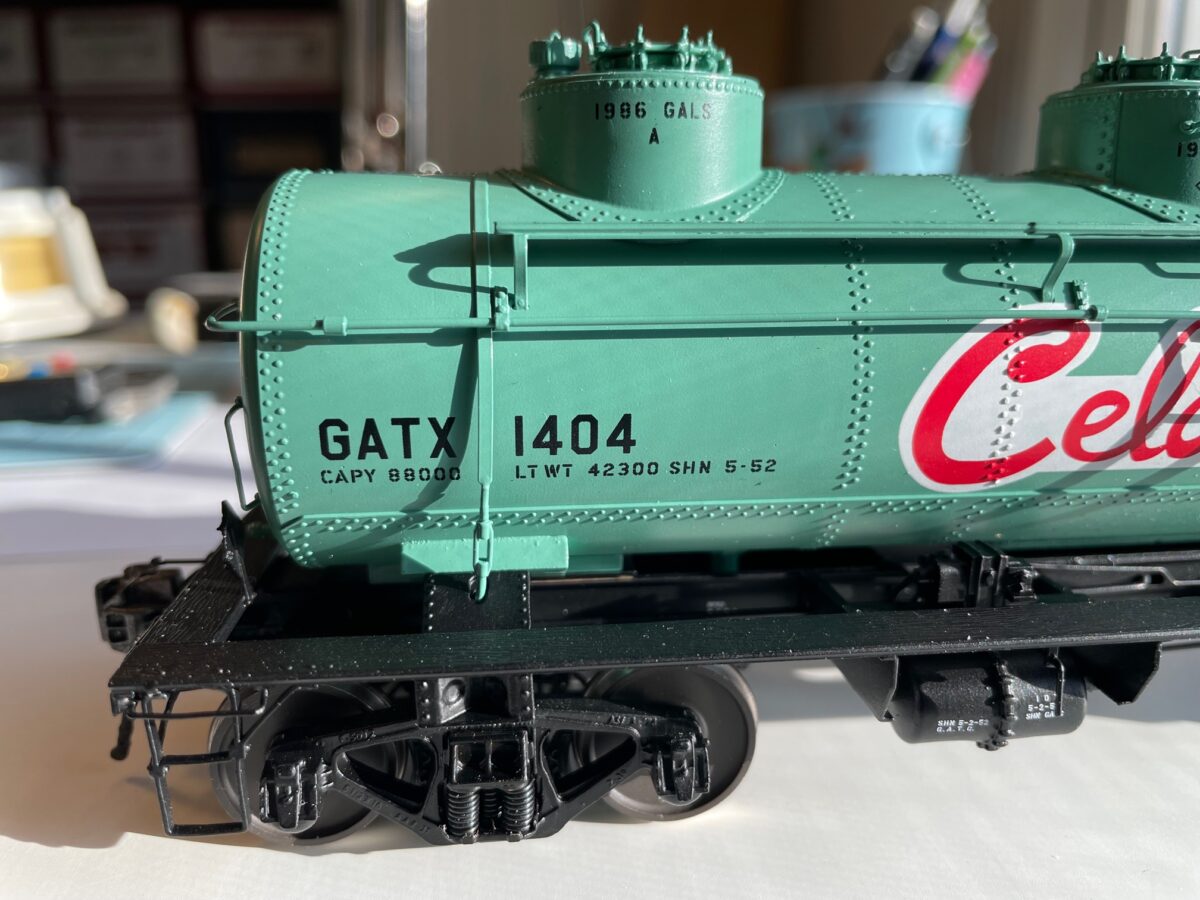
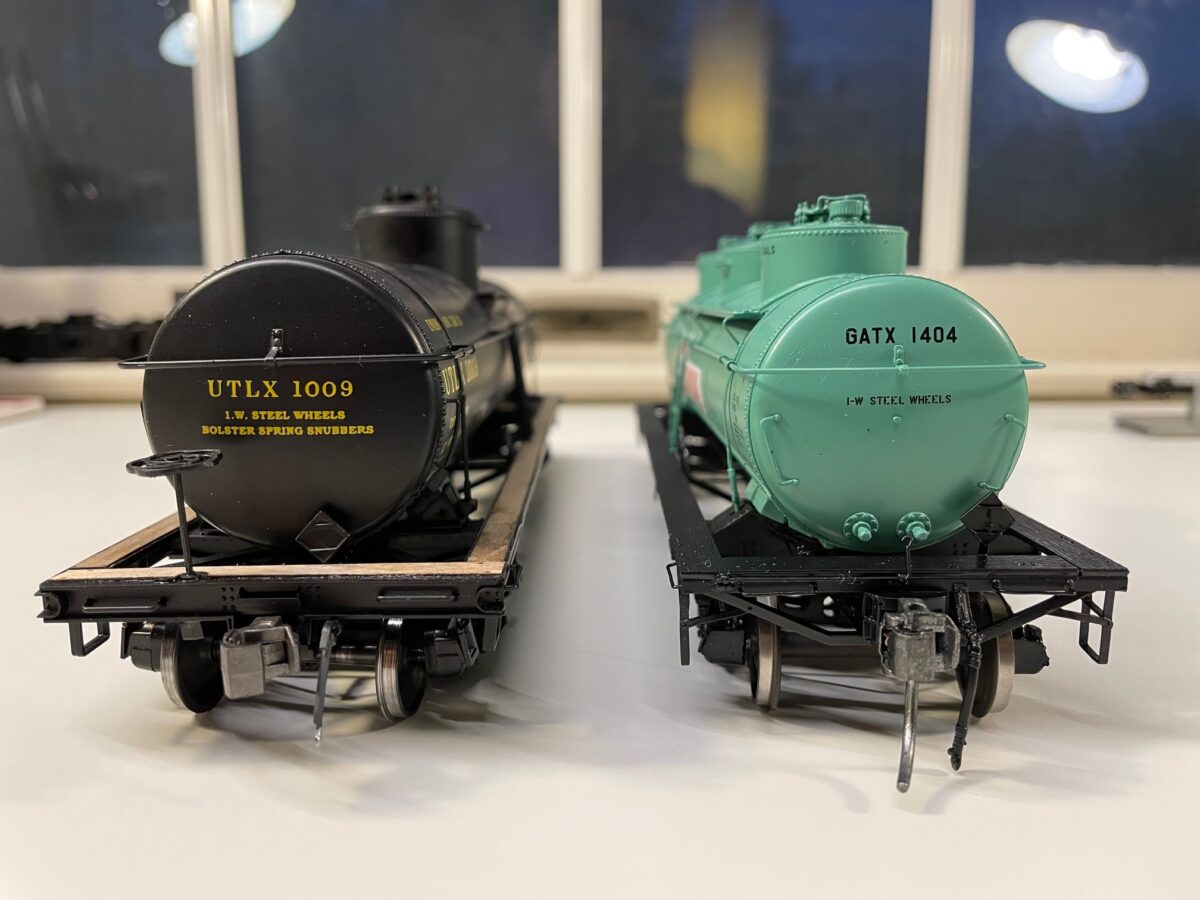
My General American 1928-Design 6000 Gallon 3-Compartment Tank Car from Tangent Scale Models arrived yesterday. This morning I’m enjoying my morning coffee in my dachshund Christmas cup looking it over this fine new model release.
This is Tangent Scale Models first model released in O Scale. The model is offered with either O Scale or Proto48 trucks. They are not the first to do that in O Scale, both RY Models and Protocraft have sold their models that way.
First Impressions: It really is a nice car! It is well engineered, well decorated and a solid model. Handling it on the workbench, I can say it is not as fragile as some highly detailed O Scale models in the past.
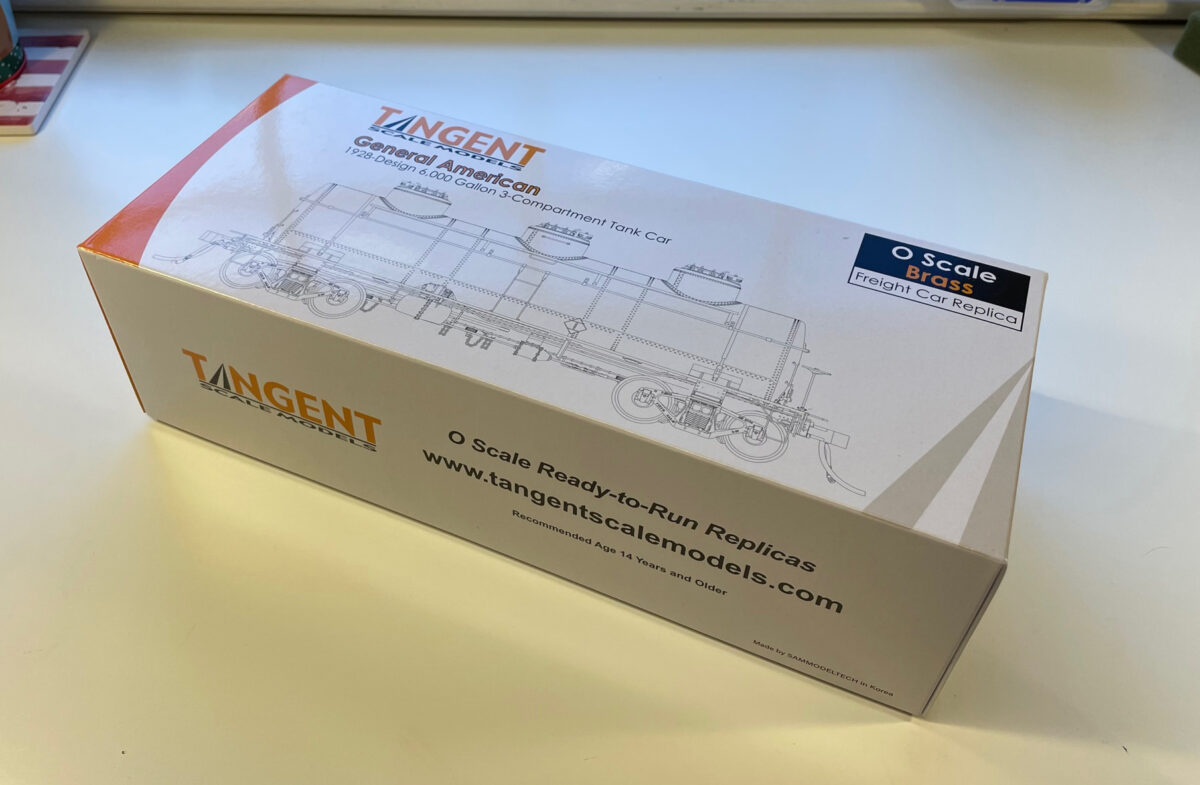
Some things are different from most brass imports. Starting with the box. Much thinner construction than often seen in brass models. Yet strong enough to make the trip to the US and keep the model safe from damage.
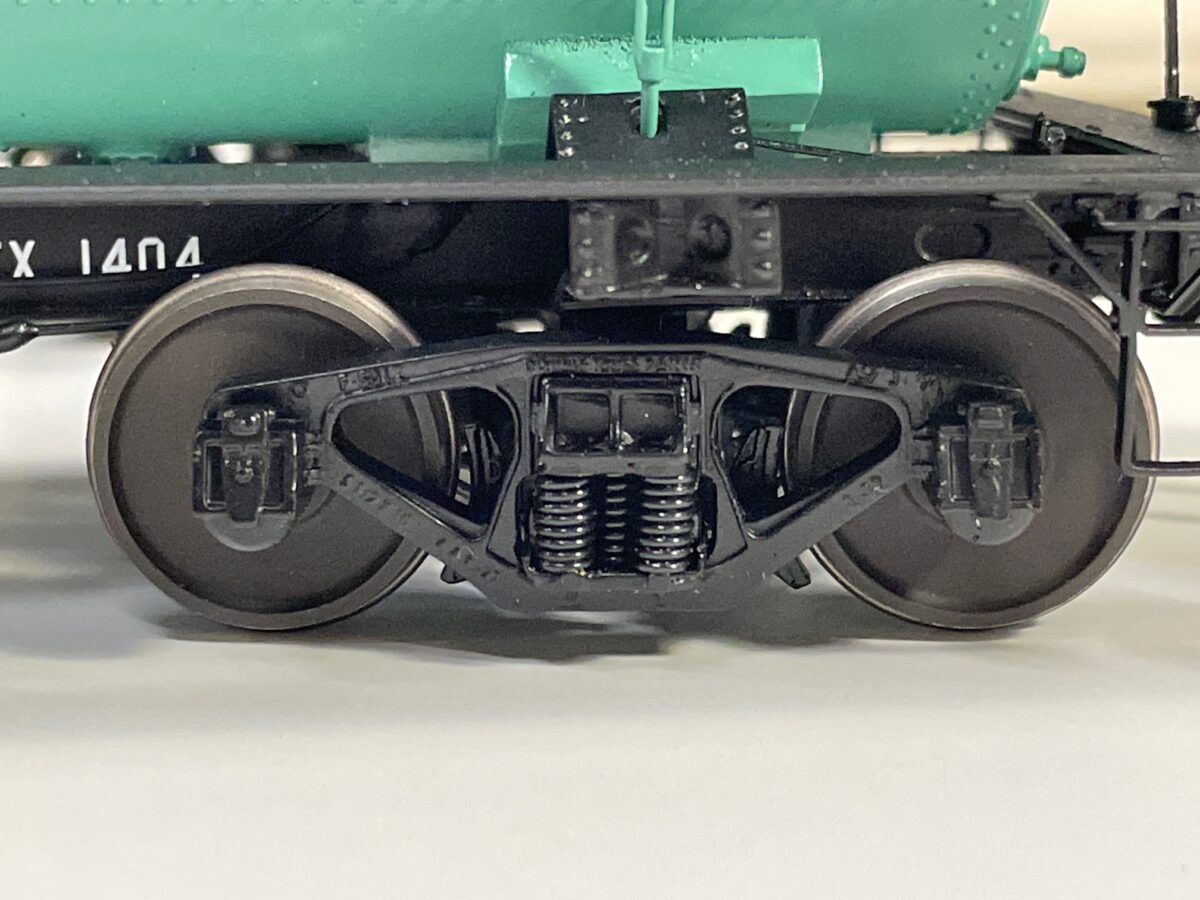
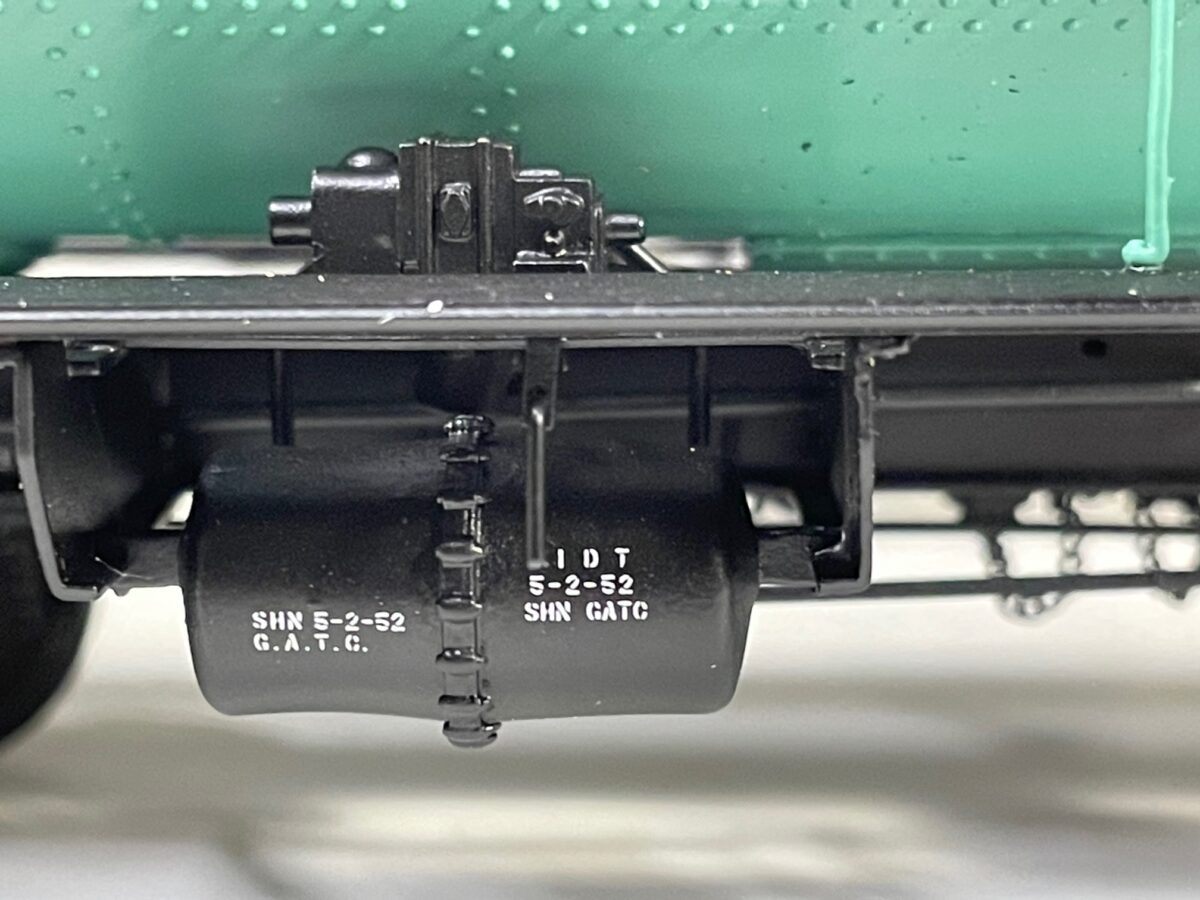
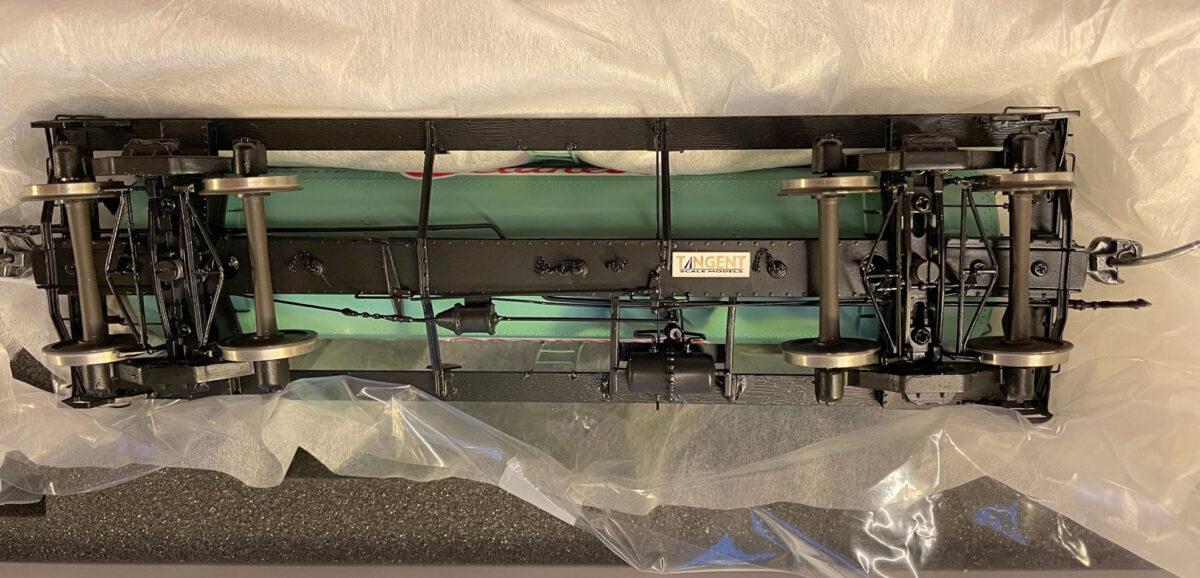
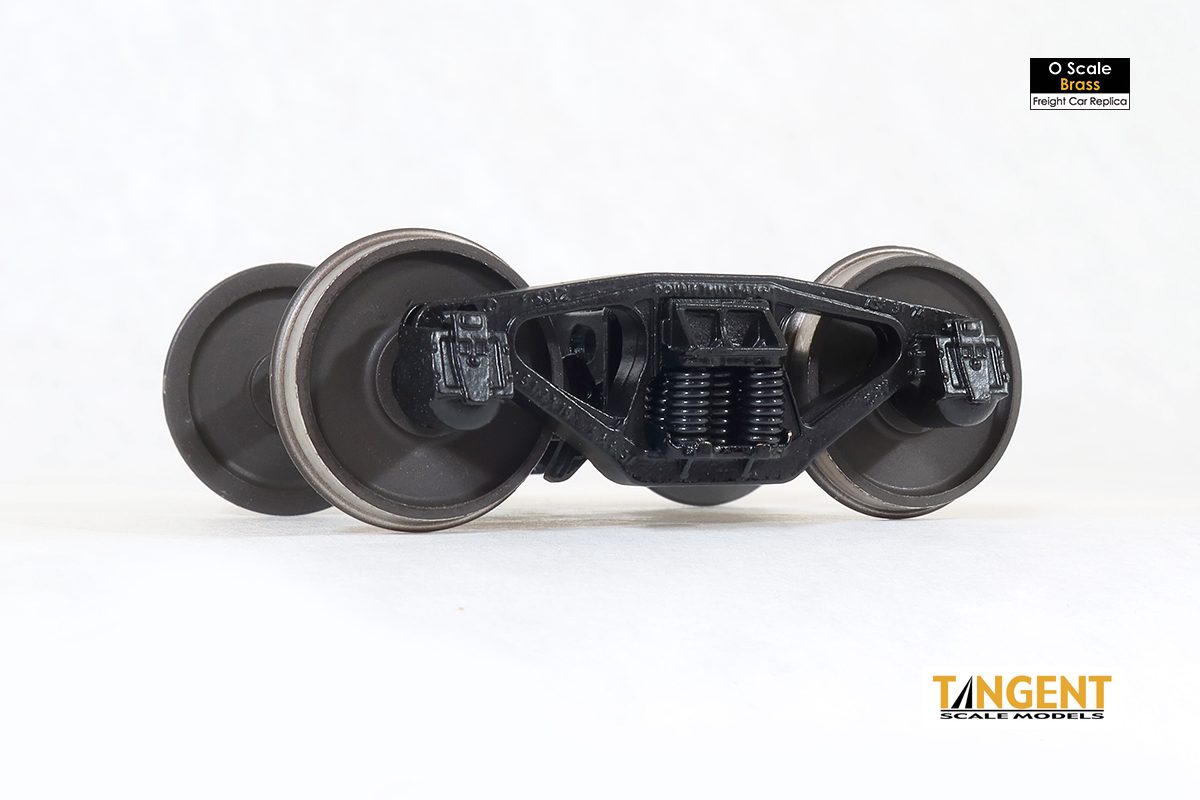
The Proto48 Trucks are nicely done and very free rolling. They have roller bearings in the journals. The spring cluster is nicely modeled compared to the usual ball point pen type springs used on some trucks. You can’t see through the spring cluster on the prototype and you can’t see through it on the model either.
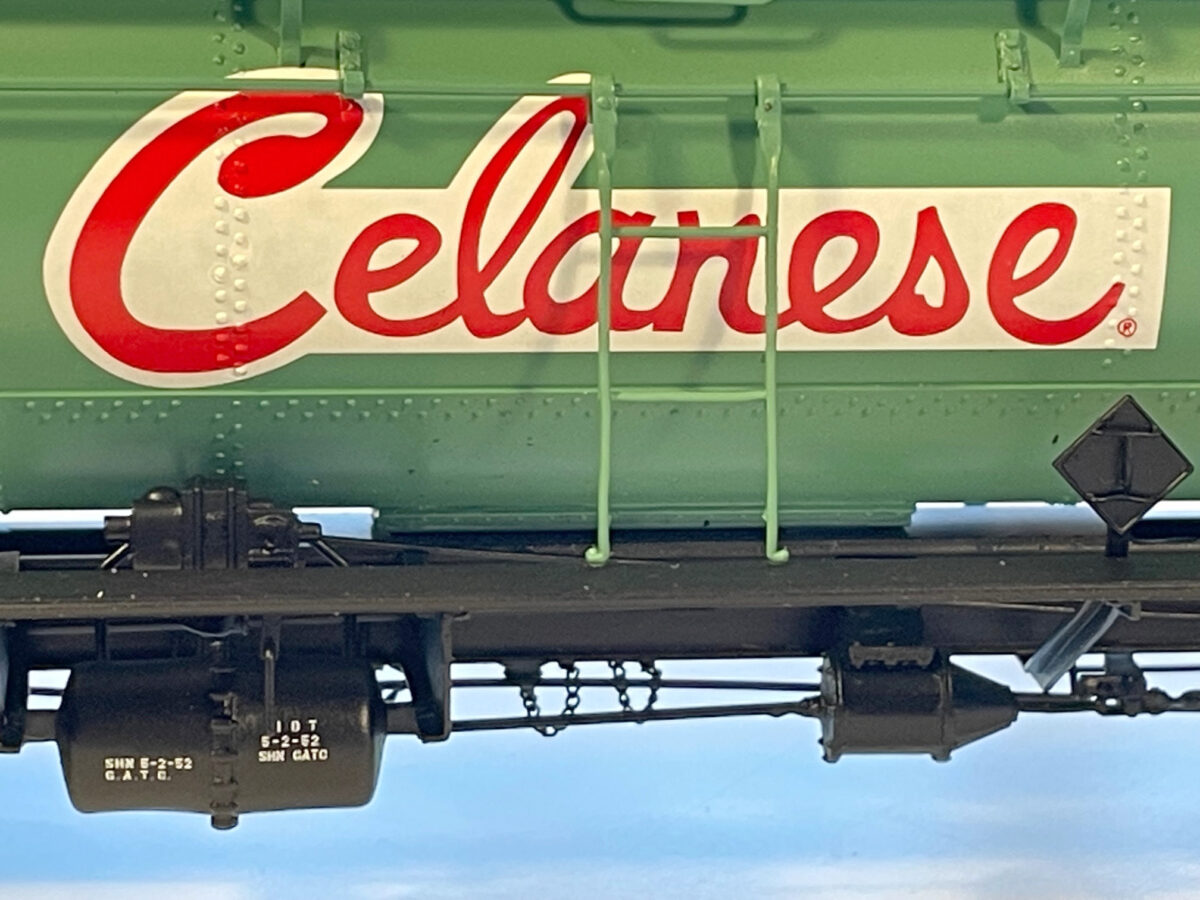
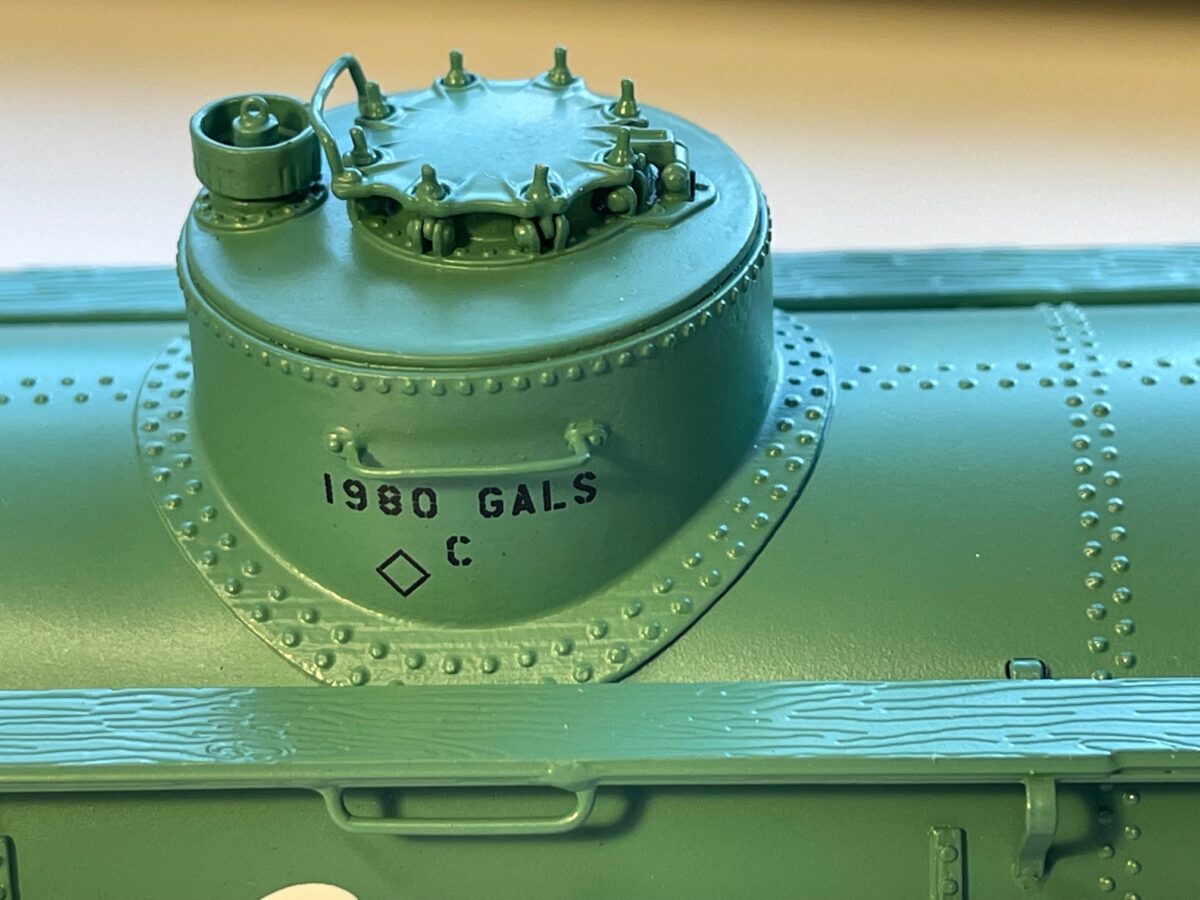
Here you can see the fine decoration on the model.
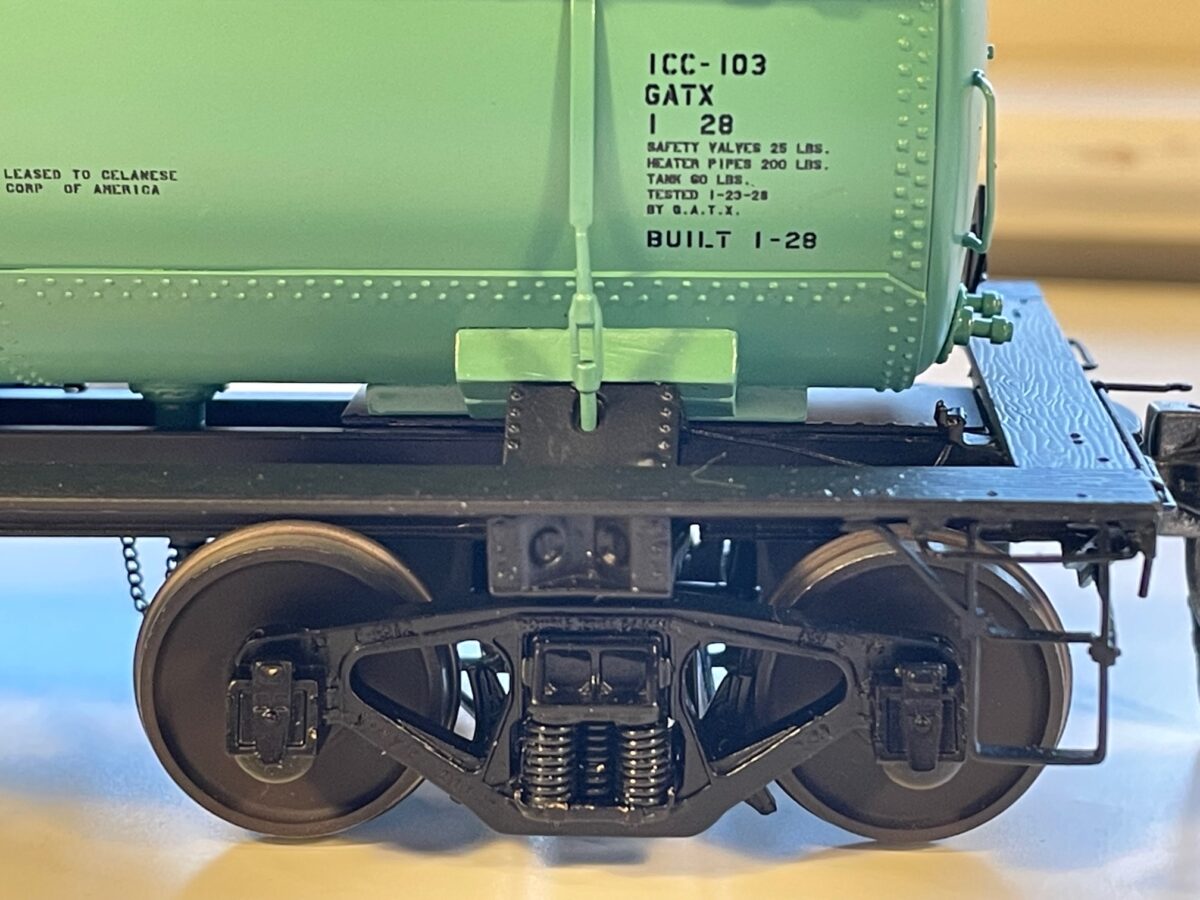
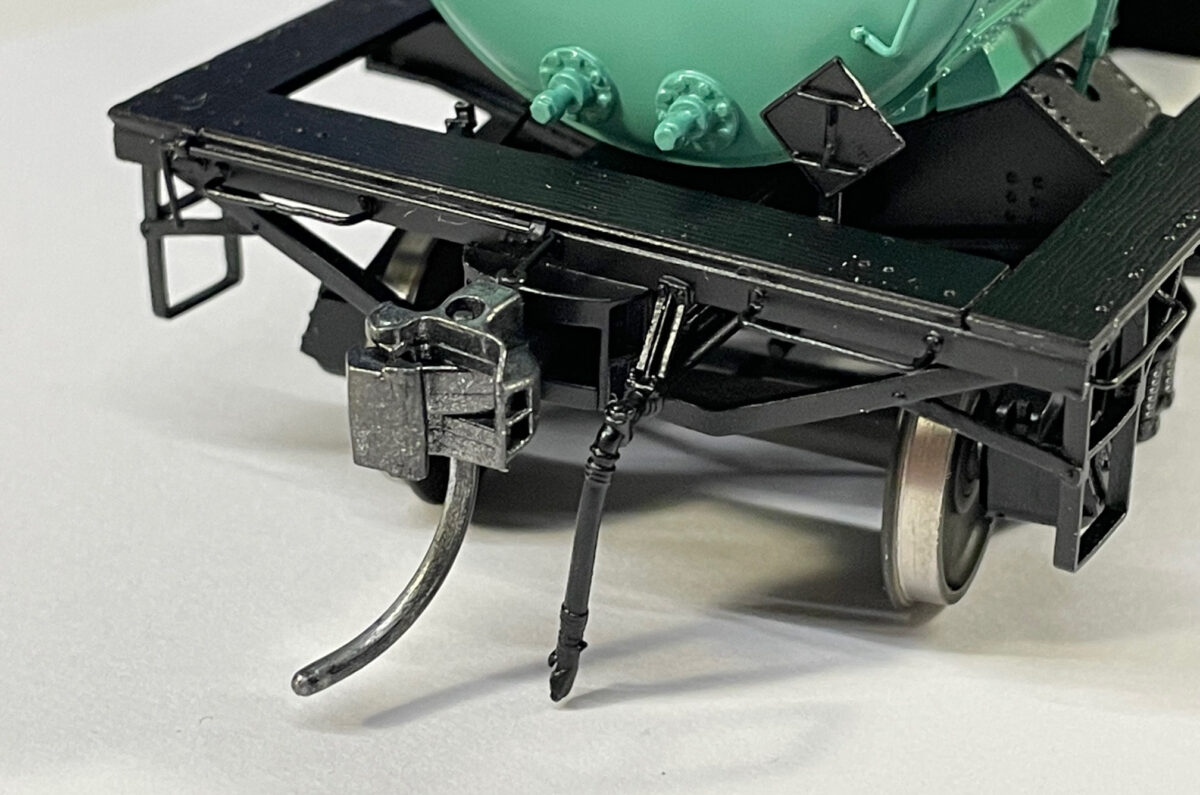
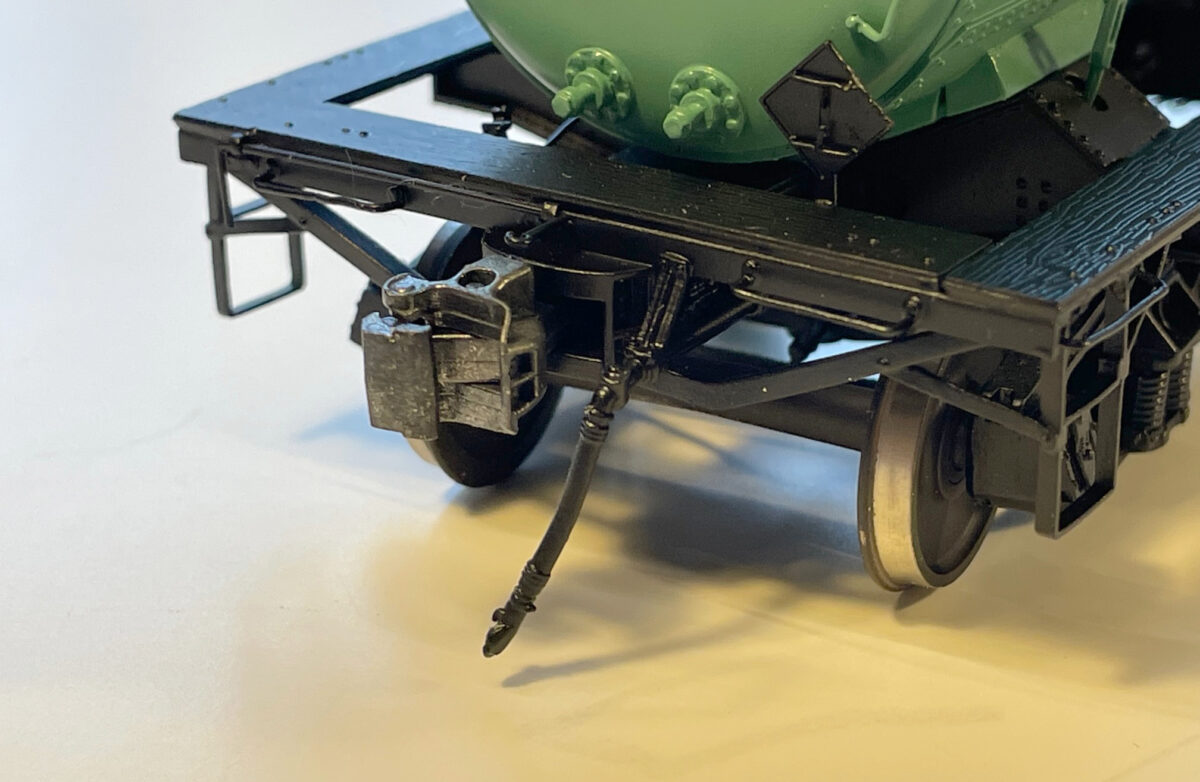
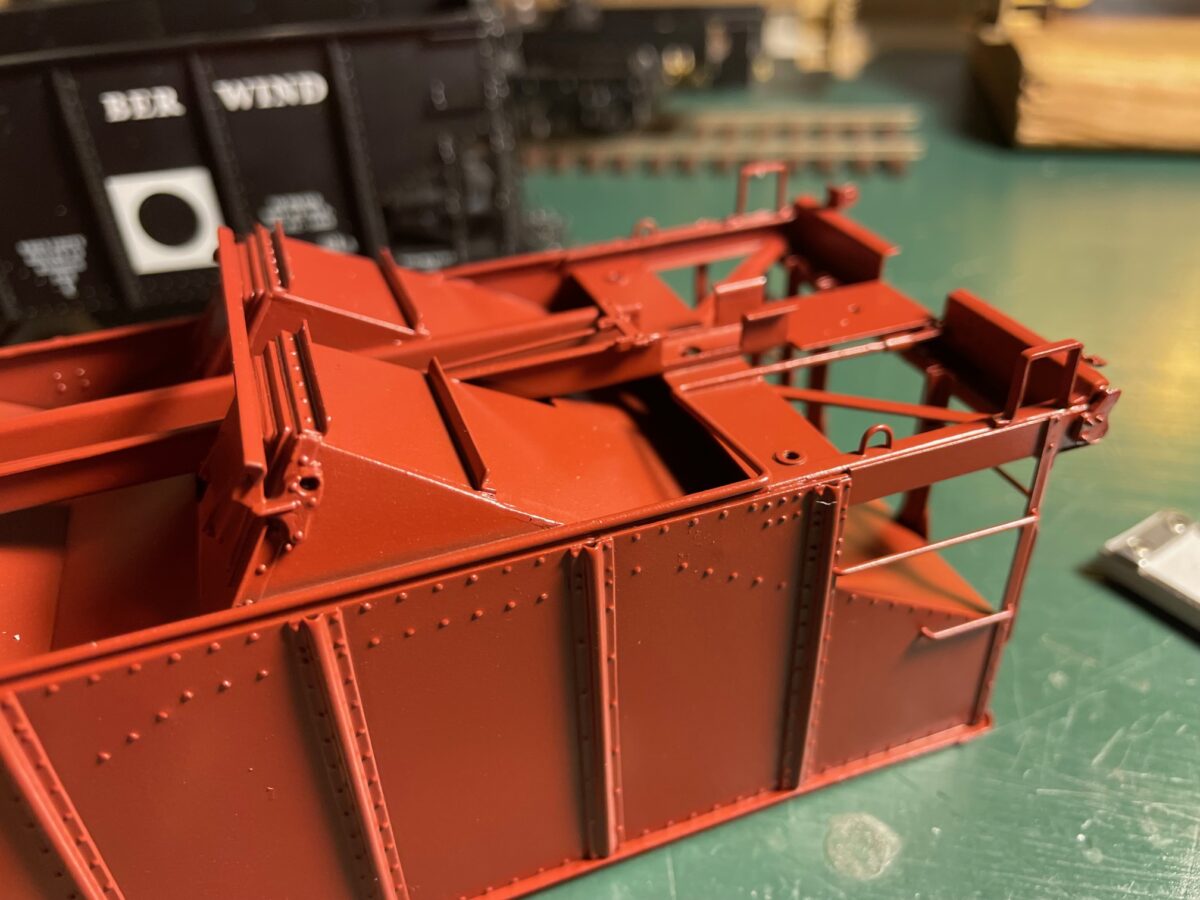
Now to point out some of the engineering standouts. The draft gear is nice. Rather than just leaving a place to mount the oversize Kadee coupler box the box and draft gear are one unit to the bolster.
Here it is from the top.
I think it looks even better without the coupler pin.
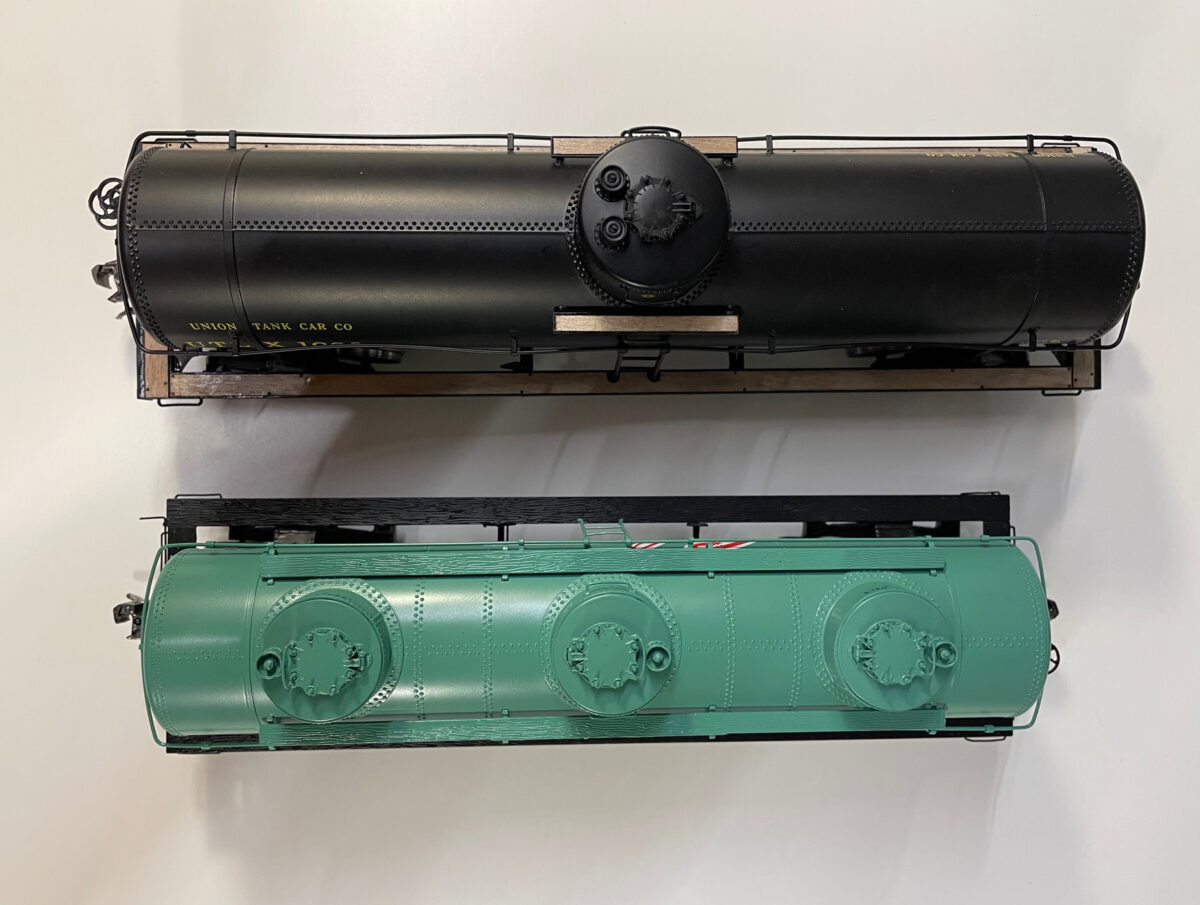
And now just for a comparison, here is the Intermountain ACF 8000 Gal tank car along side the new Tangent Scale model. You can see the Tangent model is shorter ad the tank diameter is smaller.
I normally go for more of the Plain-Jane types of freight cars. I almost ordered the 1958 version of the GATX black car. I could have easily backdated the dates to work for my modeling period of 1952. I chose instead to buy a car that I didn’t have to modify at all. Looking at how nice the lettering is applied to the car, I’m glad I did.
Some people might think the the asking price is high. If you consider the added price of a custom paint job and a pair of Proto48 replacement trucks, the price comes in under what some undecorated 30 year old brass cars from Pacific Limited currently sells for. I think this new release from Tangent Scale Models is a bargain.
Since the Tangent Scale Models announcement the other day, a few people have been very vocal that they wanted a different model produced. Well if that is truly the case, they can drop the cash and invest in a new company and produce whatever they want. They don’t seem to do more than just complain anyway. I’m waiting for their announcement of a new company and a new model release.
O Scale / Proto48 has a new manufacturer, Tangent Scale Models announced the release of a new model of a GATC 6,000 Gallon 3-Compartment tank car. They are now available from the Tangent Scale Models website.
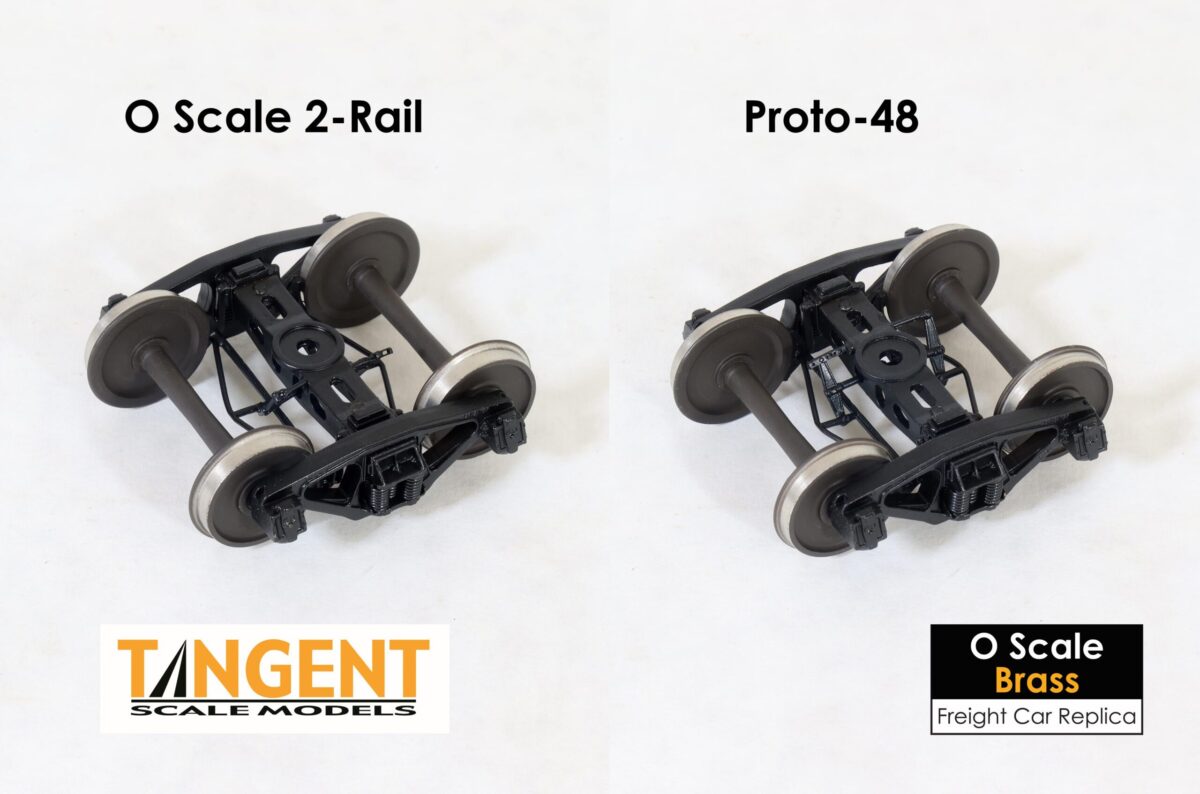
The models are hand-crafted in brass in Republic of Korea by SamModel and are offered in both O scale 2-Rail and Proto-48 configurations.
Tangent Scale Models has offered the modeler a choice of O Scale or Proto48 models with the release of their new 50 ton truck.
Tangent Scale Models has a fine reputation in HO and N scale. I am glad they have taken the chance on the O Scale/Proto48 market with this fine new offering. One of these is in transit here now. I’ll have more thoughts and photos of it after it arrives.
The title is simple but can mean different things to different people. My own thoughts on standards has evolved over time.
Standards can be as simple as making sure your models meet NMRA standards, so they operate properly. Or it can be how many details are you going to add to each model before you can call a model done.
To me, the NMRA standards are the bare minimum. If it doesn’t meet the Proto48 standards for wheels it will not operate properly. That is the starting point, for some it is the end point. Those modelers don’t care about all the different details. How many times have you heard them say they only break off anyway, why bother? Maybe that is what’s nice about the hobby, every modeler can make that call for themselves. There is no right or wrong answer, just what’s right for you and your modeling.
This post is more about what I am standardizing on now. It’s not a certain level of detail. Today the Standard I’m using is more basic than that.
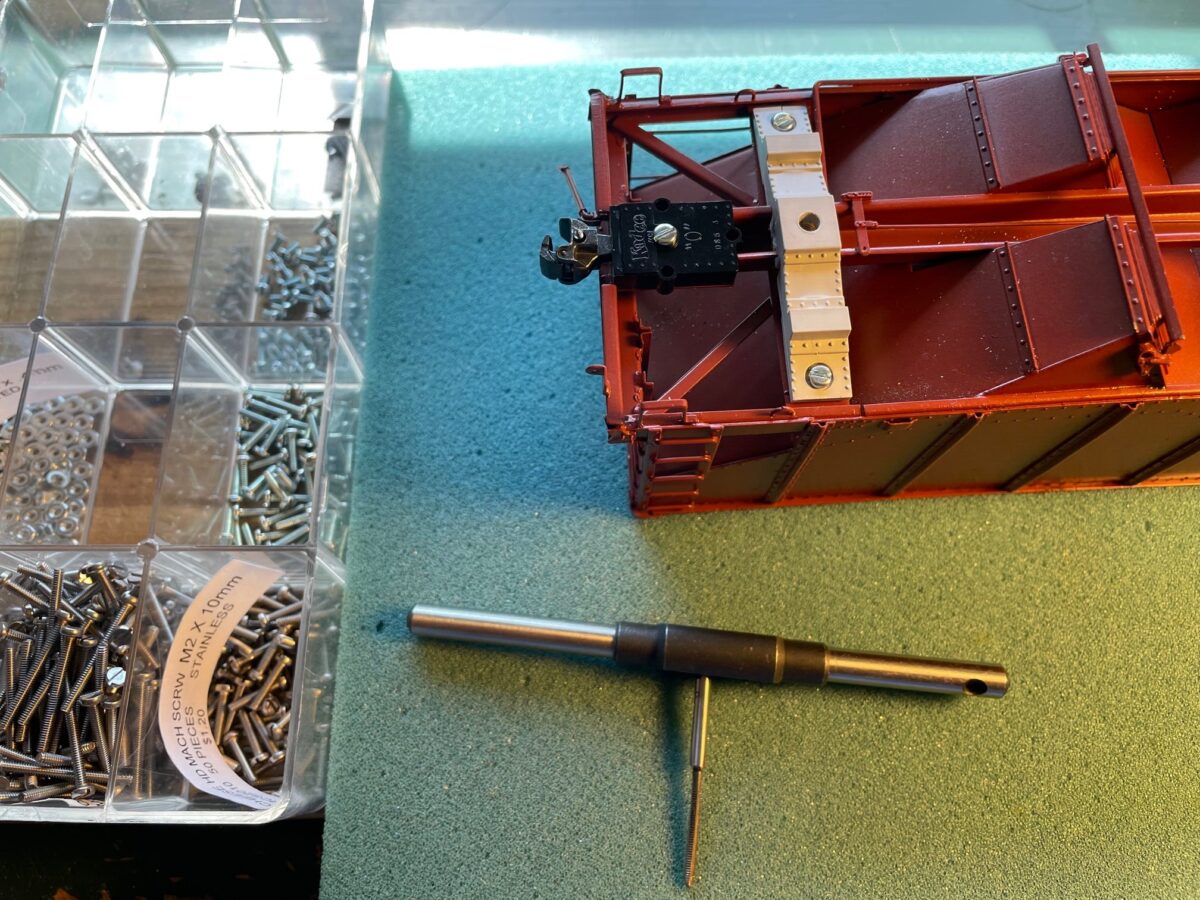
This morning, I was attaching the plastic bolsters to a 40 year old Precision Scale model. The hardware package supplied when the model was imported has disappeared in the years since the model was imported.
So today, my modeling standards are something as simple as tapping the holes for a 2 mm screw which are my standard for mounting the bolsters to cars. Same thing for mounting of the couplers to the car body. The tiny hole for the coupler on the model (top photo) is tapped for another 2 mm screw.
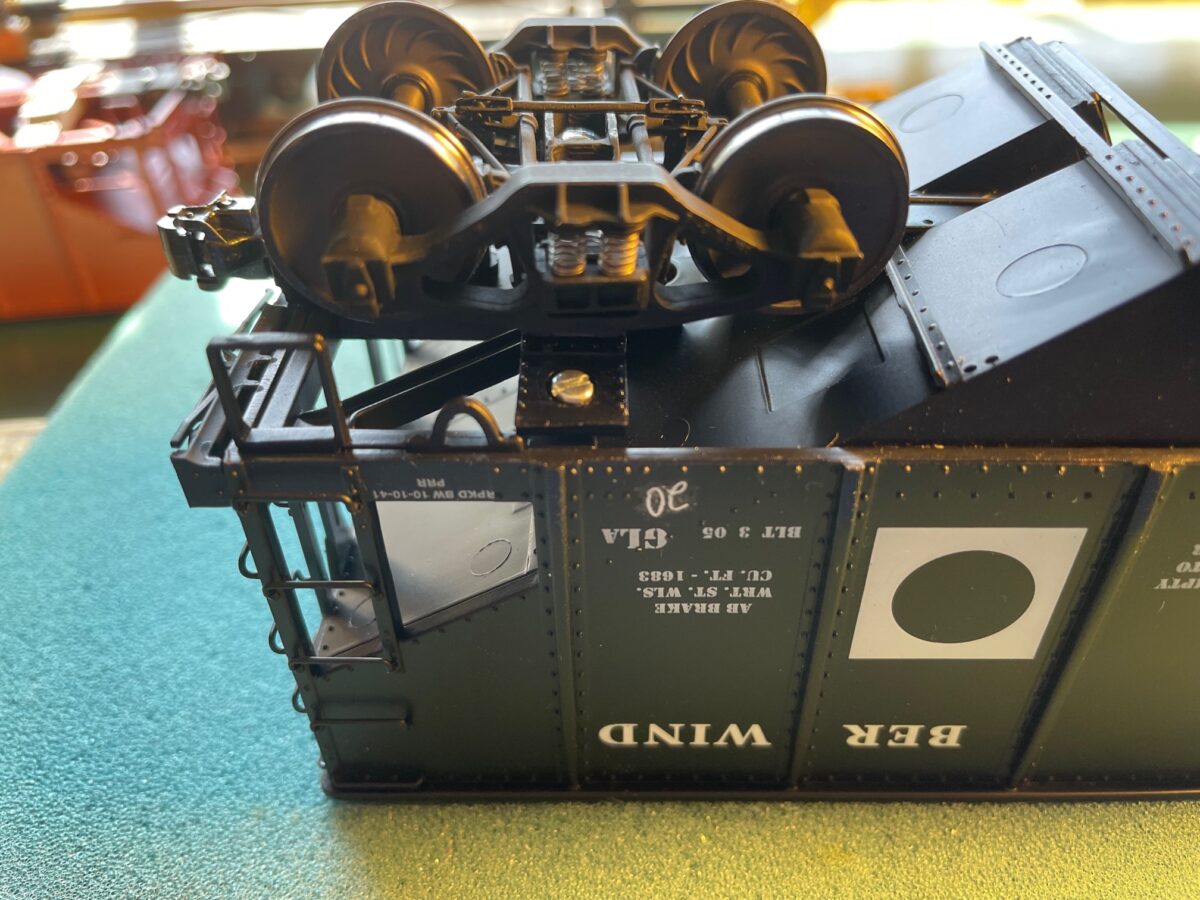
Below shows how the same standard was used to mount the PSC Bolster to a Lionel Berwind GLa. Allowing a pair of Proto48 trucks to be mounted completing that part of the conversion. Now I just need to touch up the screw head with some paint and it all disappears.
It’s took a while to get some paint of the trucks. Then it took a while longer to get them back in the work line. Some of those freight car projects just go so much faster that it feels like you have actually finished something.
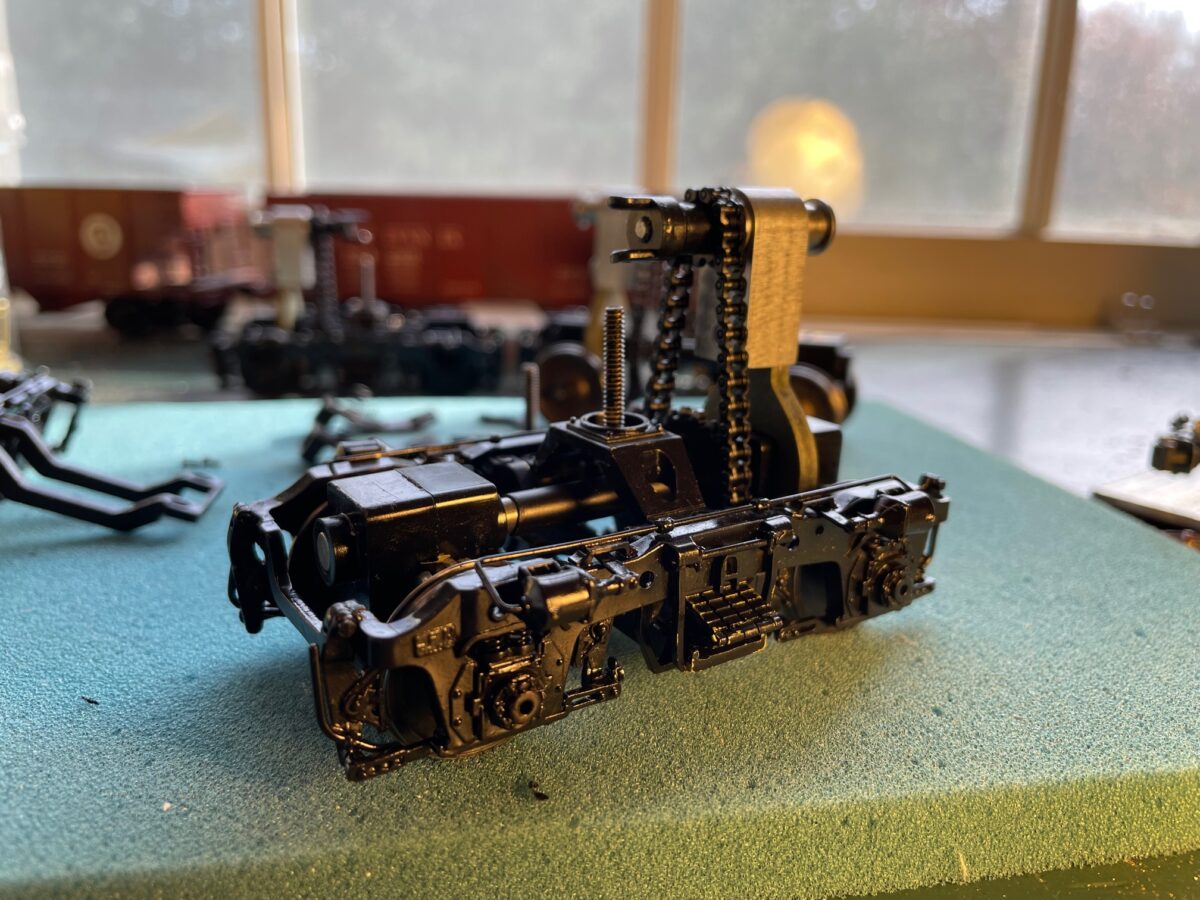
Anyway, these two pair of trucks have had new axels from Protocraft installed. Yes, they are now available from Right-O-Way but I’ve had mine on the shelf since they were a Protocraft product. I also installed ball bearing from Bearing Direct on the axels and also the FineScale 360 Weaver Chain Drive Replacement Kit.
I have to say that these are a pain in the ass to reassemble. Things seem to be moving in so many directions at the same time. It’s difficult to get them all to fit together without something moving. They are taking longer than I thought they would to reassemble.
And for anybody that might be questioning why I have a nice shinny black on the trucks instead of all kinds of weathered blacks/grays/rust. For my modeling period, the Summer of 1952, these units are less than a month old. I don’t think the railroad would have been happy if they had been delivered with well worn trucks.
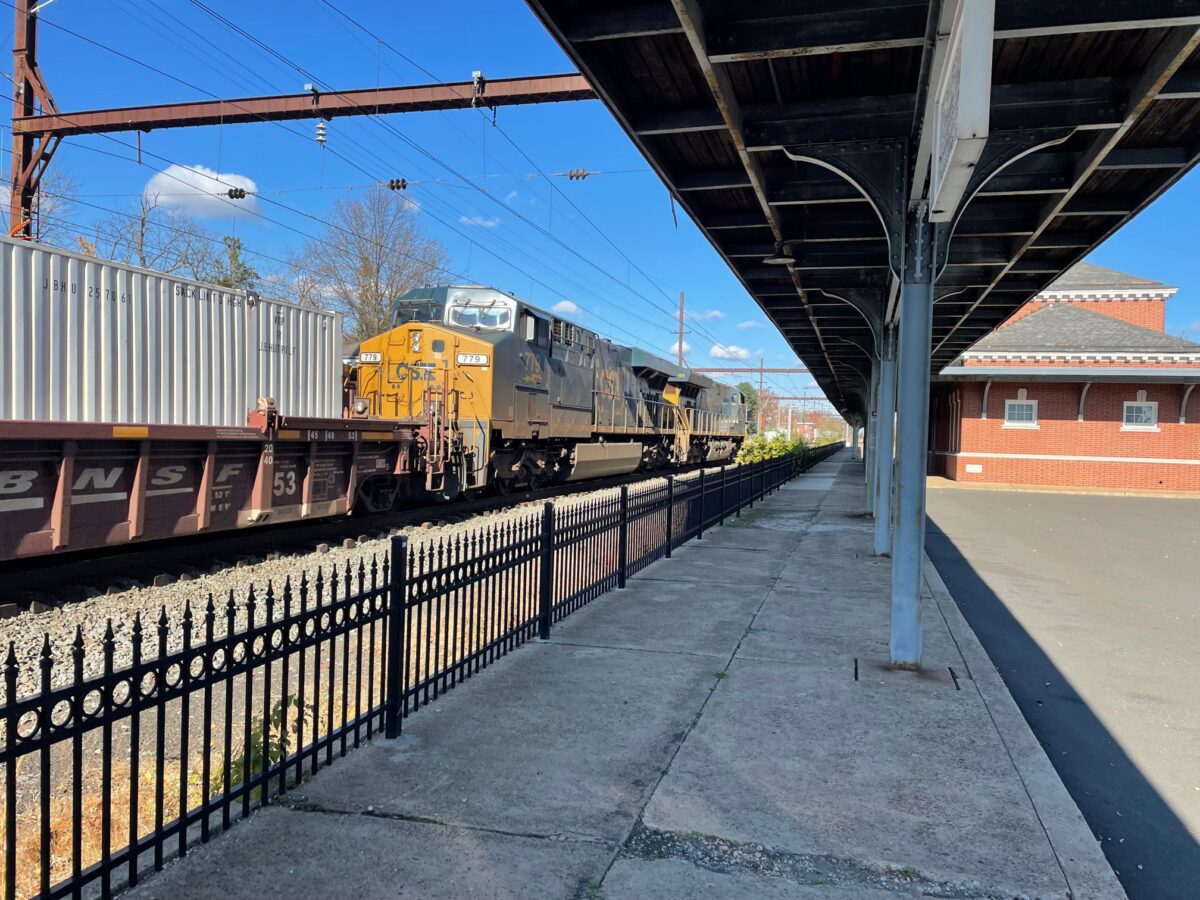
I am back at work a couple of days a week until the end of the month. This has meant getting out at lunchtime to West Trenton Station. This week I got to see a CSX stack train head North through the station.
I can’t believe I actualy wrote that headline. It’s great news!
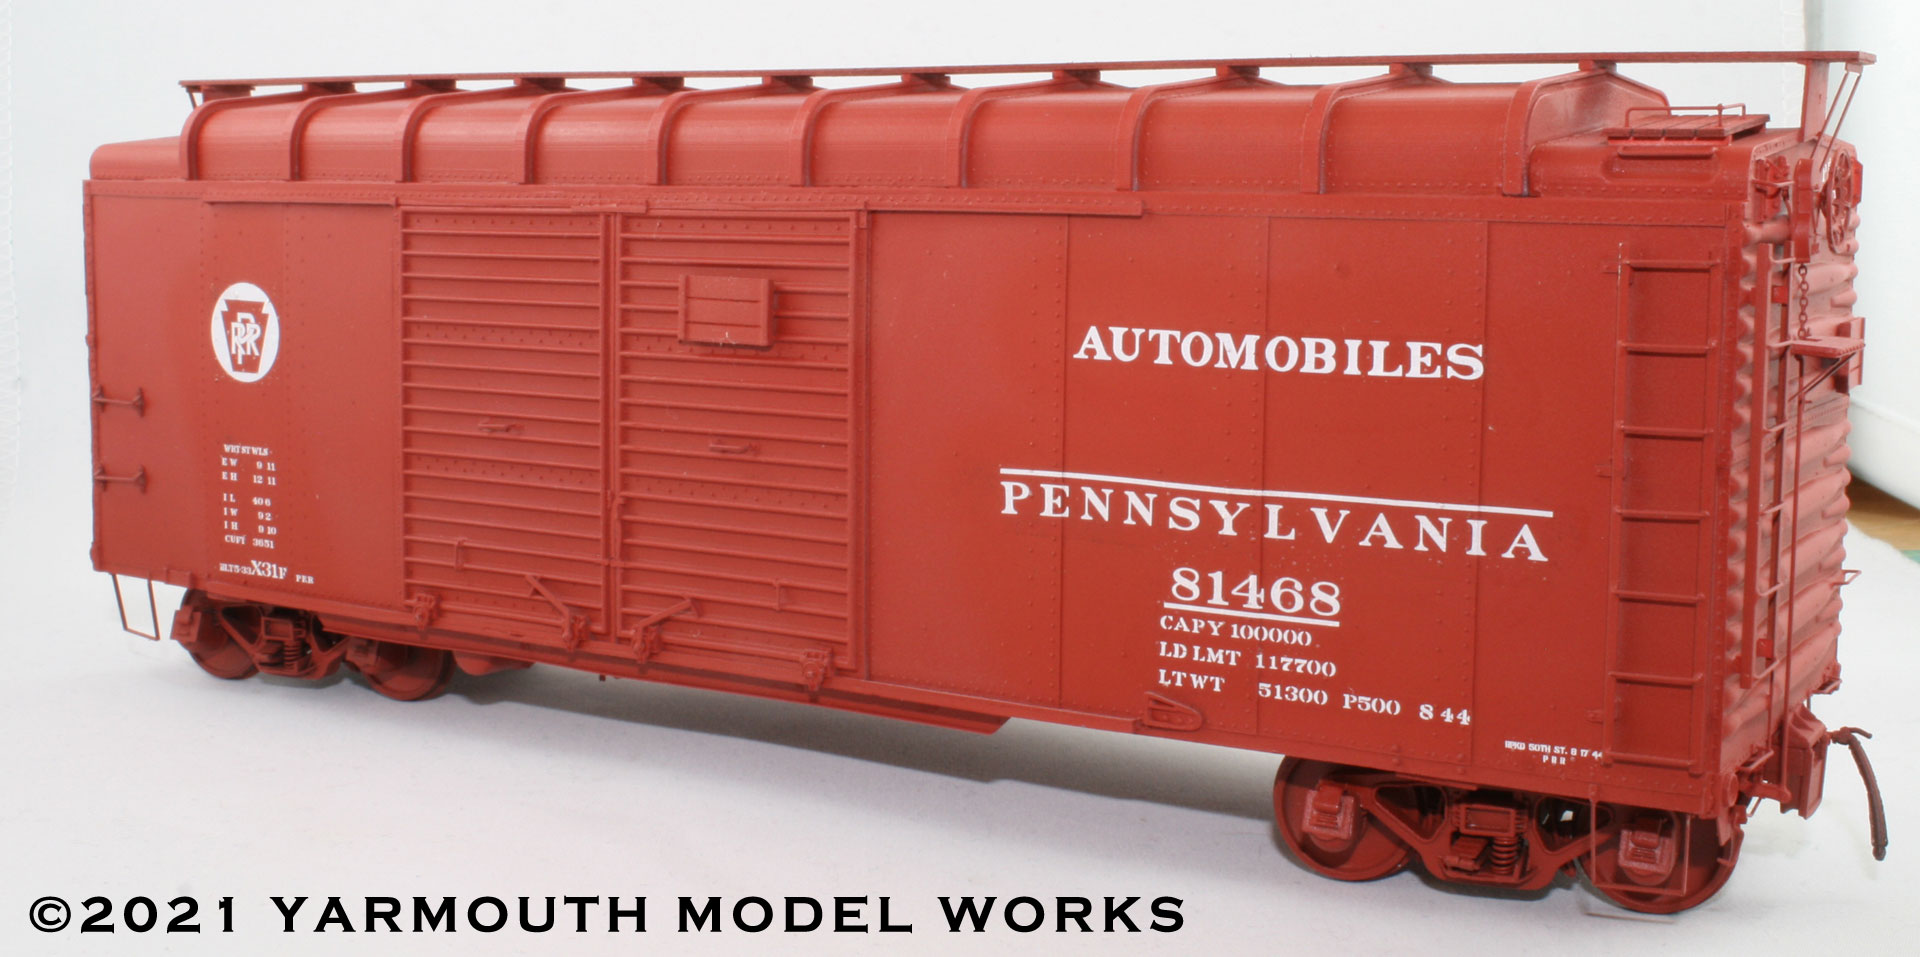
Yarmouth Model Works has released their first O Scale resin rfeight car kit. It is a model of a PRR X31f boxcar. Owner Pierre Oliver hinted about the kit last Spring and now it’s here.
The kit features a one-piece resin body casting, a 3D printed roof pattern, laser cut running boards and 3D printed details. The kit sells for $165.
For those that are not familiar with Yarmouth Model Works. They are an HO manufacturer of resin freight car kits and detail parts. I hope we might see some O Scale detail parts offered in the future also.
I’ll let you know more about this kit when it arrives here in South Jersey.
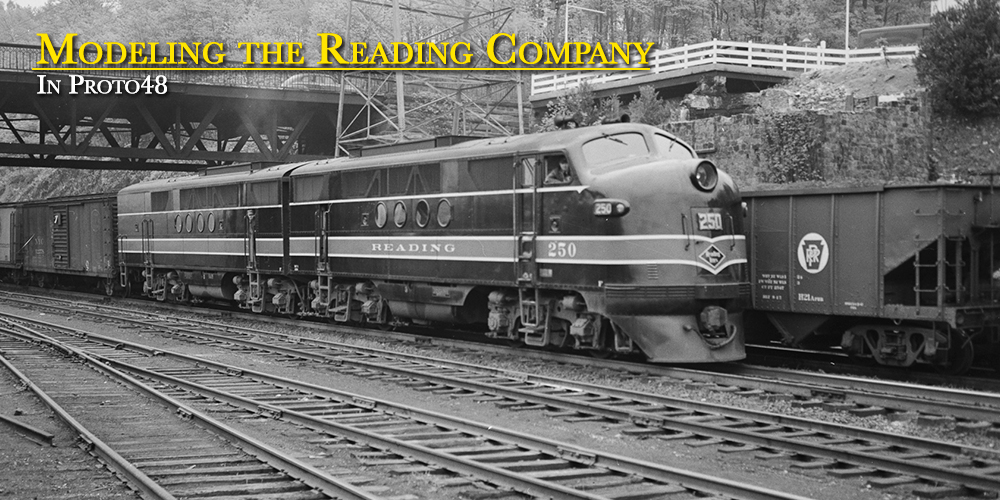
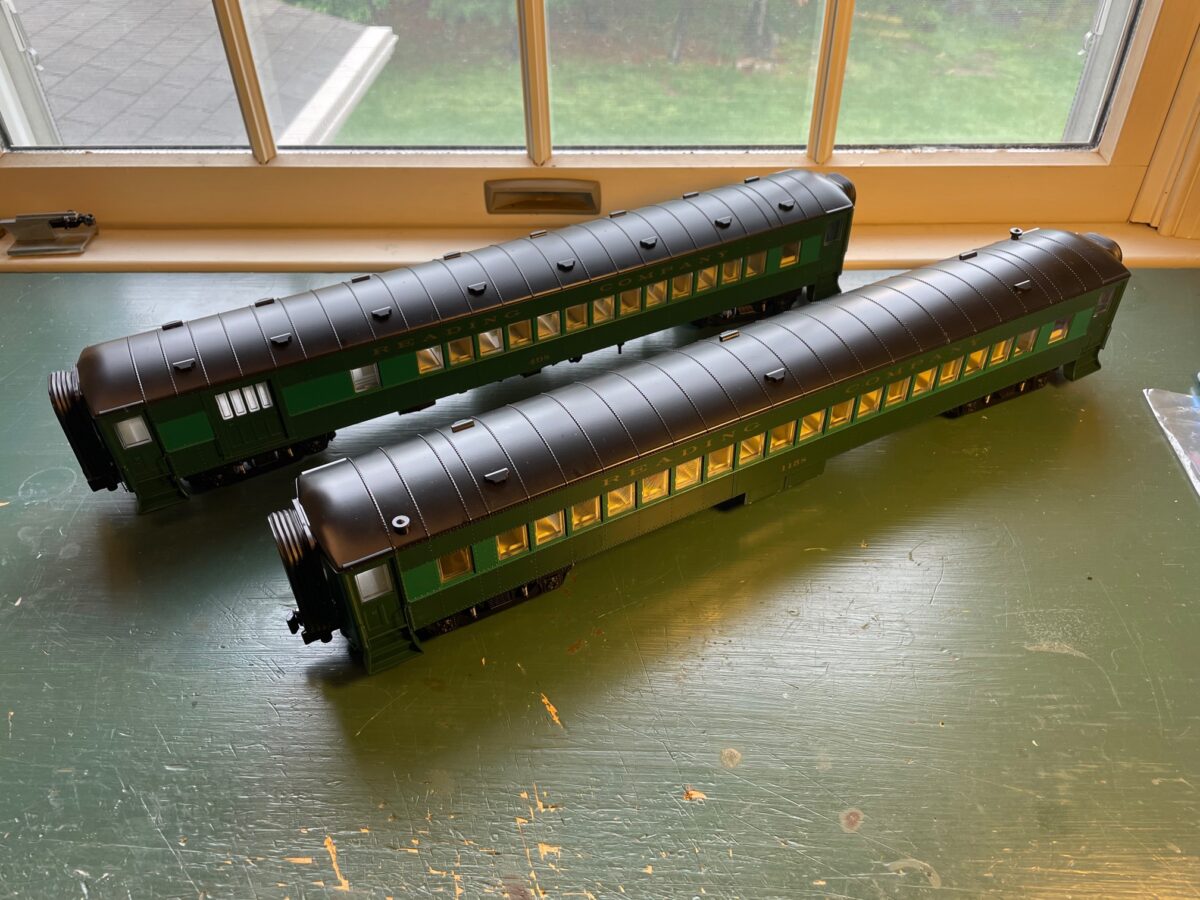
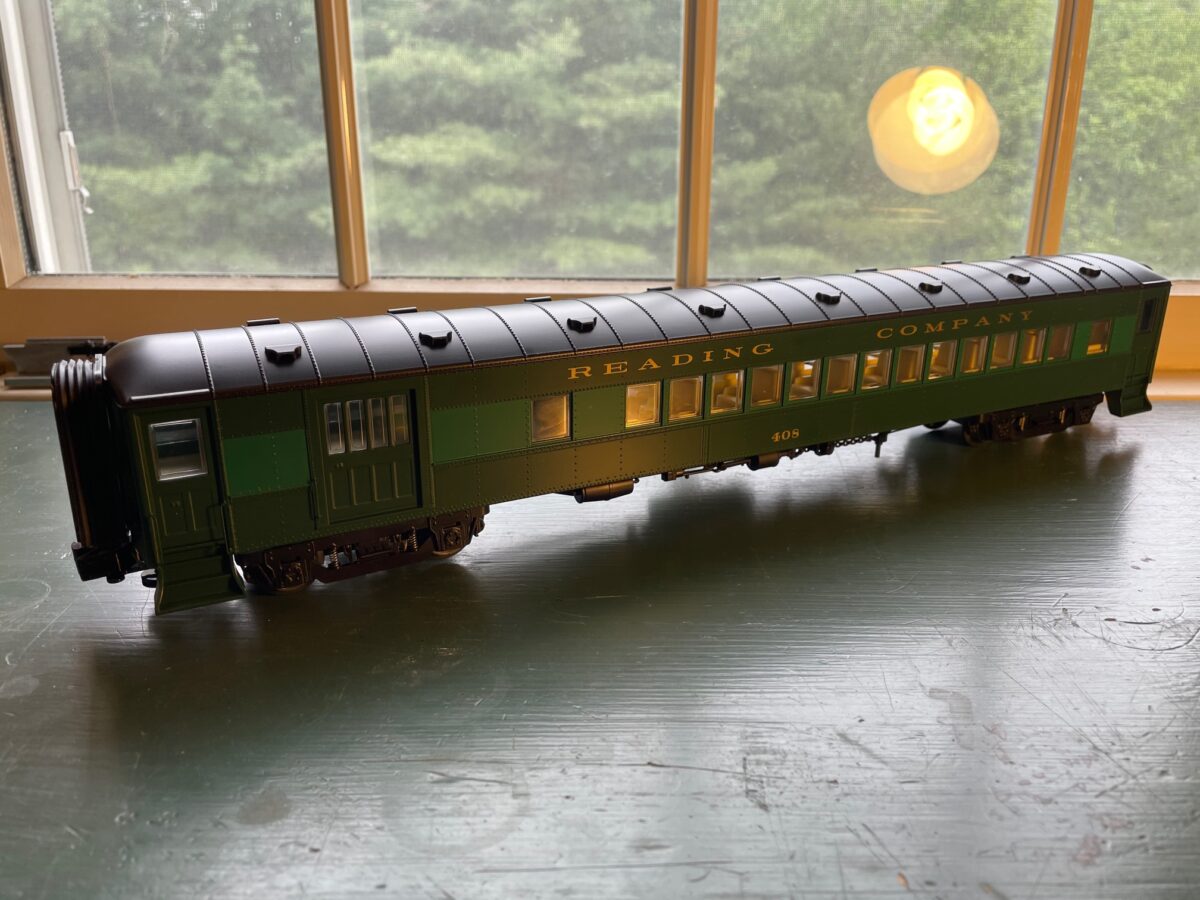
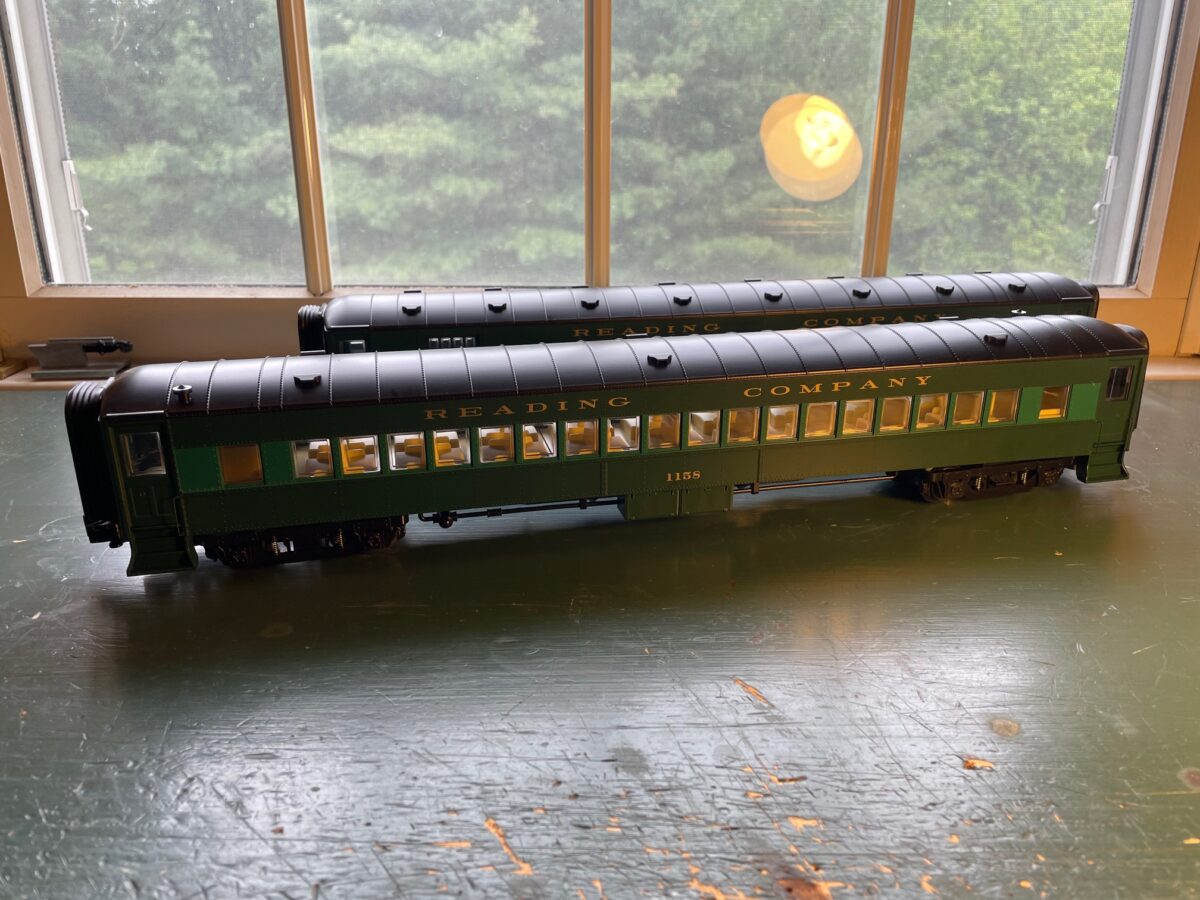
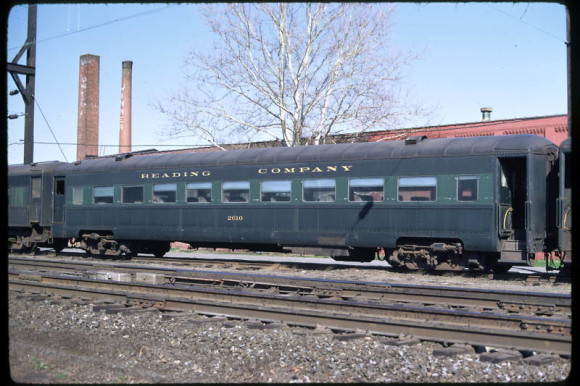
As a Proto48 modeler, I don’t often pay attention to what the 3-rail manufacturers are doing. Last year was no exception, but Lionel did list a new offering for Reading modelers that almost got past me. They released a new model with all new tooling for a Reading passenger car. Actually for two cars, a combine and a coach.
The cars are based on Reading prototypes built by Harlan and Hollingsworth. The cars appear to be a Reading coach class PBn and combine class CVm. Numbers for those cars:
Coach PBn 1100-1175, 1200-1284
Combine CVm 589-592
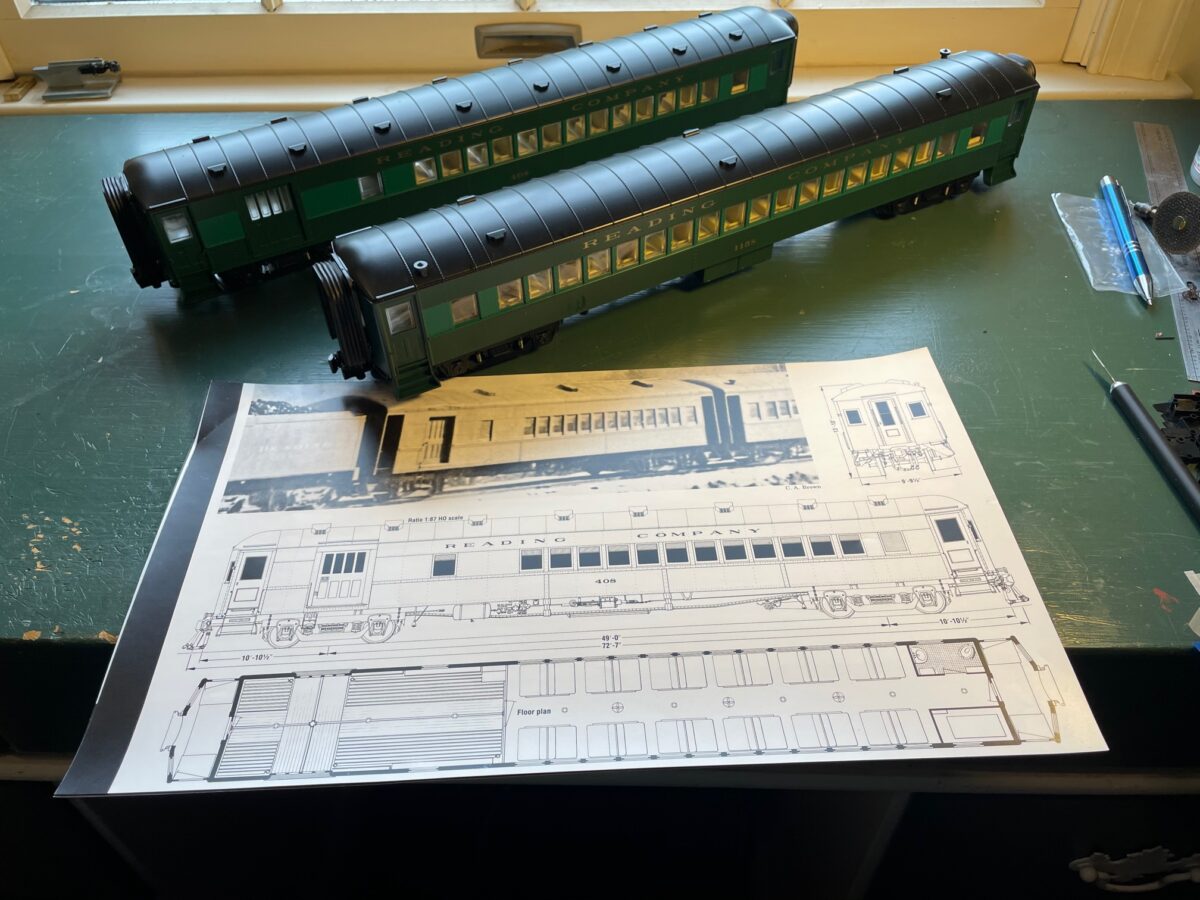
For 3-rail models, they are surprisingly nice. The body appears to scale out closely to published drawings. The roof contour is very nice, the details on the roof maybe be a little exagerated. The main issues I could find with the cars were:
Underbody details
Steps too steep
Roof vents undersized
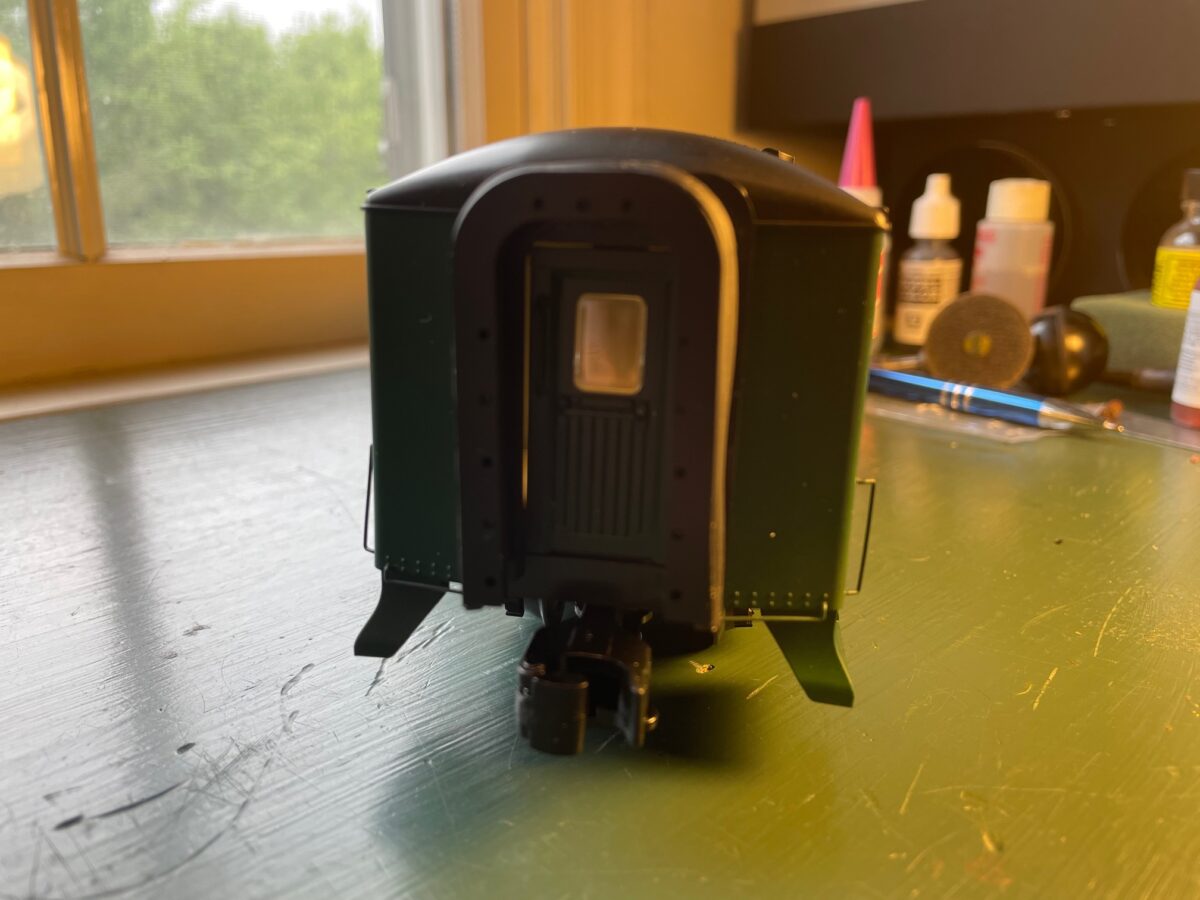
Lack of end details to allow for the oversized coupler to have about
Two batten strips on the side of the cars, instead of four on the passenger cars and three on the combine
The car diaphragms are oversized
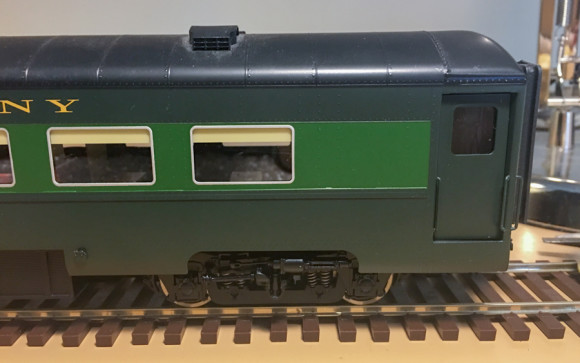
The two above images show that the steps do not go far enough into the car. Also they show the lack of end details like the uncoupling bars, safety chains, steam and air lines.
There may also be a question of how many roof vents are typically on the combines. Some further sorting through photos and equipment diagrams is needed to answer that question.
I’m pleasantly surprised by this offering from Lionel. The cars are much nicer than I was expecting. They will need some work but are a good starting point to build a nice model.
Lionel is offering three different two car sets. Manufacturers price is $379.99 for each 2 car pack. Prices do vary with different retail outlets. I would suggest shopping around. I picked up my cars at a much better price.
Recently noticed that Microscale Decals has re-issued the O Scale Reading Open Hopper car decal. This has been out of stock at Microscale since about 2009. This is a really nice decal, much more accurate then any other brand that’s been offered.
Also recently back in stock are the B&O E and F unit decals for the early paint schemes.
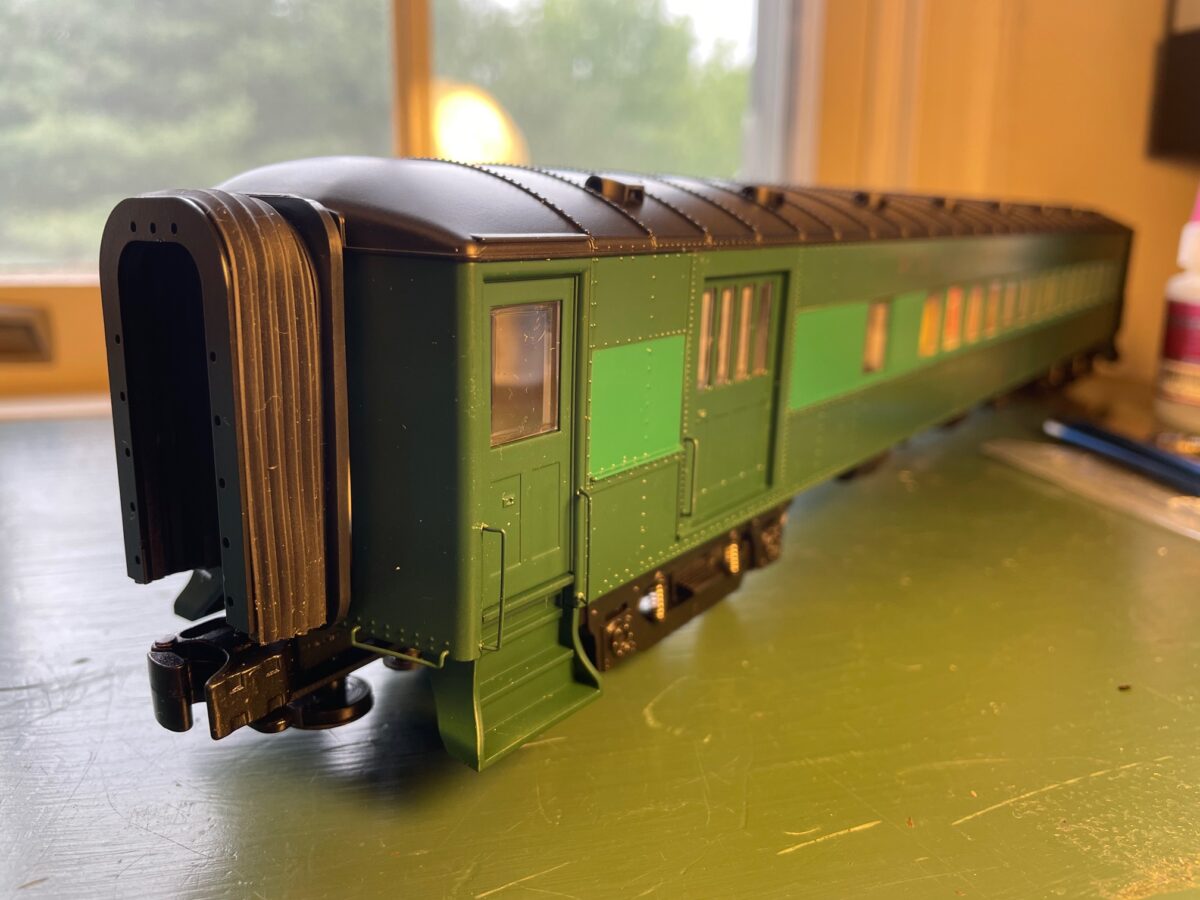
The seven SGL cars after I installed the Protocraft trucks.
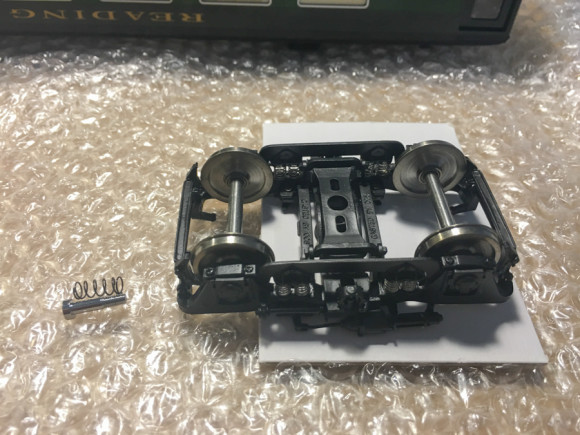
A couple of years ago I picked up a 3-rail seven car set of the SGL Reading coaches for a very good price. It turns out that Protocraft had imported a General Casting Corps 41-N passenger truck which is what is under them. So it looked like the conversion would be rather simple.
Well, nothing is ever as simple as it might first appear. I test fit one set of trucks under a car and thought the car might be sitting a little high. Thinking I had to modify the 3-rail bolsters under the cars the project ground to a screeching halt. The box with the seven pairs of trucks sat on a shelf right next to the cars for a while (it sat long enough for me to have to dust off their roofs as I worked on them).
I just finished a cleaning project in my train-room, well I’m still still cleaning some parts of the room. So lets just say I cleaned a spot to put my old drafting table back in the train-room. Now, I can work on projects on a much wider area. Feeling inspired, I pulled one of the cars down and set it on top of the trucks again. I never did actually attach the trucks to the car. My thought was that I would figure out how much I would have to mill the bolster down to bring the cars down.
I wasn’t exactly sure how much that was so, out came the books. First couple of images were close but it was hard to tell. So, I went through the images I had on the computer. Again the car looked like it did in the photos. Cool, maybe I didn’t have to mill the bolsters after all.
The Precision Scale Company bolster screws fit nicely into the SGL bolsters and they actually fit the Protocraft trucks also. So, it was a simple matter of attaching the trucks using the Precision bolster screws and springs.
Next up for these cars is fitting couplers onto them. Since, they started out as 3-rail cars they don’t have any coupler mounting pads on them.
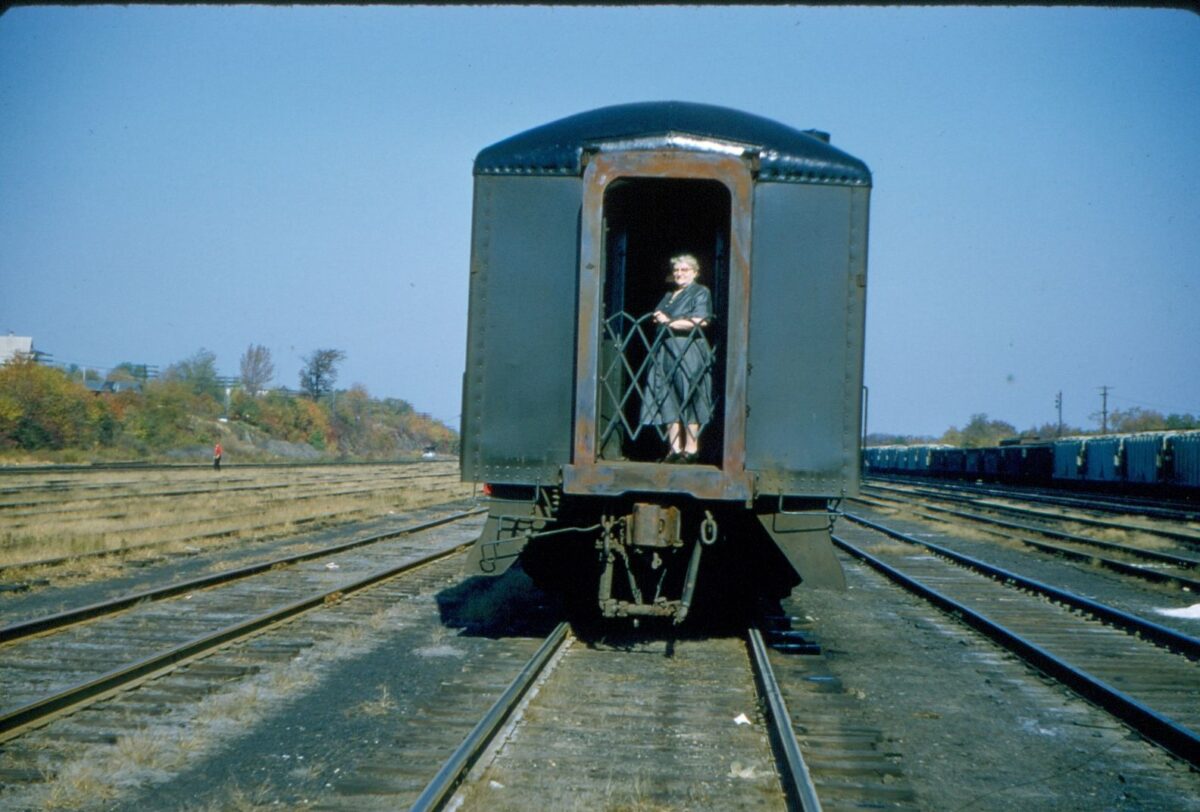
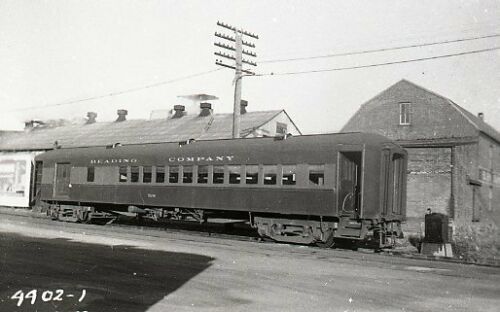
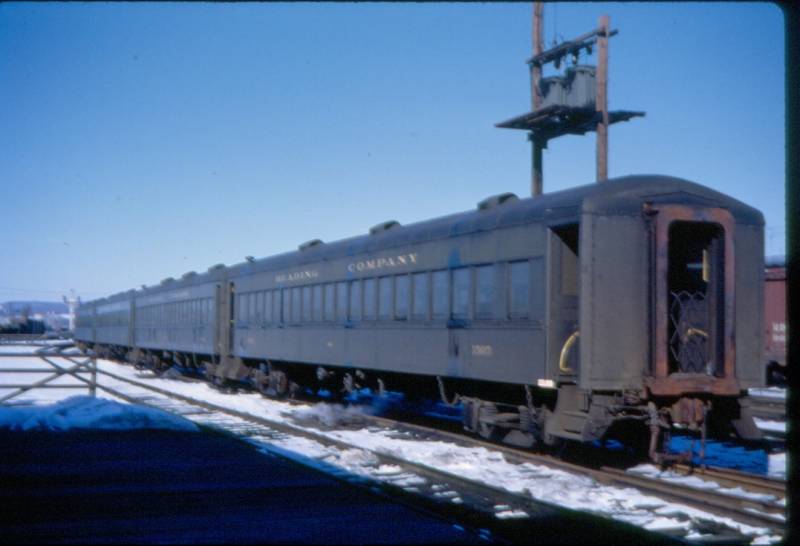
The original 3-rail truck screws in the bolster boss.Protocraft General Casting Corps 41-N passenger truck inverted next to the precision Scale truck bolster screw and spring.Close up view to compare to the prototype photo below it.One of the prototype cars later in their service life in West Trenton, NJ.