Kadee released Proto48 trucks last year. I picked some up last year. I recently noticed I never posted anything about them. I had used some of their O scale trucks on conversions for a friend of mine. They are nice trucks. These Proto48 versions are very similiar.
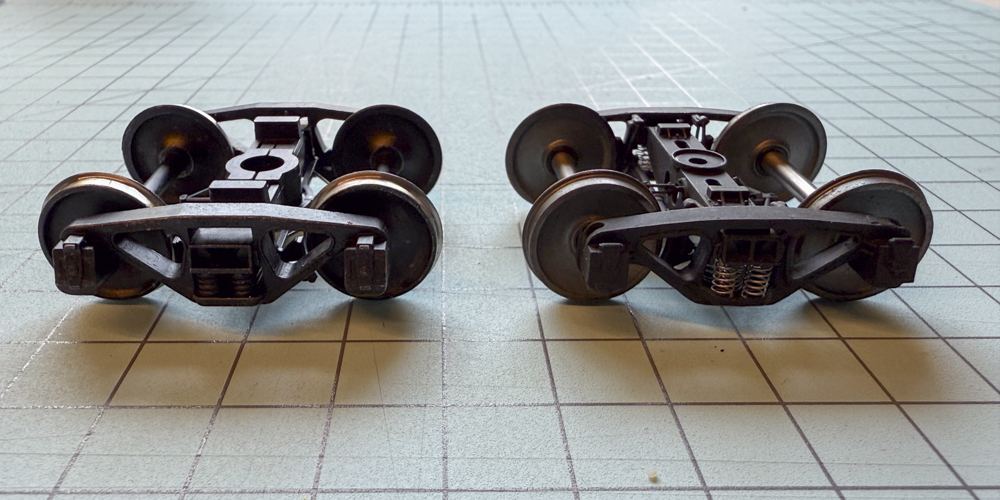
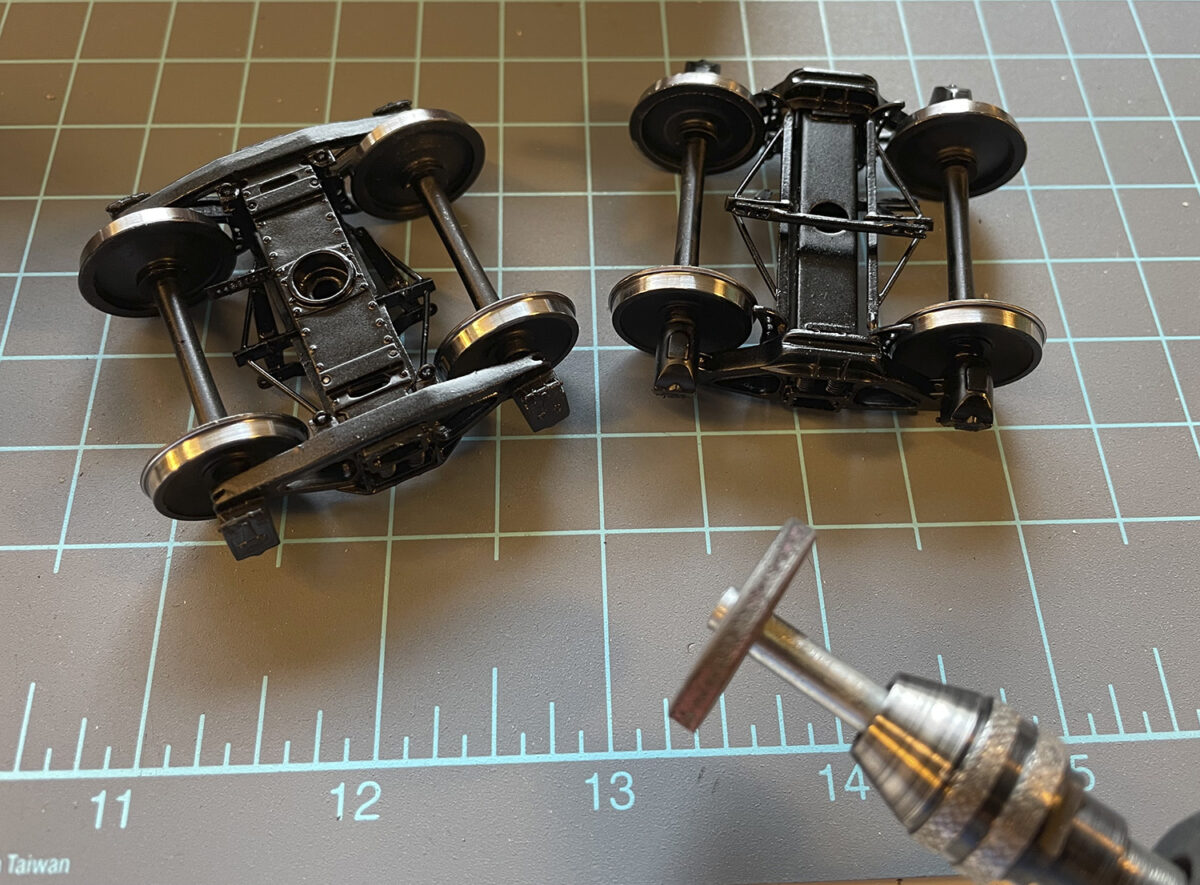
Here is a side by side view of the Kadee ASF A-3 trucks and the Protocraft version of the same style. If you are converting some 3-rail cars or even Atlas-O freight cars these are a nice option. If you are building the museum model, then the Protocraft truck may be more in line with what you are building.
Price is also something to consider. The Kadee trucks are priced just over half the price for the older imported brass trucks. For some of the Roller Bearing versions they are more than a third the costs of the imported trucks. That adds up when thinking about a fleet of cars.
Currently, Kadee is the ONLY manufacture still in production with a Proto48 truck line. Both RY Models and Protocraft are no longer importing Proto48 trucks at this time. Protocraft is still selling from their inventory but RY Models has mostly sold out. These are a very welcomed addition to the Proto48 community.
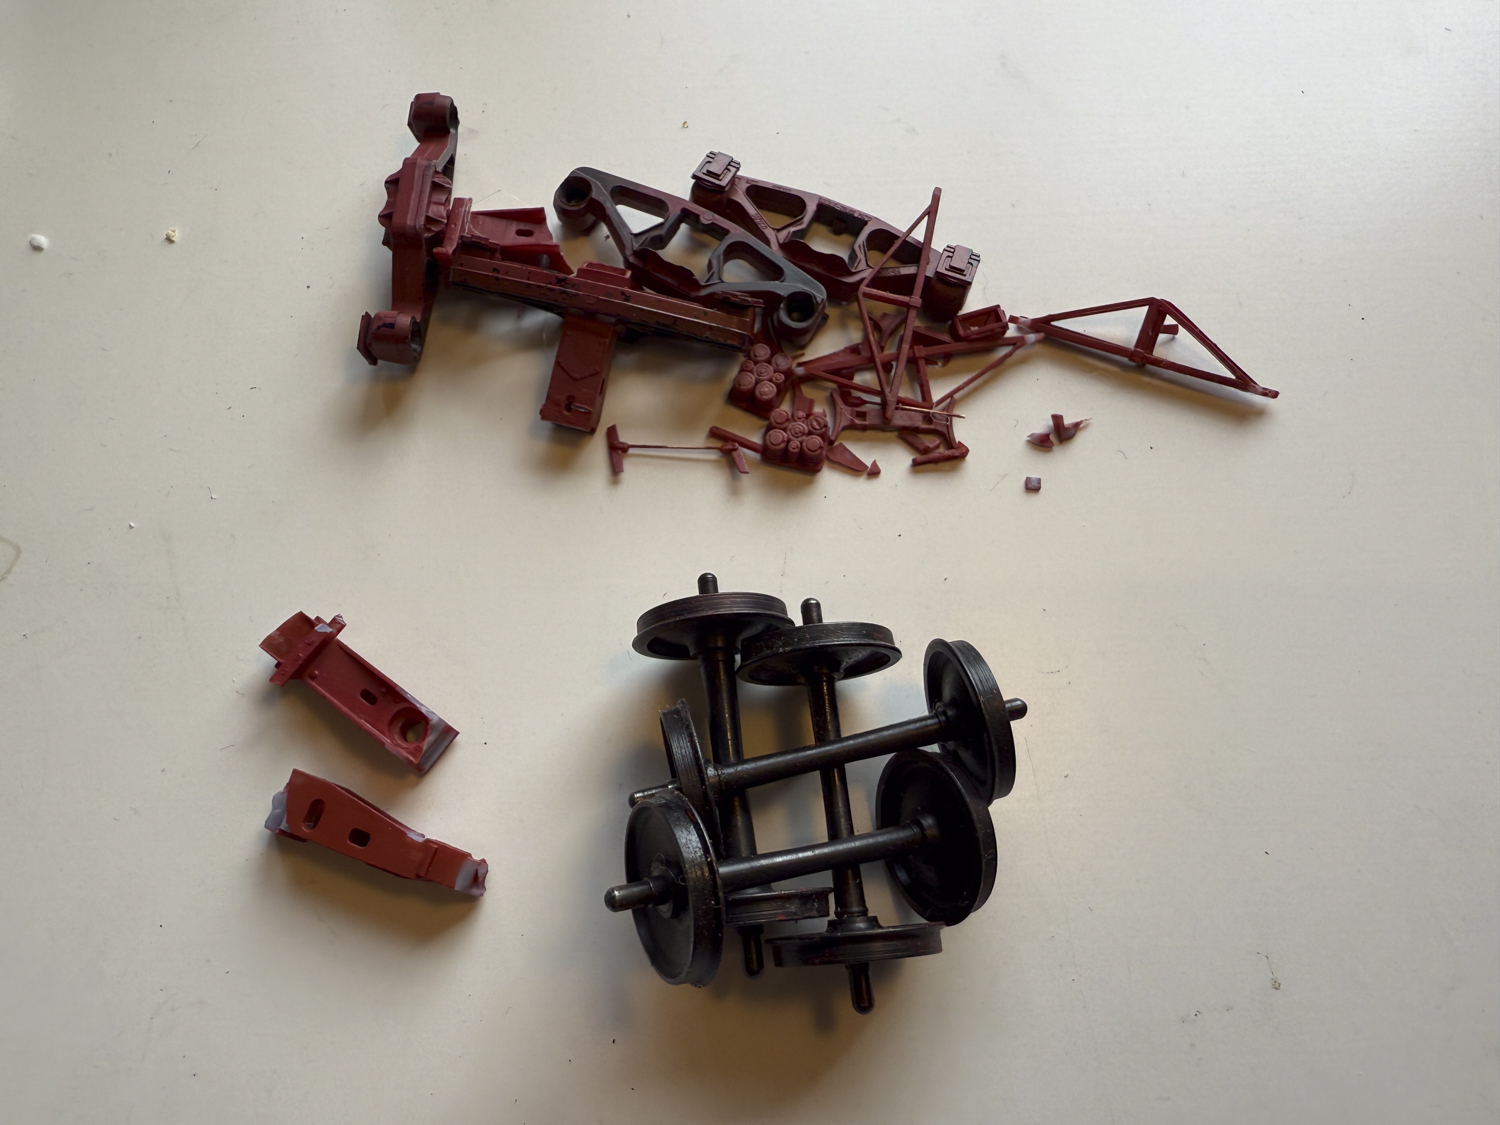
When all the unboxing was complete, this was the condition of the trucks that came with the car. Not a great look. But the Protocraft wheel sets will be reused. The rest, well the next two images tells you what I think.
I thought about using another pair of Intermountain Trucks with the wheels, but I chose to use a pair of RY Models Proto48 50 ton Bettendorf instead. Mostly because they were on the workbench already.
When I took off the half of the bolster that remained on the car I noticed that there was no spring on the bolster screws. So I decided to add one. Of corse that meant the while installing the new trucks, one had to shoot into the air. No problem reach into the screw bin and replace it.
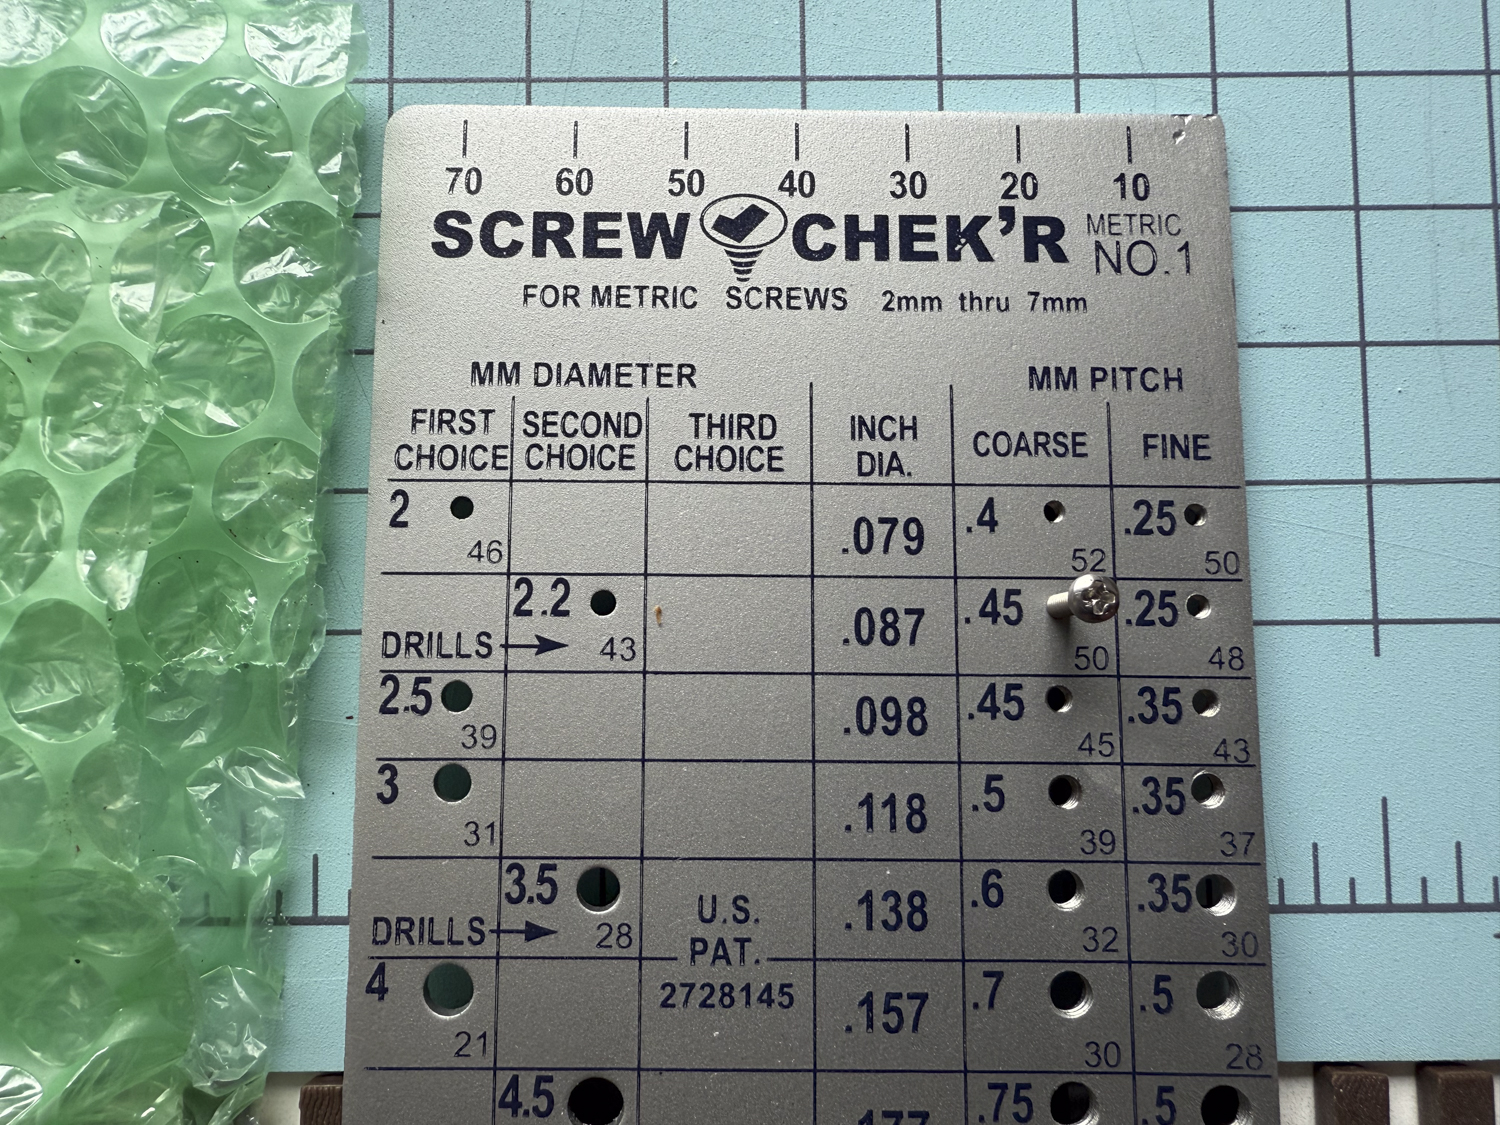
I checked the remaining bolster screw and it wasn’t a 2 mm screw. It was a 2.2 mm screw, which I don’t stock. I did find the missing screw after searching the area around the workbench.
Both bolsters showed some damage. Since it was basically the same damage reversed at each end, I wonder if it was actually damage or just poor quality castings. I know what my thoughts are.
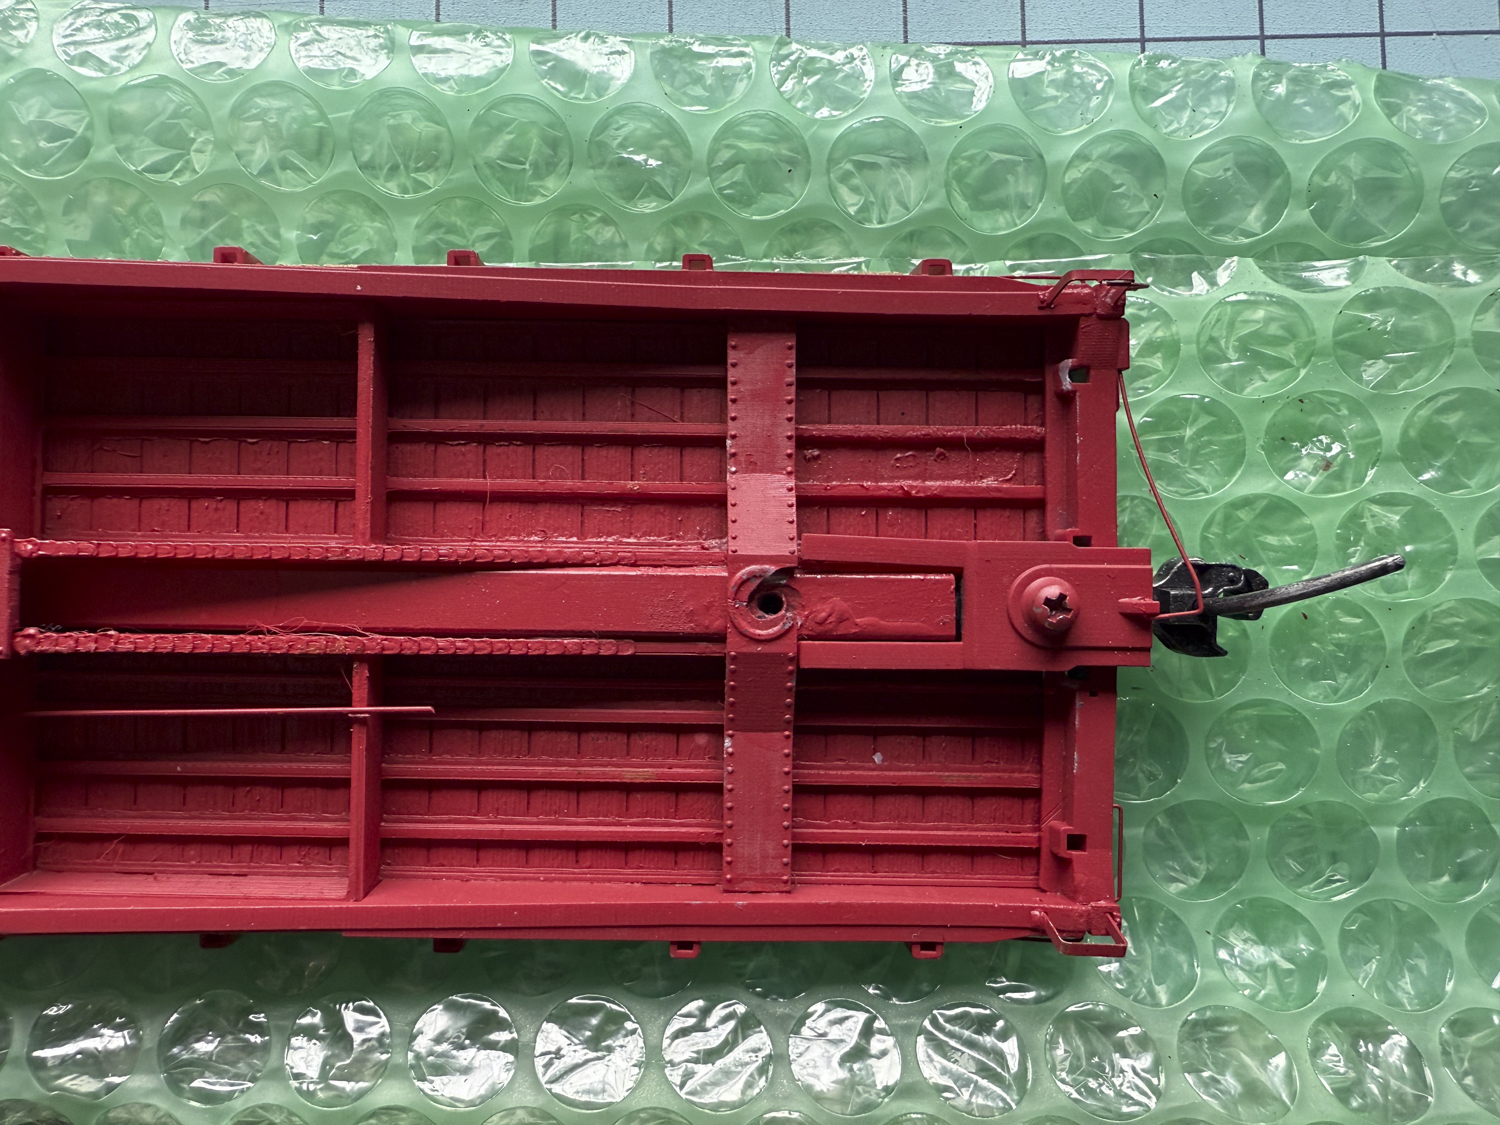
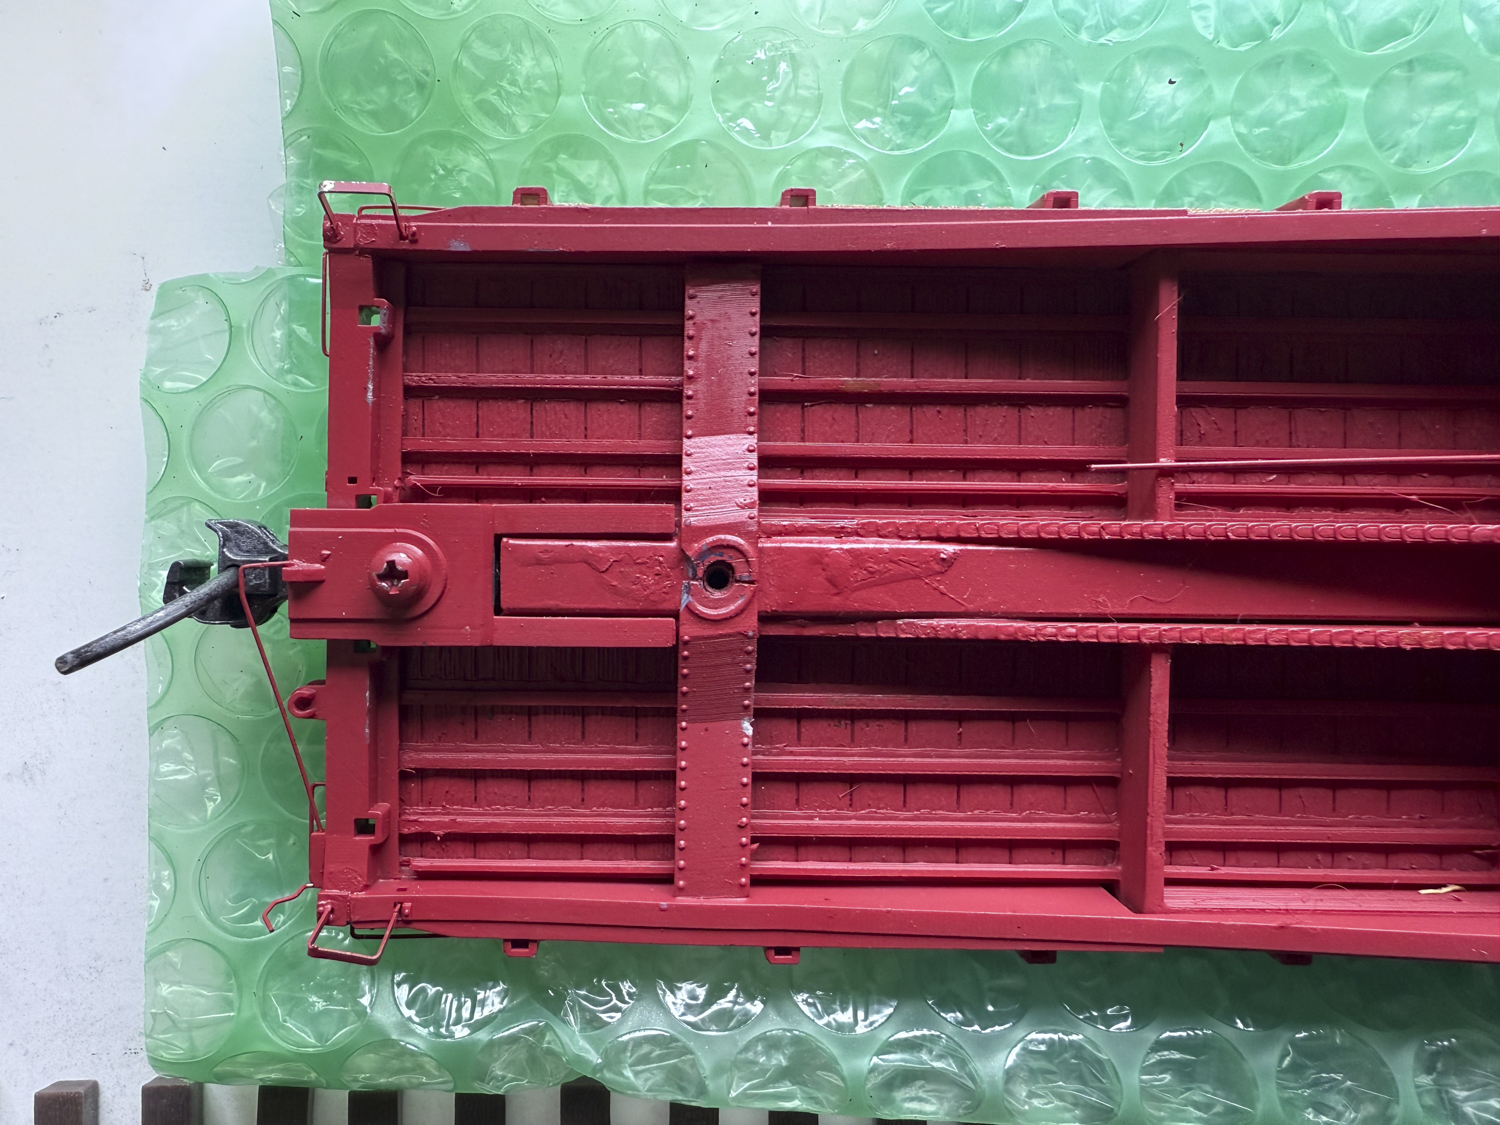
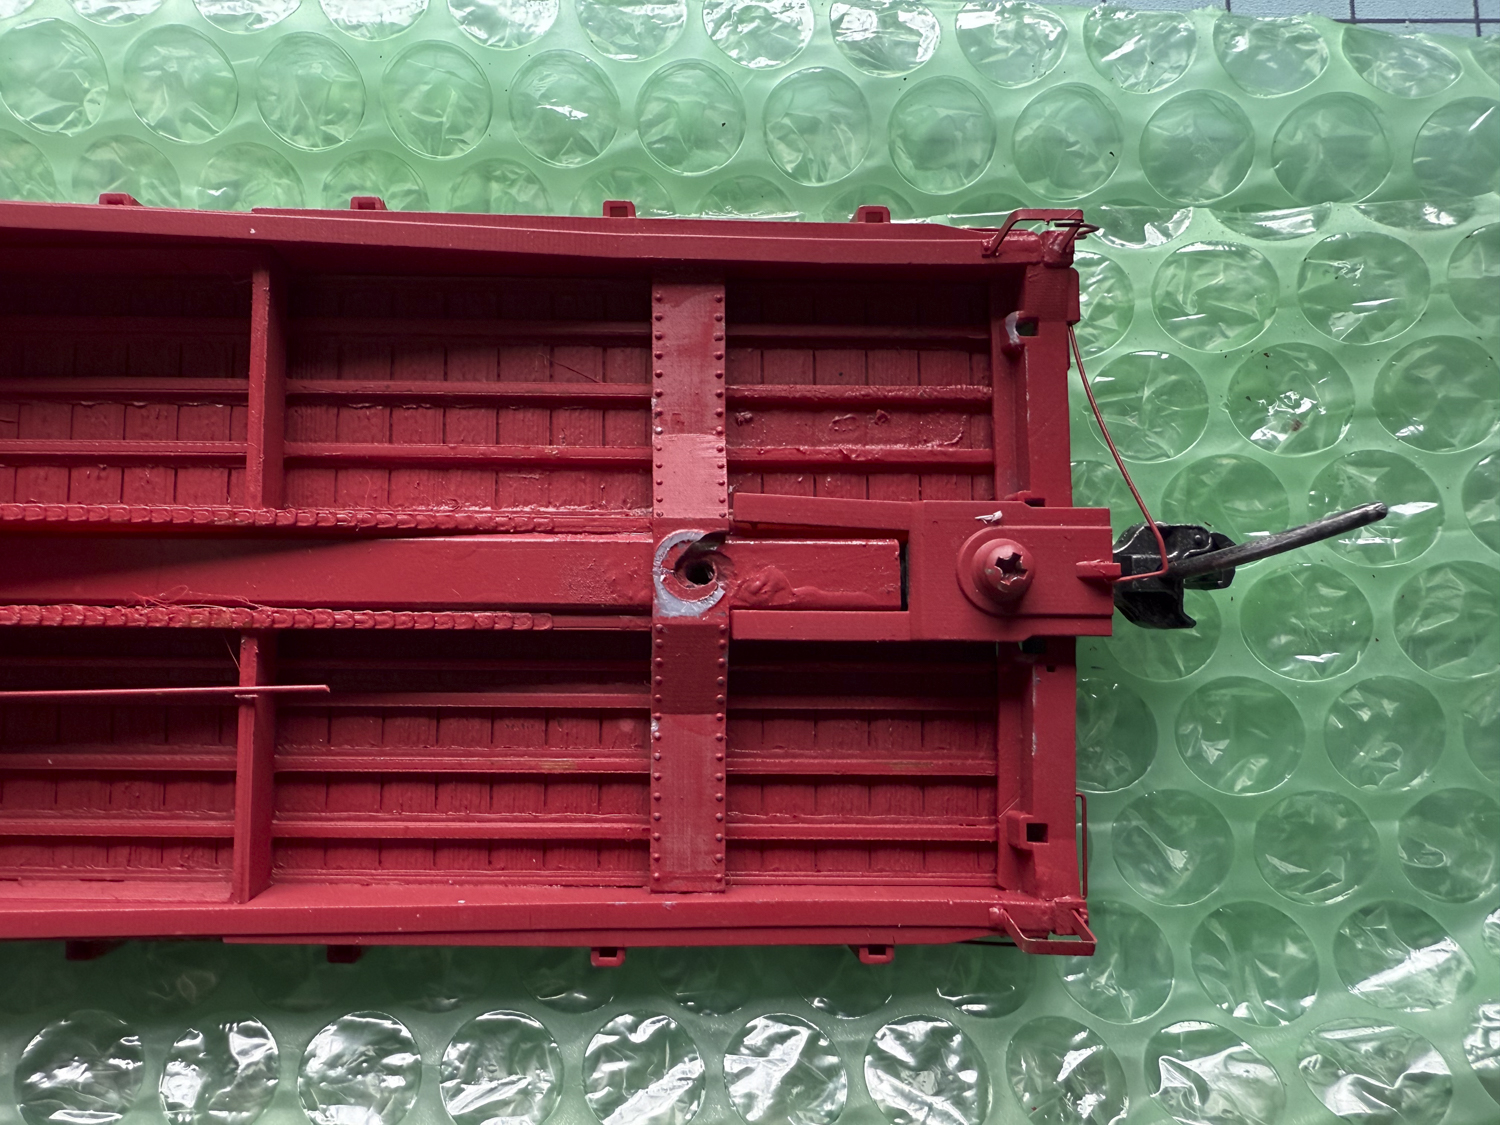
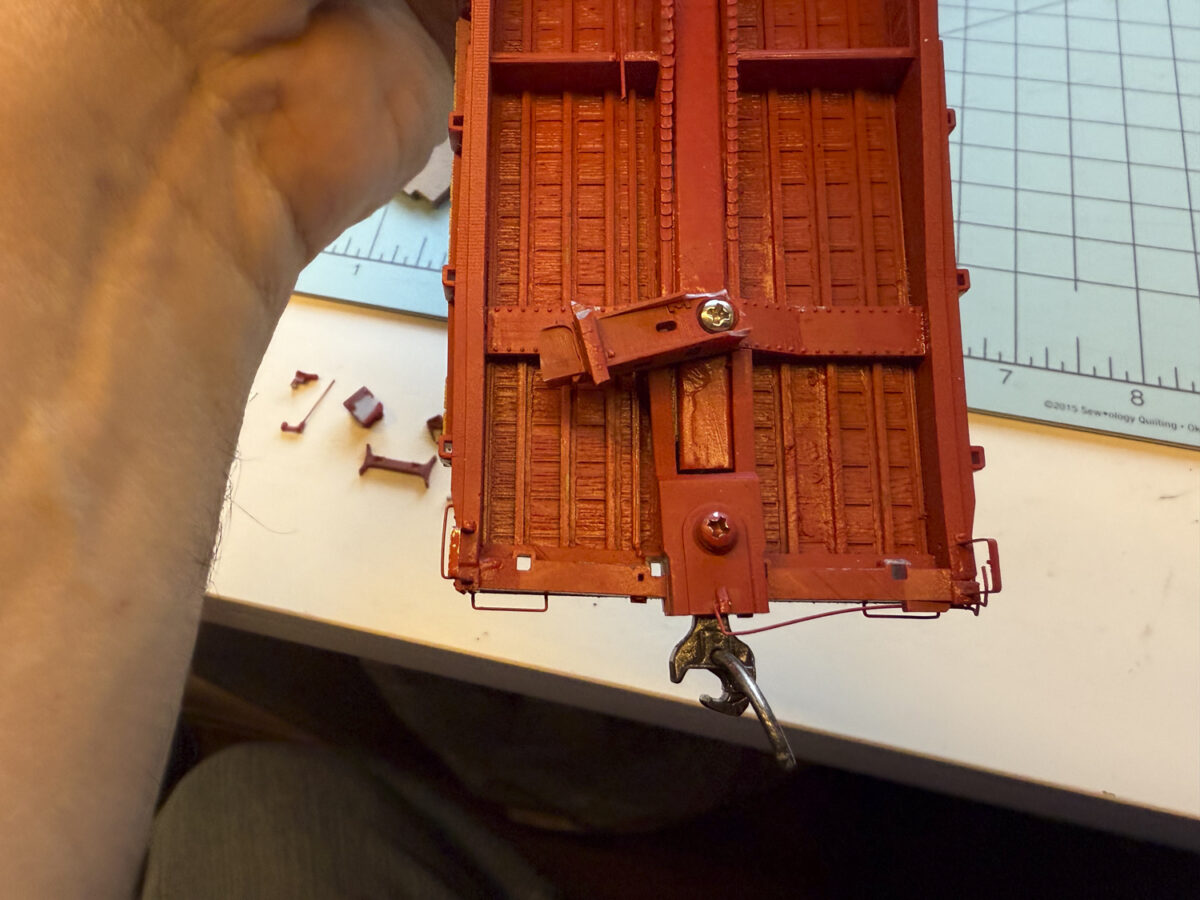
I shaved off the ridge on the bolster and then used the body washer from the RY Models trucks between the car and the truck. This placed the car at a good height for the couplers.
Here is the car with the trucks installed and the original wheels sitting on top. No they won’t be a load just forgot to take them off the car for the image.
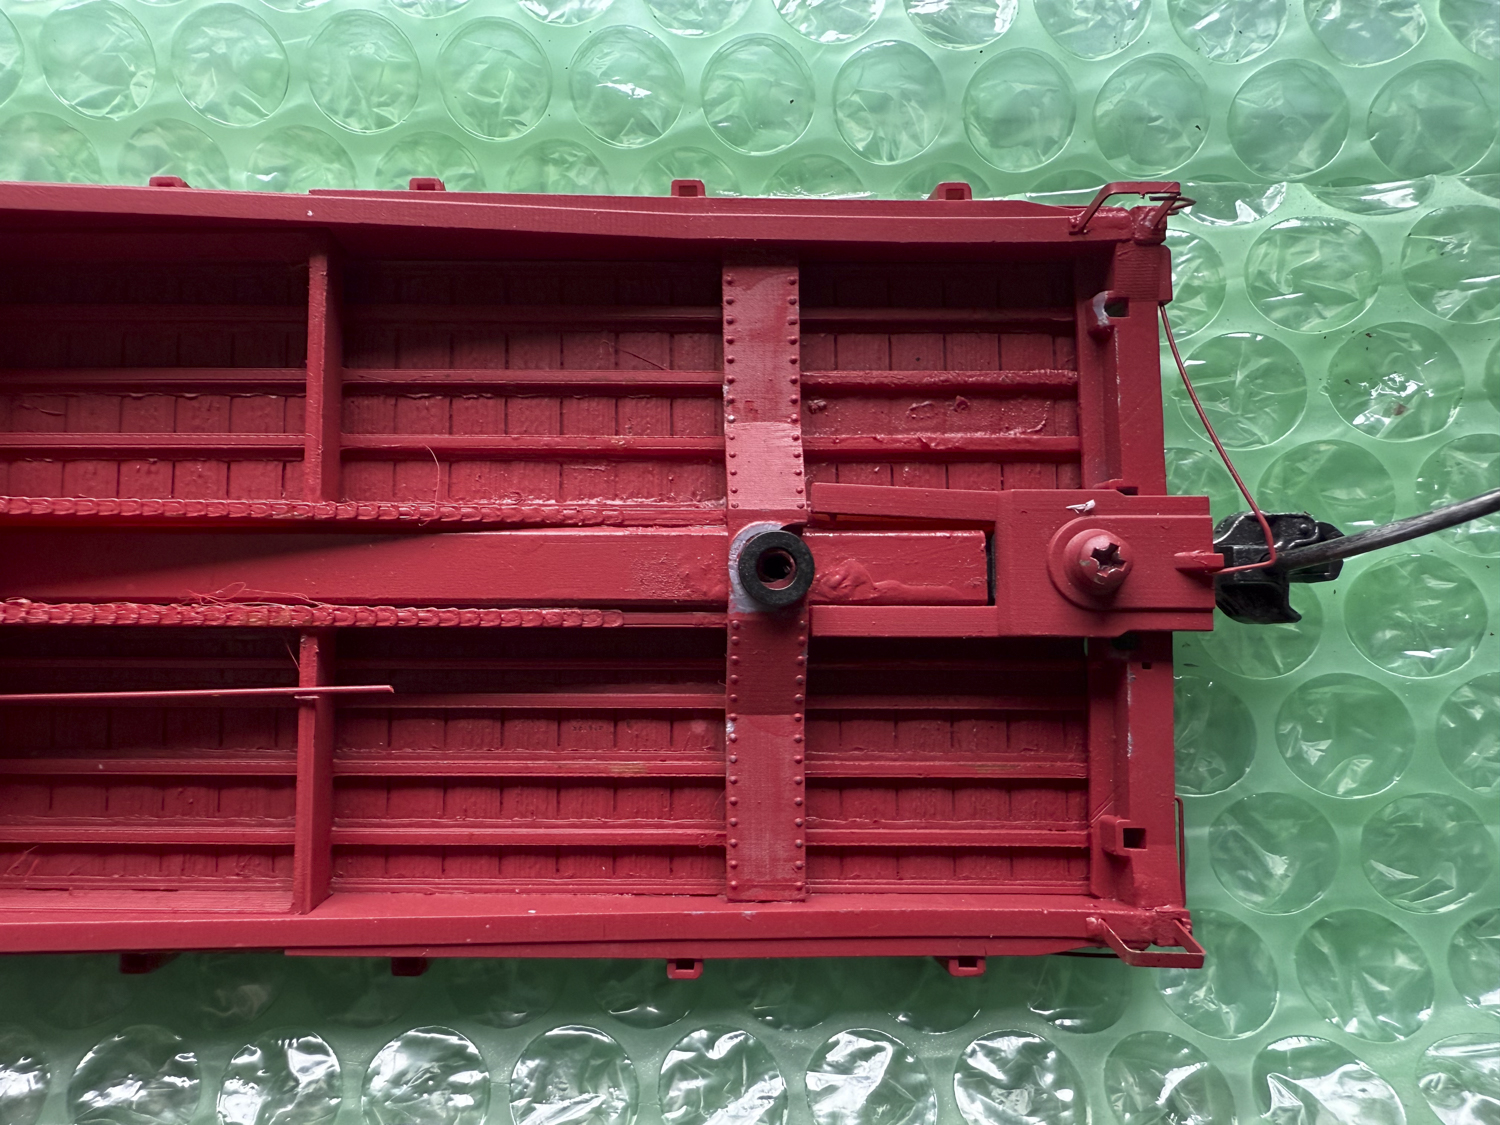
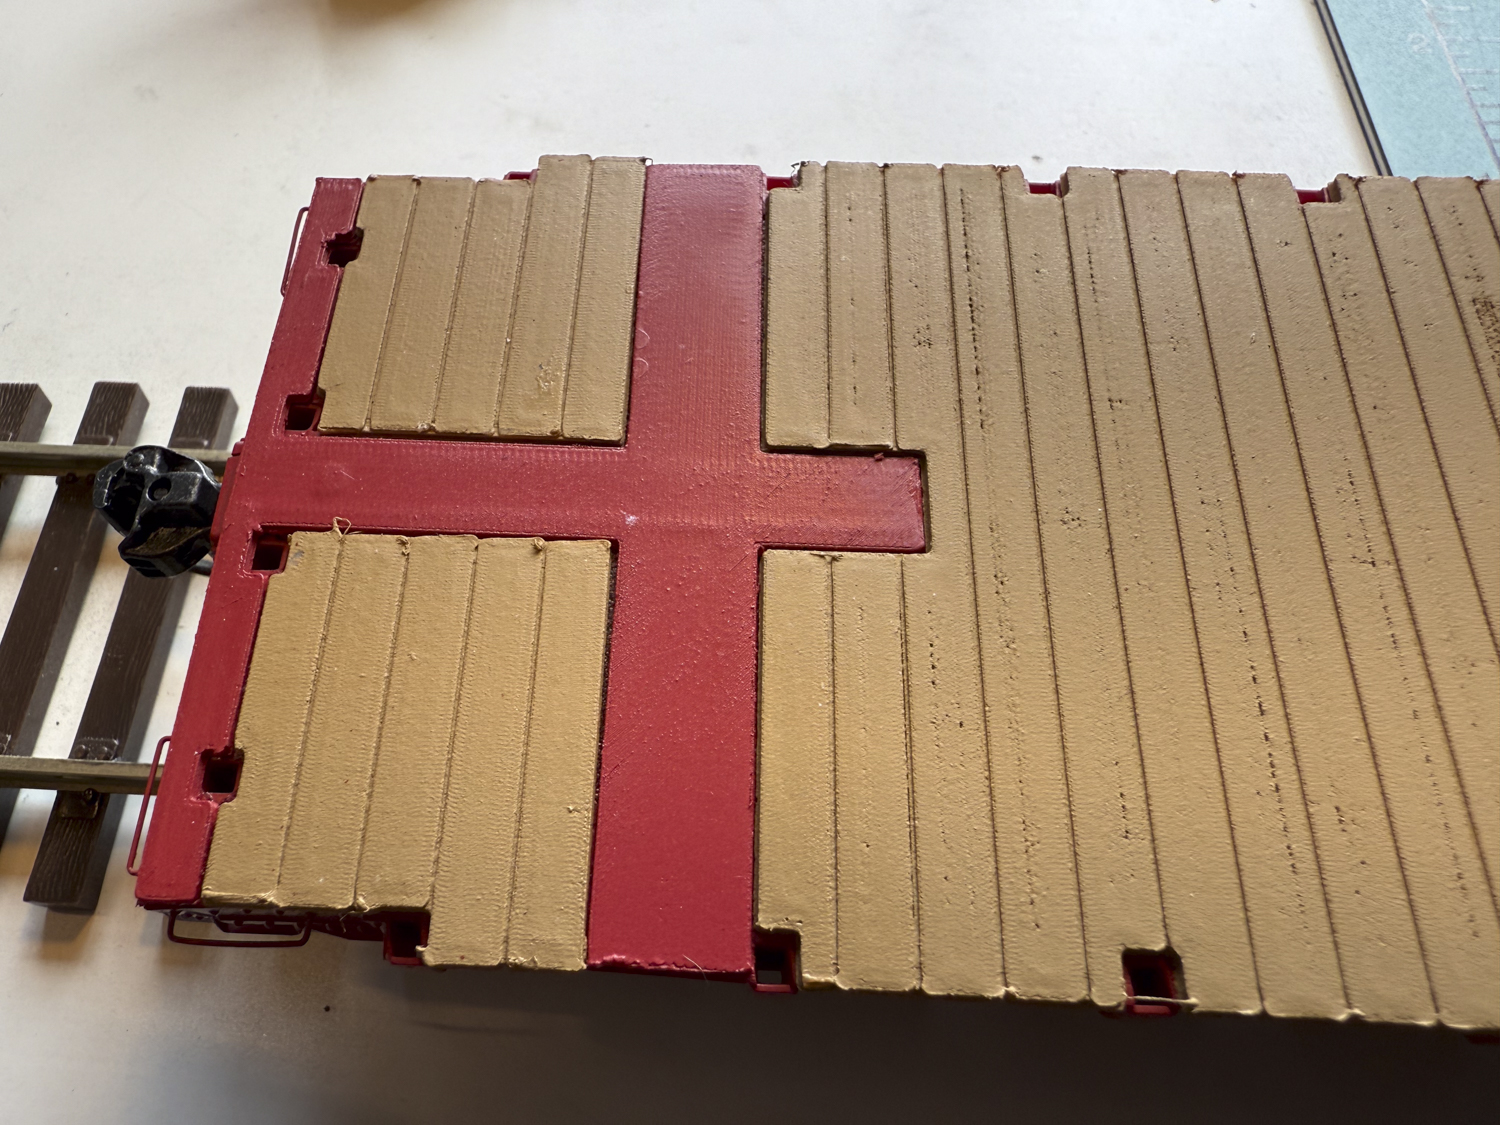
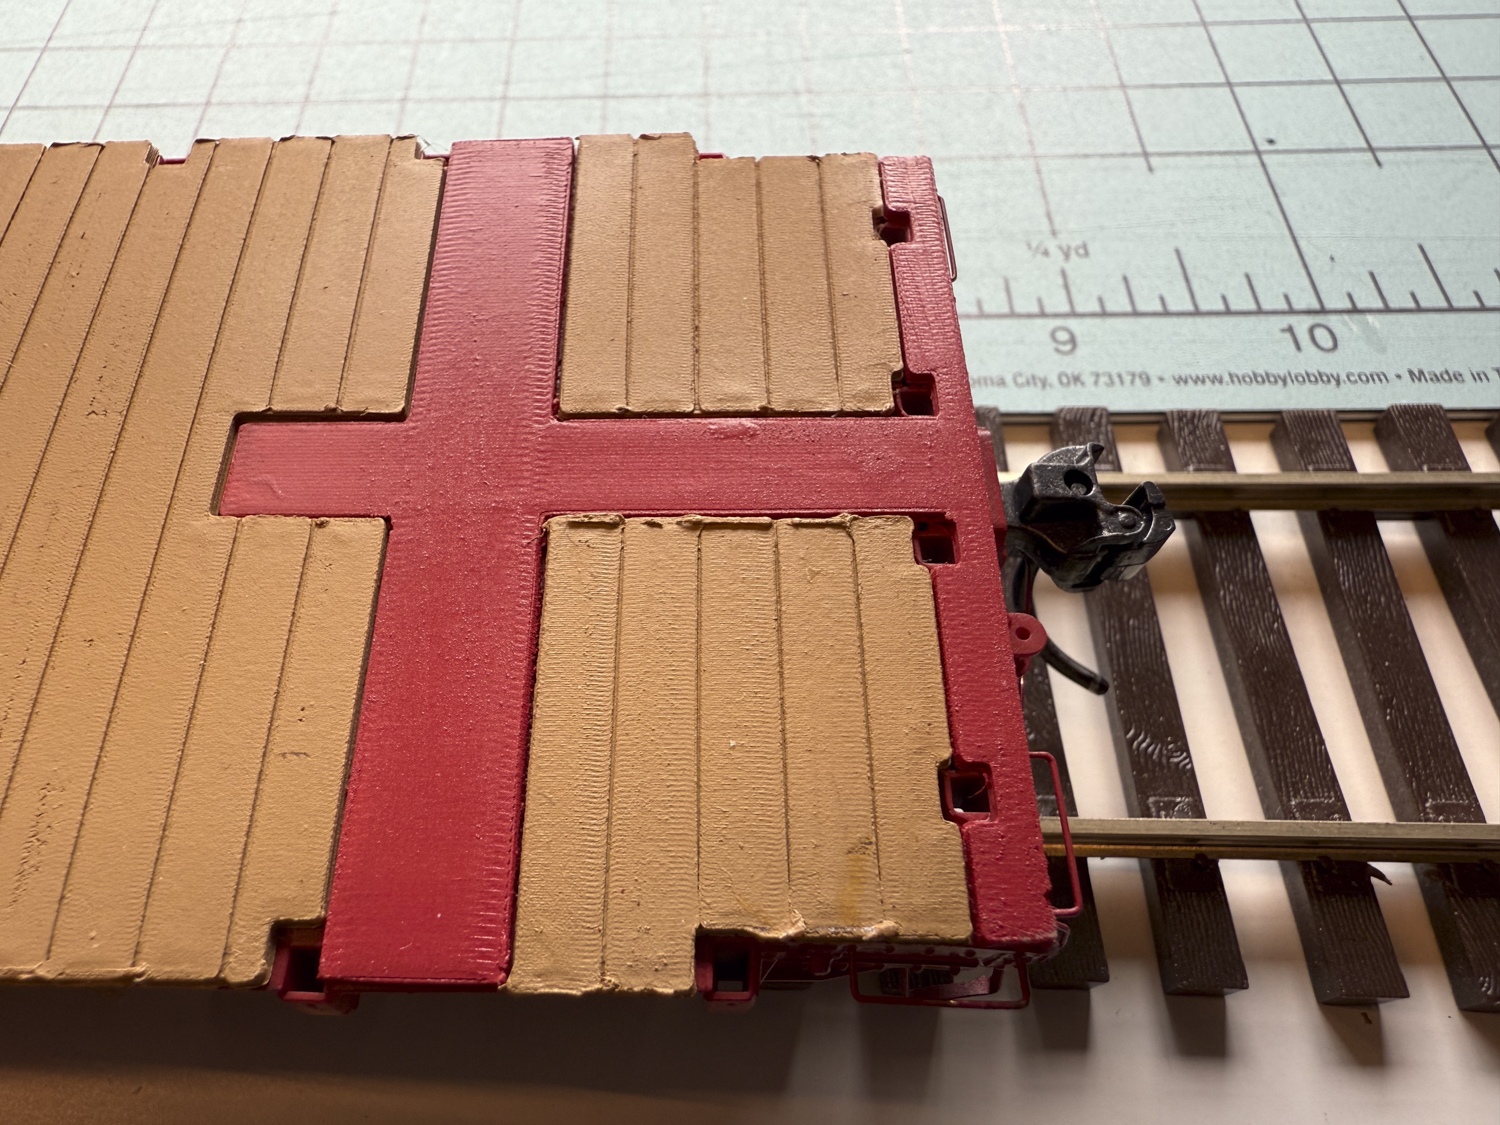
I’m not all that impressed with the car. Besides the trucks, I was disappointed with the deck on the car. Check out the edges of the deck in the next two photos.
I wanted to try one, but I don’t think I’m happy with the car. I will never consider another model by this manufacture unless I could see the car in person first.
3D printing offers a lot of possibilities for the future of O Scale, but we will have to suffer through the maturing of the products and the manufacturer’s quality control standards. The quality of each car is a one-off for each print. Will manufactures reject parts that are not of a high quality or will they throw some paint on the car and call it good?
Who knows, maybe I’ll change out the trucks for a pair of Ow5 trucks and you will see it for sale on my table in Chicago next month.
One last thought. Even after changing out the trucks for metal trucks the car is drastically under weight. NMRA recommended practice should have the car weight at 18 oz. The car weight actually is 9.7 oz., 8.3 oz under weight. Looks like this car will need a permanent load added to the car.
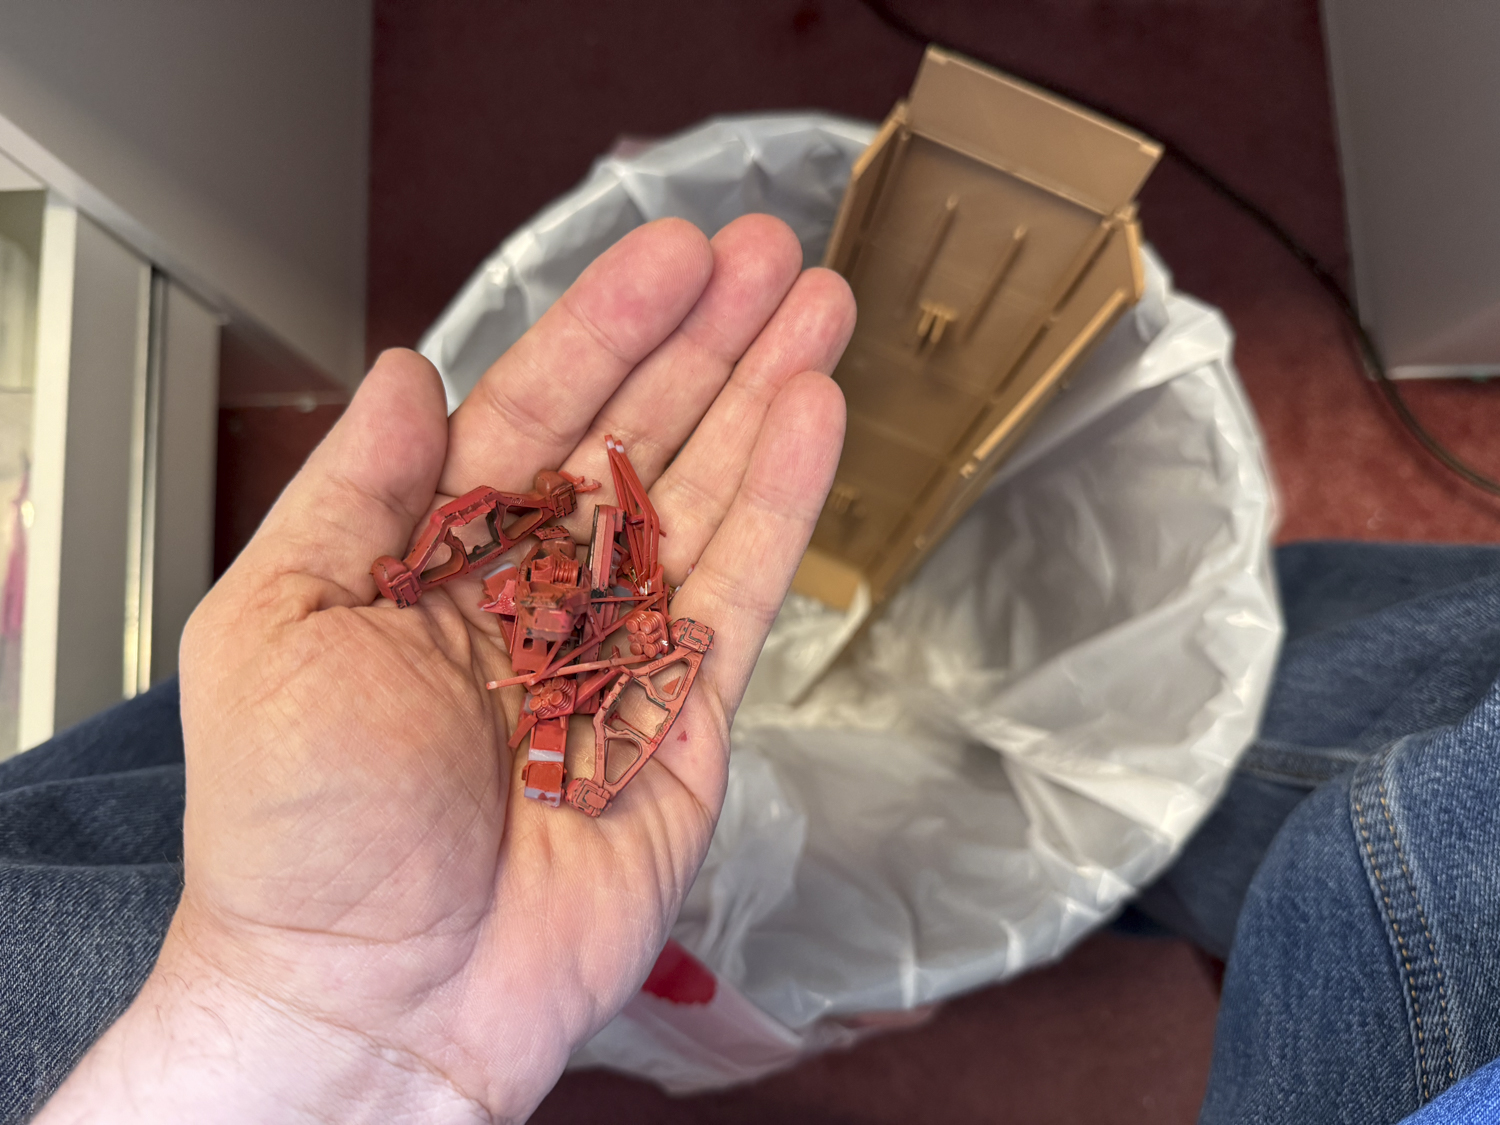
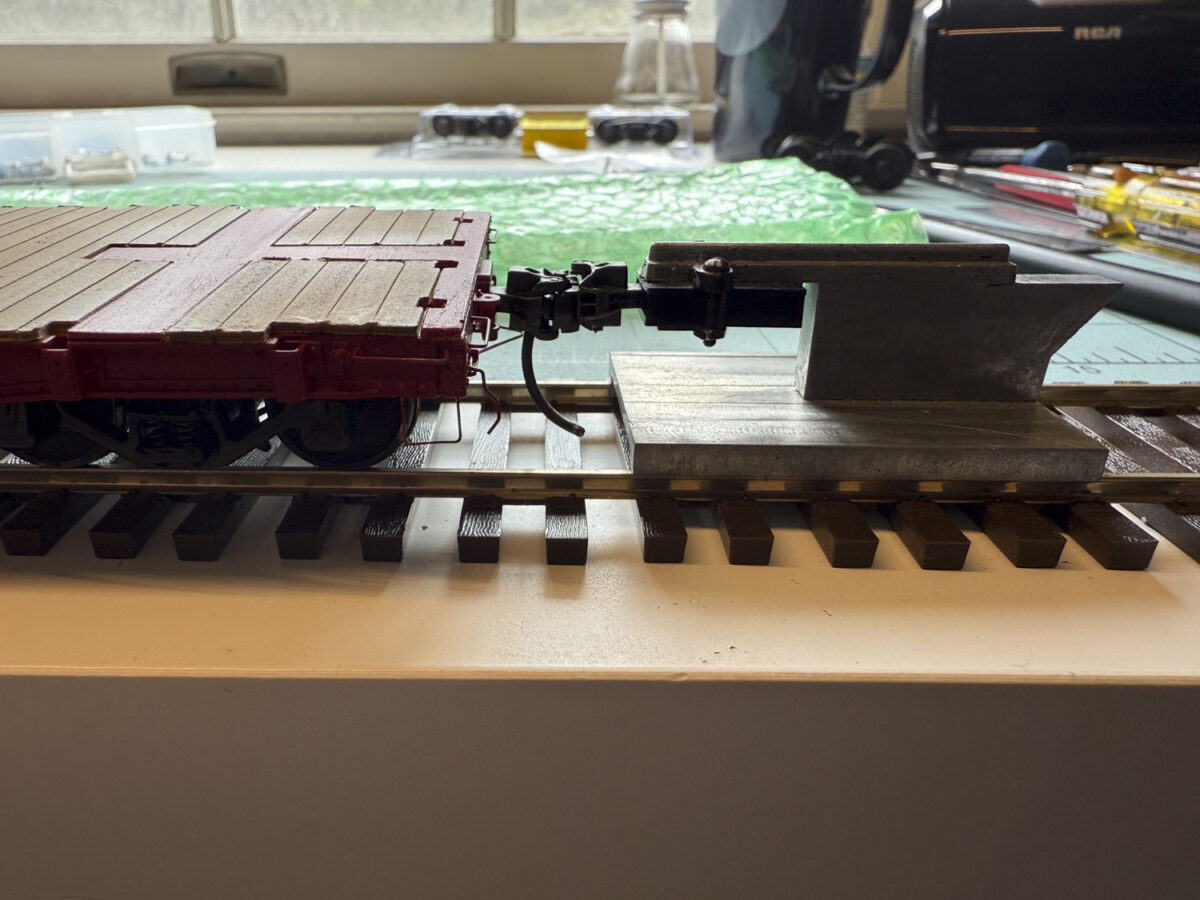
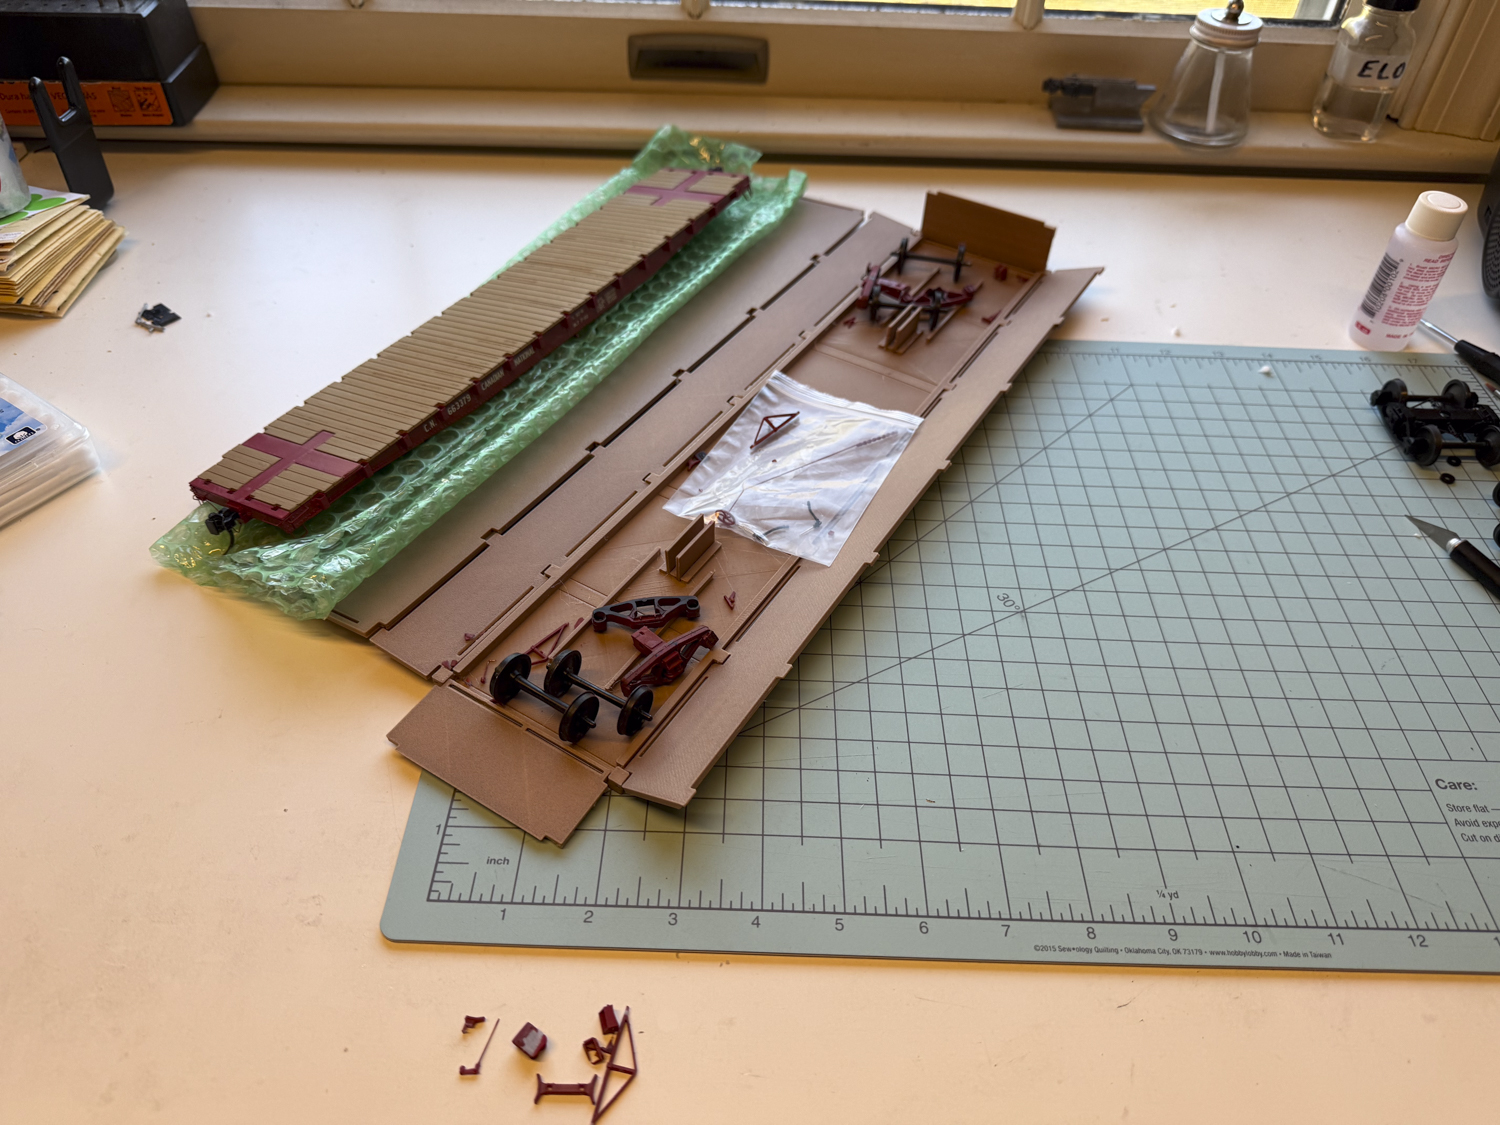
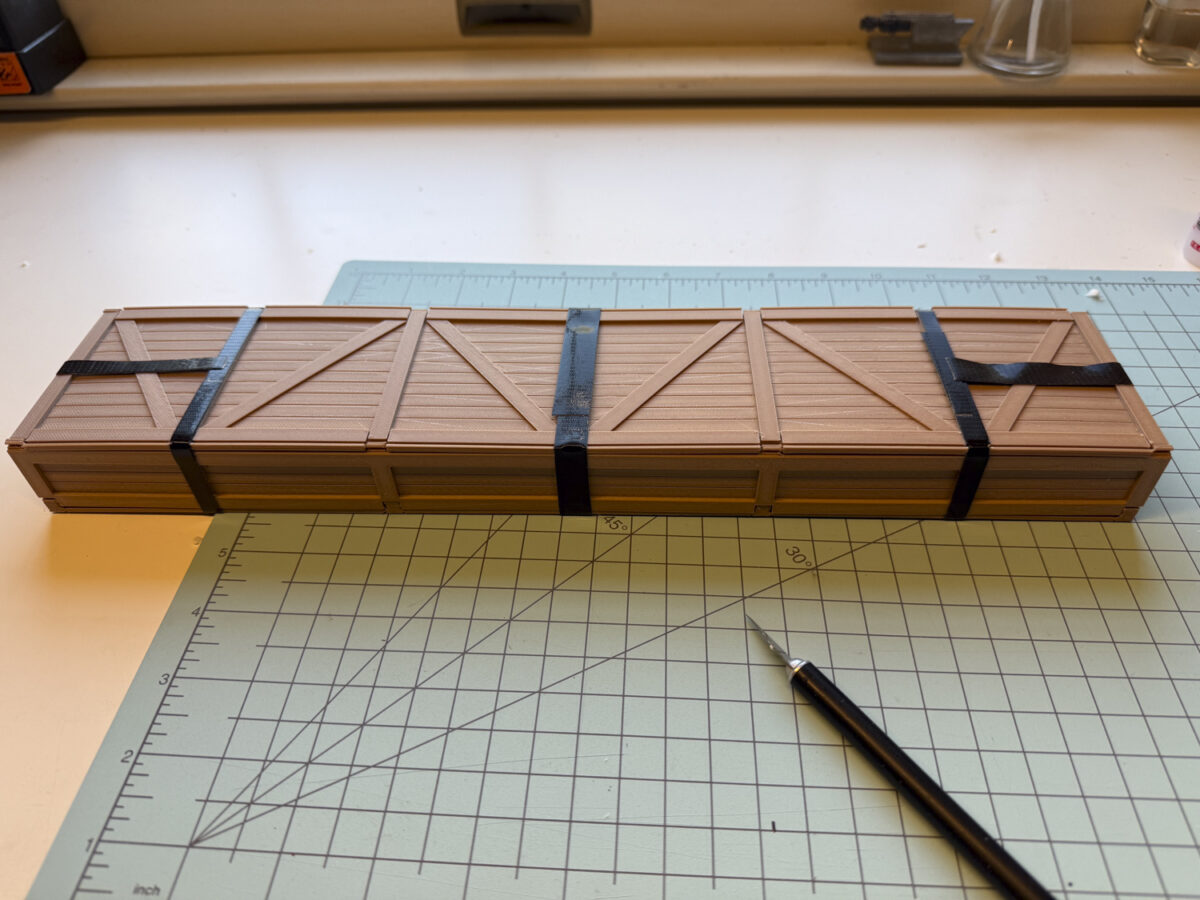
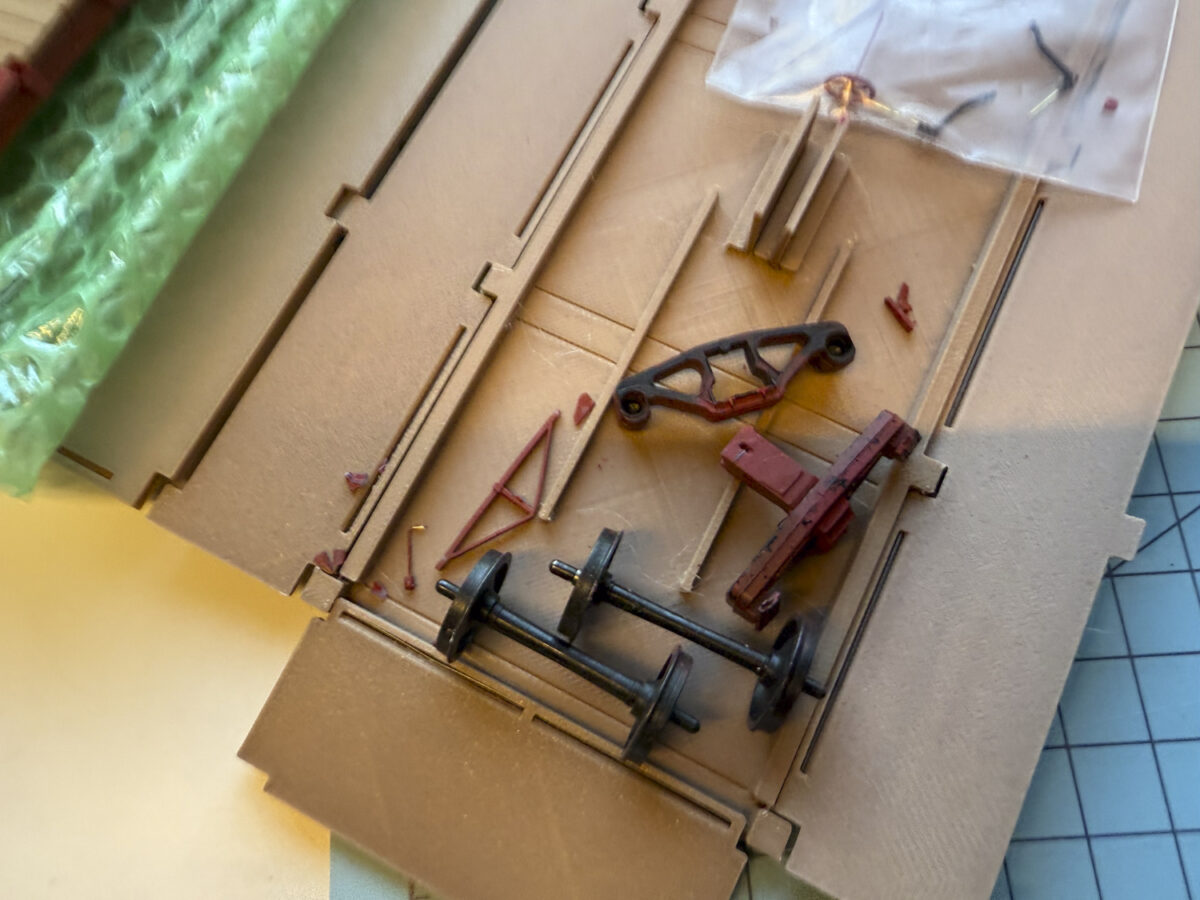
Current view on the workbench. I have a CN 50 ton flat car model from Nice Fish Model Company. It didn’t make the journey to NJ very well.
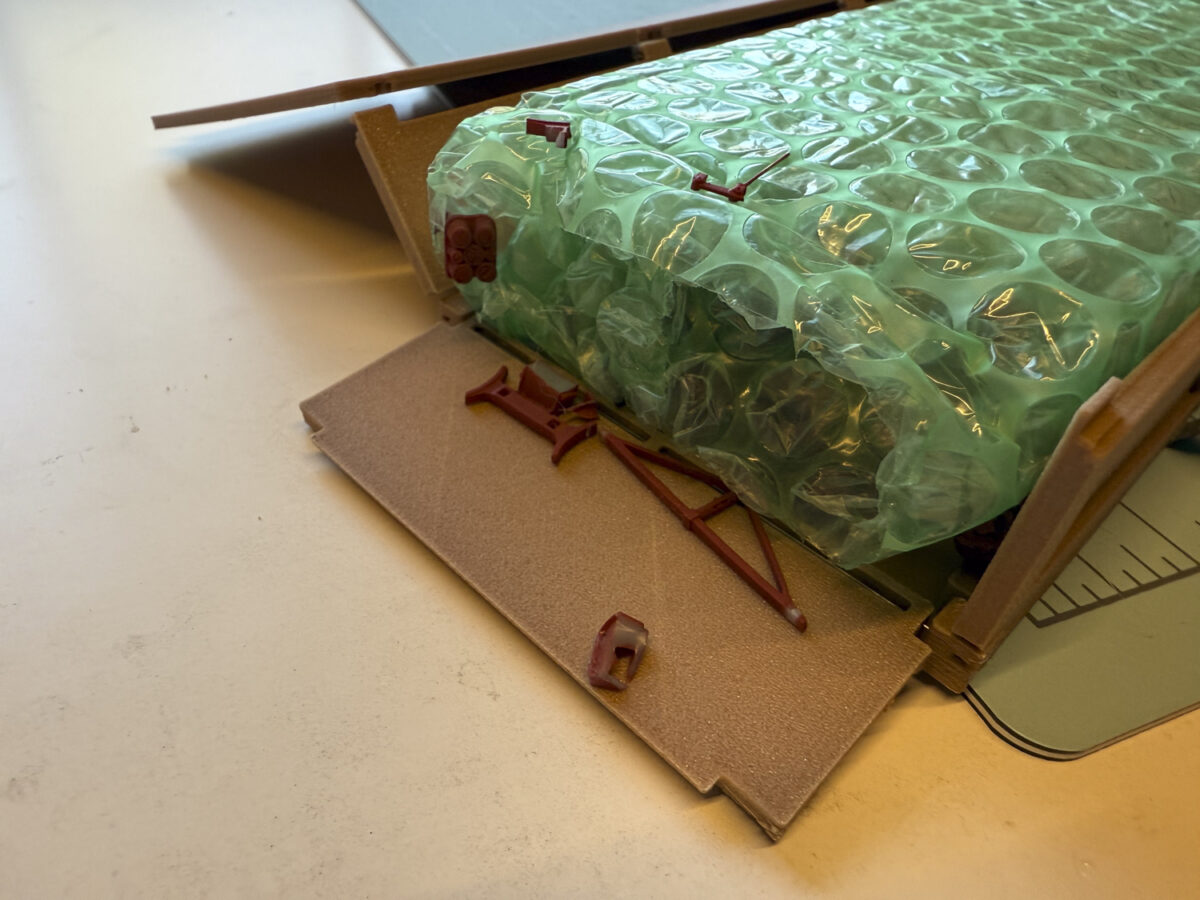
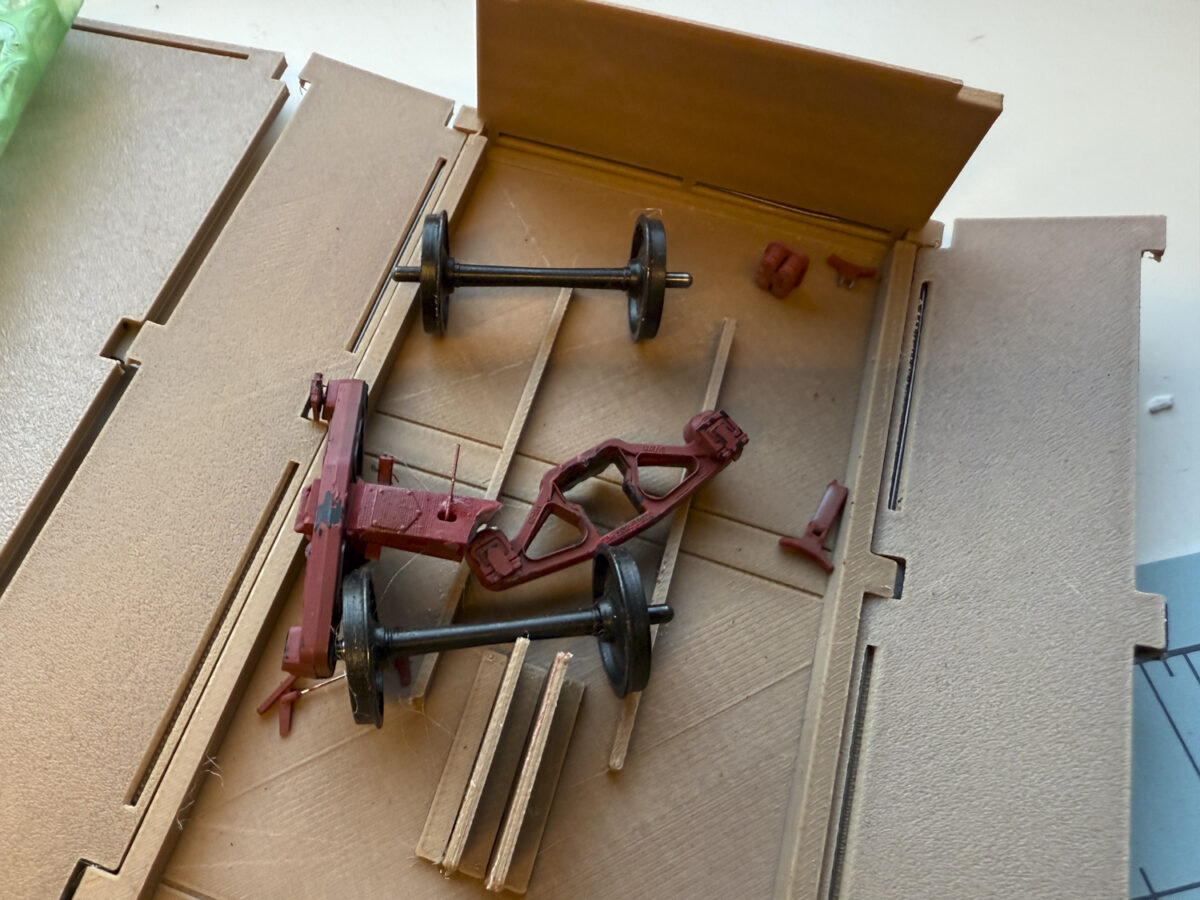
For some reason it was shipped inside a printed box. As I opened the box I heard sounds, not a great sign. Then I saw parts.
Turns out it was just the trucks. Disappointing? Yes, but not the end of the world. The trucks appear to be Intermountain side frames with Protocraft Wheelsets. The 3D printed bolster were the weak link. That does not speak well for 3D Printing.
I will need to take a closer look at the draft gear. This appears a little misaligned.
Nice model, I’ll let you know more of what I think when I can look at it more thoroughly. First impressions are not the greatest based on condition of what I received. Fancy box to ship the model in that did not do its job to protect the model in transit. That does not speak well of the engineering behind this.
Sometimes a simple solution works. Small bubble wrap around the model and then larger bubble wrap around that has worked well for me in the past.
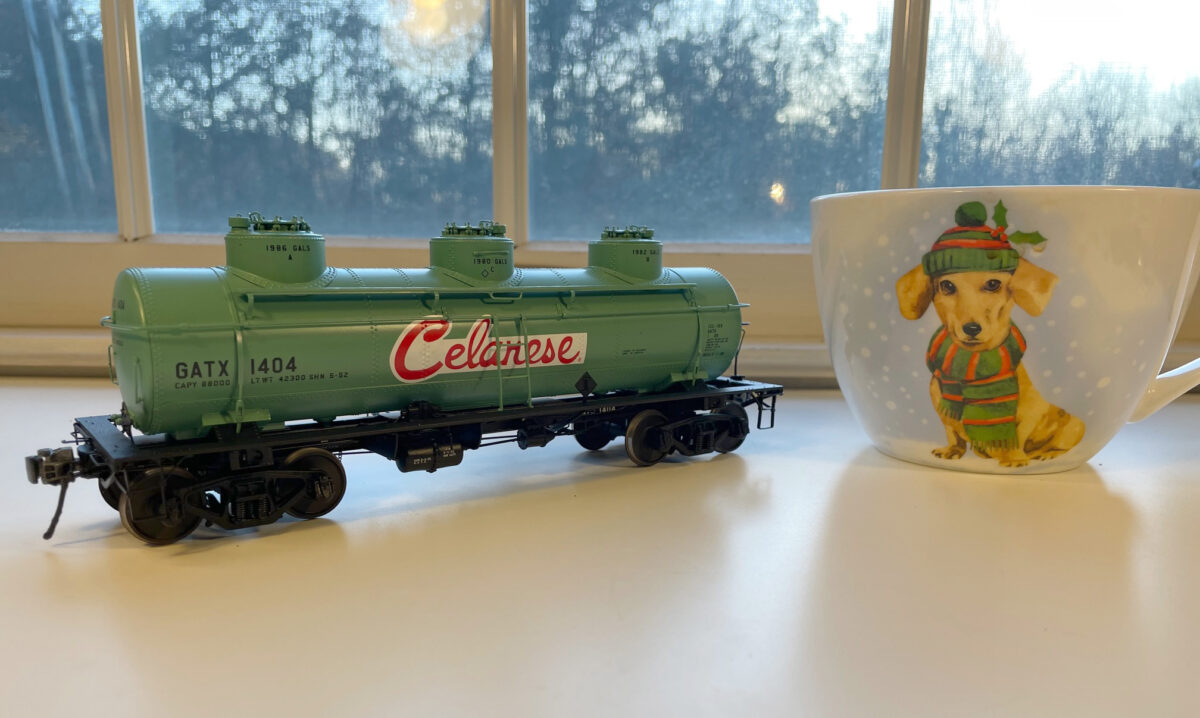
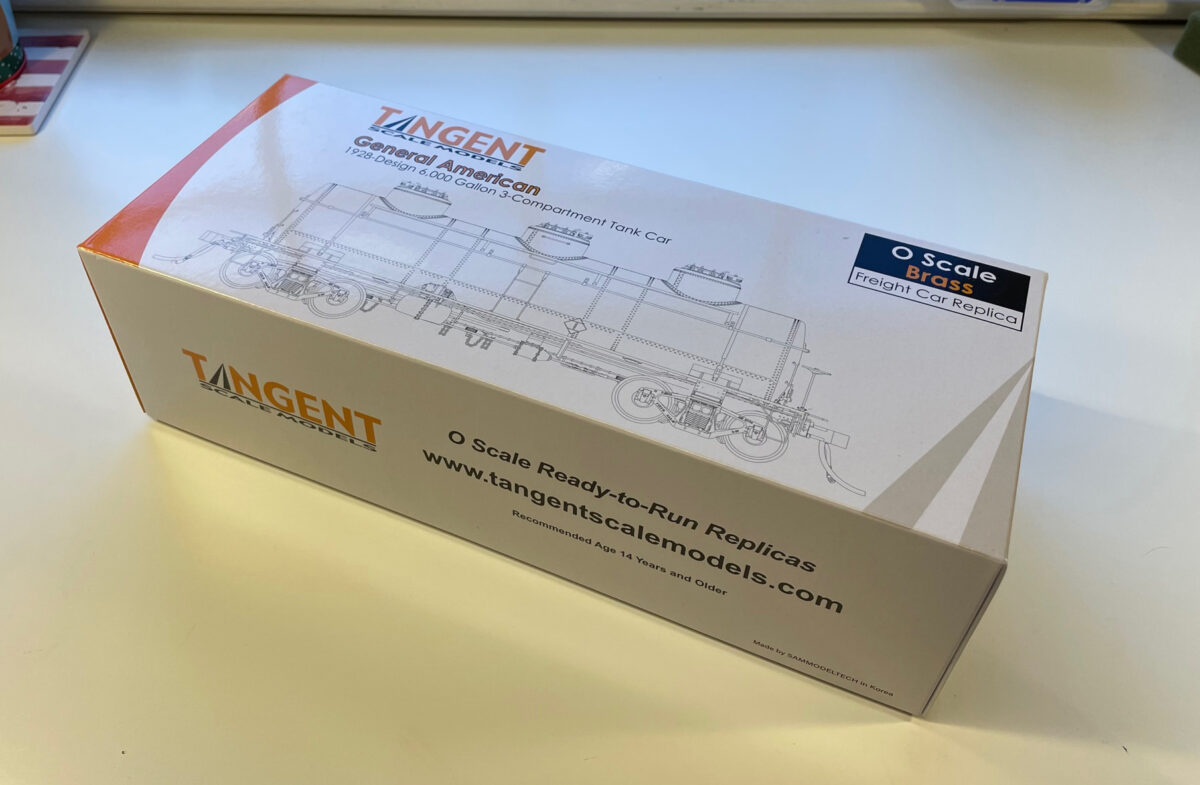
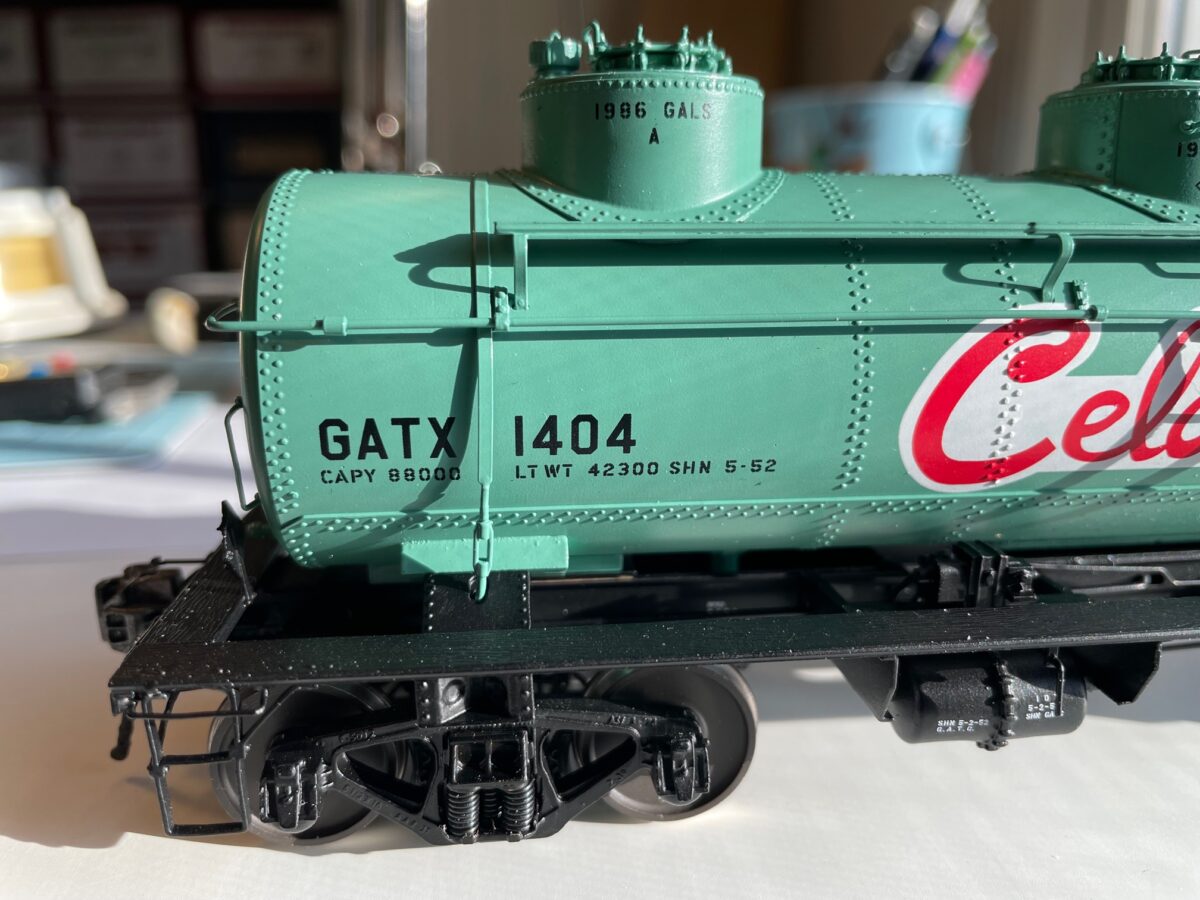
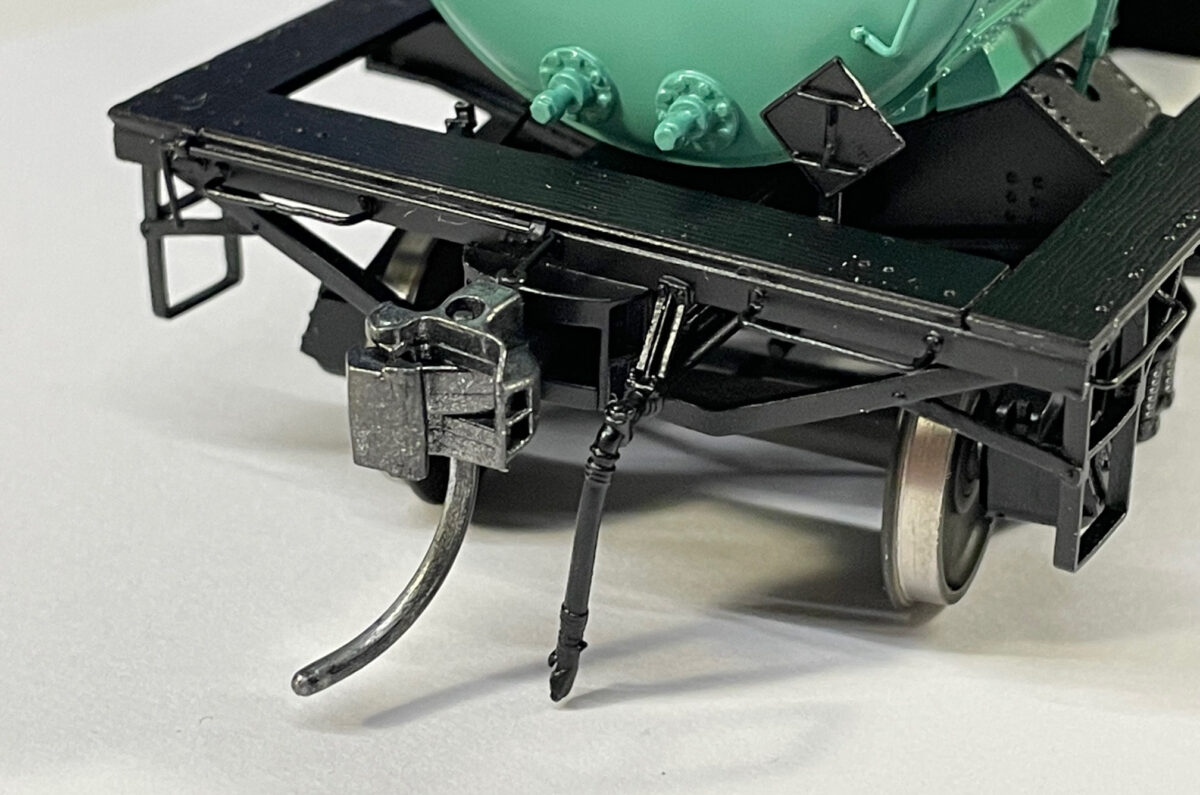
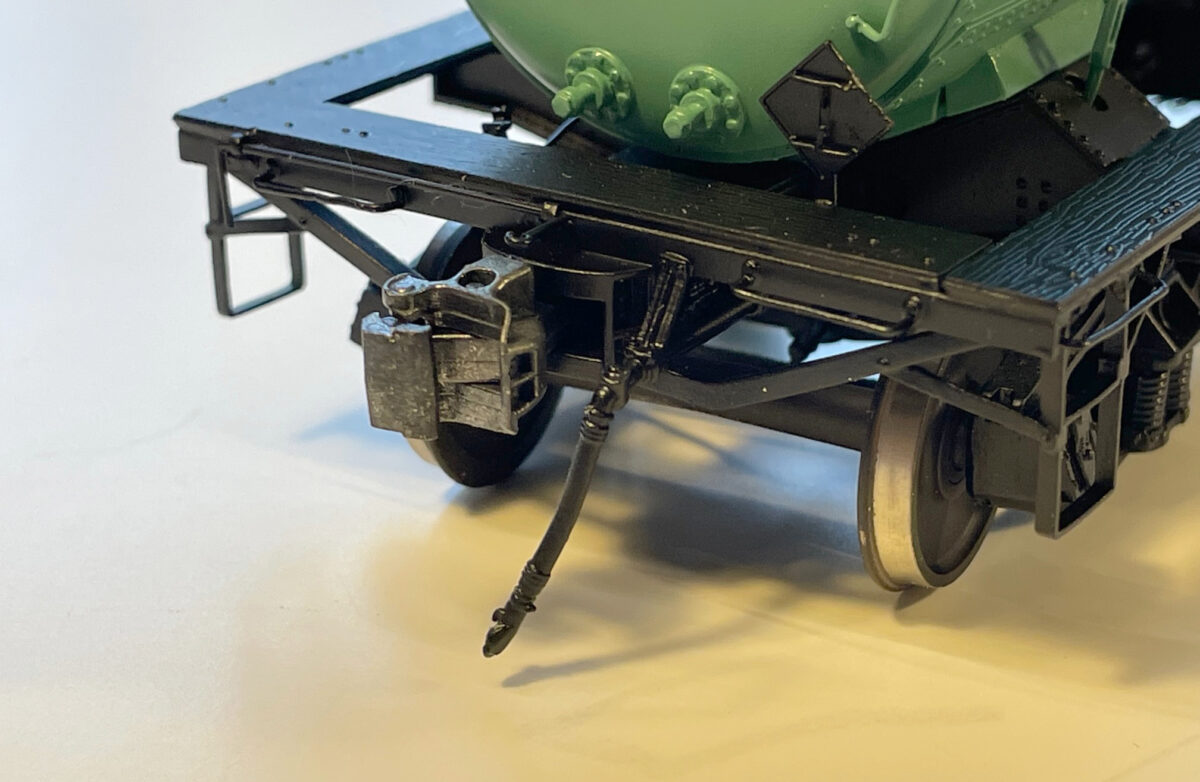
My General American 1928-Design 6000 Gallon 3-Compartment Tank Car from Tangent Scale Models arrived yesterday. This morning I’m enjoying my morning coffee in my dachshund Christmas cup looking it over this fine new model release.
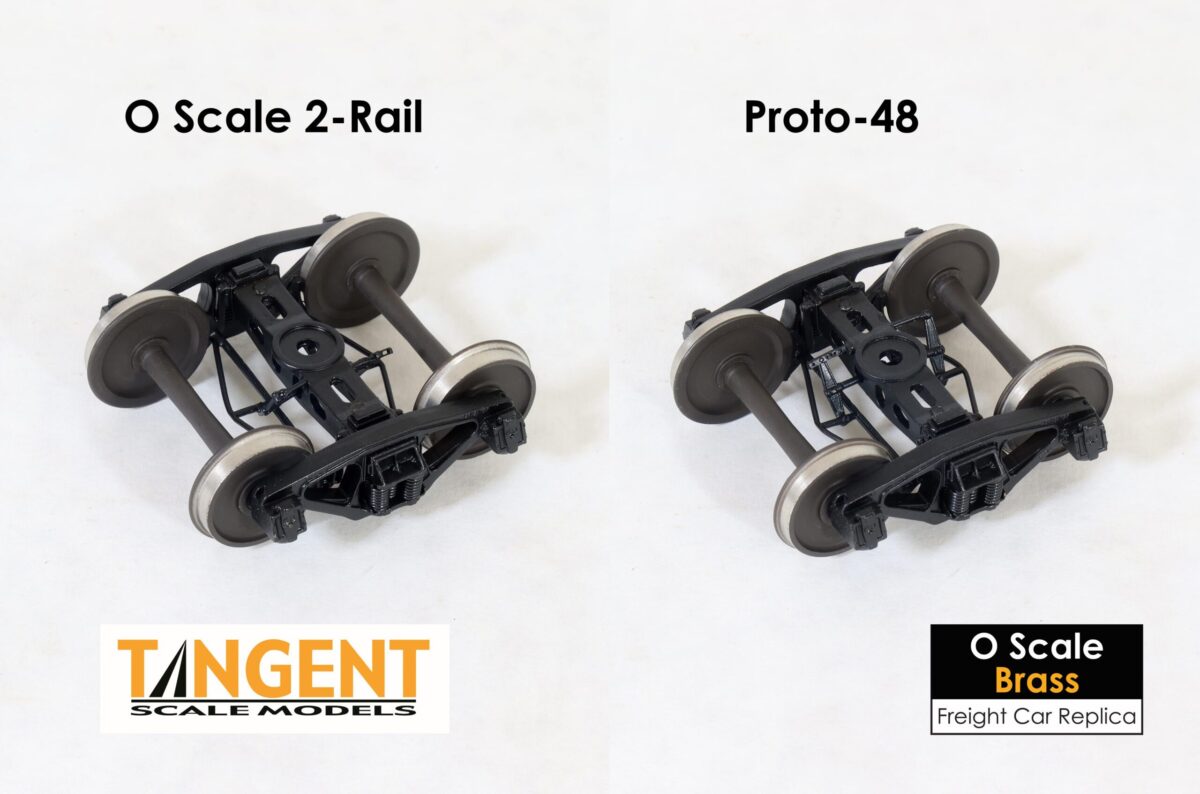
This is Tangent Scale Models first model released in O Scale. The model is offered with either O Scale or Proto48 trucks. They are not the first to do that in O Scale, both RY Models and Protocraft have sold their models that way.
First Impressions: It really is a nice car! It is well engineered, well decorated and a solid model. Handling it on the workbench, I can say it is not as fragile as some highly detailed O Scale models in the past.
Some things are different from most brass imports. Starting with the box. Much thinner construction than often seen in brass models. Yet strong enough to make the trip to the US and keep the model safe from damage.
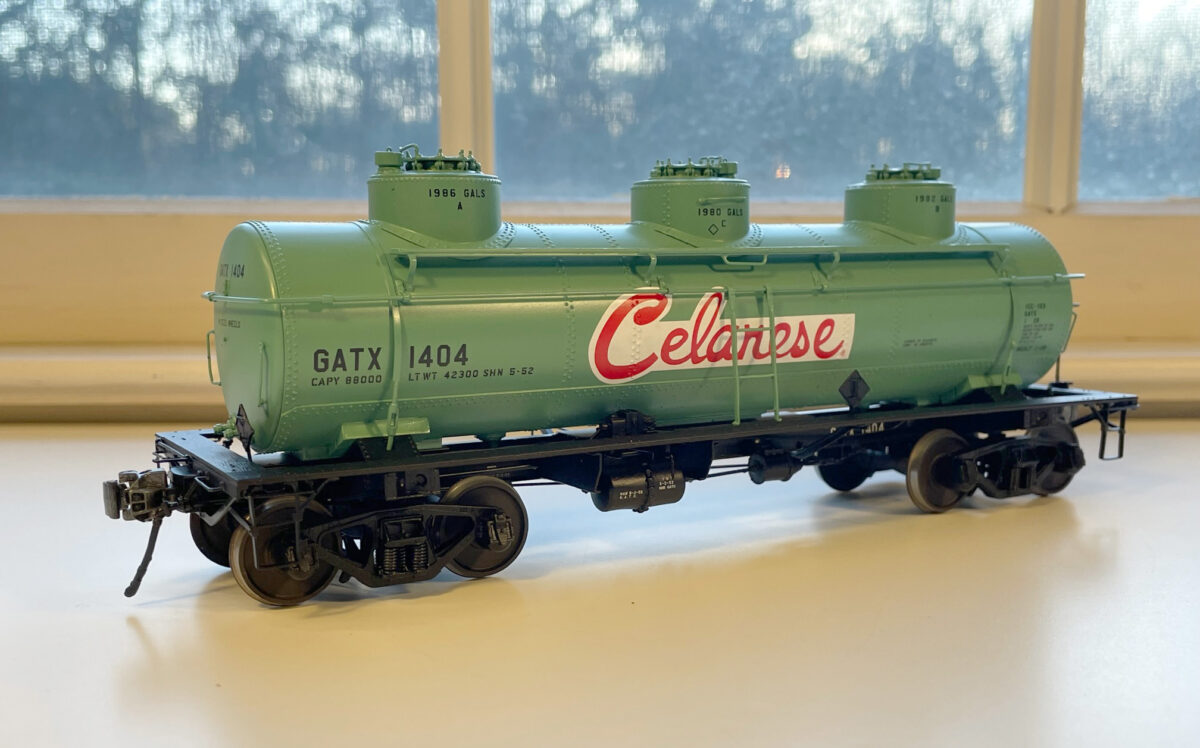
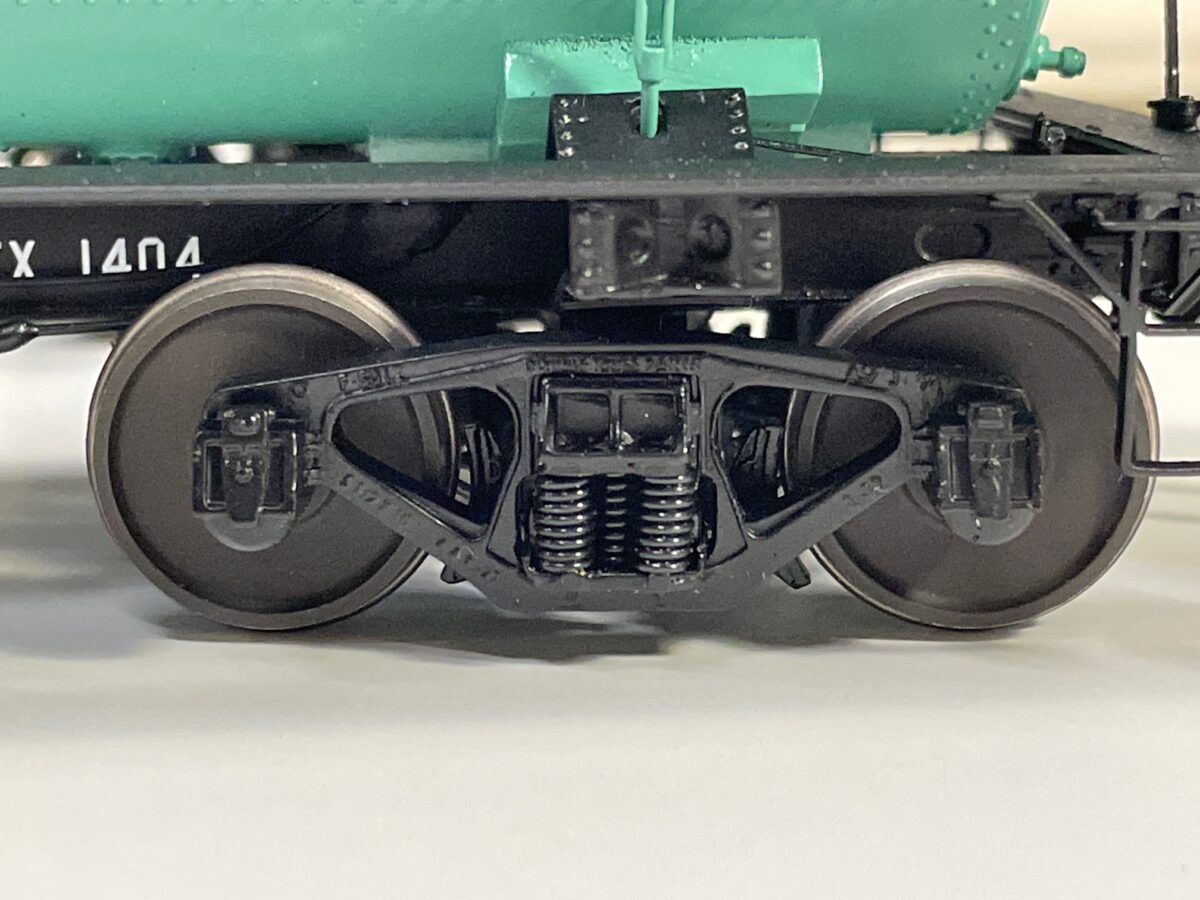
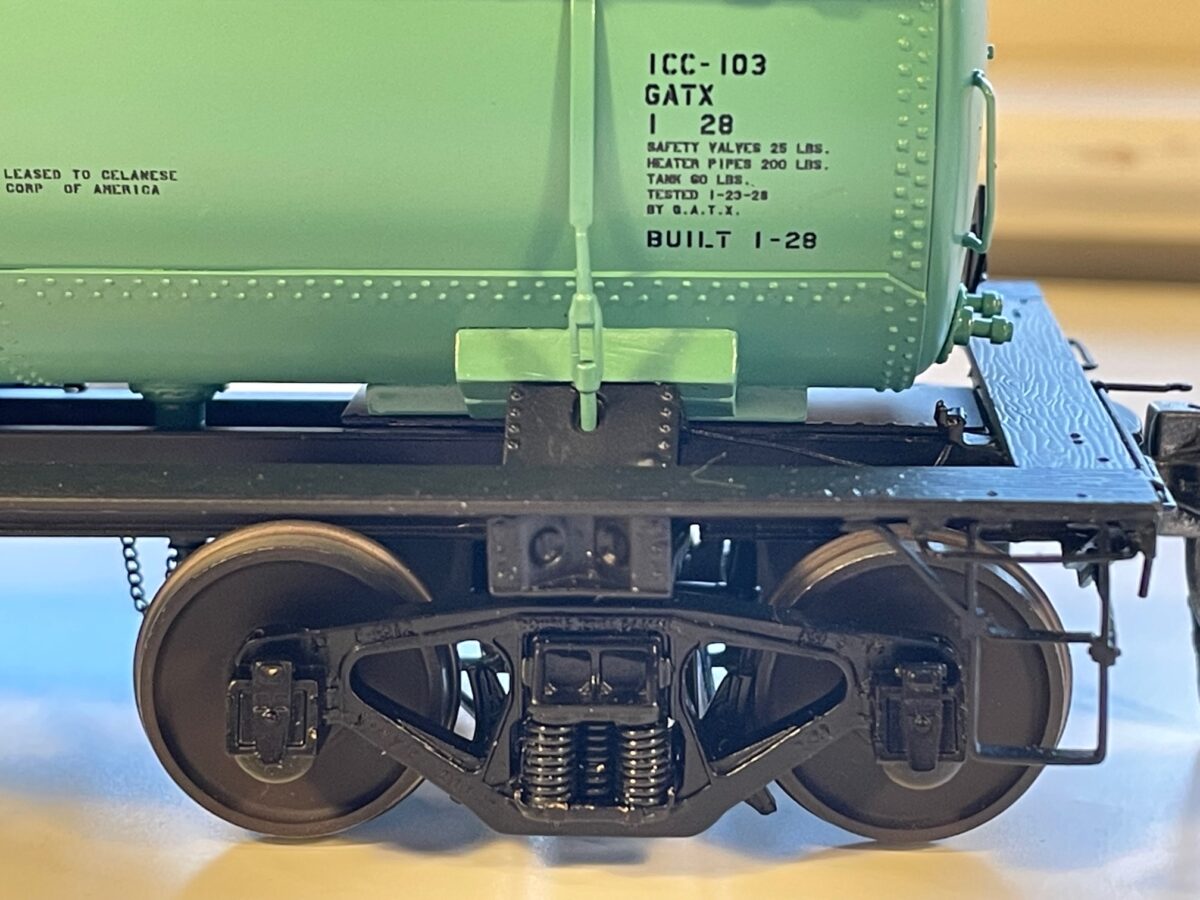
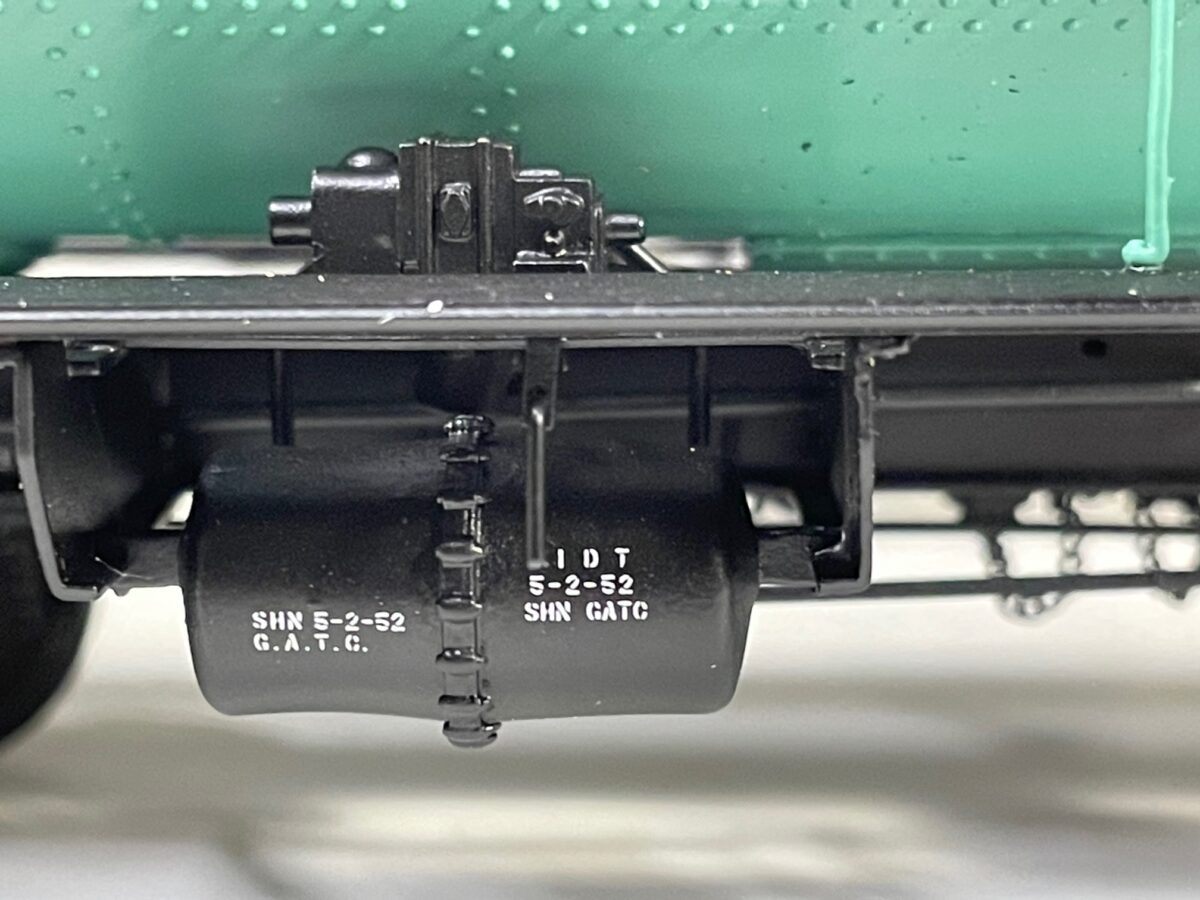
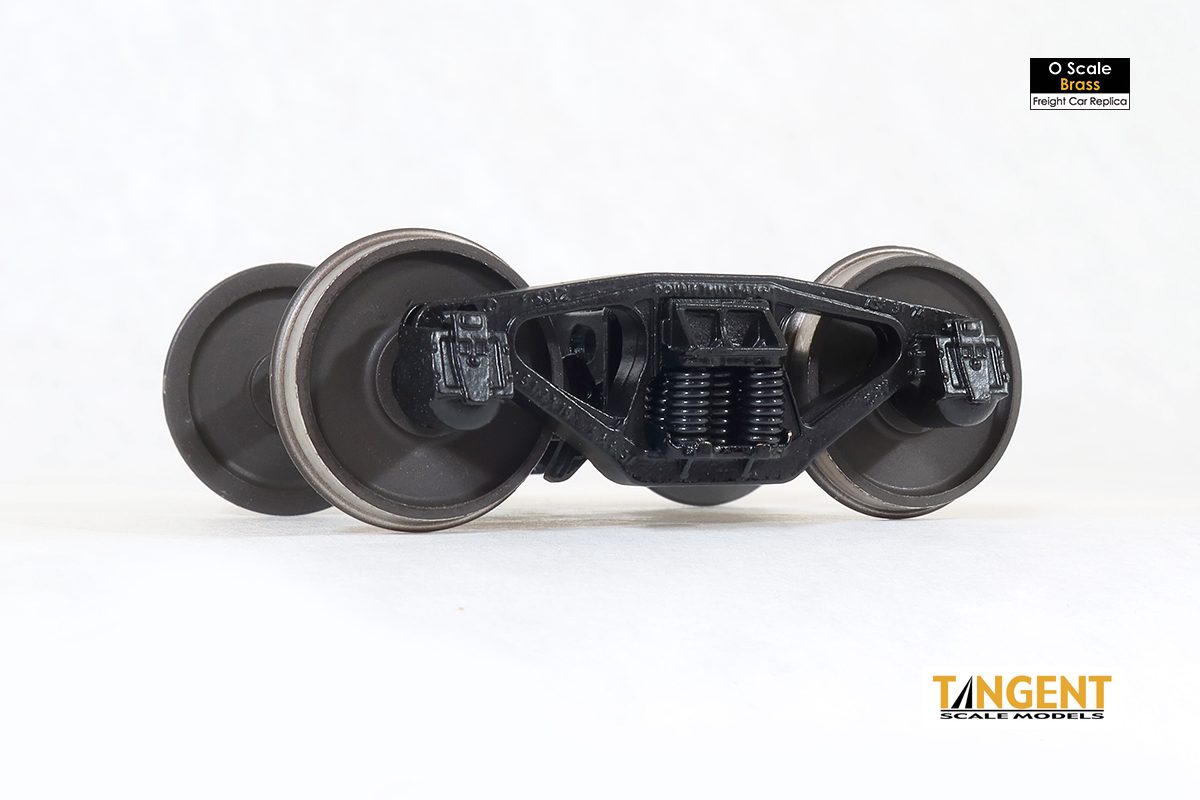
The Proto48 Trucks are nicely done and very free rolling. They have roller bearings in the journals. The spring cluster is nicely modeled compared to the usual ball point pen type springs used on some trucks. You can’t see through the spring cluster on the prototype and you can’t see through it on the model either.
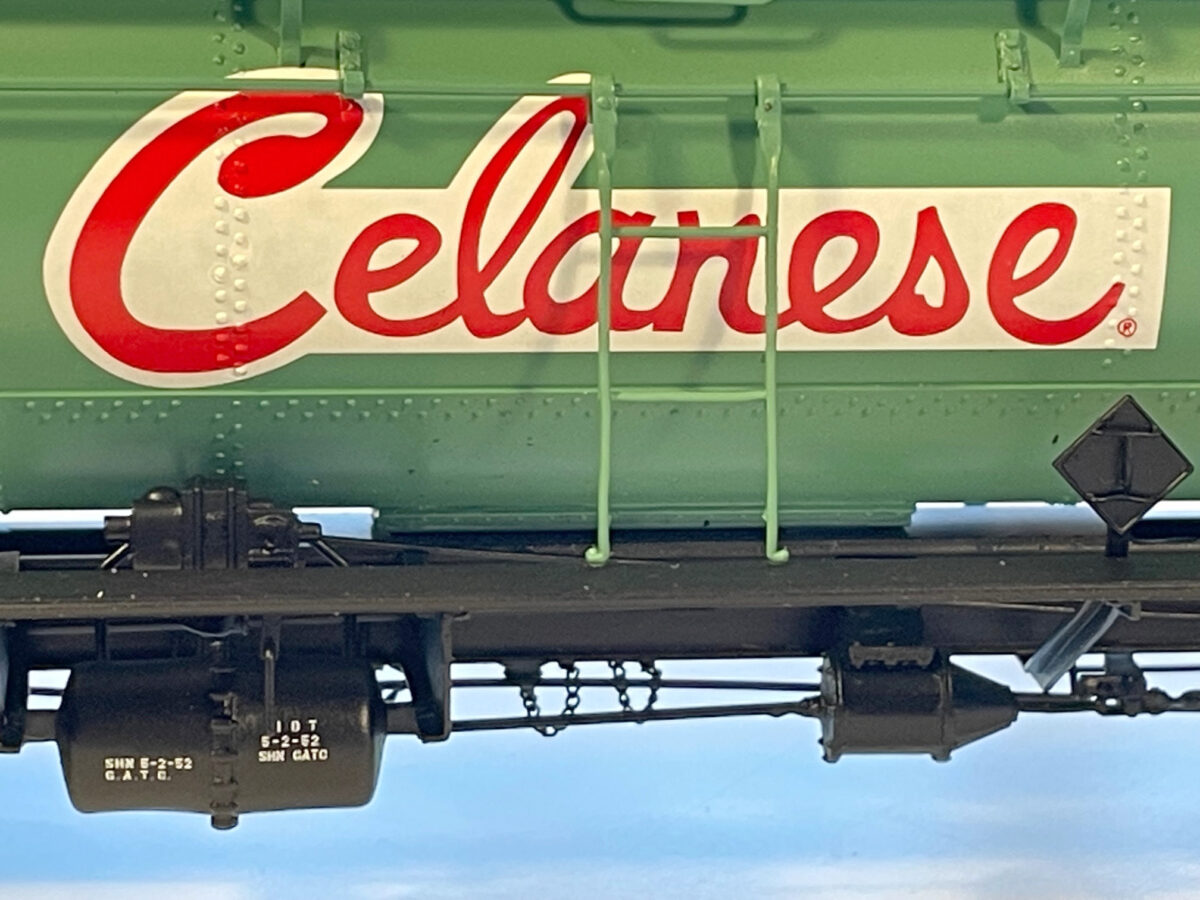
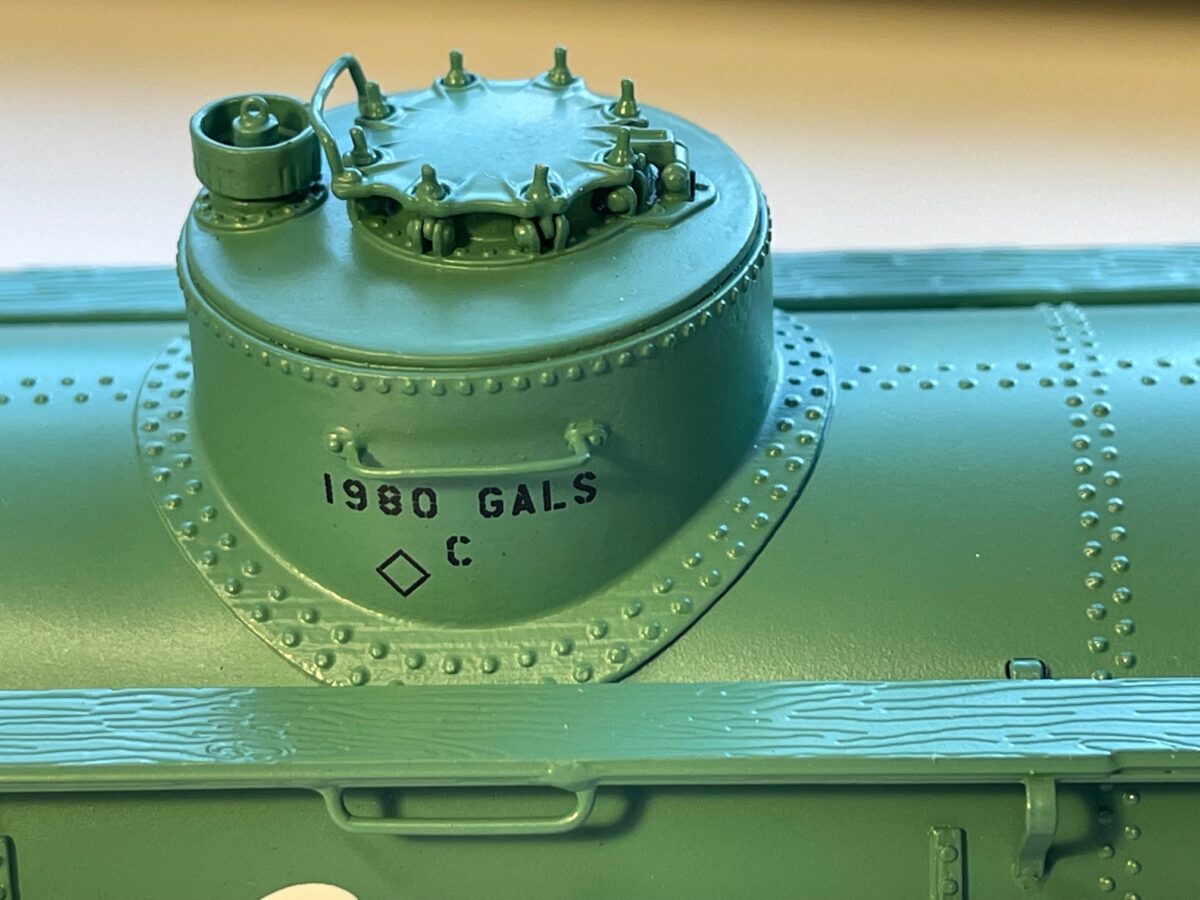
Here you can see the fine decoration on the model.
Now to point out some of the engineering standouts. The draft gear is nice. Rather than just leaving a place to mount the oversize Kadee coupler box the box and draft gear are one unit to the bolster.
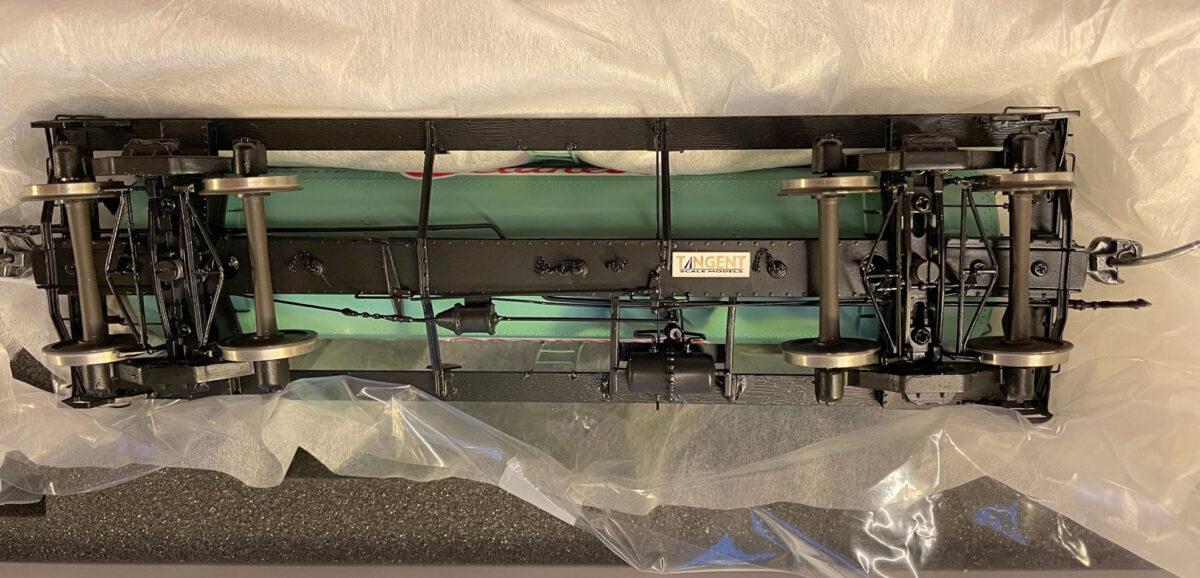
Here it is from the top.
I think it looks even better without the coupler pin.
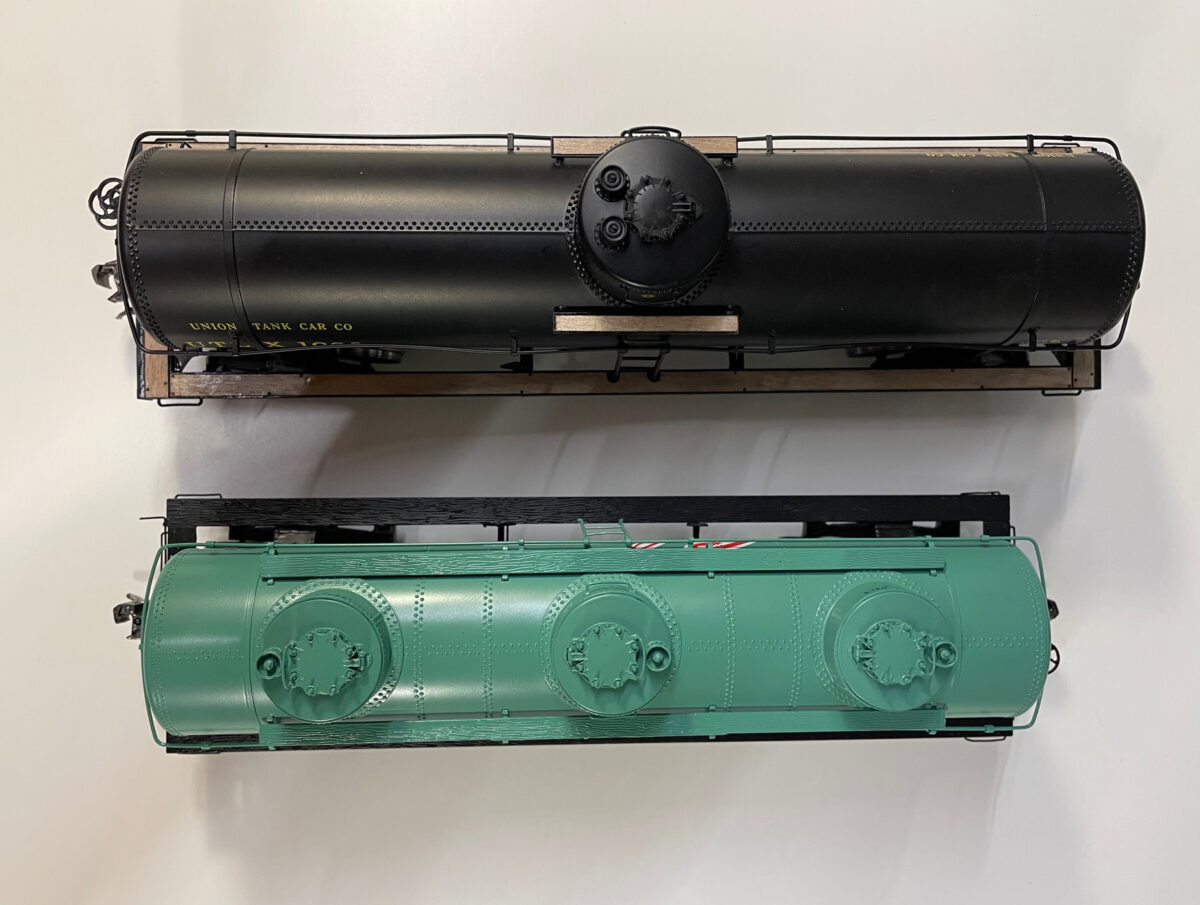
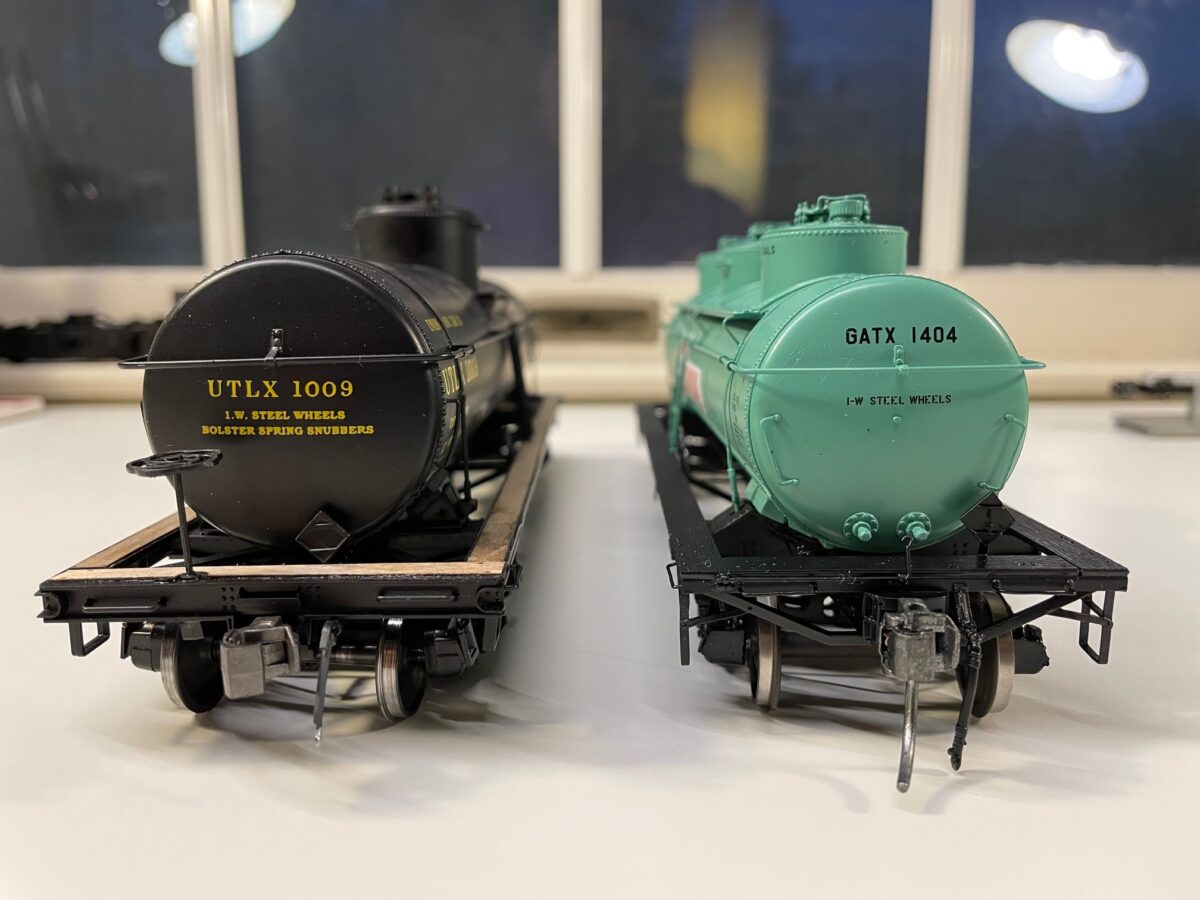
And now just for a comparison, here is the Intermountain ACF 8000 Gal tank car along side the new Tangent Scale model. You can see the Tangent model is shorter ad the tank diameter is smaller.
I normally go for more of the Plain-Jane types of freight cars. I almost ordered the 1958 version of the GATX black car. I could have easily backdated the dates to work for my modeling period of 1952. I chose instead to buy a car that I didn’t have to modify at all. Looking at how nice the lettering is applied to the car, I’m glad I did.
Some people might think the the asking price is high. If you consider the added price of a custom paint job and a pair of Proto48 replacement trucks, the price comes in under what some undecorated 30 year old brass cars from Pacific Limited currently sells for. I think this new release from Tangent Scale Models is a bargain.
Since the Tangent Scale Models announcement the other day, a few people have been very vocal that they wanted a different model produced. Well if that is truly the case, they can drop the cash and invest in a new company and produce whatever they want. They don’t seem to do more than just complain anyway. I’m waiting for their announcement of a new company and a new model release.
O Scale / Proto48 has a new manufacturer, Tangent Scale Models announced the release of a new model of a GATC 6,000 Gallon 3-Compartment tank car. They are now available from the Tangent Scale Models website.
The models are hand-crafted in brass in Republic of Korea by SamModel and are offered in both O scale 2-Rail and Proto-48 configurations.
Tangent Scale Models has offered the modeler a choice of O Scale or Proto48 models with the release of their new 50 ton truck.
Tangent Scale Models has a fine reputation in HO and N scale. I am glad they have taken the chance on the O Scale/Proto48 market with this fine new offering. One of these is in transit here now. I’ll have more thoughts and photos of it after it arrives.
During the Proto48 Meeting at this year’s Chicago show, the topic of the blackened wheel treads came up. I was very surprised by how much talk there was about them and how passionate some of the folks were. It never dawned on me that some folks think it’s difficult to polish the wheel treads.
The above image shows a pair of Yoder PRR 2D-F8 50 Ton trucks straight out of the box about to find a home under an Atlas X29. Notice the blackened wheel treads.
I use a small my Dremel with a Rubber Polishing Wheel 320 Xtra Fine grit Silicon carbide. They come 100 in the bag for about $20. I think I found them on ebay a couple of years ago. Since then I may have used a half dozen of the 100 wheels. When they wear down or get a grove in them I just put on a fresh wheel.
I hold the truck in my hand and work the polishing wheel around the wheel. They can get hot so you have to work out a sequence to be able to continue to hold the truck. After about five minutes work, the wheels are polished.
What’s all the fuss? They talked about this issue longer then it takes to polish the treads on a pair of trucks.
BTW, this also works on loose wheelsets. Just polish the treads before you assemble a truck.
All done, now back to putting these under the X29.
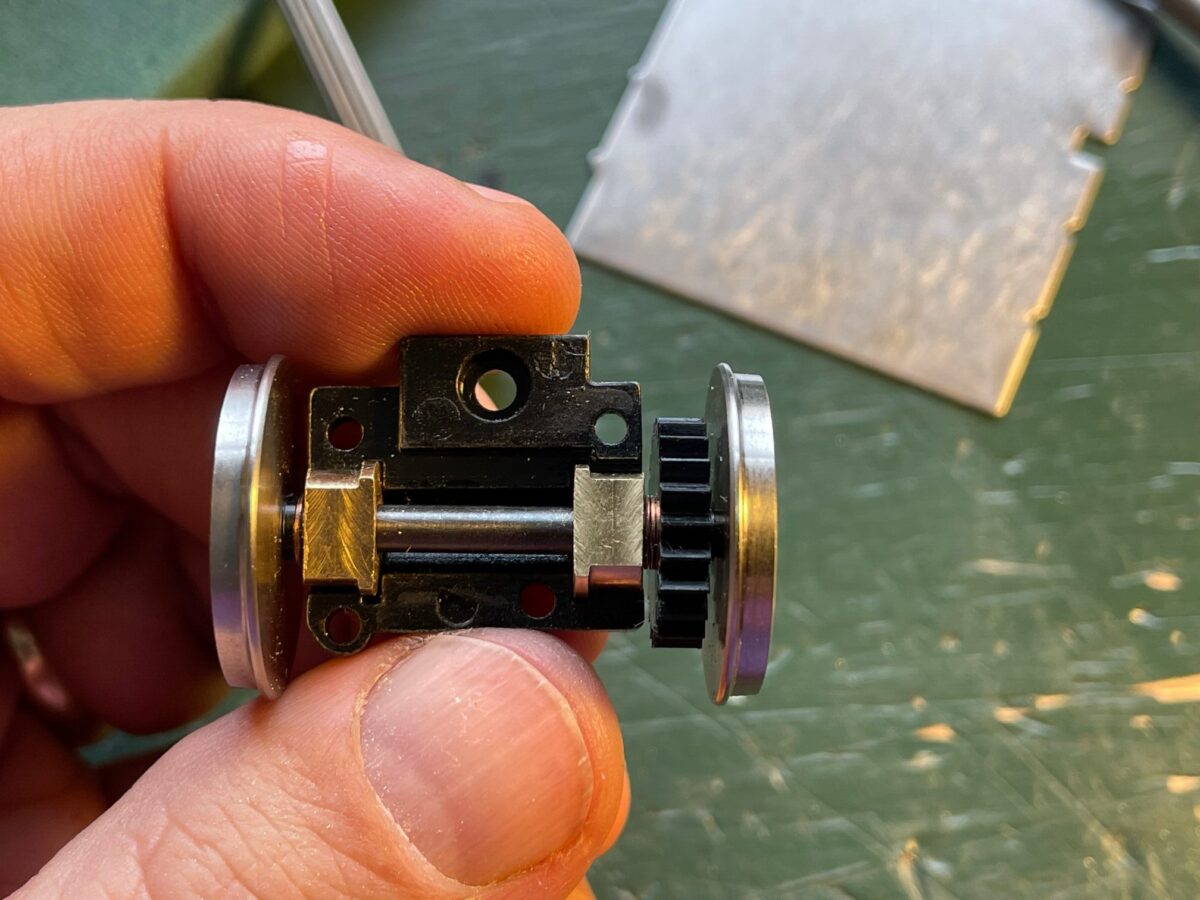
Original Atlas O axel assembly and the NWSL Conversion Wheelset
“Drop-In Conversion Parts” that is such a nice phrase. It’s not always a reality.
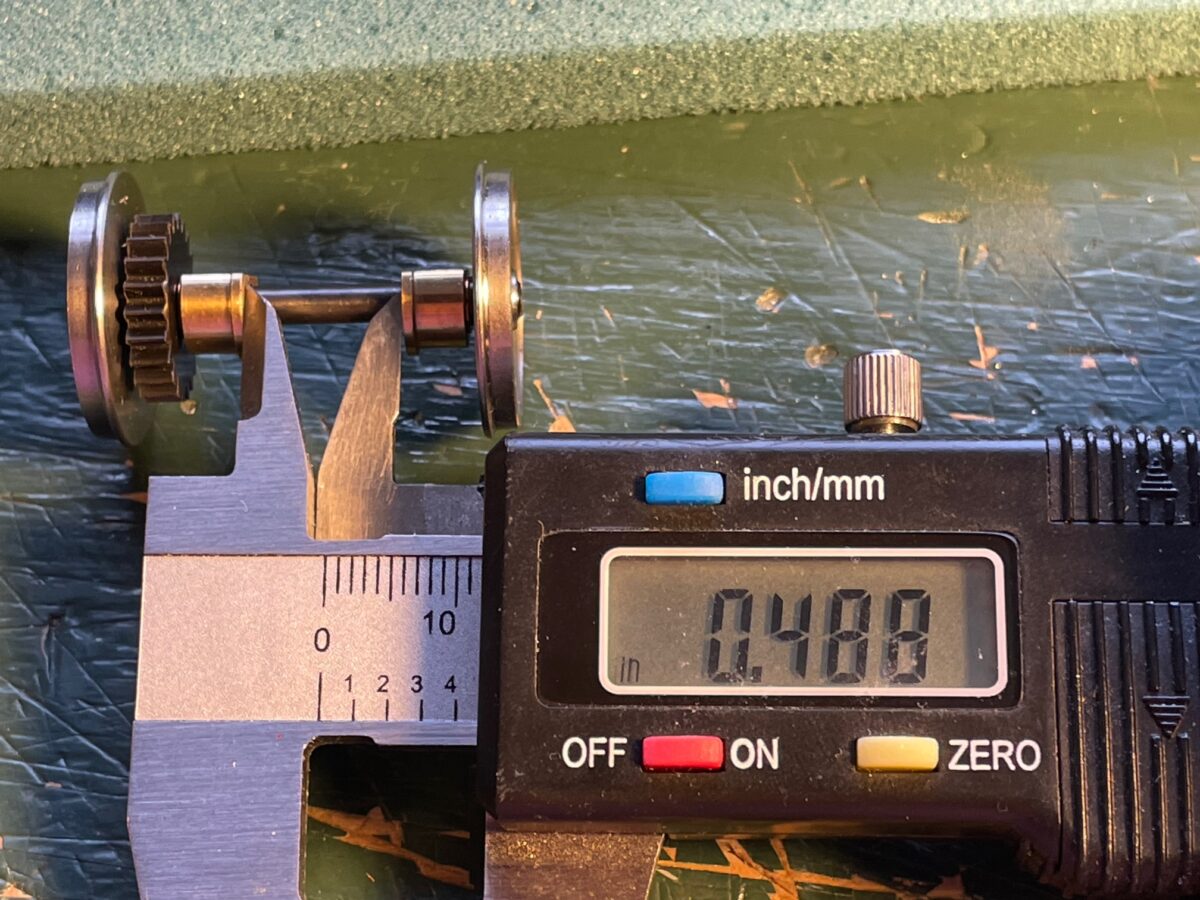
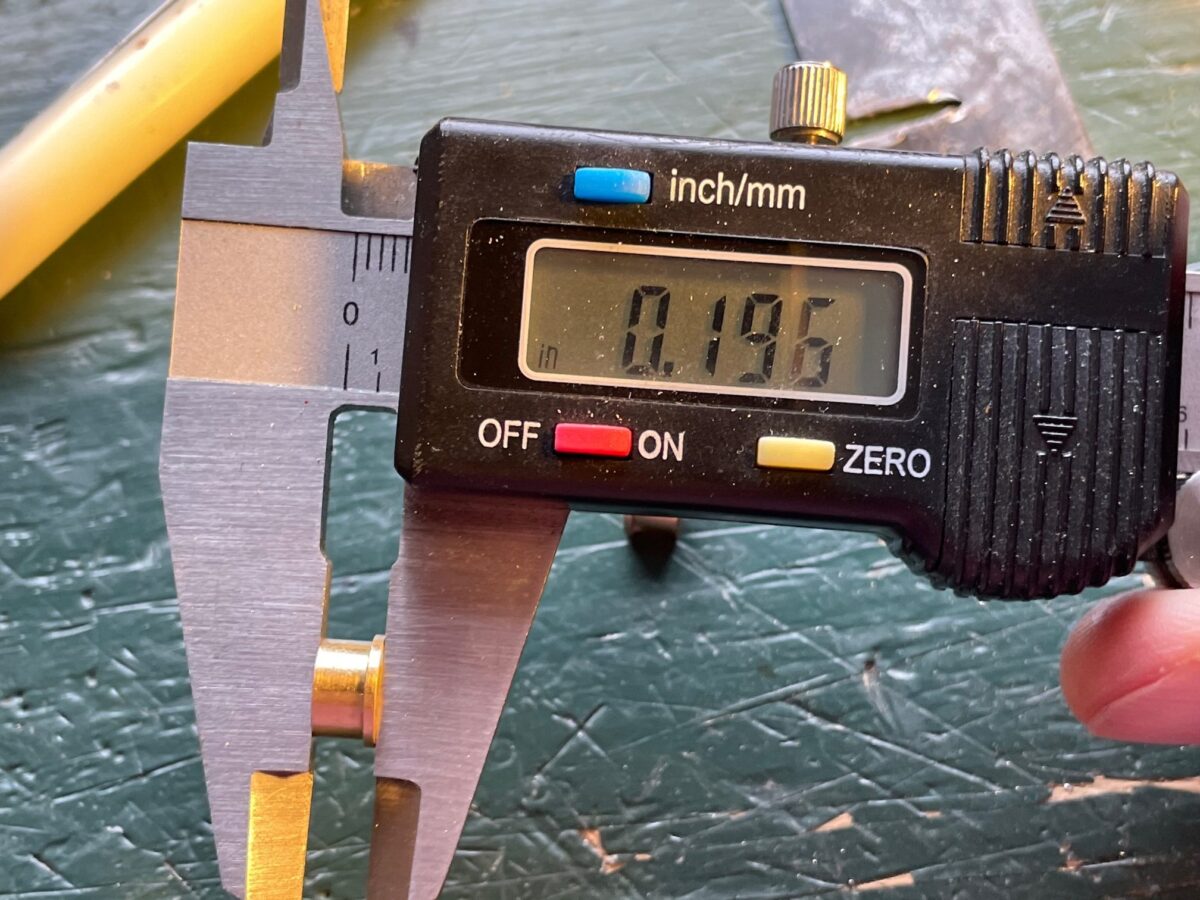
If you read yesterday’s post you know of my troubles installing the NWSL conversion wheelsets into the Atlas O F3B. To recap the back to back of the ridge on the bushings needed to be at least 0.496″.
The NWSL parts had a back to back measurement of 0.488″ – 0.490″.
I know it’s only 0.006″ – 0.008″ difference but that is the difference of them fitting or not.
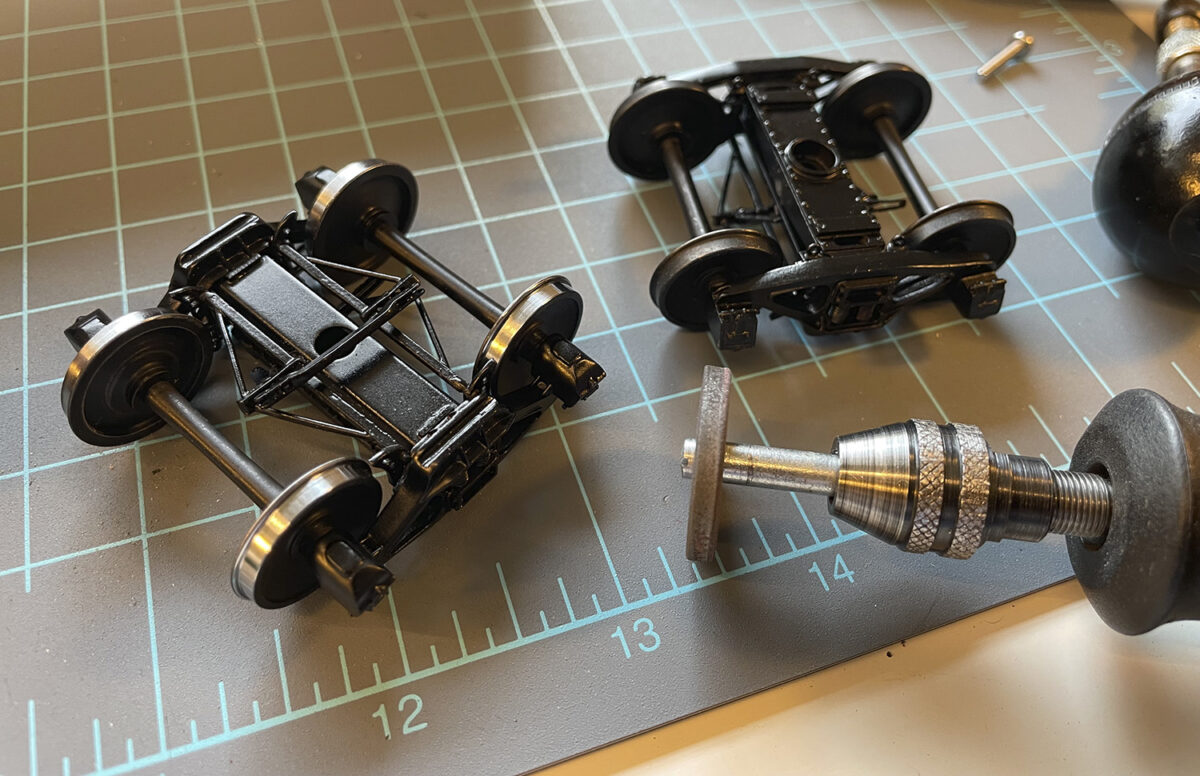
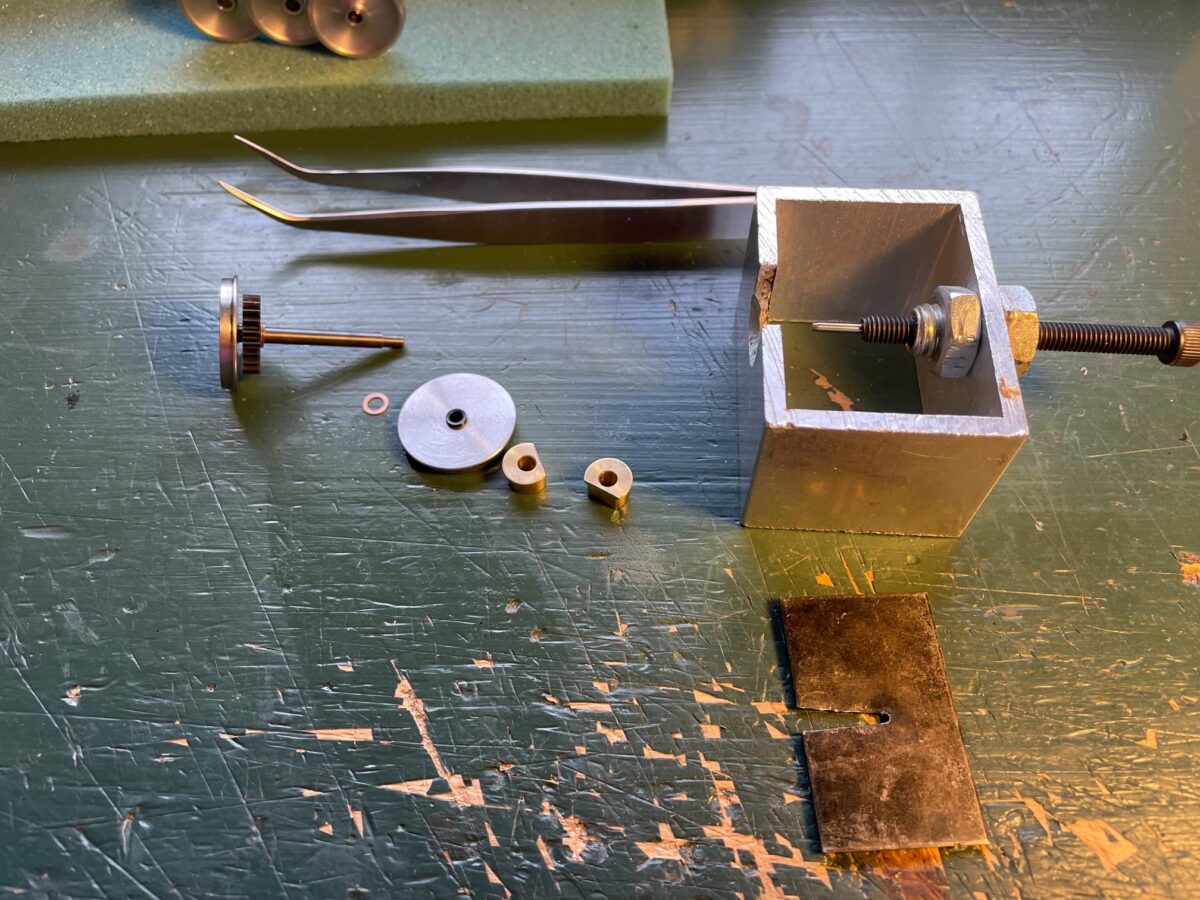
Time to disassemble the first axel.
This was the before measurement for the bushing.
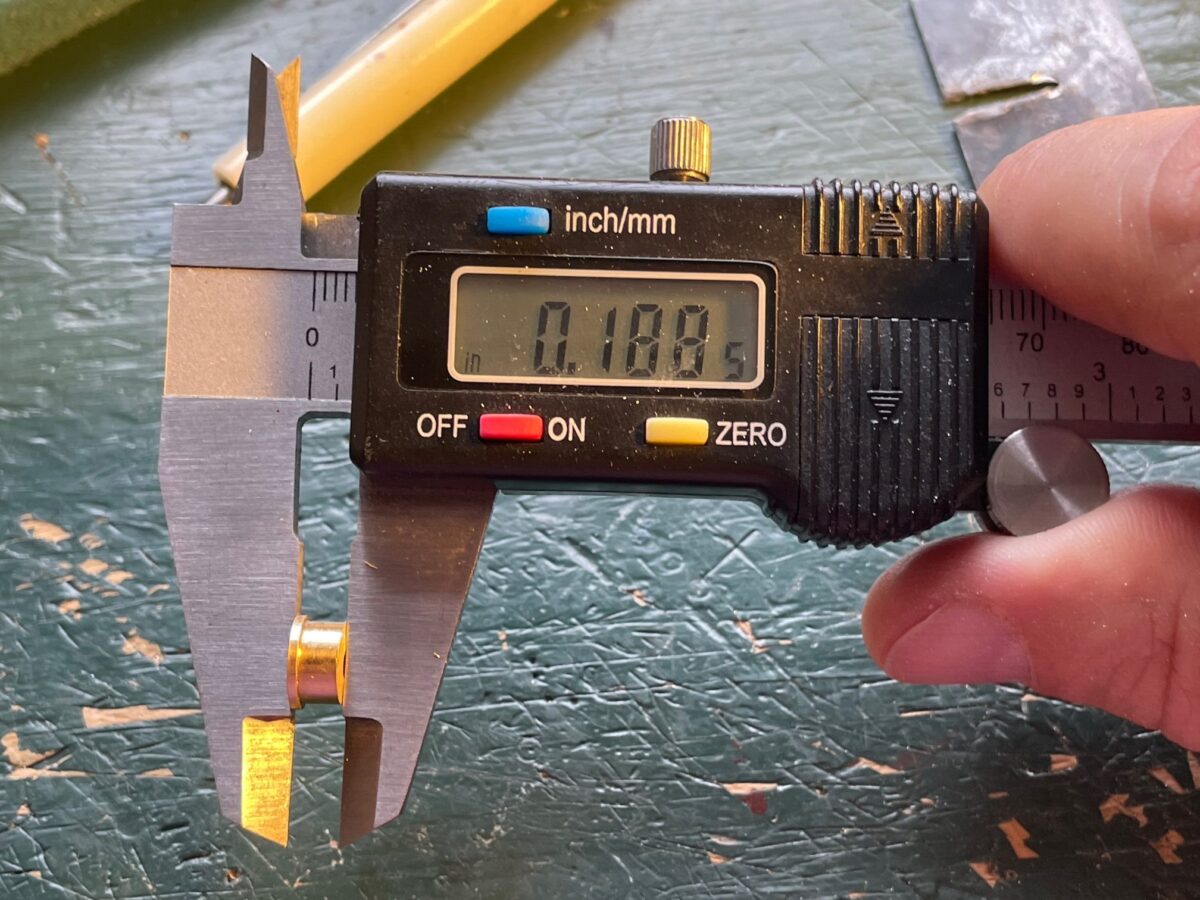
This is the bushing’s measurement after it went on a diet.
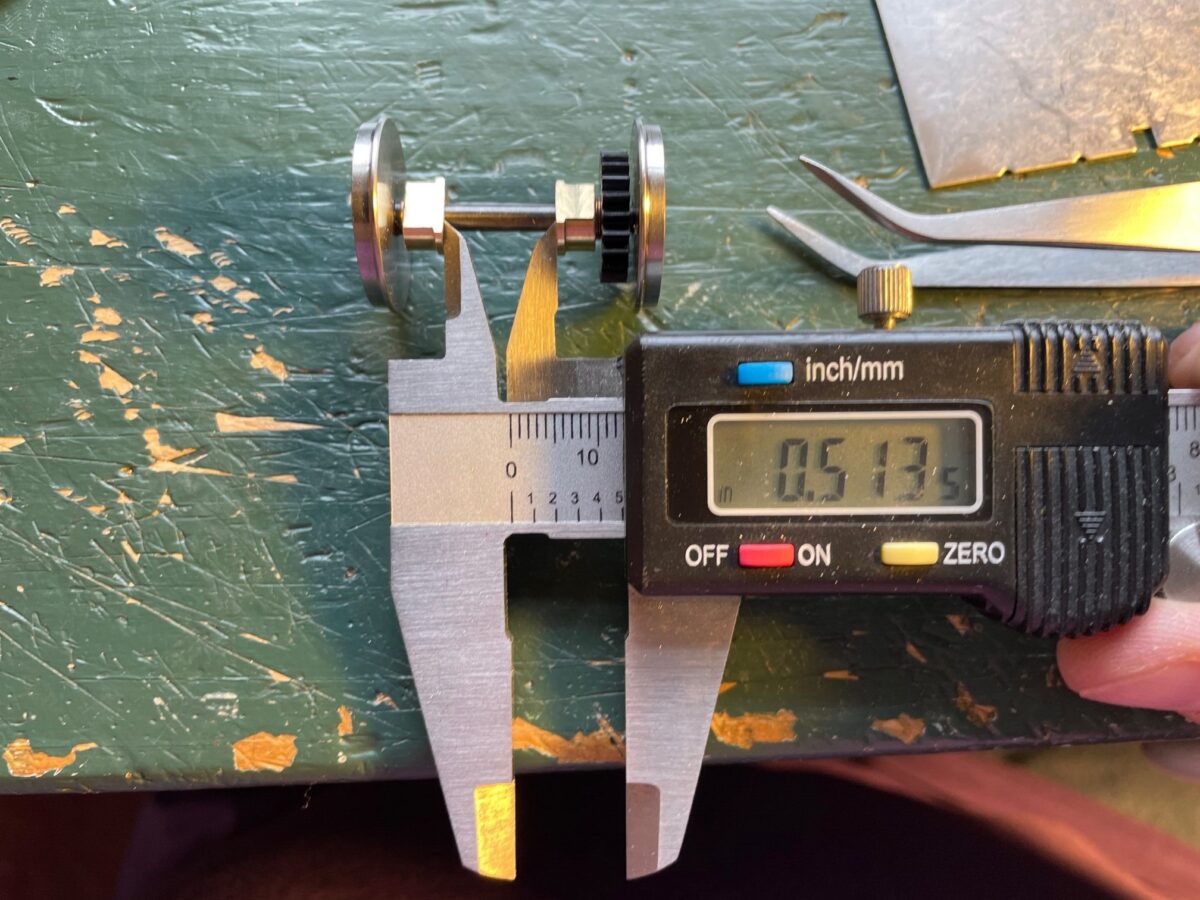
The new back to back measurement. And the most important thing….. They ACTUALLY were a drop-in fit into the grove on the top cover.
After modifying the two axels that didn’t fit, I had to open up the one truck where the axels did fit. I knew they were a very tight fit and just thought they would benefit from also being modified in the same manor.
I am happy to report that this last photo shows all four axels modified and installed. Next time I work on this model, those side frames need to move a lot closer to the wheels, but that is work for another day.
Truth be told, it took about the same amount of time to write this post as it did modify the bushings to make the axels fit properly. So it really wasn’t a big deal at all.
I’m still bothered that the conversion parts did not fit as delivered from NWSL. I’ve been modeling in Proto48 since the early ’90’s, I know there is no instant gratification in Proto48. We have to actually work on our models.
What if I was a newcomer to Proto48, this experience would have been very discouraging. It could have easily made me question if modeling in Proto48 was worth the extra effort. Sometimes the newcomer to Proto48 needs some simple wins to give them the motivation to keep going and try more difficult projects. This type of Proto48 conversion should be one of those simple wins.
Well it’s nasty outside this morning. Here in New Jersey we are experiencing a nor’easter moving past us just off the coast. They have blizzard conditions down at the shore. Just snowing and high winds here. I’m waiting for the snow to stop to go clear the walks later today. A great time to sit down at the workbench.
I had a friends model in to have the trucks repaired. That is his Pecos River Brass PRR G30 gondola sitting there on the bench. The springs came out of one of the trucks. It just needed to have the springs re-installed. Simple enough fix.
My friend wants to put this model out on the table at the Chicago show this year, so if you are looking for one of these fire off an email and I’ll pass it on to my friend.
Behind the PRR G30, you can see what remains of this week’s small project. I picked up an Atlas O CNJ F3B dummy at the last Strasburg Show. I was able to aquire a drive donor (the CB&Q F3A), the swap of the two drives went easy enough. Only little hick-up was the position of the front step. The hole for the B-unit location needed to be tapped to allow me to mount the step into the position under the door.
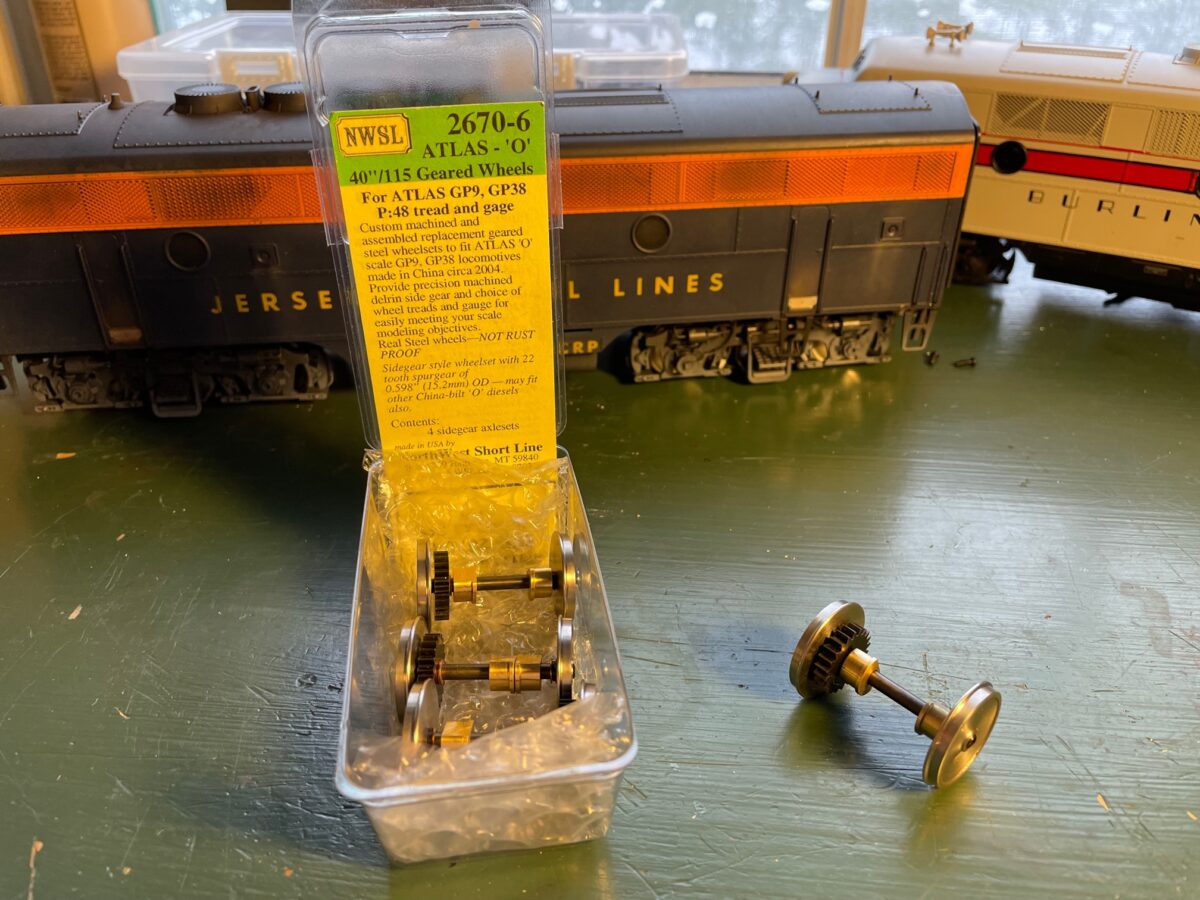
Since it was on the workbench still, I pulled out the conversion set I had purchased from North West Short Line for the Atlas O F3. The idea is that they are meant to be a direct replacement for the O Scale wheelsets.
Take off four screws and the cover plate on each axel and replace the wheel set. Simple, Right?
Well it started out that way. You can see the replacement wheels installed on this truck. They were a little tight but I was able to get them into the truck. We won’t talk about the language used to help guide them into the truck.
The second truck was not as simple. The wheels didn’t fit.
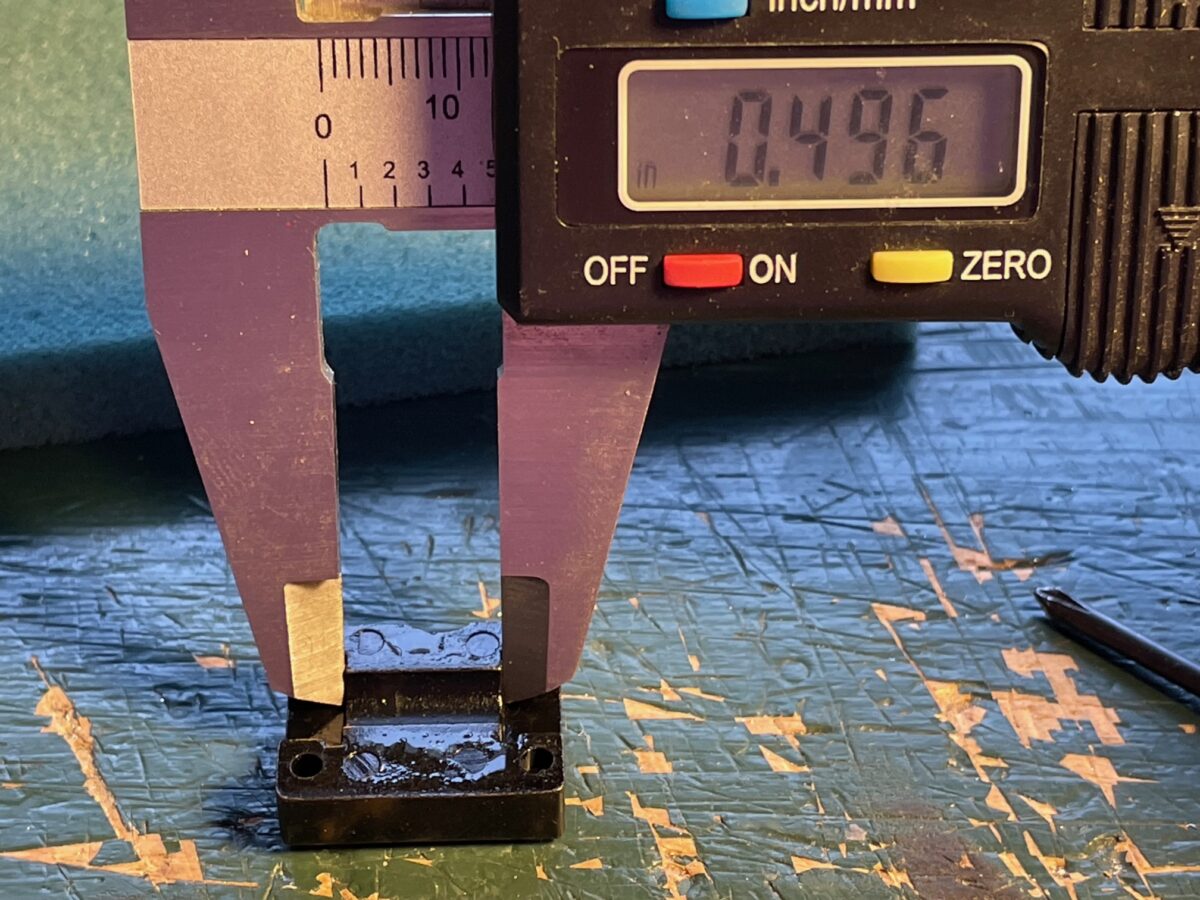
Here you can see the axel cover removed from the Atlas truck. The two brass bushing are meant to fit into the grooves on the cover and also on the truck center.
The groove has a back-to-back distance of 0.496″.
But the bushings on the NWSL conversion wheels had a 0.488 back to back spacing. Looks like they are not so “drop-in” a replacement. There is no way these could EVER fit into that truck.
I can pull the non-geared wheel off, which will allow me to remove the bushings from the axel. Then I should be able to mill down the thickness of the bushings to give me the needed clearence. Then I’ll have to reassemble the axels again.
BUT this ALL should not be needed on what is supposed to be a drop in replacement part. At $64.95 USD (plus shipping) per conversion set they should work as a conversion set and NOT be a conversion PROJECT. I’m not a happy NWSL customer at this point.
For those that want to know. I have two sets of the NWSL Altas O F unit replacement wheelsets. Only two out of the eight axels I measured will actually fit into the Atlas O trucks.
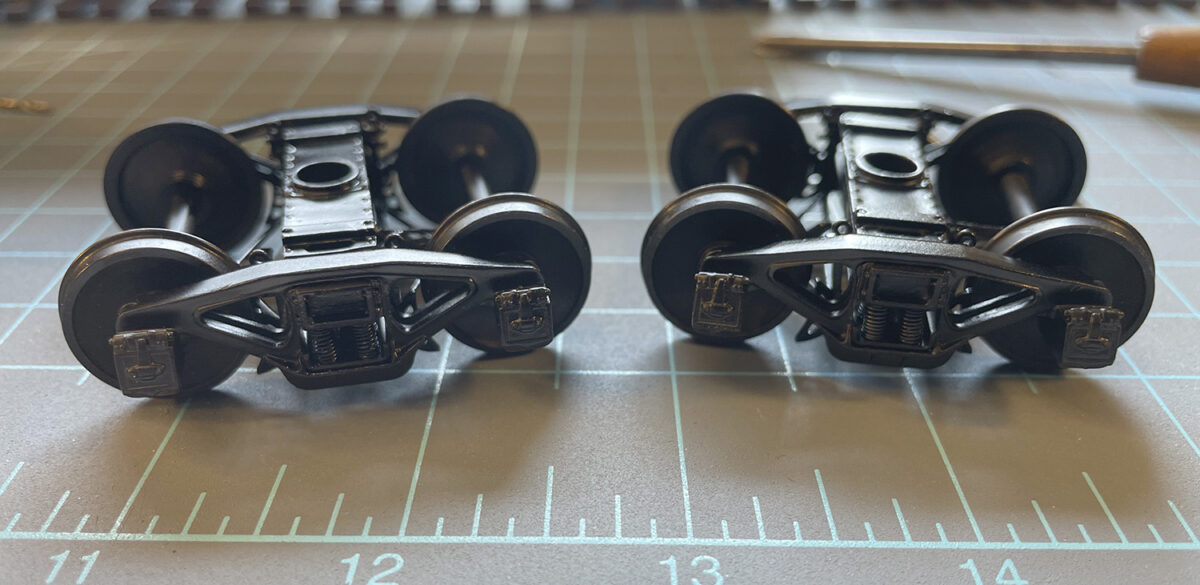
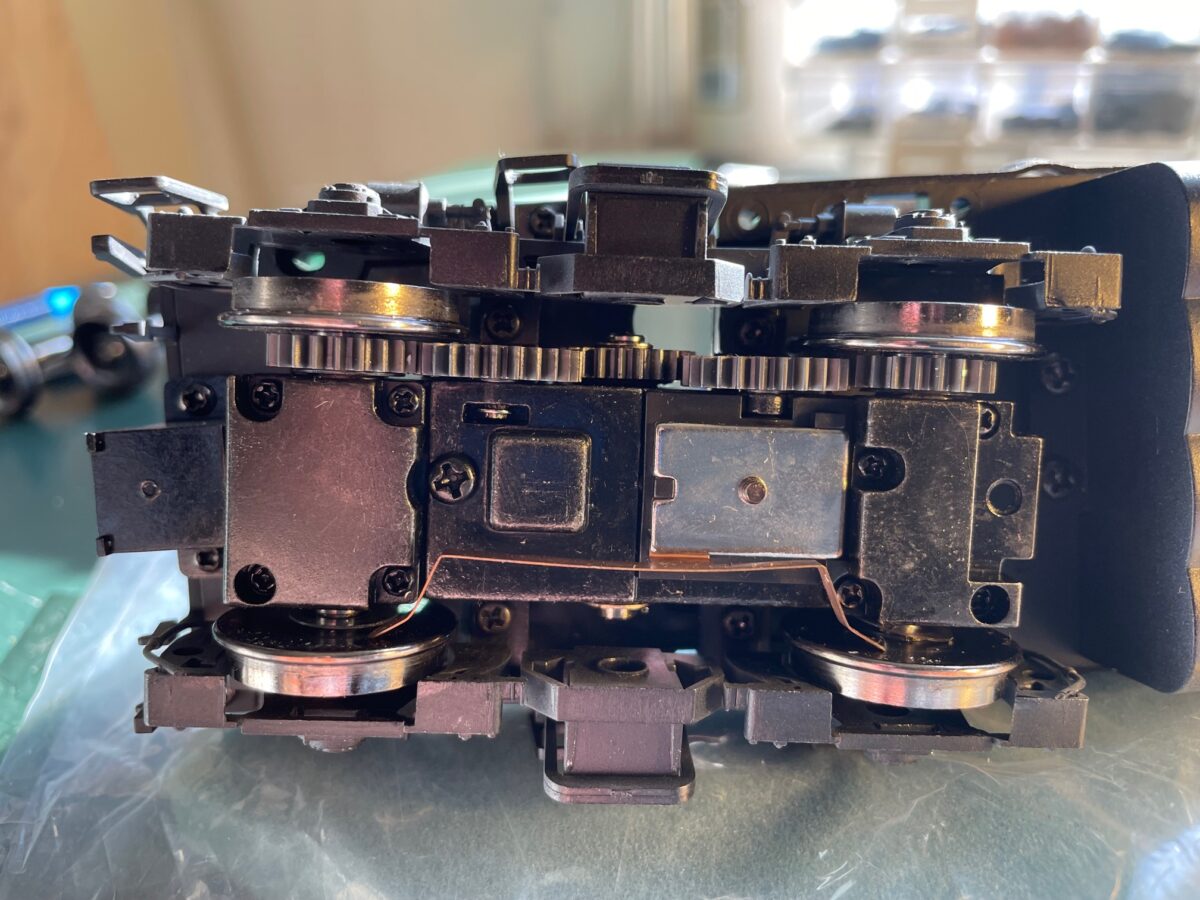
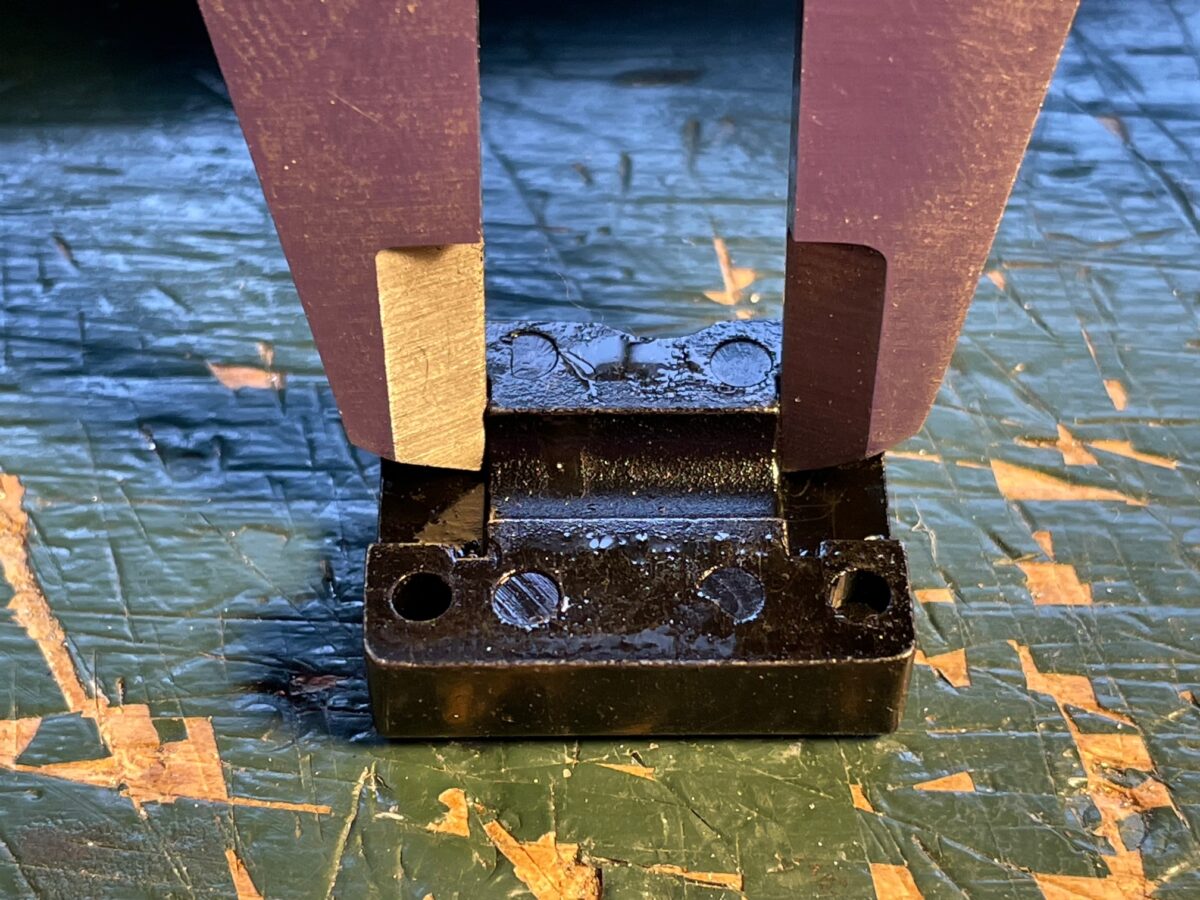
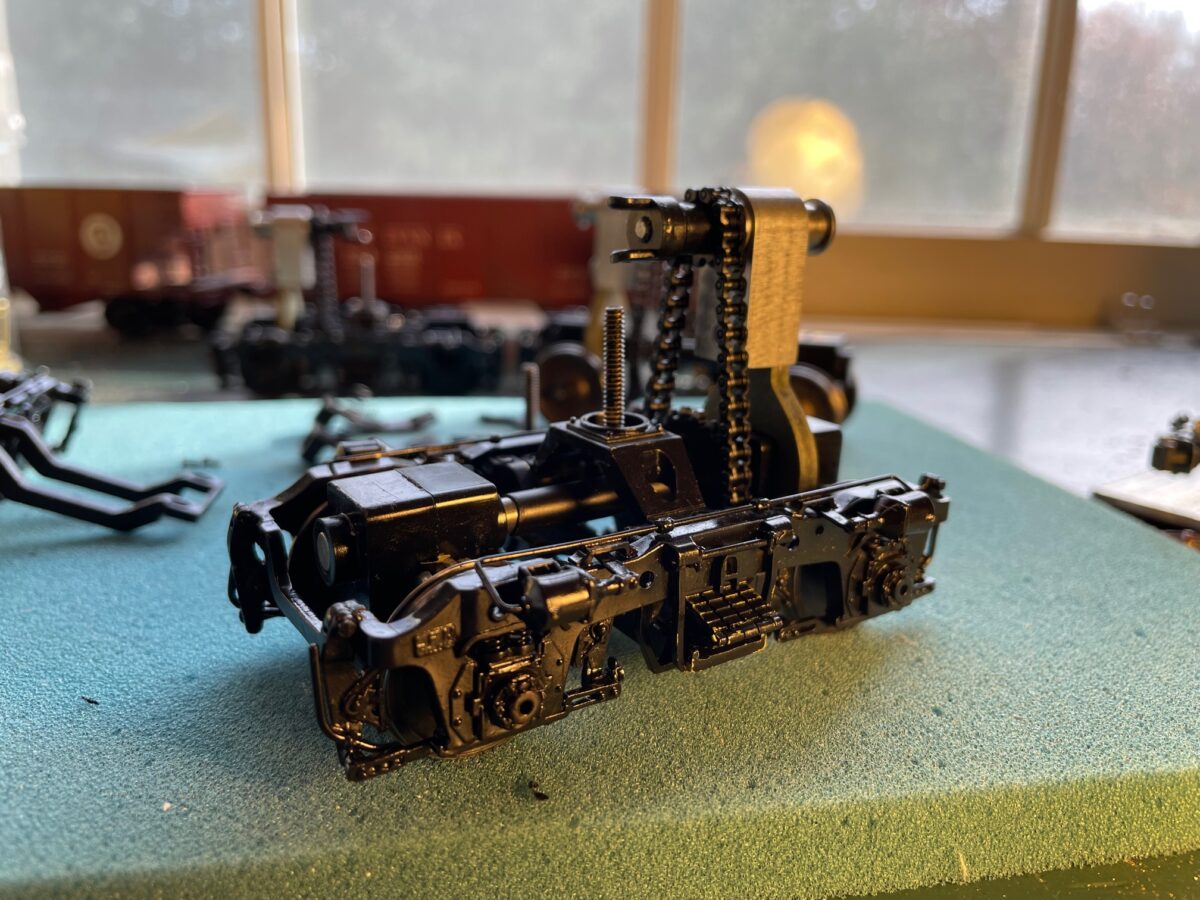
It’s took a while to get some paint of the trucks. Then it took a while longer to get them back in the work line. Some of those freight car projects just go so much faster that it feels like you have actually finished something.
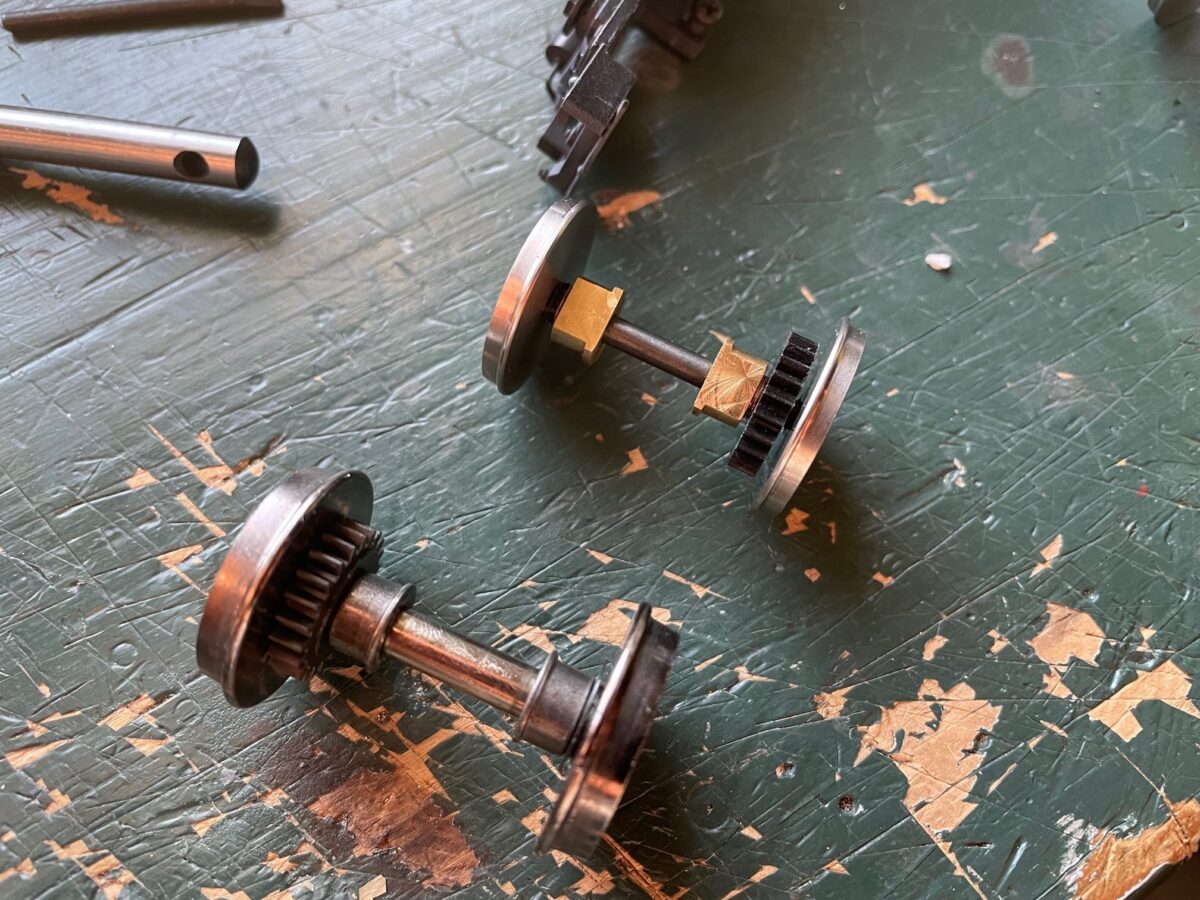
Anyway, these two pair of trucks have had new axels from Protocraft installed. Yes, they are now available from Right-O-Way but I’ve had mine on the shelf since they were a Protocraft product. I also installed ball bearing from Bearing Direct on the axels and also the FineScale 360 Weaver Chain Drive Replacement Kit.
I have to say that these are a pain in the ass to reassemble. Things seem to be moving in so many directions at the same time. It’s difficult to get them all to fit together without something moving. They are taking longer than I thought they would to reassemble.
And for anybody that might be questioning why I have a nice shinny black on the trucks instead of all kinds of weathered blacks/grays/rust. For my modeling period, the Summer of 1952, these units are less than a month old. I don’t think the railroad would have been happy if they had been delivered with well worn trucks.
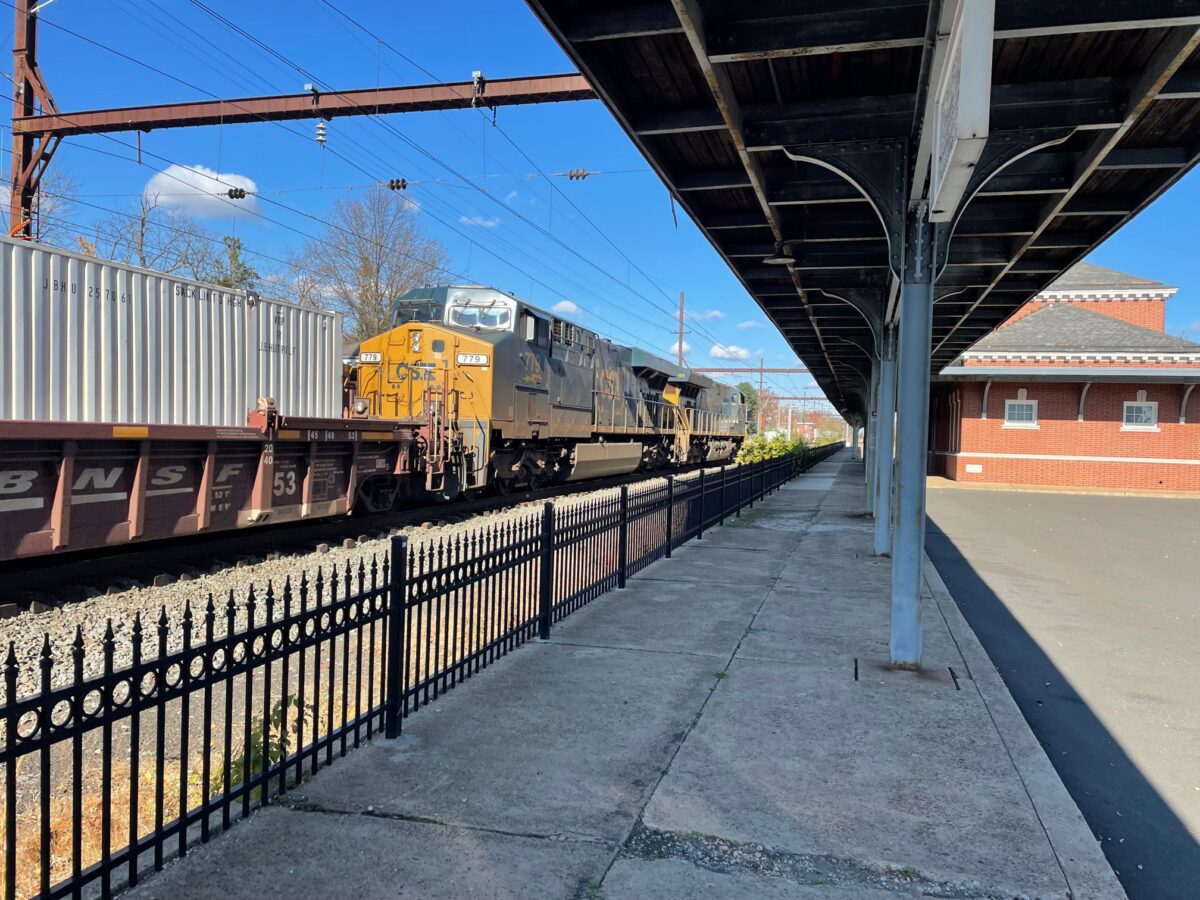
I am back at work a couple of days a week until the end of the month. This has meant getting out at lunchtime to West Trenton Station. This week I got to see a CSX stack train head North through the station.
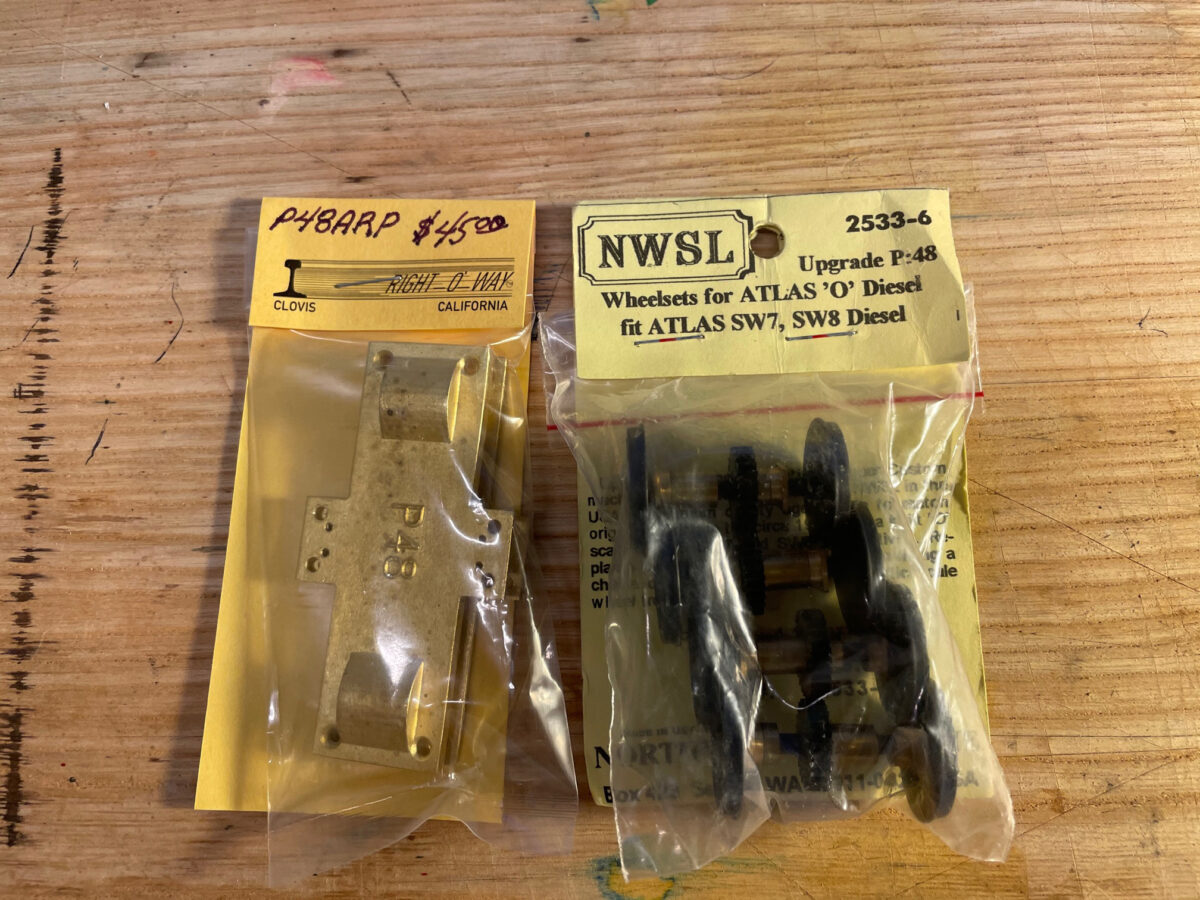
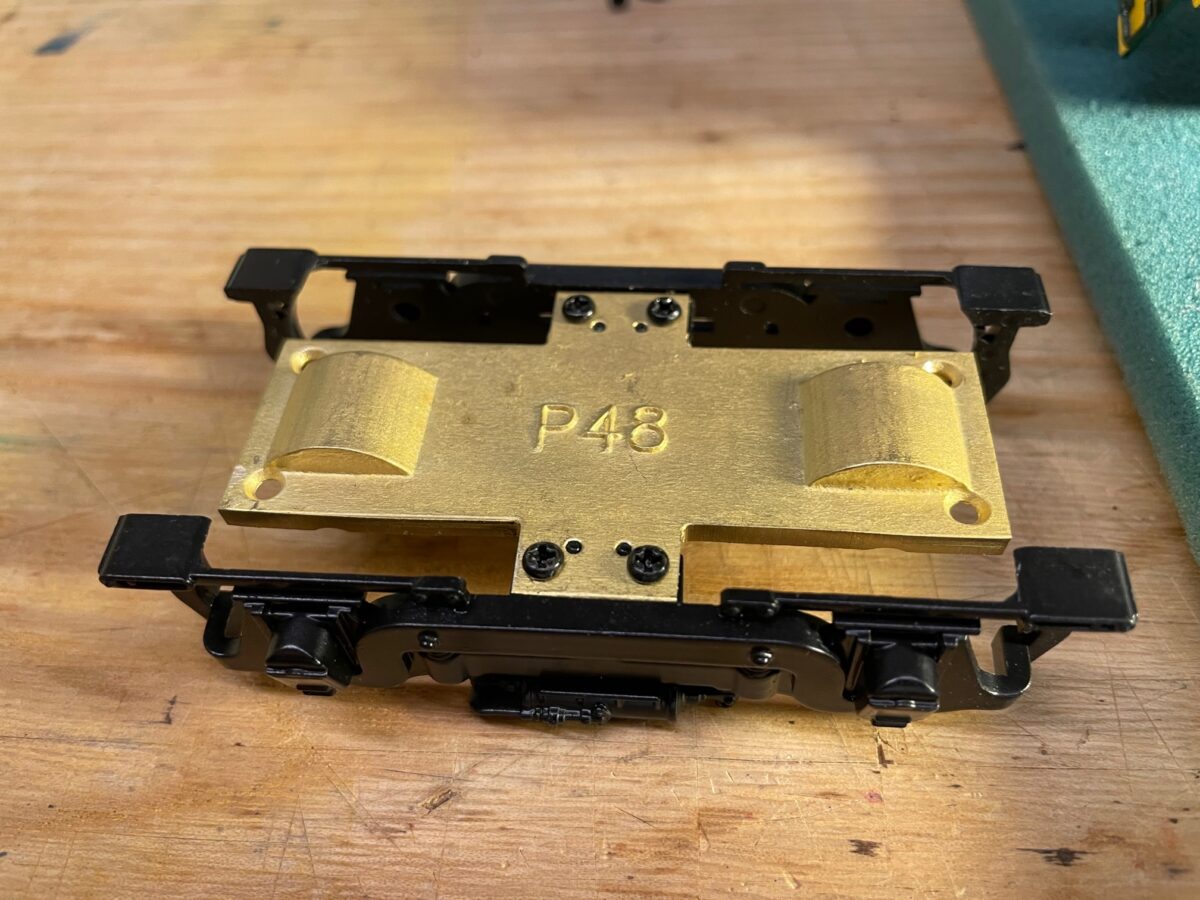
I have two Atlas “O” switchers, I thought my one project drive had been converted already. But when I got a phone call from a friend asking about Atlas SW wheelsets, I checked the model and it did have an upgrade set of wheels but they were the .145 NMRA wheels.
No problem, I had a set of P48 wheels on the shelf for a while (check out the old packaging), but the retainer plates I just got in a couple of weeks ago from Right-O-Way.
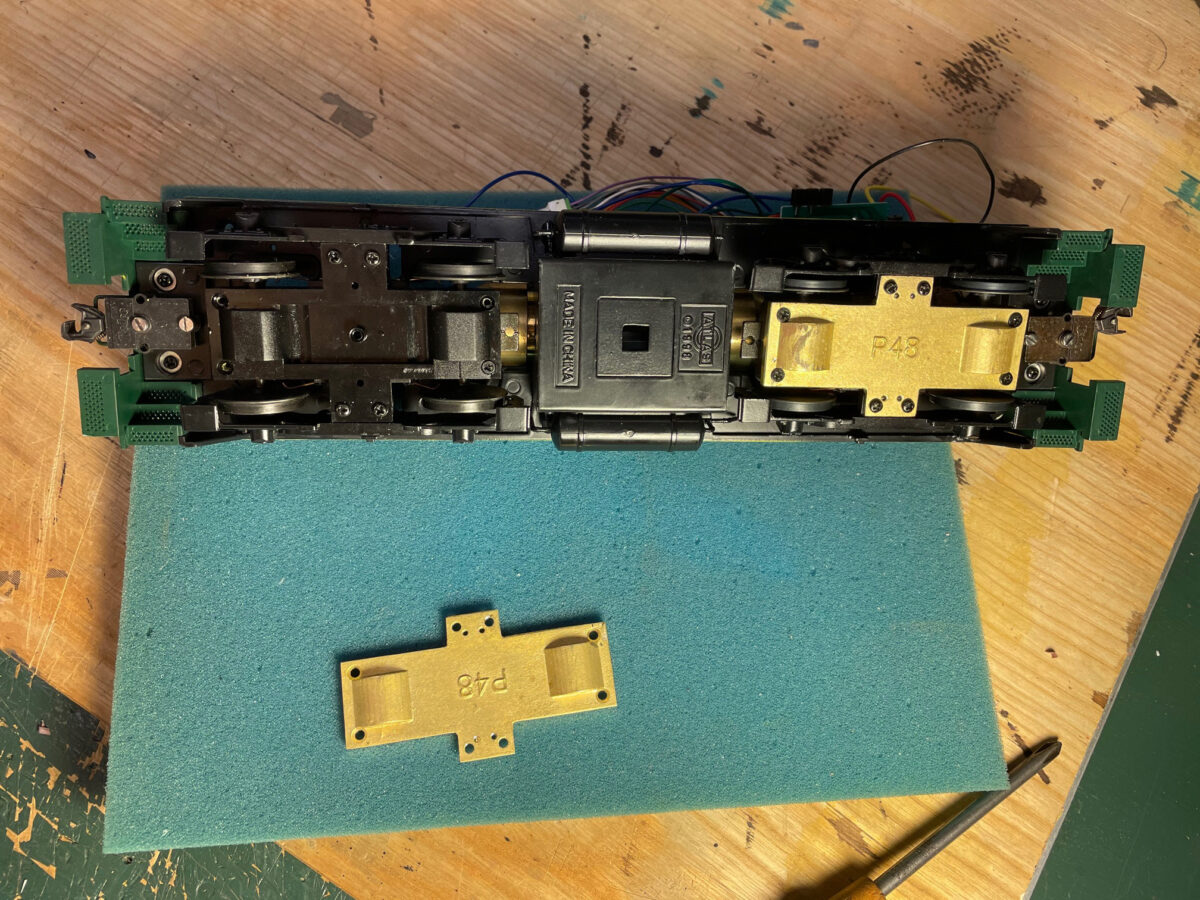
The retainer plate replace the original Atlas part. They are very simple to install, just unscrew the original plate and replace it with the new one.
Here you can see how much the ROW retainer Plates pull in the truck side frames. It’s a very simple conversion, four screws remove the retainer plate and four more hold the side frames.
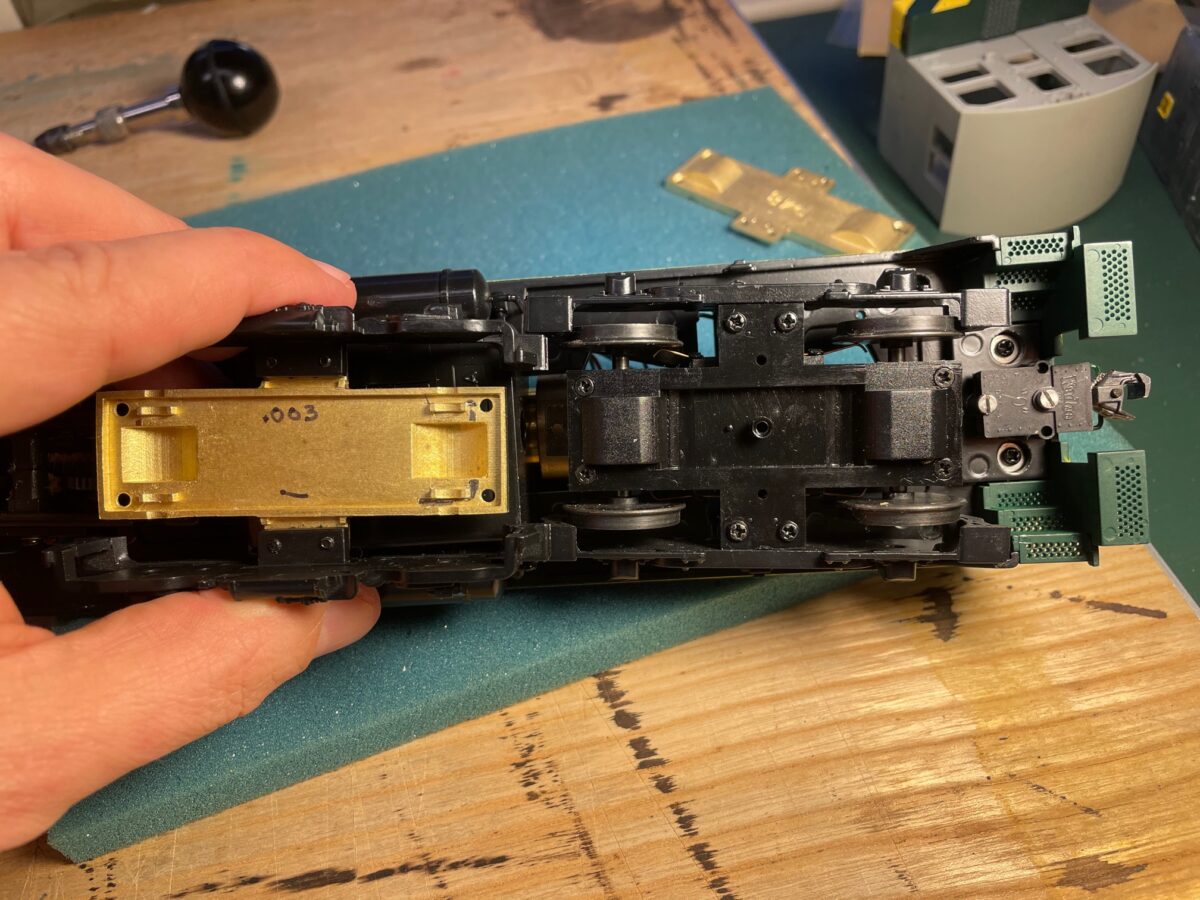
I really should have painted them BEFORE installing them. But my “mistake” allows you to see them more clearly.
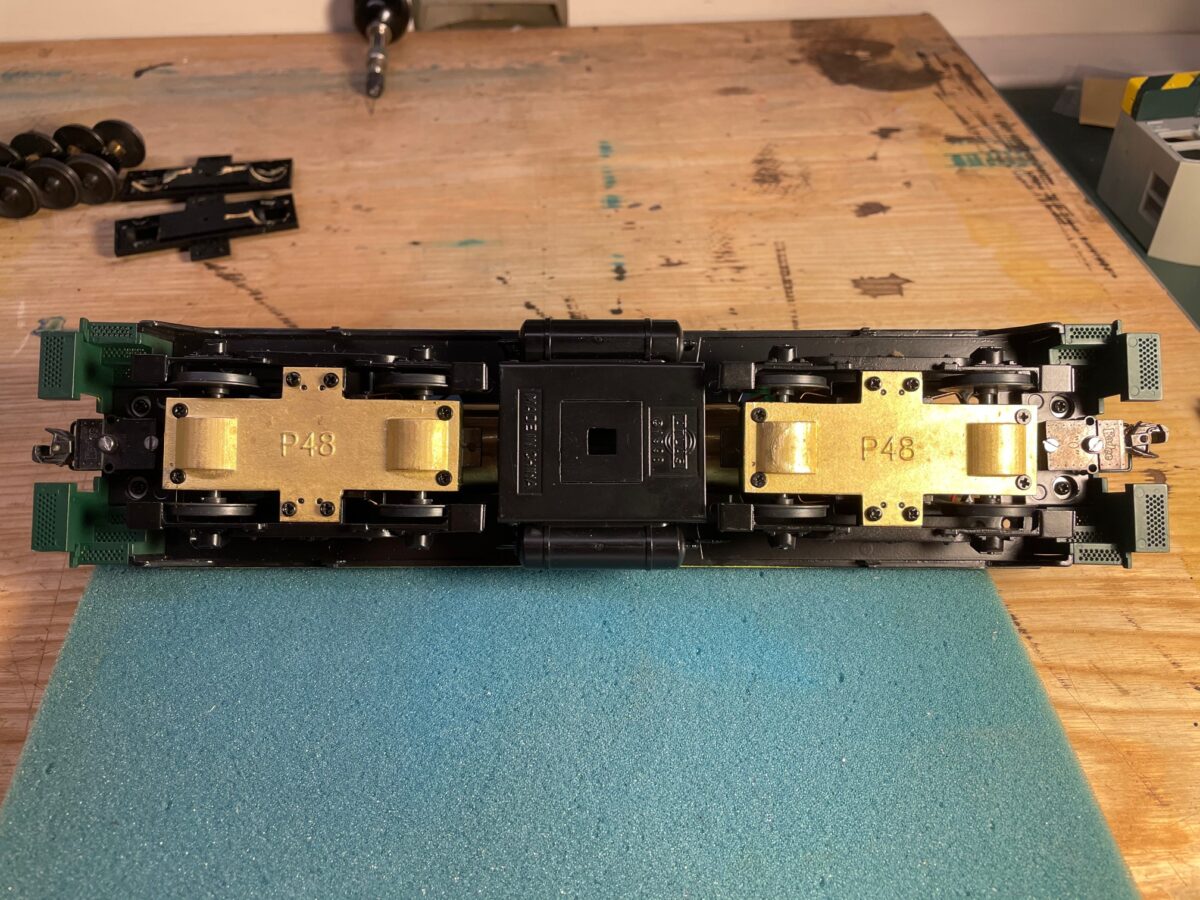
All done. My Frankenstein SW9/NW2 project back together. Still not sure this project will continue or be turned back into an SW9.
The Right-O-Way Proto48 Retainer Plates combined with the NWSL Proto48 Conversion Wheelsets really make this a simple and much improved looking conversion. I’ll time it next time, when I do the other switcher. It could not have taken more than a half hour to complete. The only tool required was a Phillips screwdriver.
Right-O-Way sells the retainer plates by themselves or with the conversion wheelsets. They really do make a big difference in the appearence of the trucks.