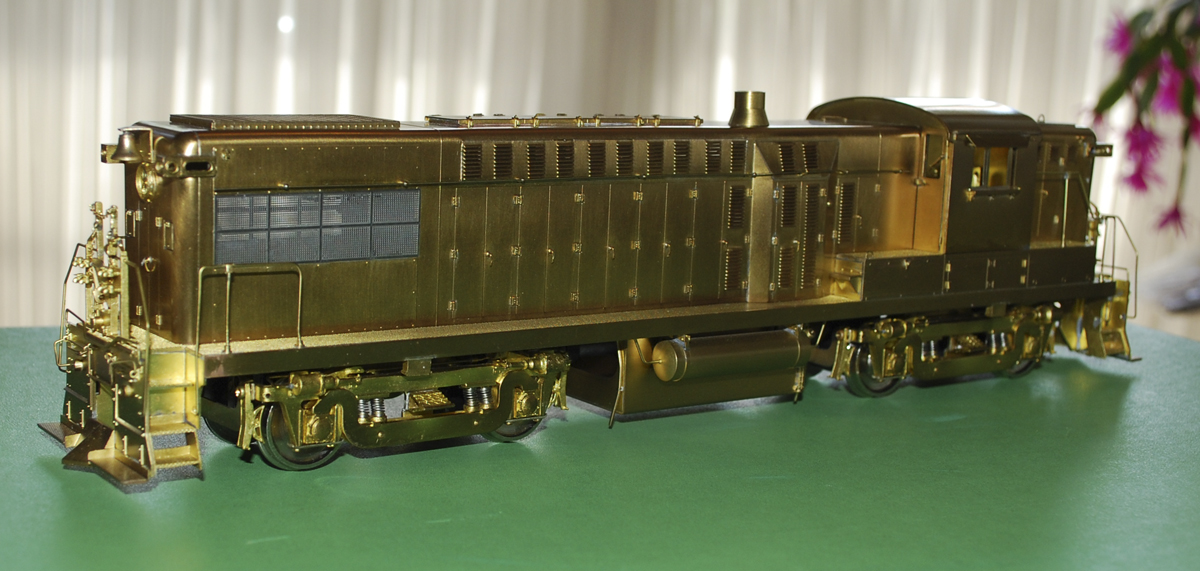
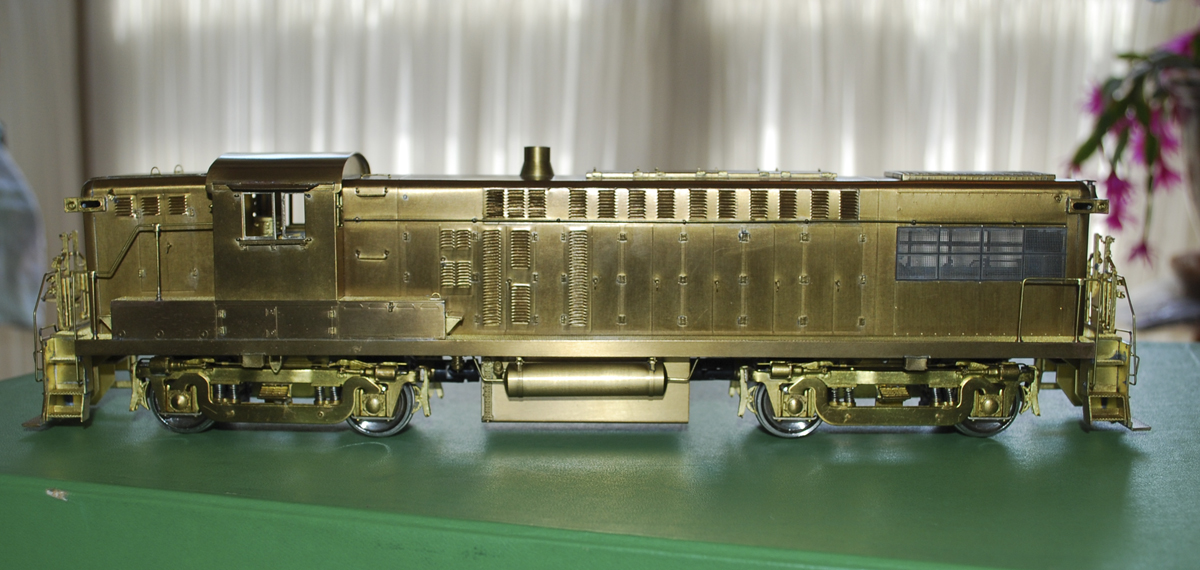
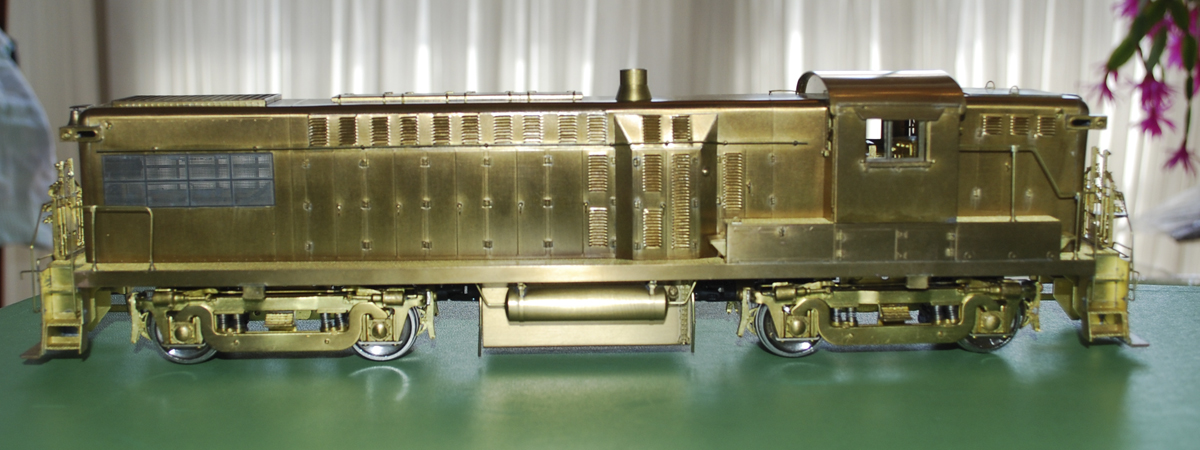
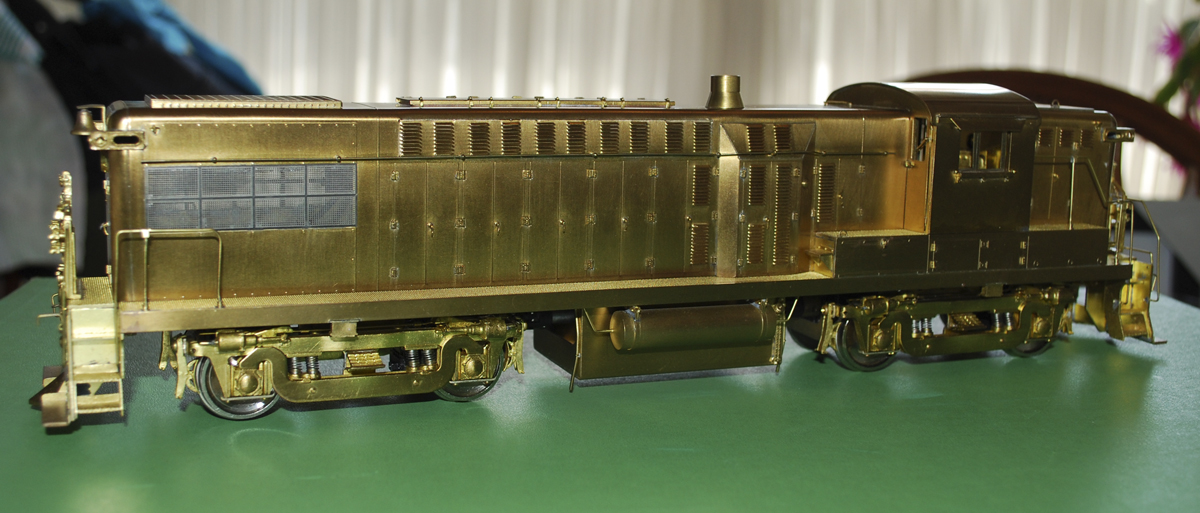
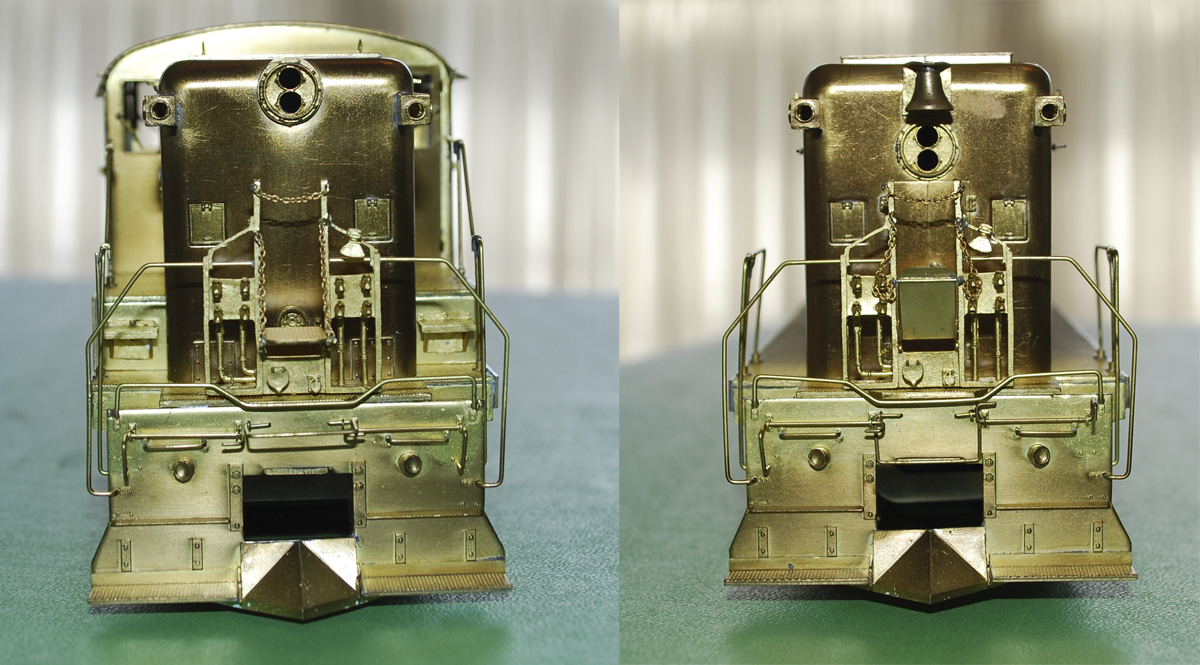
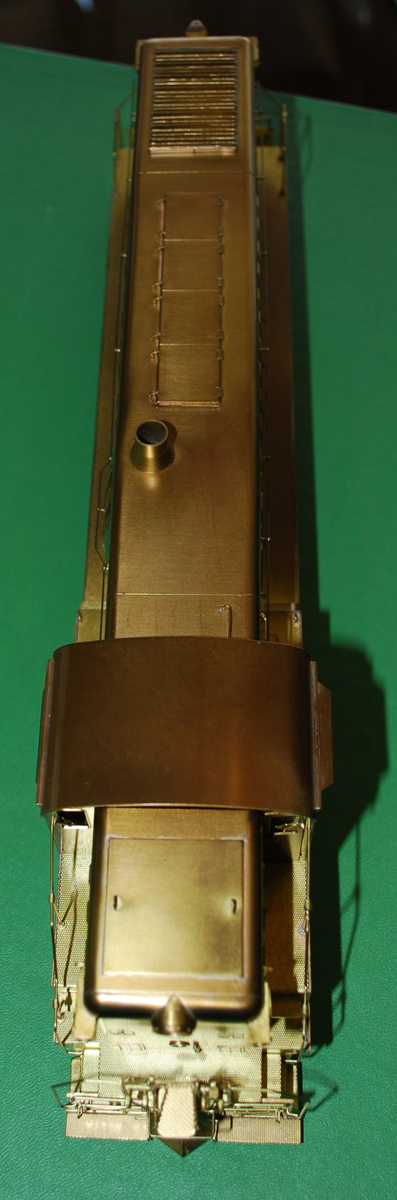
Yesterday at the Strasburg 2-Rail O Scale Train Show the first of my Sunset I1sa’s went to a new home and a new baby came home with me, an Overland Baldwin AS-16.
Possible prototypes that could be built from this model:
1951 built AS-16 Freight Unit: Add rain gutter on cab roof Remove the fuel tank between the trucks
1951 built AS-16 Passenger Unit: Add rain gutter on cab roof
1952 built AS-16 Freight Unit: Add rain gutter on cab roof Add Dynamic Brake opening on the short hood. Remove the tank behind the cab on the short hood
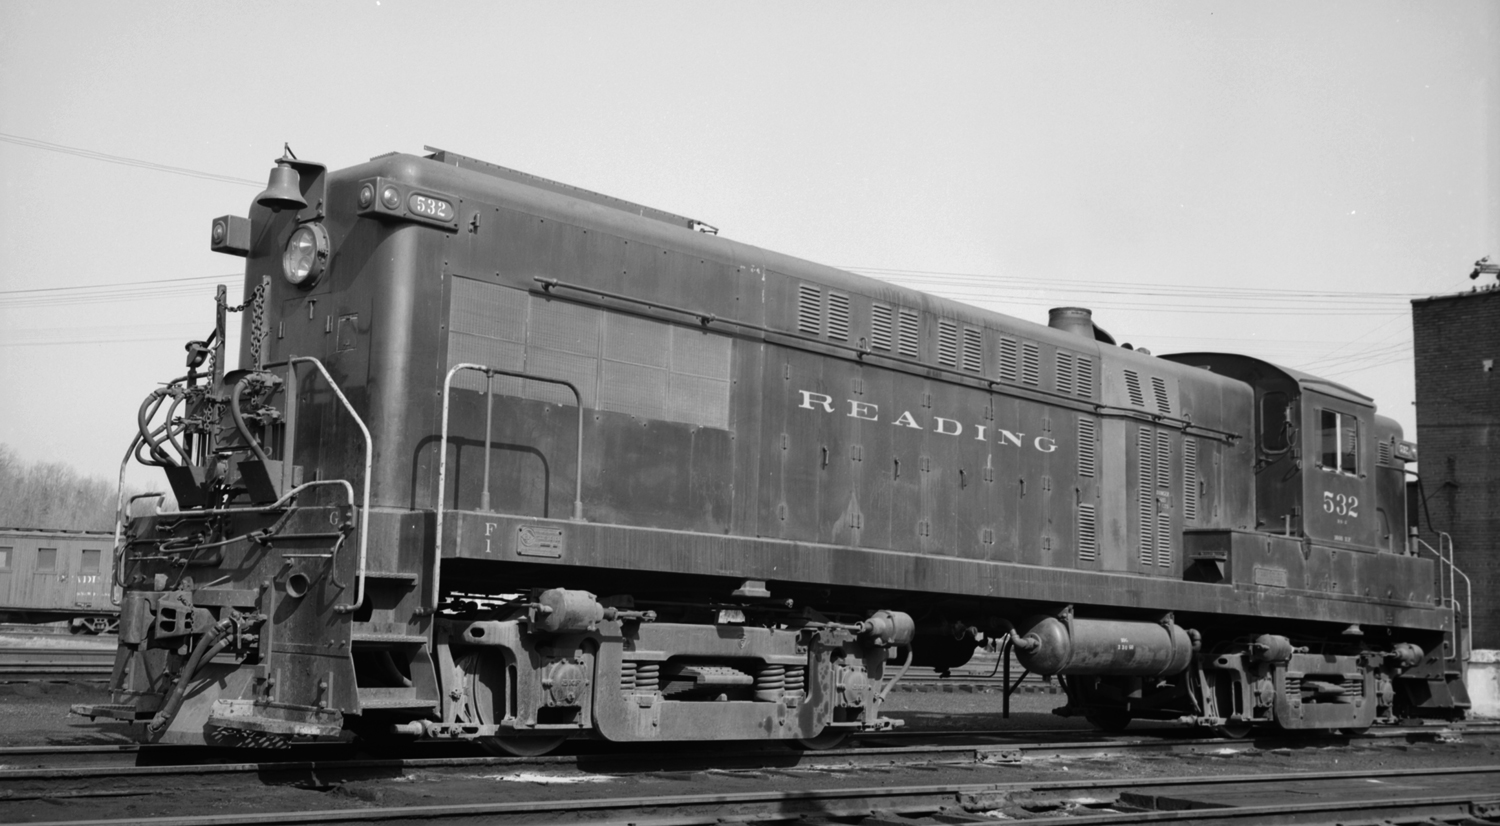
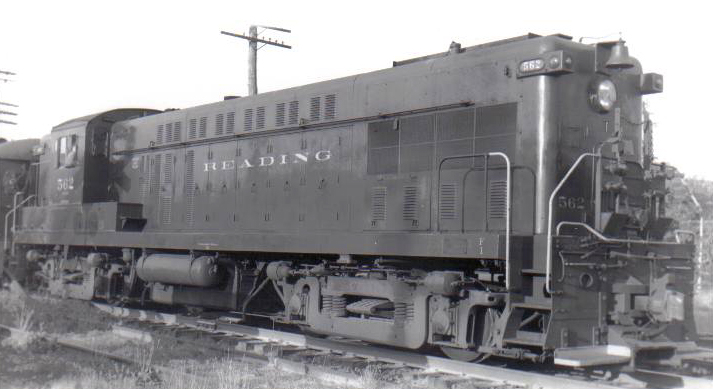
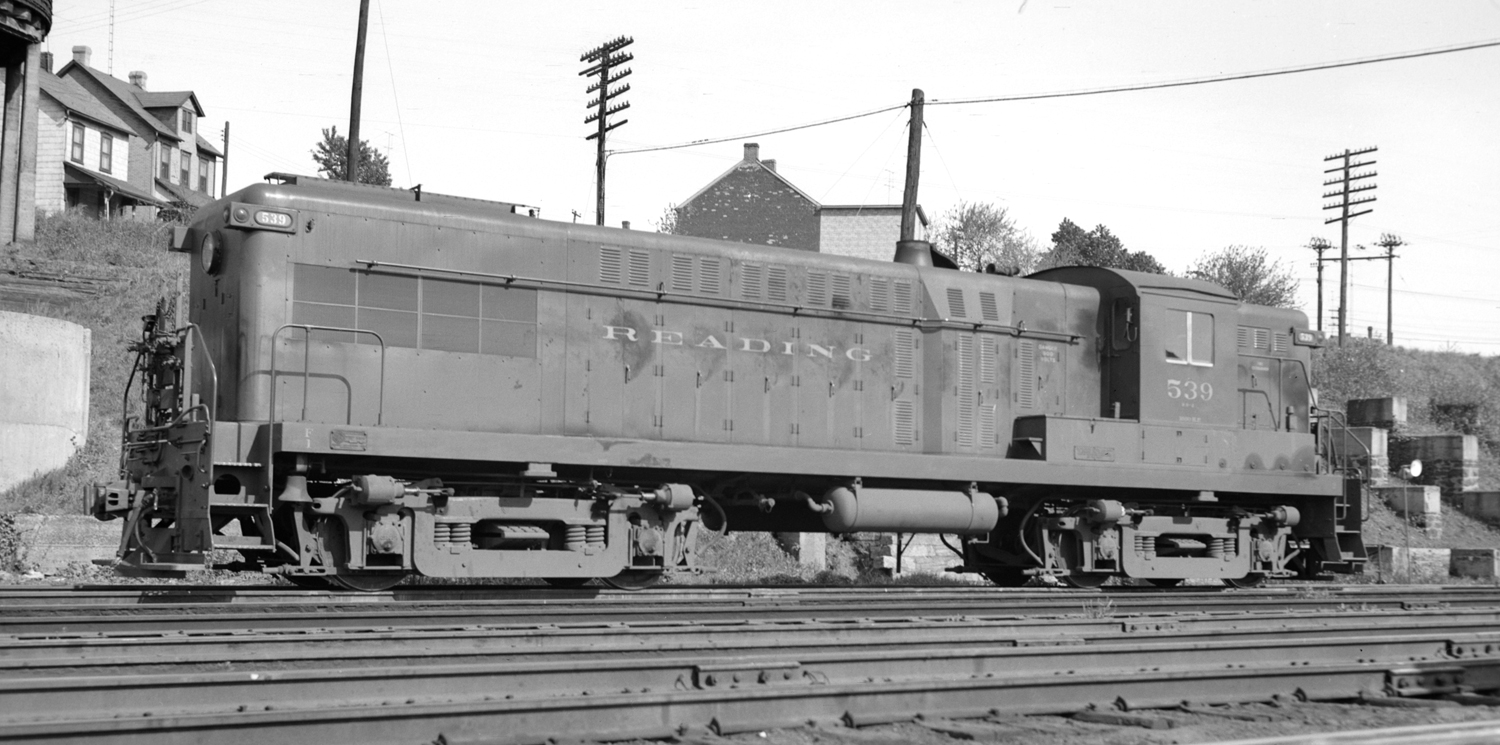
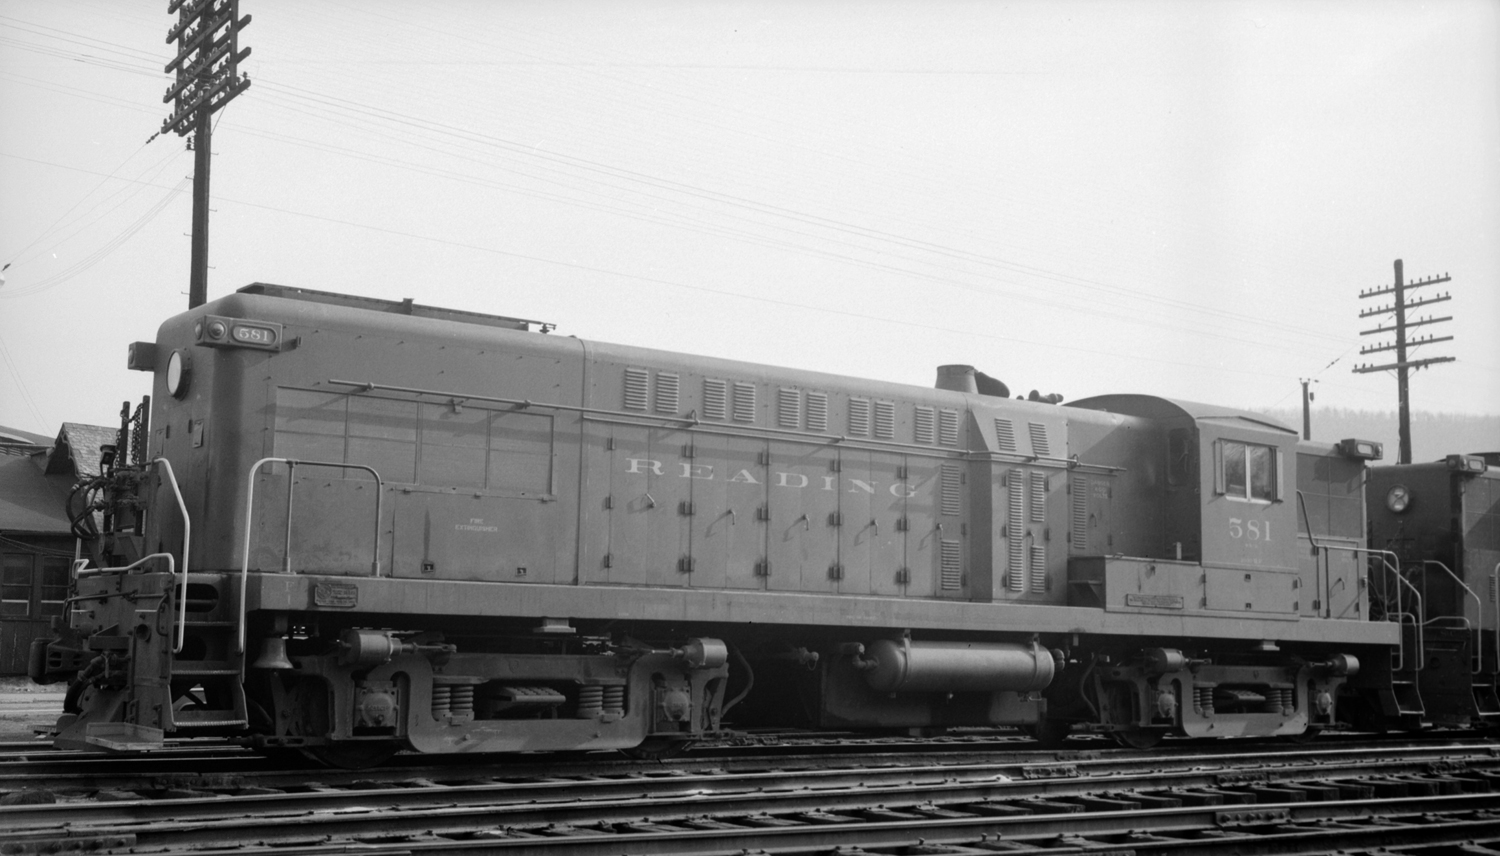
Overland AS-16Engineers side viewFireman’s side viewFireman’s 3/4 viewEnd views
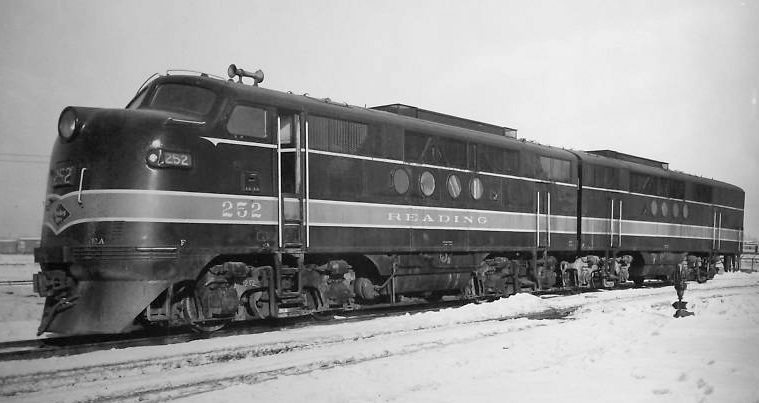
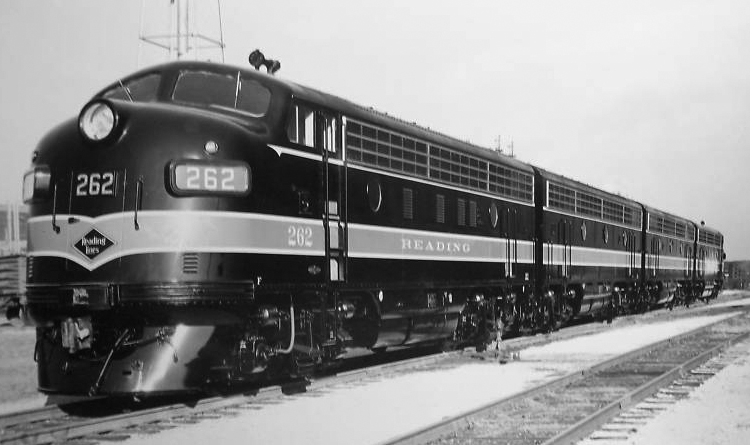
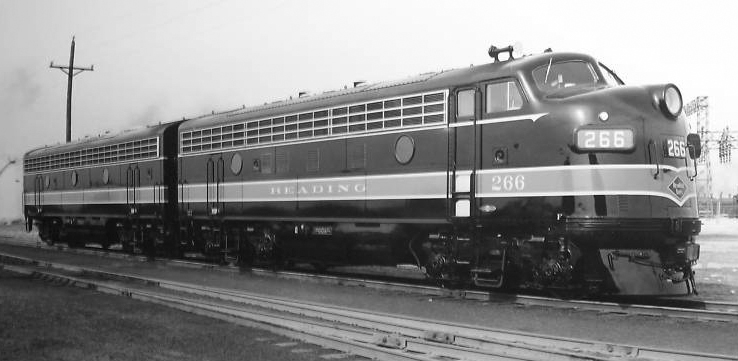
The Reading Company had been a long time buyer from Baldwin locomotive Works. They had bought steam locomotive from them and had been very happy with the diesel switchers made by Baldwin. When the railroad turn to the road switcher models they again turned to Baldwin and bought their AS-16 model.
There are good sources of information on these units in print. Here is a short list:
Diesels of the Reading Company Volume 1, Paul K. Withers
Reading Diesels Volume 1 The First Generation, Dale Woodland
While each group of AS-16’s were different they did have a few things in common. They all had walkways over the top of the vent in the roofs. Most had louvers on the engineer’s side of the long hood under the air intakes. They all had railroad applied rain gutters applied to the cab roofs.
All the AS-16’s were delivered in the Pullman Green paint scheme, and they wore it until they were retired. As delivered they had green handrails and low numbers on the ends of the locomotives. During sometime around 1953 the handrails were painted the safety yellow. Sometime near 1956 the end numbers started to move up on the end. I would imagine so that the tower operators could see the numbers.
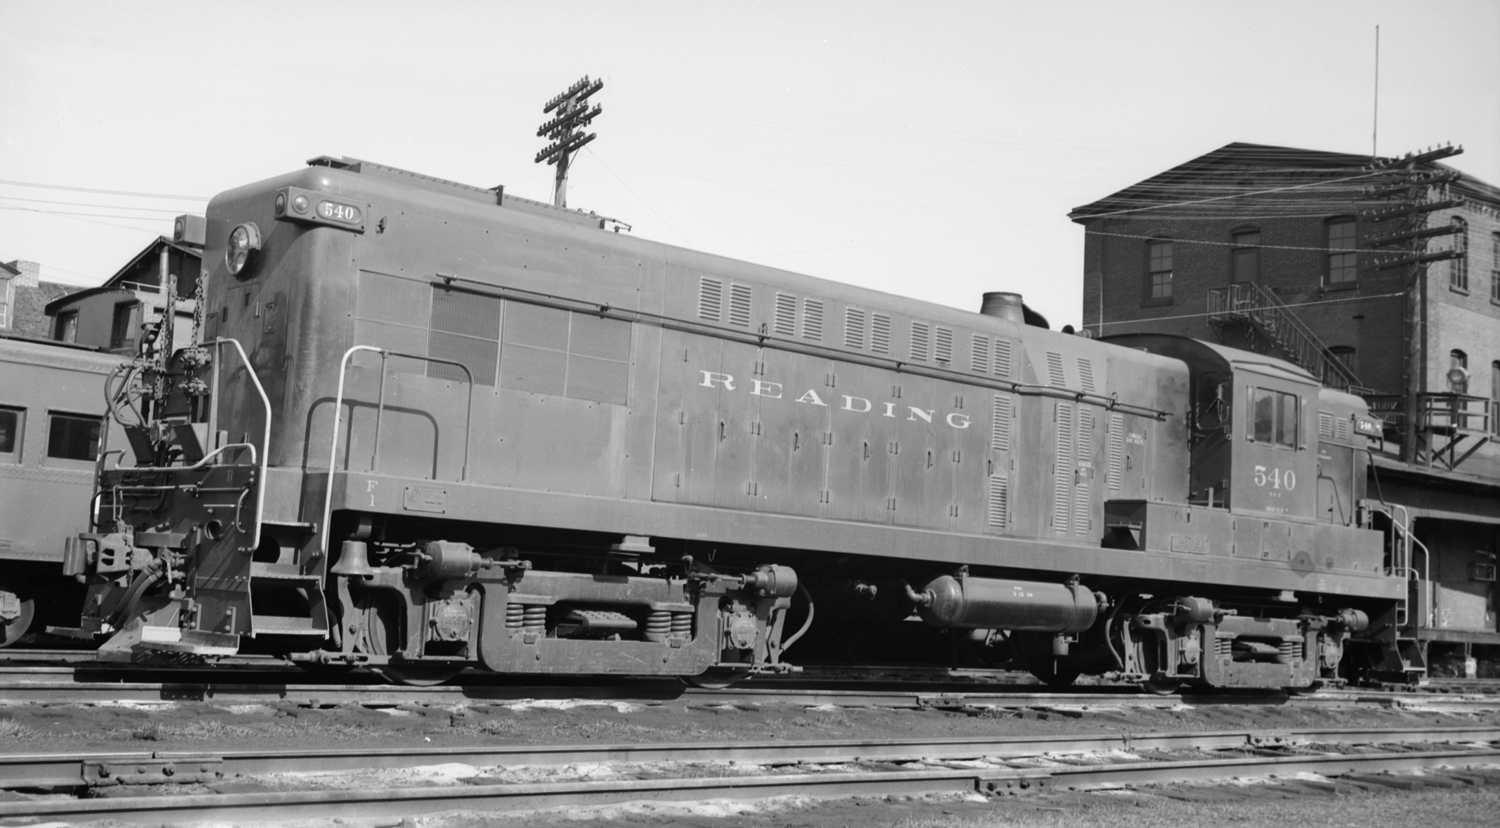
The first group #530-537 arrived on the property from 7/51-9/51. They were straight freight locomotives without dynamic brakes. They had 900 gallon fuel tanks above the frame directly behind the cabs, leaving the space between the trucks under the locomotive open. Their bell’s were mounted at the top of the long hoods. The long hoods were forward.
The next four locomotives to arrive were 560-563 were dual controlled, steam generator equipped passenger locomotives. They were based out of Green Street engine house. Their 1000 gallon fuel tank was under the frame between the trucks. The 900 gallon tank behind the cab was used for water for the steam generator. The bell was still mounted on the end of the locomotive.
The next group of freight units #538-550 arrived 10/51-11/51. Externally they differed from the first group of freight units only in the moving of the bell from the end to under the frame on the fireman’s side of the front of the locomotive. Not visible to the modeler they were heavier than the first group by 1100 lbs.
The next group of AS-16’s #576-589 arrived on the property between 6/52-7/52. They were equipped with dynamic brakes in the short hood, the bell mounted under the frame, had a 1000 gallon fuel tank under the frame between the trucks and did not have a tank of the short hood end of the locomotive. In addition they were 1300 lbs. heavier than the last group of freight locomotives.
The grill work in the short hood for the dynamic brake required the number boards be moved up the car side to the top of the short hood.
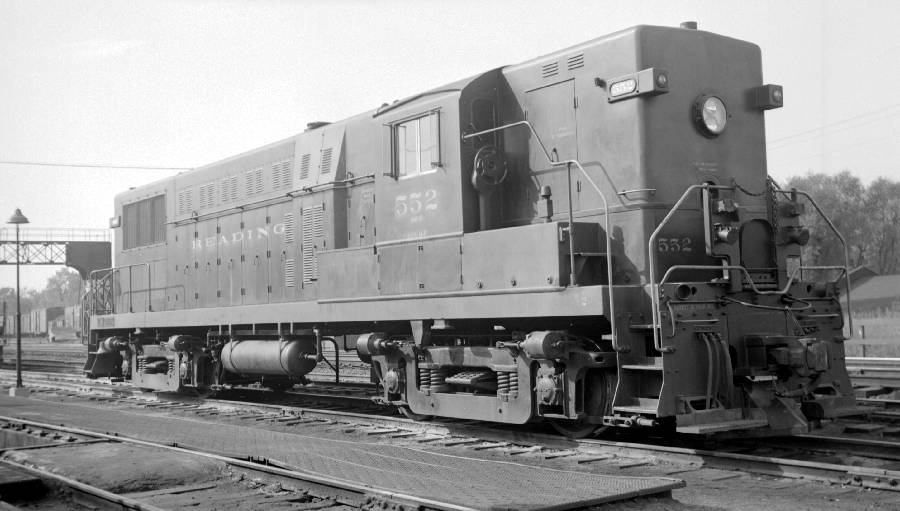
The last group of Baldwins #551-554 arrived 10/53. The order started out a 10 units but the railroad cut the order to just four units. The six locomotives left over at Baldwin were later sold to the PRSL without the Dynamic brake equipment. This was also the first use of Baldwin’s new carbody design which had enough room to move the dynamic brake equipment into the long hood. This order went back to the use of the 900 gallon fuel tank behind the cab. leaving the space under the long hood between the trucks open.
One of the problems the railroad had with the Baldwins was that they could not MU with other locomotives. Worse than that, they could not even MU with each different order. The 1951 locomotives could not MU with the 1952 units until the railroad made modifications to the load regulators, costing the railroad $16,820 per unit for the modifications. This could also account for why early photos of the Baldwins show them MU’ing with other units from the same orders. The 1953 locomotives never were able to MU with the rest of the Baldwin fleet. They had electric throttles which aloud them to MU with other manufactures locomotives but not the other Baldwins.
Most of the photos that have been published have been of the units later in life. This is understandable as they replaced steam locomotives as they arrived and most railfans tried to capture what was going away instead of what was replacing it. Why not, the new units would be around for another 15 years? What few photos are around of the units in their first years show that changes came to them early. I’ve already pointed out the numbers on the ends move higher. The hand rails get painted with safety colors and also they added louvers under the long hood’s air intake on the engineer’s side of the locomotive. This appears to have happened in late 1952 or early 1953, after my modeling period of the Summer of 1952.
Below is a chart of the Baldwin AS-16 roster on the Reading. Some of the data is pulled from the Diesel Era article on the Reading AS-16’s and some from photos. Assignment refers to engine house assignments painted on the locomotive as seen is photos of the units.
No.
Built
DB
Bell
Fuel Tank
Assignment
530
7-51
–
Top
Walkway
StC
531
8-51
–
Top
Walkway
SH
532
8-51
–
Top
Walkway
G
533
8-51
–
Top
Walkway
CATA
534
9-51
–
Top
Walkway
G
535
9-51
–
Top
Walkway
536
9-51
–
Top
Walkway
SH
537
9-51
–
Top
Walkway
G
538
10-51
–
UF
Walkway
G
539
10-51
–
UF
Walkway
540
11-51
–
UF
Walkway
R
541
11-51
–
UF
Walkway
542
11-51
–
UF
Walkway
StC
543
11-51
–
UF
Walkway
G
544
11-51
–
UF
Walkway
SH
545
11-51
–
UF
Walkway
546
11-51
–
UF
Walkway
StC
547
11-51
–
UF
Walkway
548
11-51
–
UF
Walkway
549
11-51
–
UF
Walkway
550
11-51
–
UF
Walkway
StC
551
10-53
LH
UF
Walkway
552
10-53
LH
UF
Walkway
553
10-53
LH
UF
Walkway
554
10-53
LH
UF
Walkway
560
9-51
–
Top
UF
GS
561
9-51
–
Top
UF
GS
562
9-51
–
Top
UF
GS
563
9-51
–
Top
UF
GS
576
6-52
SH
UF
UF
577
6-52
SH
UF
UF
578
6-52
SH
UF
UF
579
6-52
SH
UF
UF
StC
580
6-52
SH
UF
UF
581
6-52
SH
UF
UF
StC
582
7-52
SH
UF
UF
583
7-52
SH
UF
UF
StC
584
7-52
SH
UF
UF
585
7-52
SH
UF
UF
StC
586
7-52
SH
UF
UF
StC
587
7-52
SH
UF
UF
StC
588
7-52
SH
UF
UF
589
7-52
SH
UF
UF
StC
References:
Diesels of the Reading Company Volume 1, Paul K. Withers
Diesel Era – 1991 September/October – Reading Baldwin AS-16 Road Switchers by Gerard E. Bernet.
Diesel Era – 1998 March/April – Reading’s First-Generation Diesels by by Paul K. Withers
Reading Diesels Volume 1 The First Generation – by Dale Woodland
Photograph’s from George Losse Collection either scanned from negatives or prints.
The first of my O scale PRR models sold today and it’s not an April Fool’s day joke.
I have always thought of myself as a PRR modeler. I’ve been building and collecting O scale models of PRR equipment for over twenty-five years. About five years ago I began to focus my model building on a particular branch and a fixed period in time, The PRR Elmira Branch in 1956. This caused a refinement/thinning of the collection. Models that did not fit the time frame or location were sold off and appropriate models were bought.
I did well at the last National selling/trading off surplus models and aquiring models for the Elmira Branch. Since the National I have on a number of occasions talked about one Reading Caboose that I thought about buying but didn’t. I didn’t talk about the two Steam Locomotives that joined the roster, I talked about the one caboose that wasn’t even needed for the proposed railroad.
I have struggled with a layout design for the last two years. I have been trying to find a way to fit in more Reading models into the layout. Thinking maybe the interchange at Williamsport might be enough. It wasn’t enough.
So, I started to look at the PRR Shamokin Branch. Plenty of I1sa running, lots of hopper cars moving, so it looked like a good fit. But as I explored the branch more and learned more about it. I started to shift my focus/research from PRR as main modeling interest to the Reading as the main modeling interest.
Actually, I’ve had more fun researching the Reading these last three months since shifting to the Shamokin area then the last 15 years worth of modeling the PRR. So now I have to think of myself as a Reading Modeler.
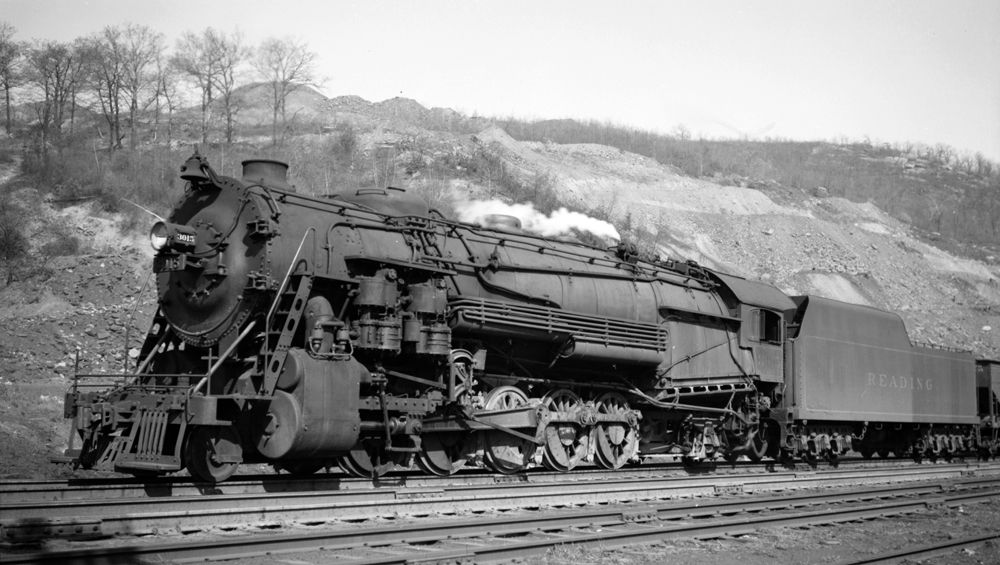
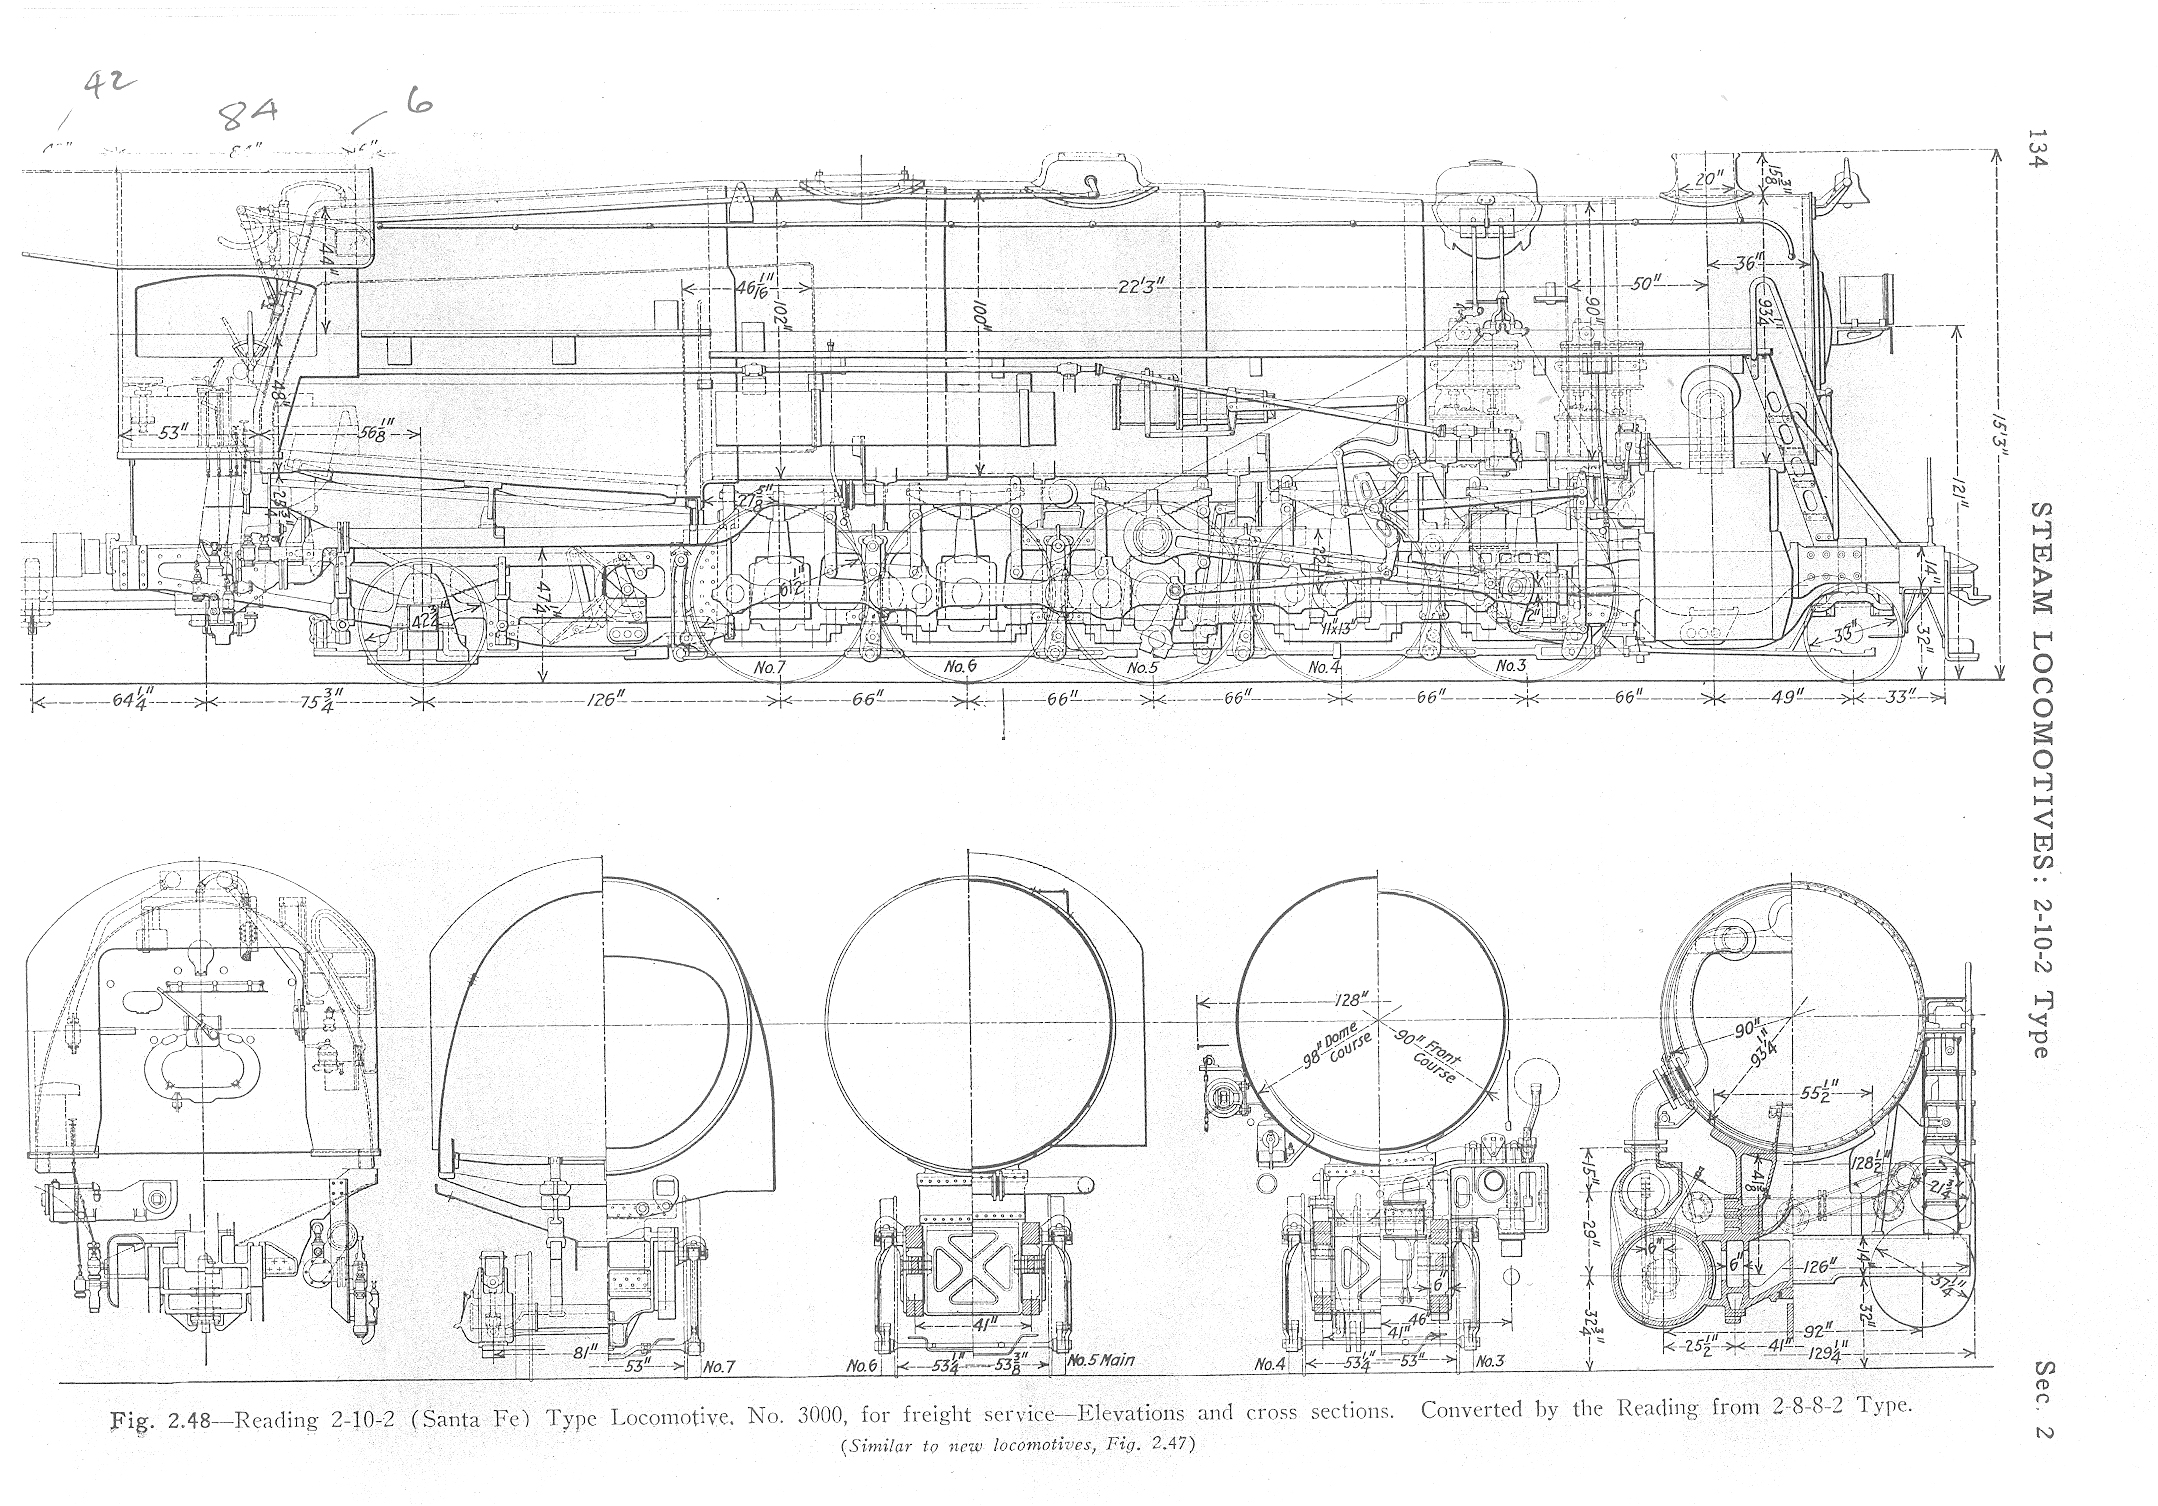
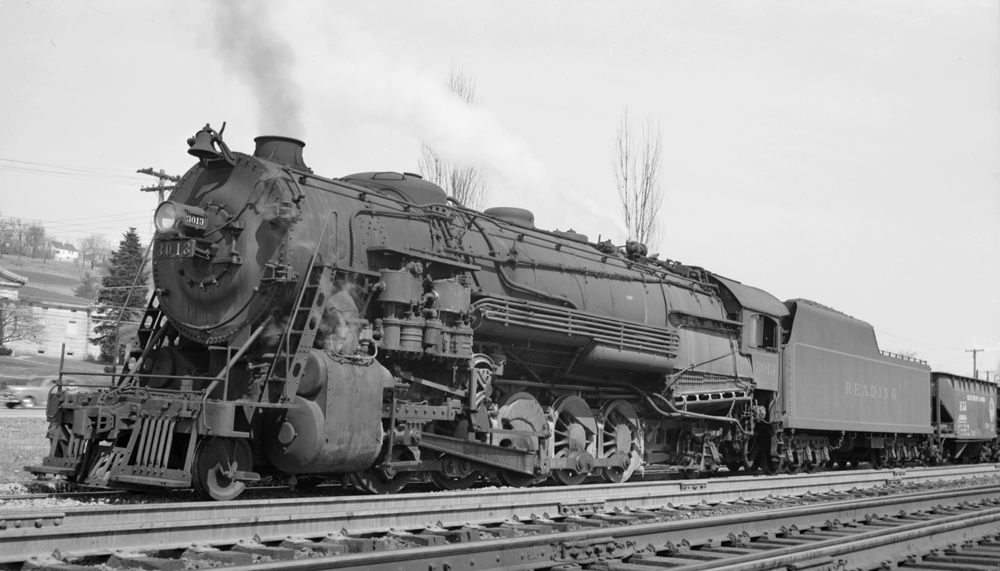
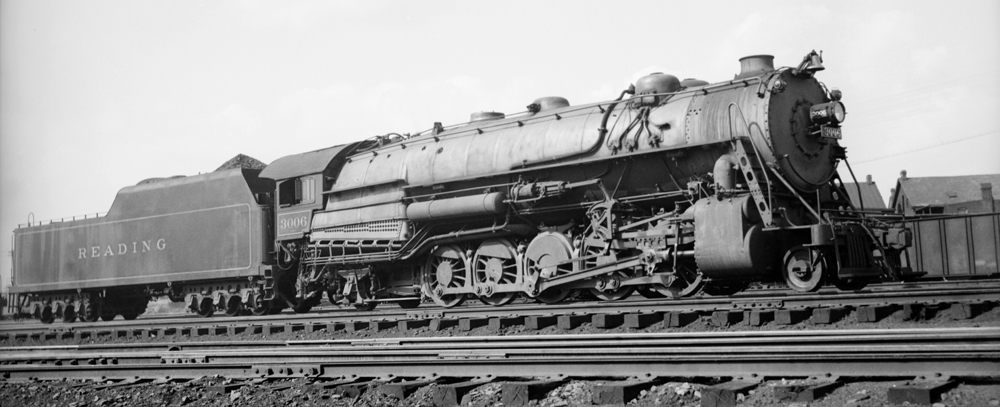
The story of the Reading K1 2-10-2 is told very well in a 16 page article in the May/June 1981 issue of Mainline Modeler by Bert Pennypacker “Reading 2-10-2 It should have been a Texas” I do not plan to go into all the details the article did, instead I’ll go over the highlights. There is an HO scale drawing of the K1sd in the center spread of the magazine.
The Reading 3000-series K1 started as a rebuilding program in 1927 with parts supplied by Baldwin. The first 11 locomotives were rebuilt in the Reading Shops from N1’s 2-8-8-2 which were built between 1917-1919. An additional ten locomotives (3011-3020) were built by Baldwin. The 3000-3009 were classed K1-sa, 3010 was classed K1-sc, and the 3011-3020 were classed K1-sb.
The 3010 was classed K1-sc because it was built with Caprotti valve gear. This proved to be troublesome to operate and costly to maintain. In 1942 it was replaced with the same Walscheart valve gear the others locomotives had and the 3010 was re-classed as K1-sa.
In 1945 while the Reading shops were busy building the T1 4-8-4’s the K1received some modernization changes including dynamically cross-balanced Baldwin disc main driving wheels, tapered main rods and high speed drifting valves. These changes where made to increase the K1’s potential speed from 50 to 60 m.p.h. making them similar to the new T-1’s. The locomotives were re-classed from K1-sa/b to K1-sd/e.
By 1948, the diesels arriving on the railroad started to bump the K1’s from their normal routes. They started to be reassigned into the coal regions and on the Shamokin Division.
The class survived intact until the first end of steam on the Reading in the beginning of 1954. The rebuilt K1’s were first to be retired in May of 1954. Followed by the Baldwin built locomotives in March of 1955. There were No survivors from the scrappers torch.
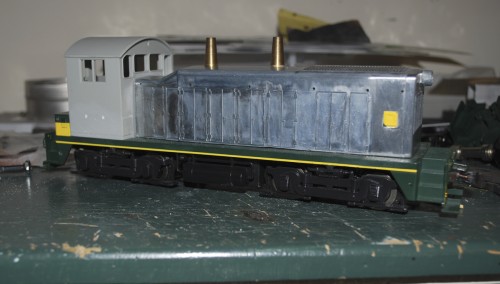
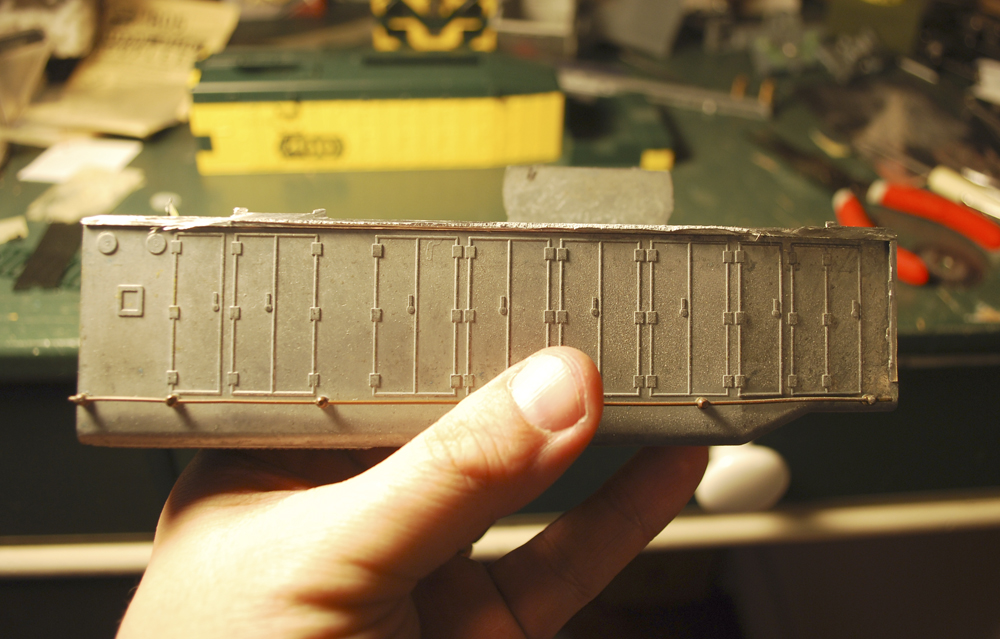
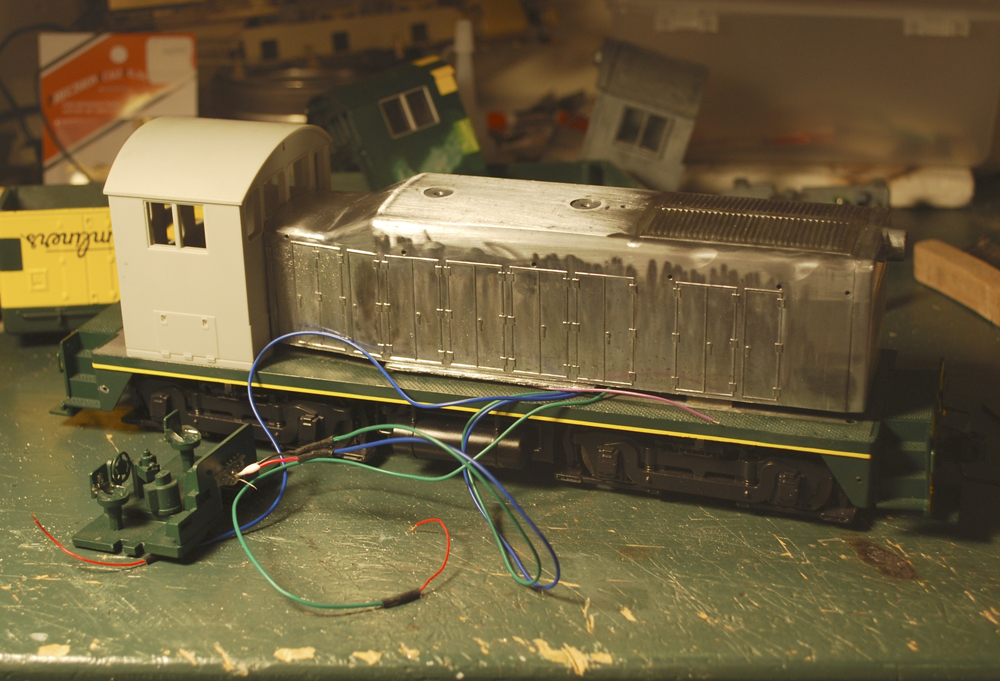
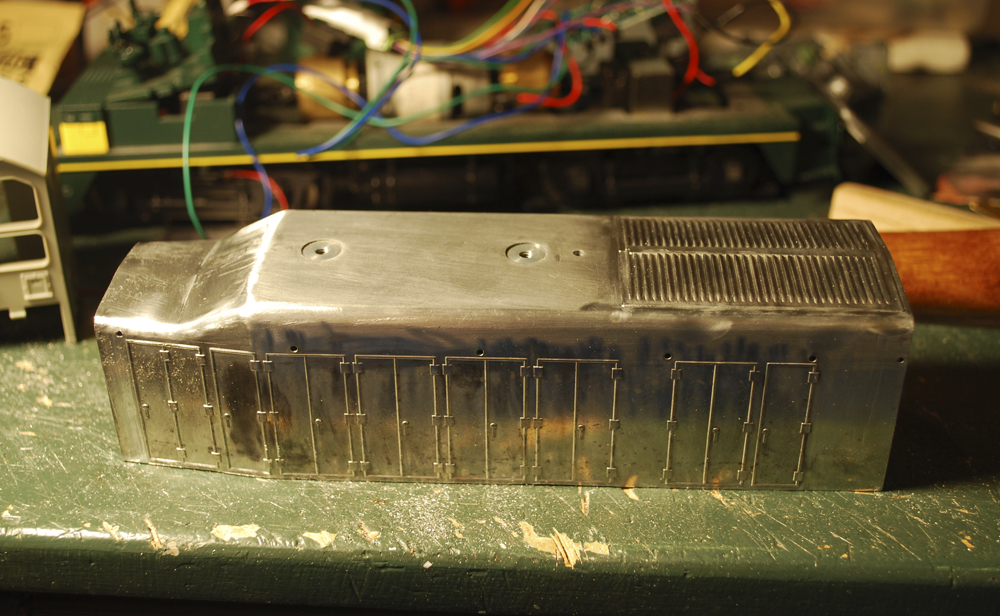
The long hood has been fully cut off and fitted. The sand fills were cut from an extra cab and then thinned down. I hate doing that, it not hard, I just hate sanding tiny parts. The Atlas couplers were thrown in the TRASH where they belong, and Kadees have been installed.
I still have to attach the handrails, cut the front window arch in the cab windows, add a frame shim and attach the cab/hood/rear step to the frame.
Maybe I’ll get a chance to work on it this weekend. It’s not looking like it. Besides I was thinking about starting to work on the K-1 by turning the twin sand domes.
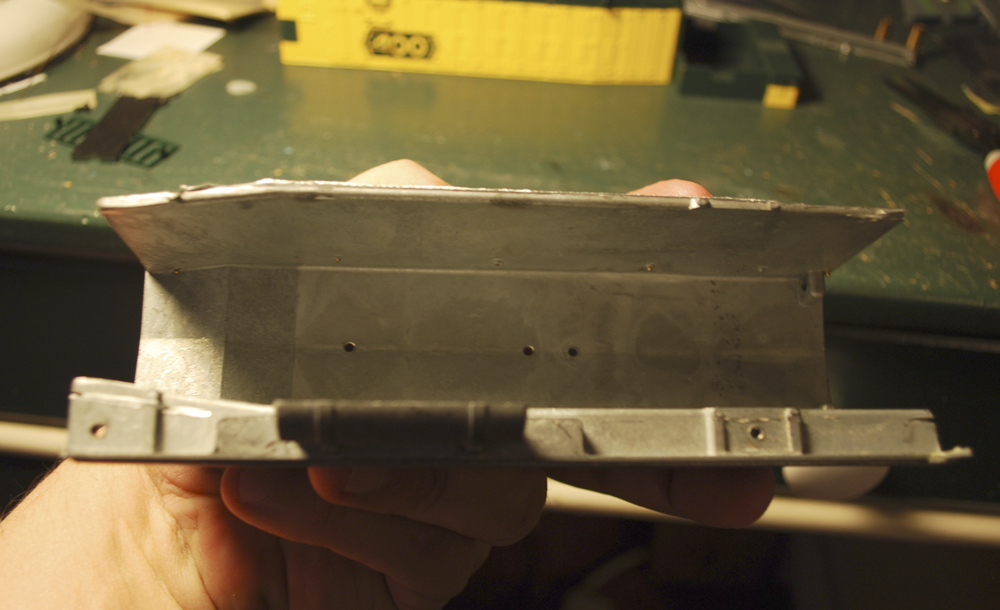
One walkway still to cut - Bottom View of the All-Nation Shell
I started by cutting the ends platforms off the shell. Since the cab was not going to stay it was also cut off the body through the doors.
The Cab, and walkways have been removed.
This photo is from the same time as the last. You can see the opposite fuel tank still below the walkway. Also you can see where I rough cut through the walkway floor and the cab walls. The finish cuts will be just inside those walls.
Here is the Mock-up with half of the engineer
I stopped an put the cab and shell on the Atlas frame. I was checking to see if I needed to shorten the fram at the cab wall area. It did need that cut also. You can see that about half of the rough-cut material has been removed from this side.
NW2 hood with two of the three finish cut made.
This view shows the finish cut on the engineer’s side and along the cab wall. I still have to make the Fireman’s side cut. This view also show the roof line clean up that has been done so far.
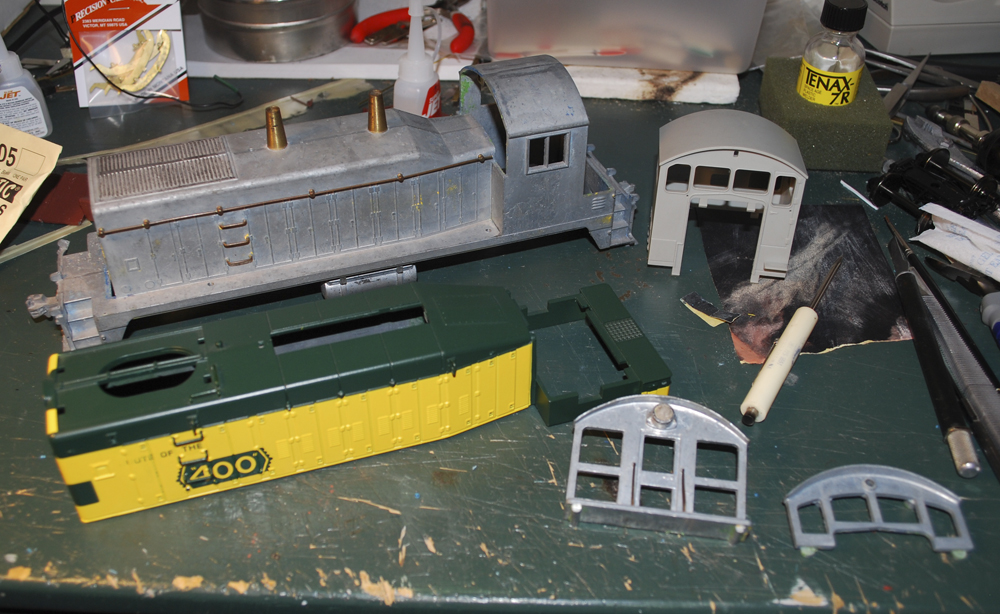
As with any project you build at some point you lay out the parts and see if they can be made into what you are thinking. Here we see the All-Nation NW-2 body. I bought this shell second hand at a meet. It shows signs of being striped of paint at least two different layers. Yet, if you look closely at this photo, the modelers never bothered to clean up the center seem on the body casting.
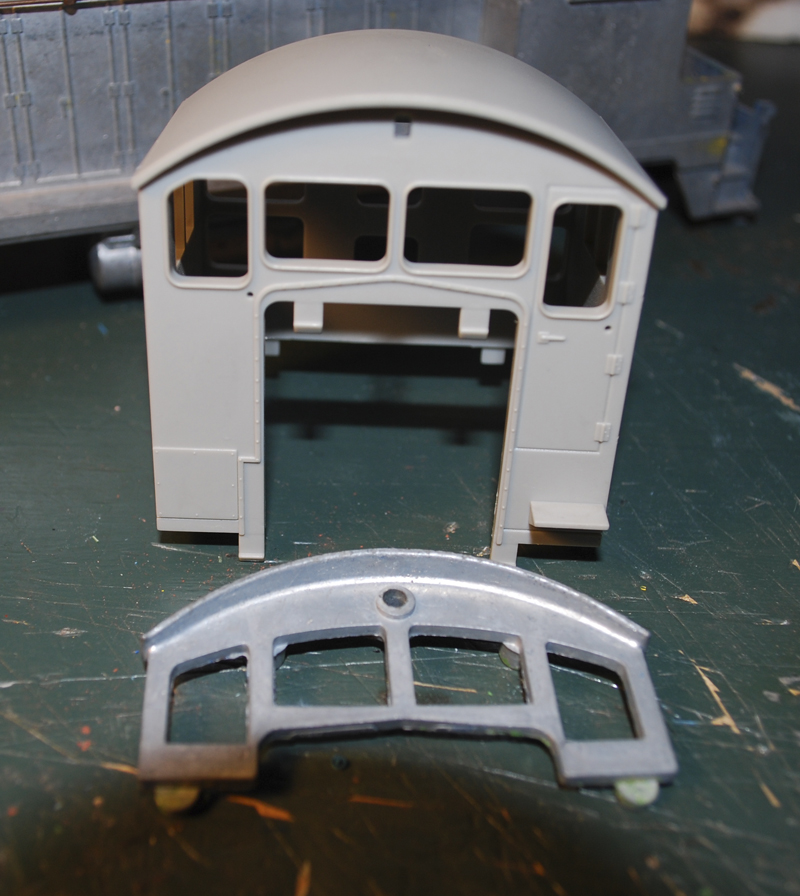
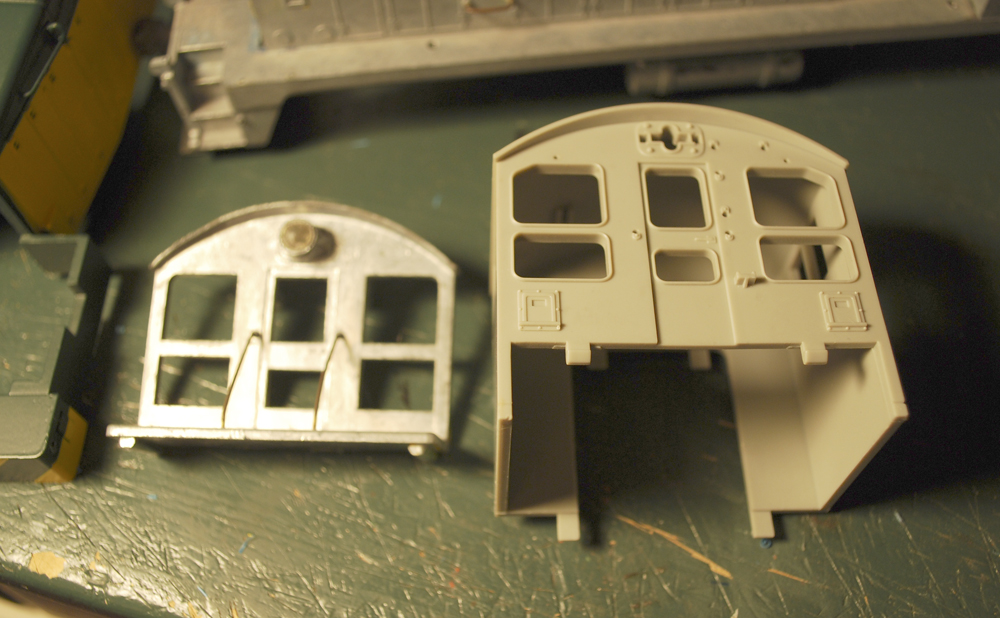
I had disassembled the NW-2 into its parts, the main body, cab front, cab rear and grill front. Before I could just start cutting, I had to see if I wanted to keep the All-Nation Cab that was on the shell. The All-Nation Cab has the correct windows for an NW-2 but it is crude compaired to teh Atlas cab. I’d rather cut the window arch into the Atlas cab than try to bring the All-Nation Cab up to the Atlas level of detail.
Cab Fronts showing what changes will need to be made to the Atlas cab.
Rear Cab Walls
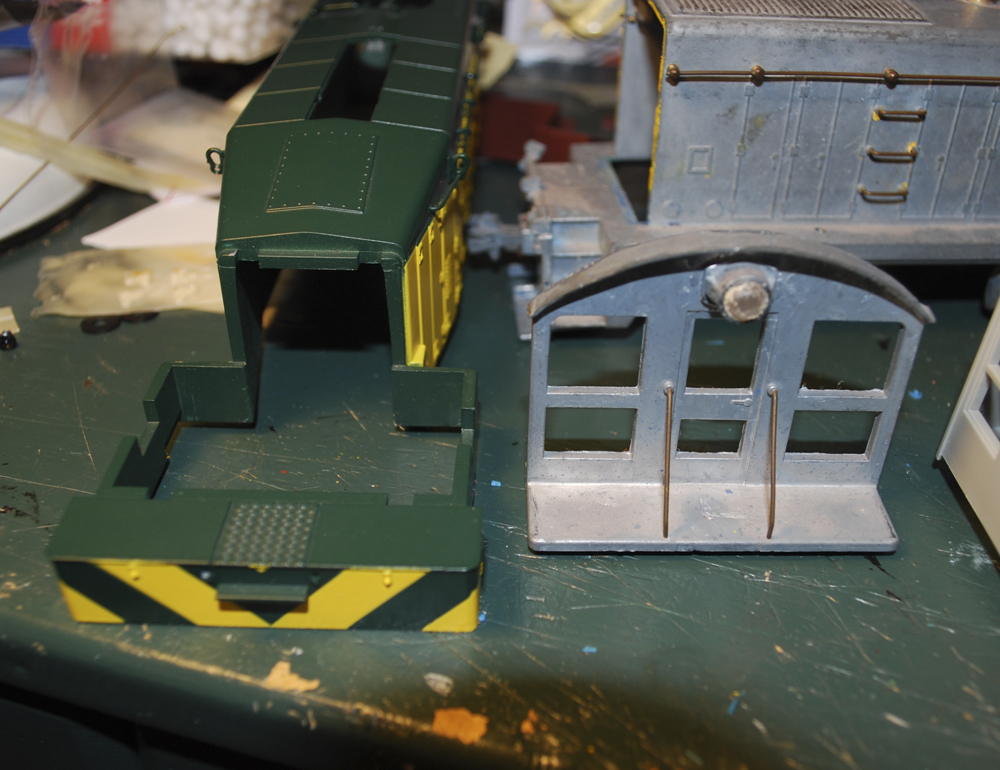
Rear Deck Details
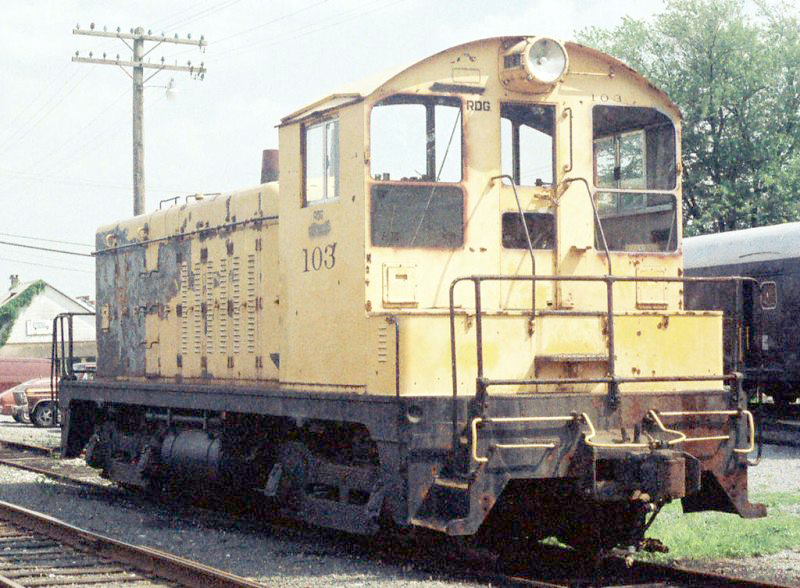
Reading 103
So I think I will use the Atlas cab in this project. Also I want to reuse the rear deck area of the Atlas model as it more closely represents the prototype.
References: Diesel Era – 1998 March/April – Reading’s First-Generation Diesels by by Paul K. Withers FD&S – Vol. 12, No. 2 – Reading’s DF-2: TThe EMD F3 by Richard W. Jahn Reading Diesels Volume 1 The First Generation – by Dale Woodland The Revolutionary Diesel EMC’s FT – by Diesel ERA Photograph’s from George Losse Collection.
I bought this MTH SW-1 shell a couple of years ago. The SW-8 frame has the same wheel spacing as the SW-1 so I thought I could drop the shell on top of the frame. You pretty much can but there are a couple of other thing you need to do to finish up the model. The SW-1 frame top is a different pattern then the longer hood of the SW-8. Atlas did not continue the sapty tread pattern of the deck under the hoo or cab of their SW-8. WHy should they you would never see it. But when the shorter SW-1 hood was placed on top the difference is easy to spot. In the photo it shows up as the unpaited and untextured area in front and behind the shell.
This meant that a new frame deck was needed. I did that and I even cut it slightly wider then the frame deck to take care of the second visual difference in the frames. The SW-1 had a top lip to its frame, the side of the SW-8/9 has a smooth side.
If you have seen this site in the last year you would know that I have been going back and forth about how to model the Elmira branch of the PRR, include Williamsport or Southport wasusualy the hang up. Williamsport did not allow enough Reading to meet my need and Southport gave more interchange but none with the Reading. Anyway, I kept going back and forth about this unit and never finished the conversion because I would need the SW-1 and then the yard would change and I would need an SW-9. Since that is no longer the question and I do not need the SW-1 in this idea of the Shamokin division I decided the shell needed a new home which it now has.
BTW the SW-9 doesn’t fit in the new layout time period. So an All-Nation NW-2 shell is going on top of the Atlas frame. More on that to come.
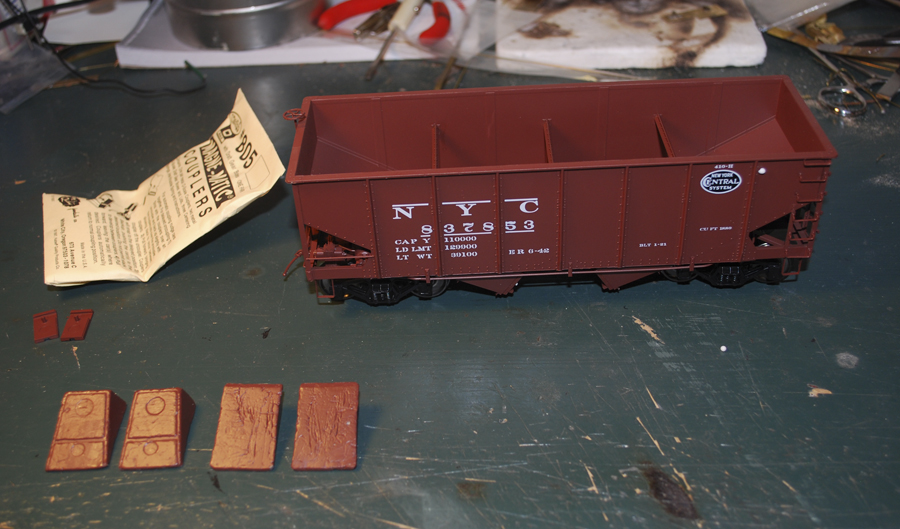
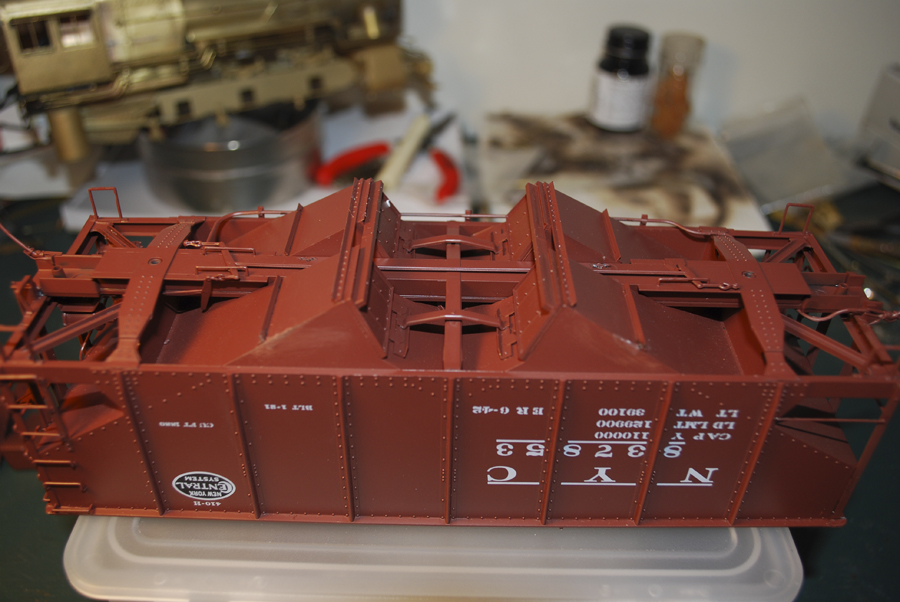
Intermountain NYC USRA Twin – Everything from the box
Starting from the bottom, the trucks were removed and then the hopper opening mechanism.Parts removed from underfram and the center crossmember on the interior.
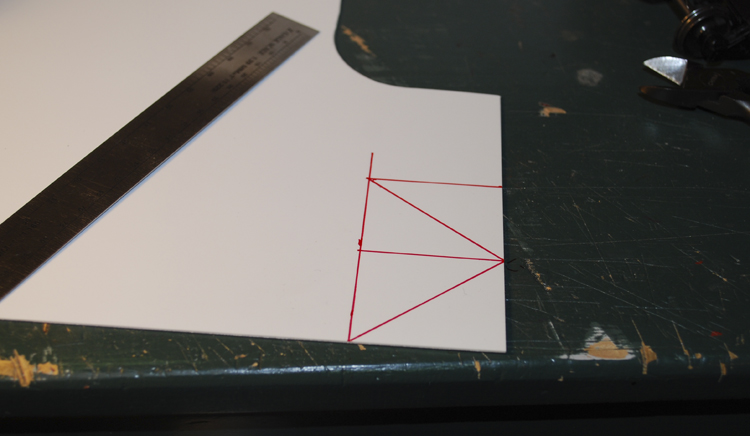
Laying out the center brace on .030 styrene
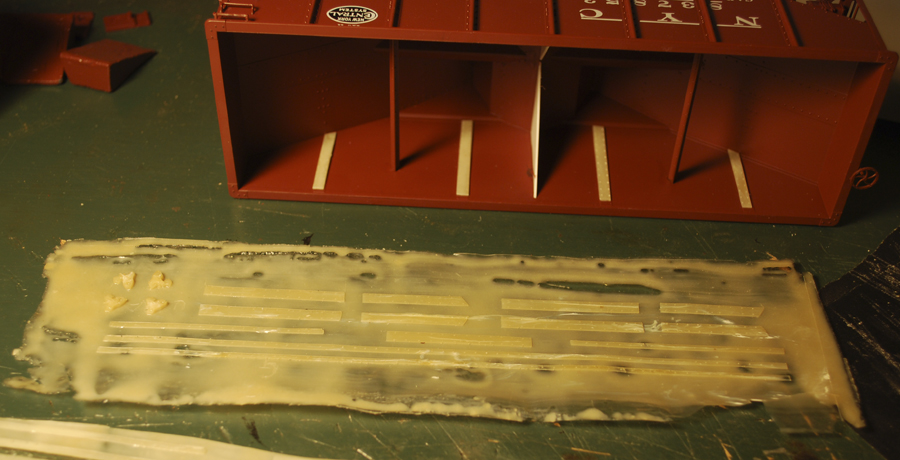
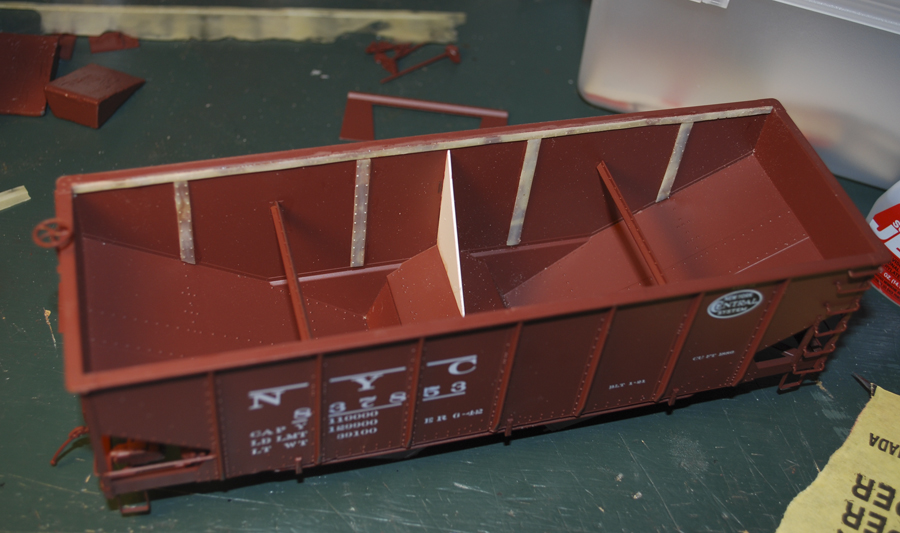
Center brace is in the car and the interior rivet detail is being fitted. Note the castings in the forground. I built all the parts to detail the interiors and then made a rubber mold and cast the parts.
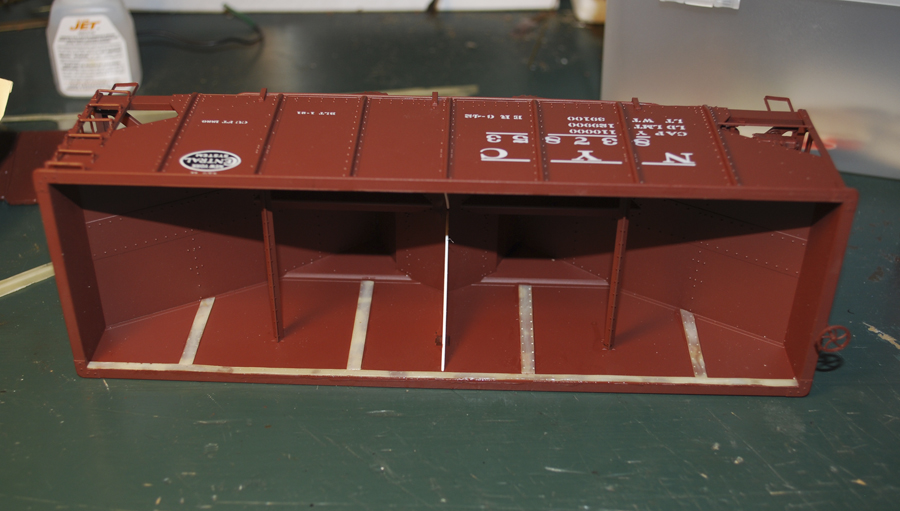
Details have been added to one side of the model.
Rivets detail and center braces have been added in theis view.