New Model Released

O Scale / Proto48 has a new manufacturer, Tangent Scale Models announced the release of a new model of a GATC 6,000 Gallon 3-Compartment tank car. They are now available from the Tangent Scale Models website.

The models are hand-crafted in brass in Republic of Korea by SamModel and are offered in both O scale 2-Rail and Proto-48 configurations.

Tangent Scale Models has offered the modeler a choice of O Scale or Proto48 models with the release of their new 50 ton truck.

Tangent Scale Models has a fine reputation in HO and N scale. I am glad they have taken the chance on the O Scale/Proto48 market with this fine new offering. One of these is in transit here now. I’ll have more thoughts and photos of it after it arrives.

All Photos from the Tangent Scale Models Website.

A Model I Once Owned

Above is one of the locomotives I sold off through my For Sale Page. Since I’m not modeling the PRR as my primary road any more, it became surplus. Along with over 24 other steam locomotives, and unique PRR equipment. Happily most have new homes now.

I sold this locomotive to a guy I never meet, only corresponded with him by emails. He then shipped it up to Forsyth Rail Services to let Matt Forsyth do his magic.

Today, Matt sent me a link the this video and as he said, “It’s been extensively rebuilt and accurately re-detailed.” Matt also installed newest QSI Q3 sound for steam. He says he still has yet to install the headlight lens and the coal load for the tender, then it will be shipped to it’s new home.

Here is what it looked like when I sold it.
I’d say Matt did a really fine job on this locomotive.

ush-prr-l1

Baldwin VO-1000 #79

Reading OE-10 #79 at Gordon

One of the switchers I’ve chosen to model is Reading class OE-10 #79. It was a Baldwin VO-1000 switcher assigned to Gordon, PA during my modeling time-period.

I’m going to use a Car Works VO-1000 model as the starting point. Car Works imported the VO series back in the early 90’s. They imported three versions, “VO-1000 1942-1944 #Curved Walks,” “VO-1000 1945-1947 Straight Walks” and a “DS4-4-1000 with FLat Grill.” They have a Weaver chain drive with Pittman motor. Out of the box they run fine. I may explore using a different drive set-up.

Looking at the fireman’s side there are shutters in two of the engine compartment doors, they will need to be added. The exhaust stack needs to be extended. I will need to add a cover for the radiator. Since my model has broken solder joints on one of the foot-boards at each end I think all four need to come off, be cleaned up and re-soldered back on.

Fireman's side of the Car Works VO-1000

Fireman’s side of the Car Works VO-1000

Looking at the engineer’s side of the locomotive. There does not appear to be many changes needed. I’ll have to add a number board to the lower part of the radiator screen. This view shows the radiator cover removed in 1956, so maybe I don’t need to add it. The Reading rain gutters will need to be added to the cab roof.

Reading #79 at Shamokin, PA 1956

Engineer's Side of the Car Works VO-1000

Engineer’s Side of the Car Works VO-1000

Archer Transfers

On the Reading AS-16’s there were four rows of louvers under the engineer’s side air intake on the long hood, as seen on this detail of my brother’s drawing. These are missing on my pair of Overland AS-16’s. I’m not going to punch them in the brass sheeet and the thoght of cutting them into the sheet does not appeal to me either.

I thought this would be a good test for Archer Fine Transfers new surface details #36 O Scale 14″ Louvers and #37 O Scale 6″ Louvers. So I ordered them in last week. I have to say that they arrived a couple of days after placing the order on their website. I had ordered their rivets before but had not had a chance to use them yet.

I thought it would be a good idea to test them out before using them on the model. Even though these sheets are a little expensive there are plenty of louvers on the sheet.

They are handled just like decals but they are more fragile than decals. I soaked them in water until they released from the backing paper and then applied them to a test sheet of brass. They adheared fine, I did use Champs setting solution on them after they had dried.

For my needs for the AS-16 niether size is really correct. So I experimented with cutting the 14″ down to 8″ width. My first attempt did not work as I slide the blade down the decal. This cause the ends to chip away. I did say these details are fragile. My second attempt worked much better, I cut through the decals in a chopping motion and did not have any chipping of the detail.

Here is the test in primer. As I mentioned the left column, the 6″ louvers are spaced too far apart and are too narrow. The middle column is the 14″ louvers. They are close to the correct spacing but are too wide. The third column is the cut down 8″ column from the 14″ details. There is a hint of overlap in this image but remember column one is 1/8 of an inch wide, so they are reproduced here at about 400% of the actual size.

I like them. I’ll try them out on the Baldwins in the next couple of days.

And Then There Were Two….

Two and counting
A pair of AS-16’s.

As more of the PRR models finding continue to find new homes. A second AS-16 arrived yesterday in as nice a condition as the first one. I can’t wait to get these painted.

Last night’s trading also brought a SGL G-3 to the roster. This will move my modeling clock back into 1952.

One Door Closes and One Door Opens

Yesterday at the Strasburg 2-Rail O Scale Train Show the first of my Sunset I1sa’s went to a new home and a new baby came home with me, an Overland Baldwin AS-16.

Possible prototypes that could be built from this model:

1951 built AS-16 Freight Unit:
Add rain gutter on cab roof
Remove the fuel tank between the trucks

1951 built AS-16 Passenger Unit:
Add rain gutter on cab roof

1952 built AS-16 Freight Unit:
Add rain gutter on cab roof
Add Dynamic Brake opening on the short hood.
Remove the tank behind the cab on the short hood

Overland AS-16
Overland AS-16
Engineers side view
Engineers side view
fireman's side view
Fireman’s side view
Fireman's 3/4 view
Fireman’s 3/4 view
End views
End views
Top View

Gem PRR B6sb Tender

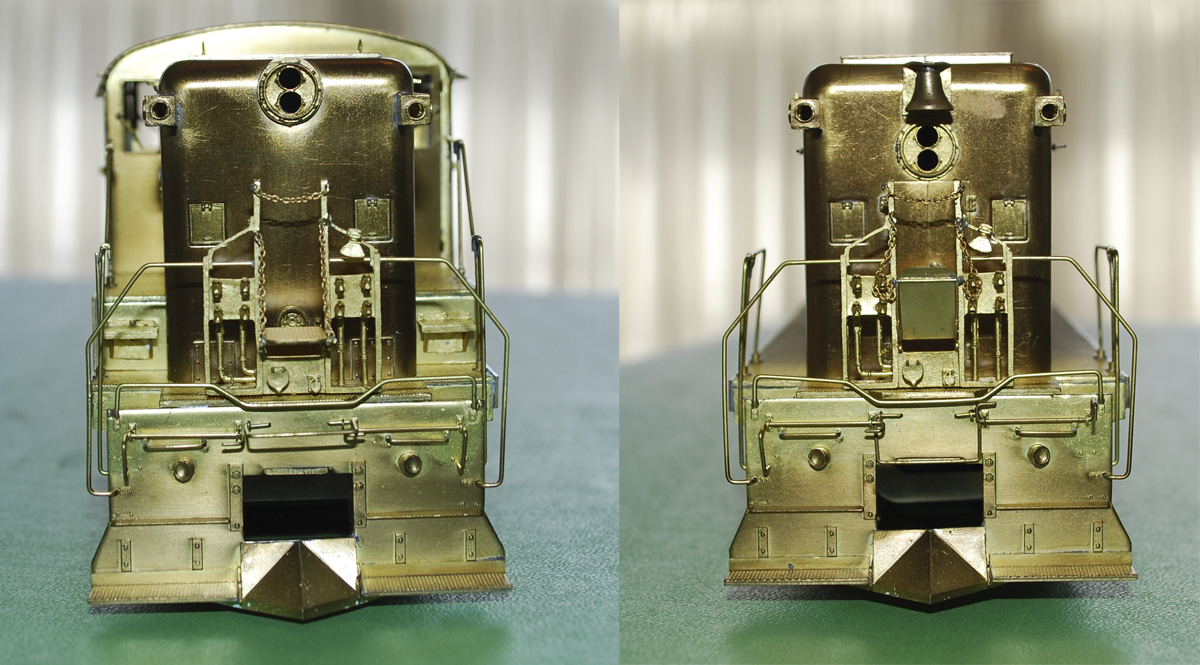
Rear View of Gem B6sb Tender

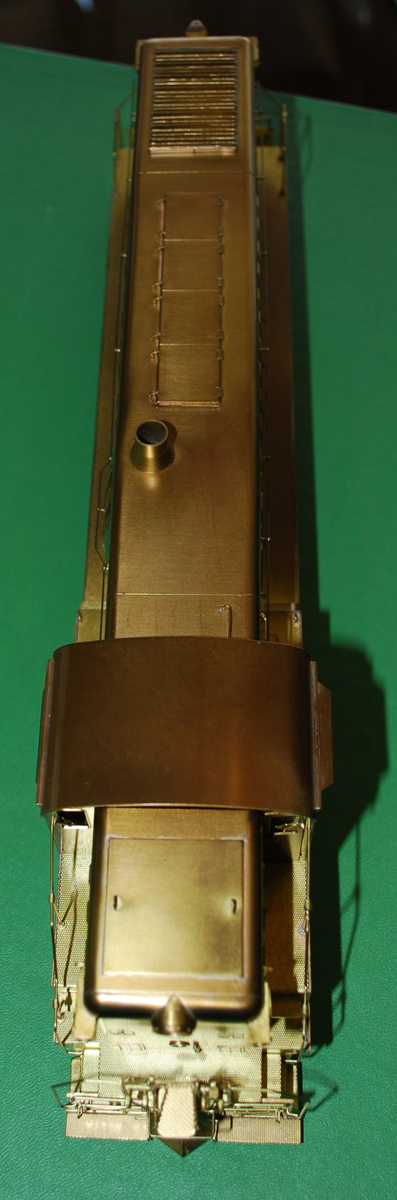
Top View of Gem B6sb Tender

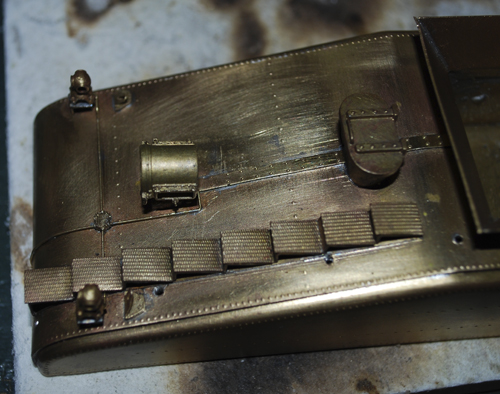
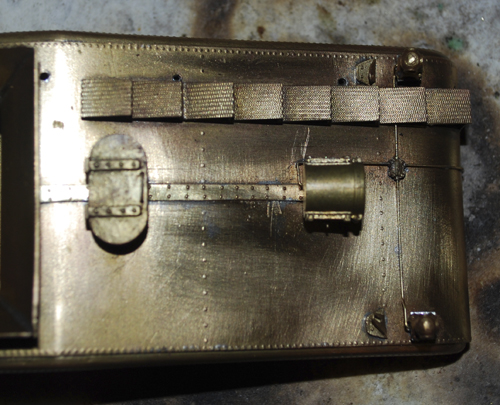
Side View of Gem B6sb Tender

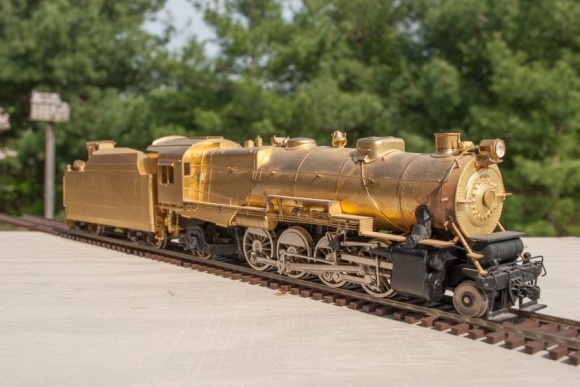
Here is a quick look at what I have on my workbench. It’s a Gem PRR B6sb tender.

I started by removing the marker castings, handrails, and rear headlight.

I made up the missing rivet strip for the middle of the tender by punching rivets in a piece of sheet brass and cutting out the strip. This was not as easy as working with styrene, although similar it had a very different feel to the process. Once it was made, it was soldered in place. The rivet strip in the photo was actually my second attempt. The first one looked OK until I asked myself a question, “If this were a styrene model instead of brass would I keep it?” The answer was no, so out came the torch and off it went. It only added an extra half hour to make the new part and solder it in place and it was time well spent.

Next came the new markers from Precision Scale (PSC) . My friend Matt Forsyth suggested placing a small square of brass under the markers feet since they did not sit well on the Gem brackets. That worked out great. It was tough trying to hold them while soldering them in place they tended to want to walk, but I applied pressure from the top to try to minimize this movement and was able to get them soldered on.

I next added the lifting brackets and a new headlight from Trackside Specialties. The headlight bracket was a pain because of the tiny feet on the casting. I left the mold spur at the bottom of the casting and alloud it to go through the bottom of the headlight platform on the tender. This allowed another surface to be soldered and gave the whole assembly some added strength.

Tonight, I added the conduit for the markers and headlight. I formed brass wire for one side of the conduit based on photo of the rear of the tender. This was fed through the casting for the junction box. The second side had to be formed with the casting on the wire. after that was soldered in place the two vertical conduits were formed and soldered in place.

Still to go is the remake of the handrails for the back of the tender and a little more clean up on the coal bunker.