WB: A Model Returns

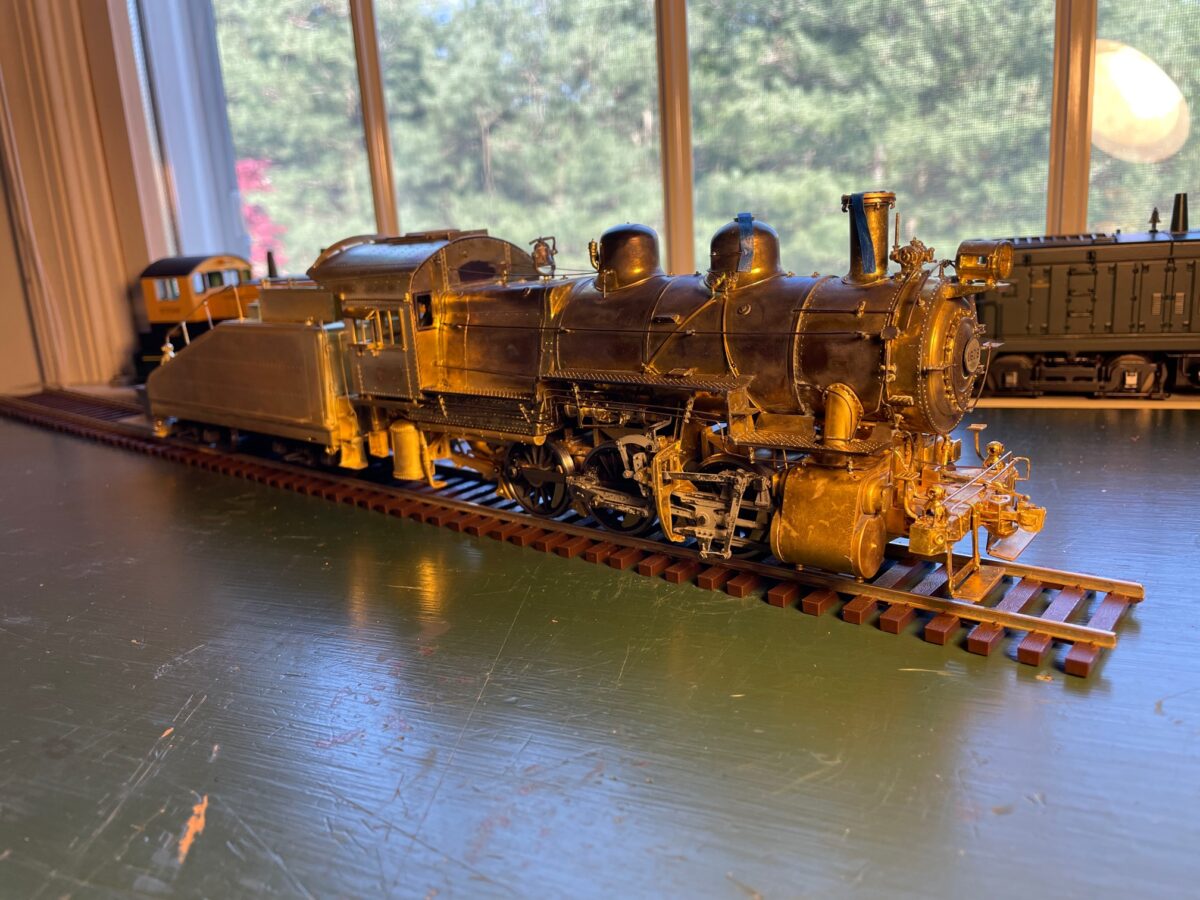
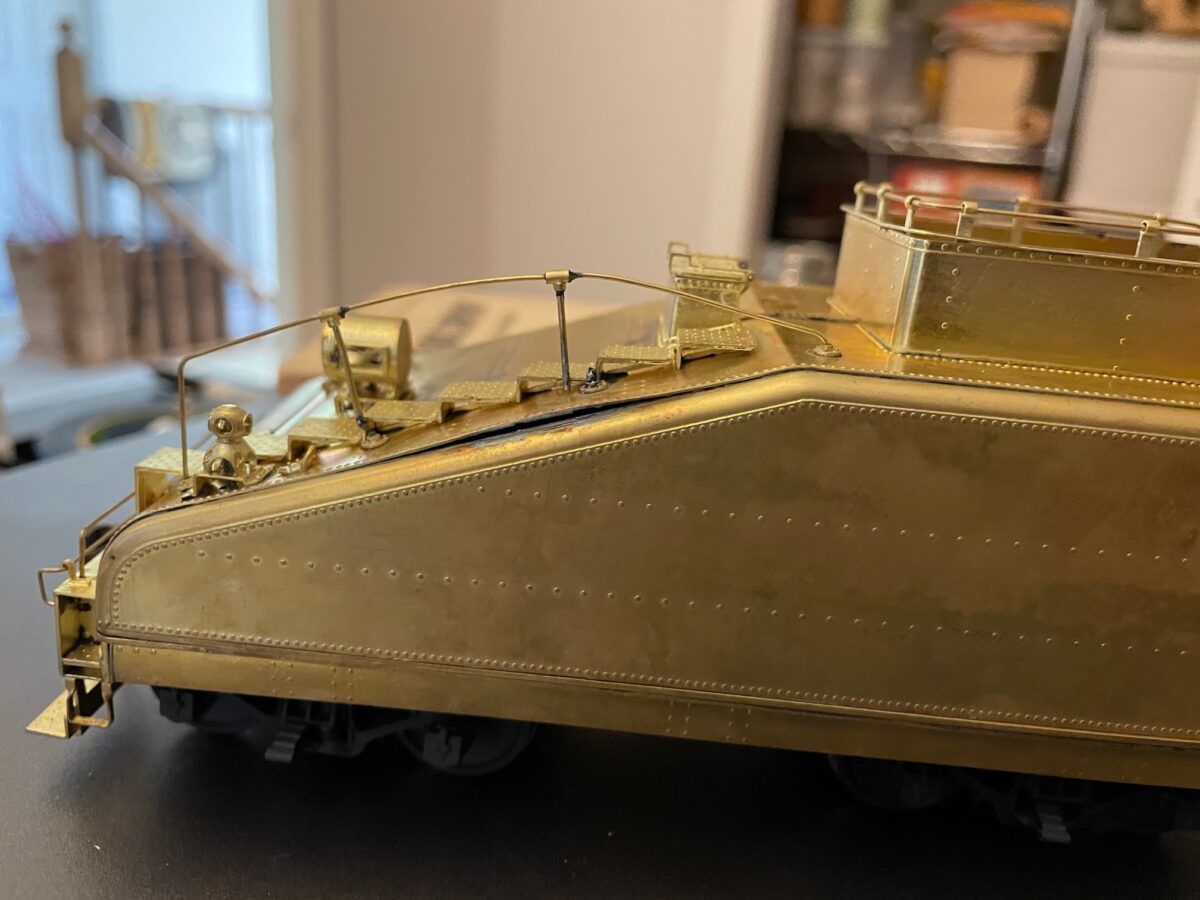
A strange thing happened to me at the Chicago Show in 2019, a PRR B6sb followed me home. First is was priced so well, I couldn’t pass it up. That was mostly because it had a very bad paint job.

After spending some time being converted to Proto48 by Carl Jackson, this fine looking model came home with me on Saturday. During the time the model was with Carl it had the chance to take a bath in his stripping tank. It needed it!

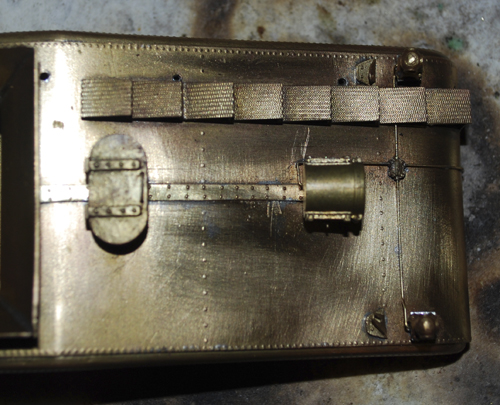
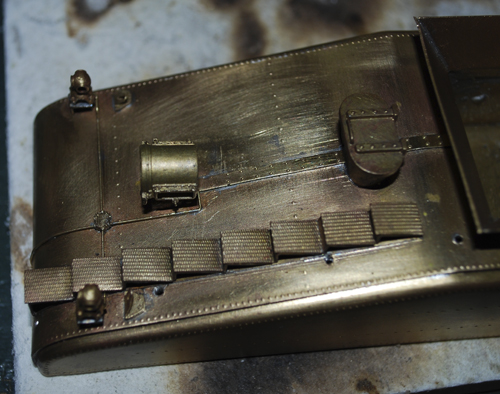
Now that all that ugly paint is gone, it revealed a couple of things the bad paint was hiding. It appears the previous owner had a mishap with the tender. The railings appear to have been damaged at one time. A repair attempt has resulted with too much heat being applied, which caused the rear tender deck to seperate from the side. There is also a little separation along the top rim of the coal bunker. So, I have some repair work to do before I can think about painting this model.

Next up was another model that came home from this past weekend’s show. It’s an RY Models Reading welded 55 ton twin hopper. It also is suffering from a case of bad paint. This time the issue was in the weathering attempt.

This is a good reason why you learn to paint and weather freight cars using a $20 Weaver car, not a brass model.

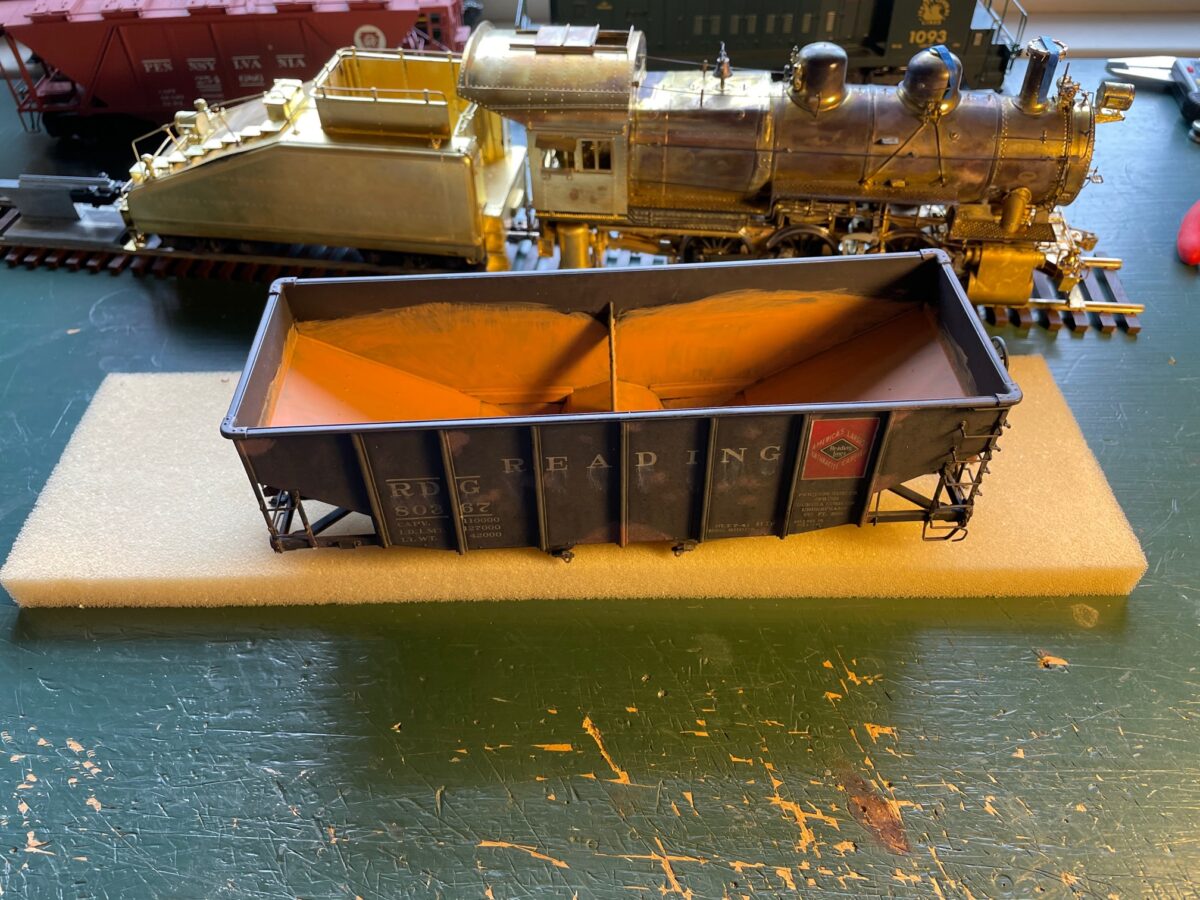
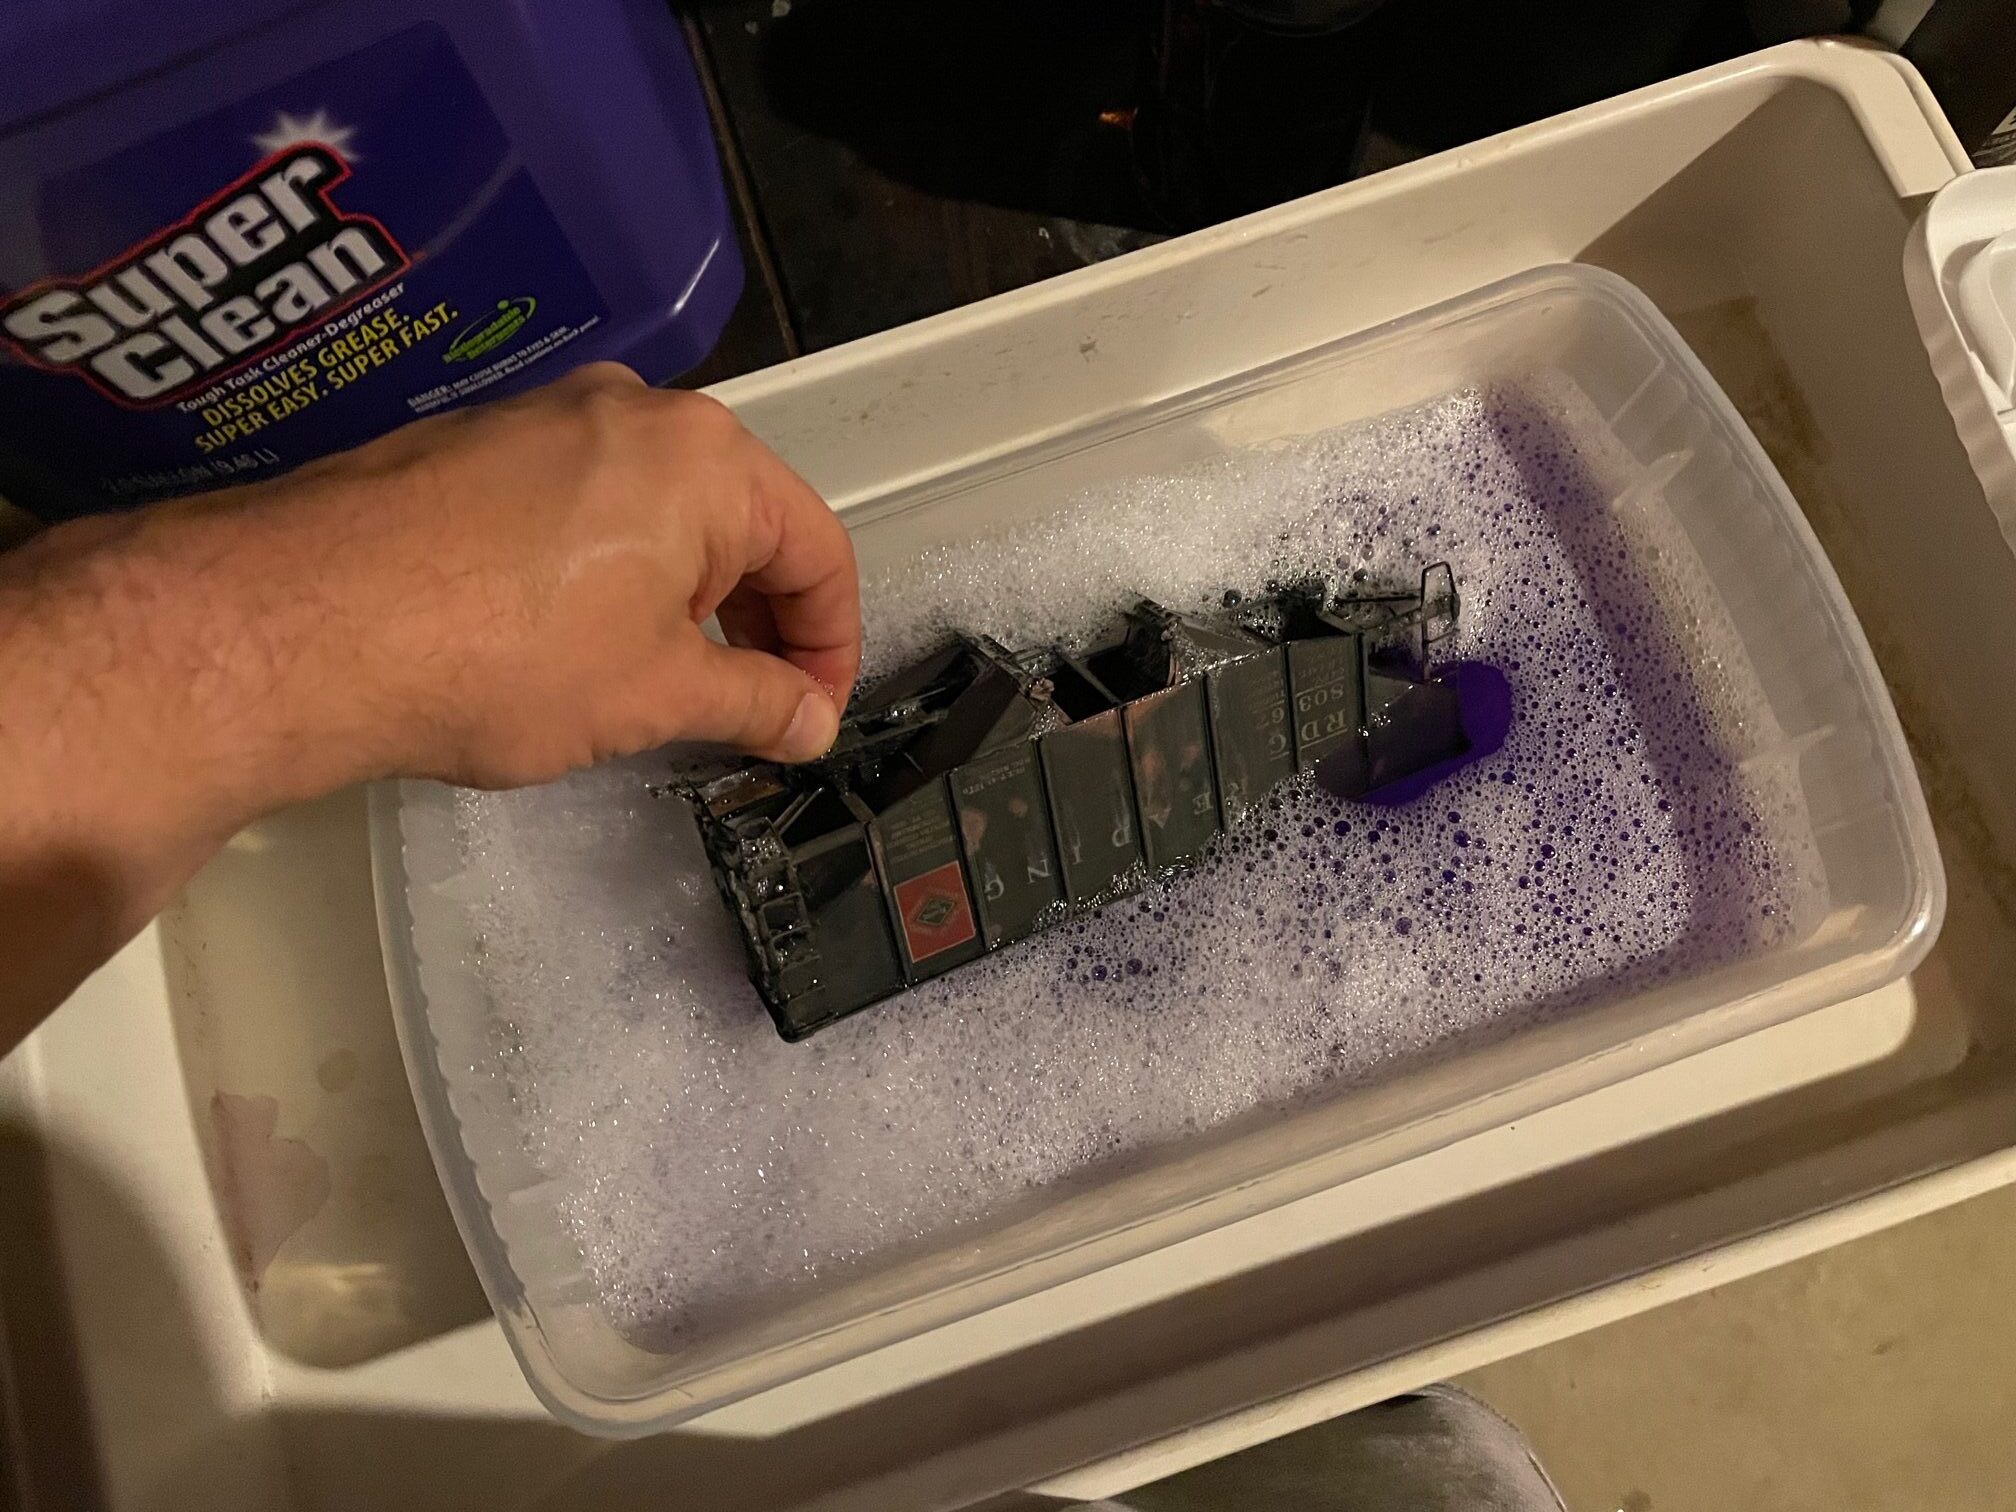
My first thought was to try to salvage the paint by just cleaning up the weathering. Better sense took over, rather than try to fix the bad weathering, I’ll just start over. So into the stripping tank for this one. I can say that with a little help from a toothbrush every few hours this model is now almost back to brass. I figure it will be done later today.

Gem PRR B6sb Tender

Rear View of Gem B6sb Tender

Top View of Gem B6sb Tender

Side View of Gem B6sb Tender

Here is a quick look at what I have on my workbench. It’s a Gem PRR B6sb tender.

I started by removing the marker castings, handrails, and rear headlight.

I made up the missing rivet strip for the middle of the tender by punching rivets in a piece of sheet brass and cutting out the strip. This was not as easy as working with styrene, although similar it had a very different feel to the process. Once it was made, it was soldered in place. The rivet strip in the photo was actually my second attempt. The first one looked OK until I asked myself a question, “If this were a styrene model instead of brass would I keep it?” The answer was no, so out came the torch and off it went. It only added an extra half hour to make the new part and solder it in place and it was time well spent.

Next came the new markers from Precision Scale (PSC) . My friend Matt Forsyth suggested placing a small square of brass under the markers feet since they did not sit well on the Gem brackets. That worked out great. It was tough trying to hold them while soldering them in place they tended to want to walk, but I applied pressure from the top to try to minimize this movement and was able to get them soldered on.

I next added the lifting brackets and a new headlight from Trackside Specialties. The headlight bracket was a pain because of the tiny feet on the casting. I left the mold spur at the bottom of the casting and alloud it to go through the bottom of the headlight platform on the tender. This allowed another surface to be soldered and gave the whole assembly some added strength.

Tonight, I added the conduit for the markers and headlight. I formed brass wire for one side of the conduit based on photo of the rear of the tender. This was fed through the casting for the junction box. The second side had to be formed with the casting on the wire. after that was soldered in place the two vertical conduits were formed and soldered in place.

Still to go is the remake of the handrails for the back of the tender and a little more clean up on the coal bunker.