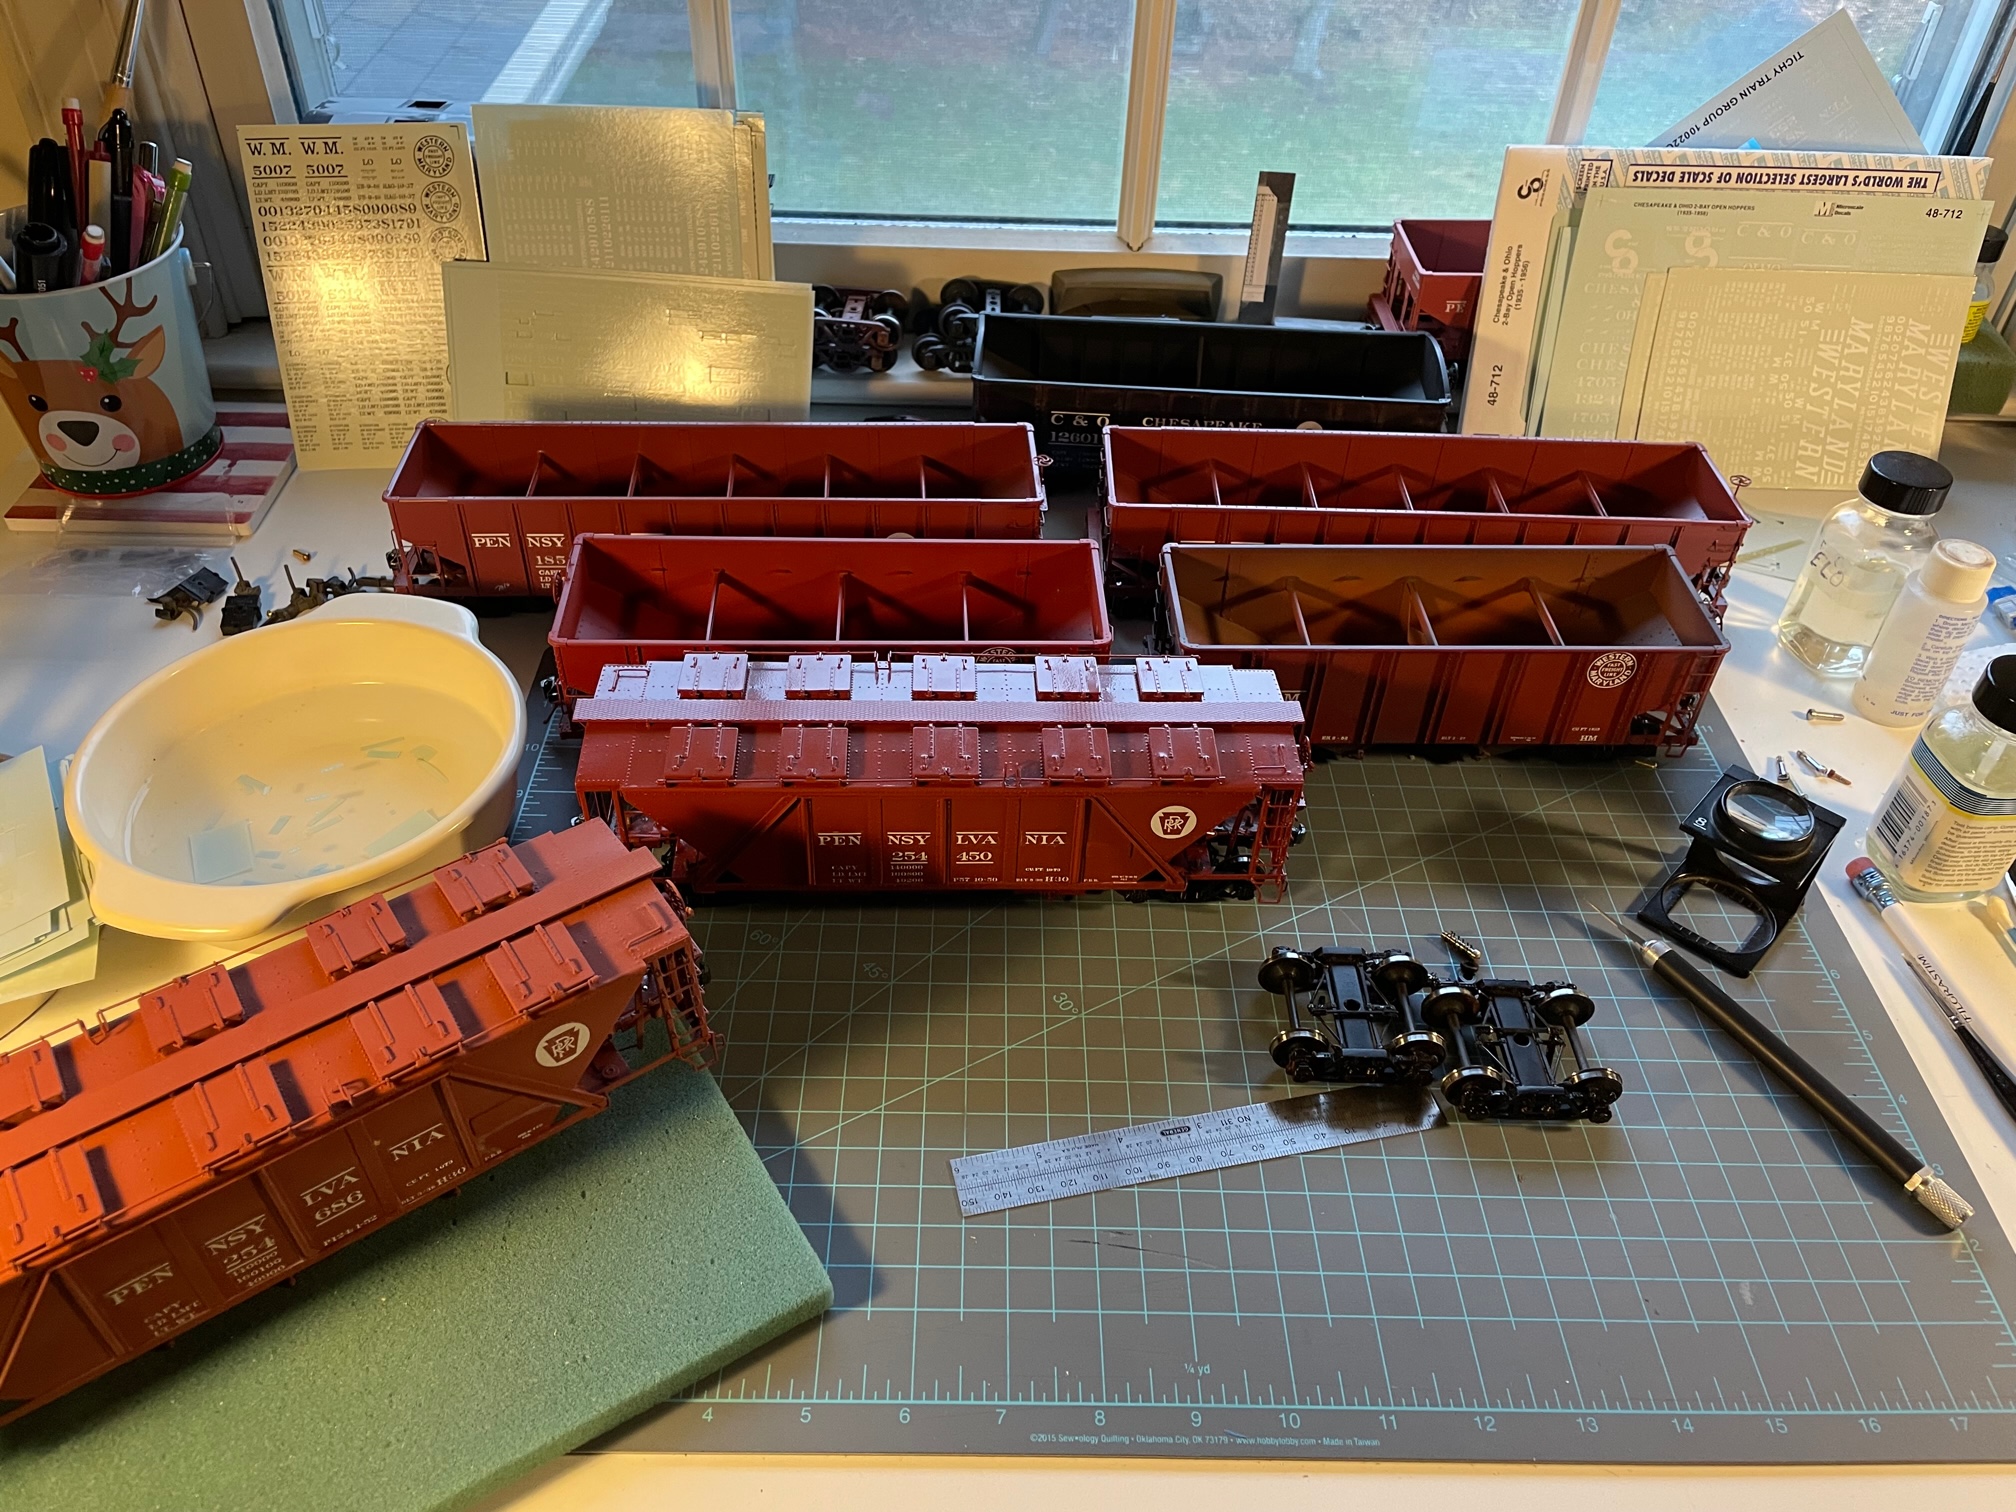
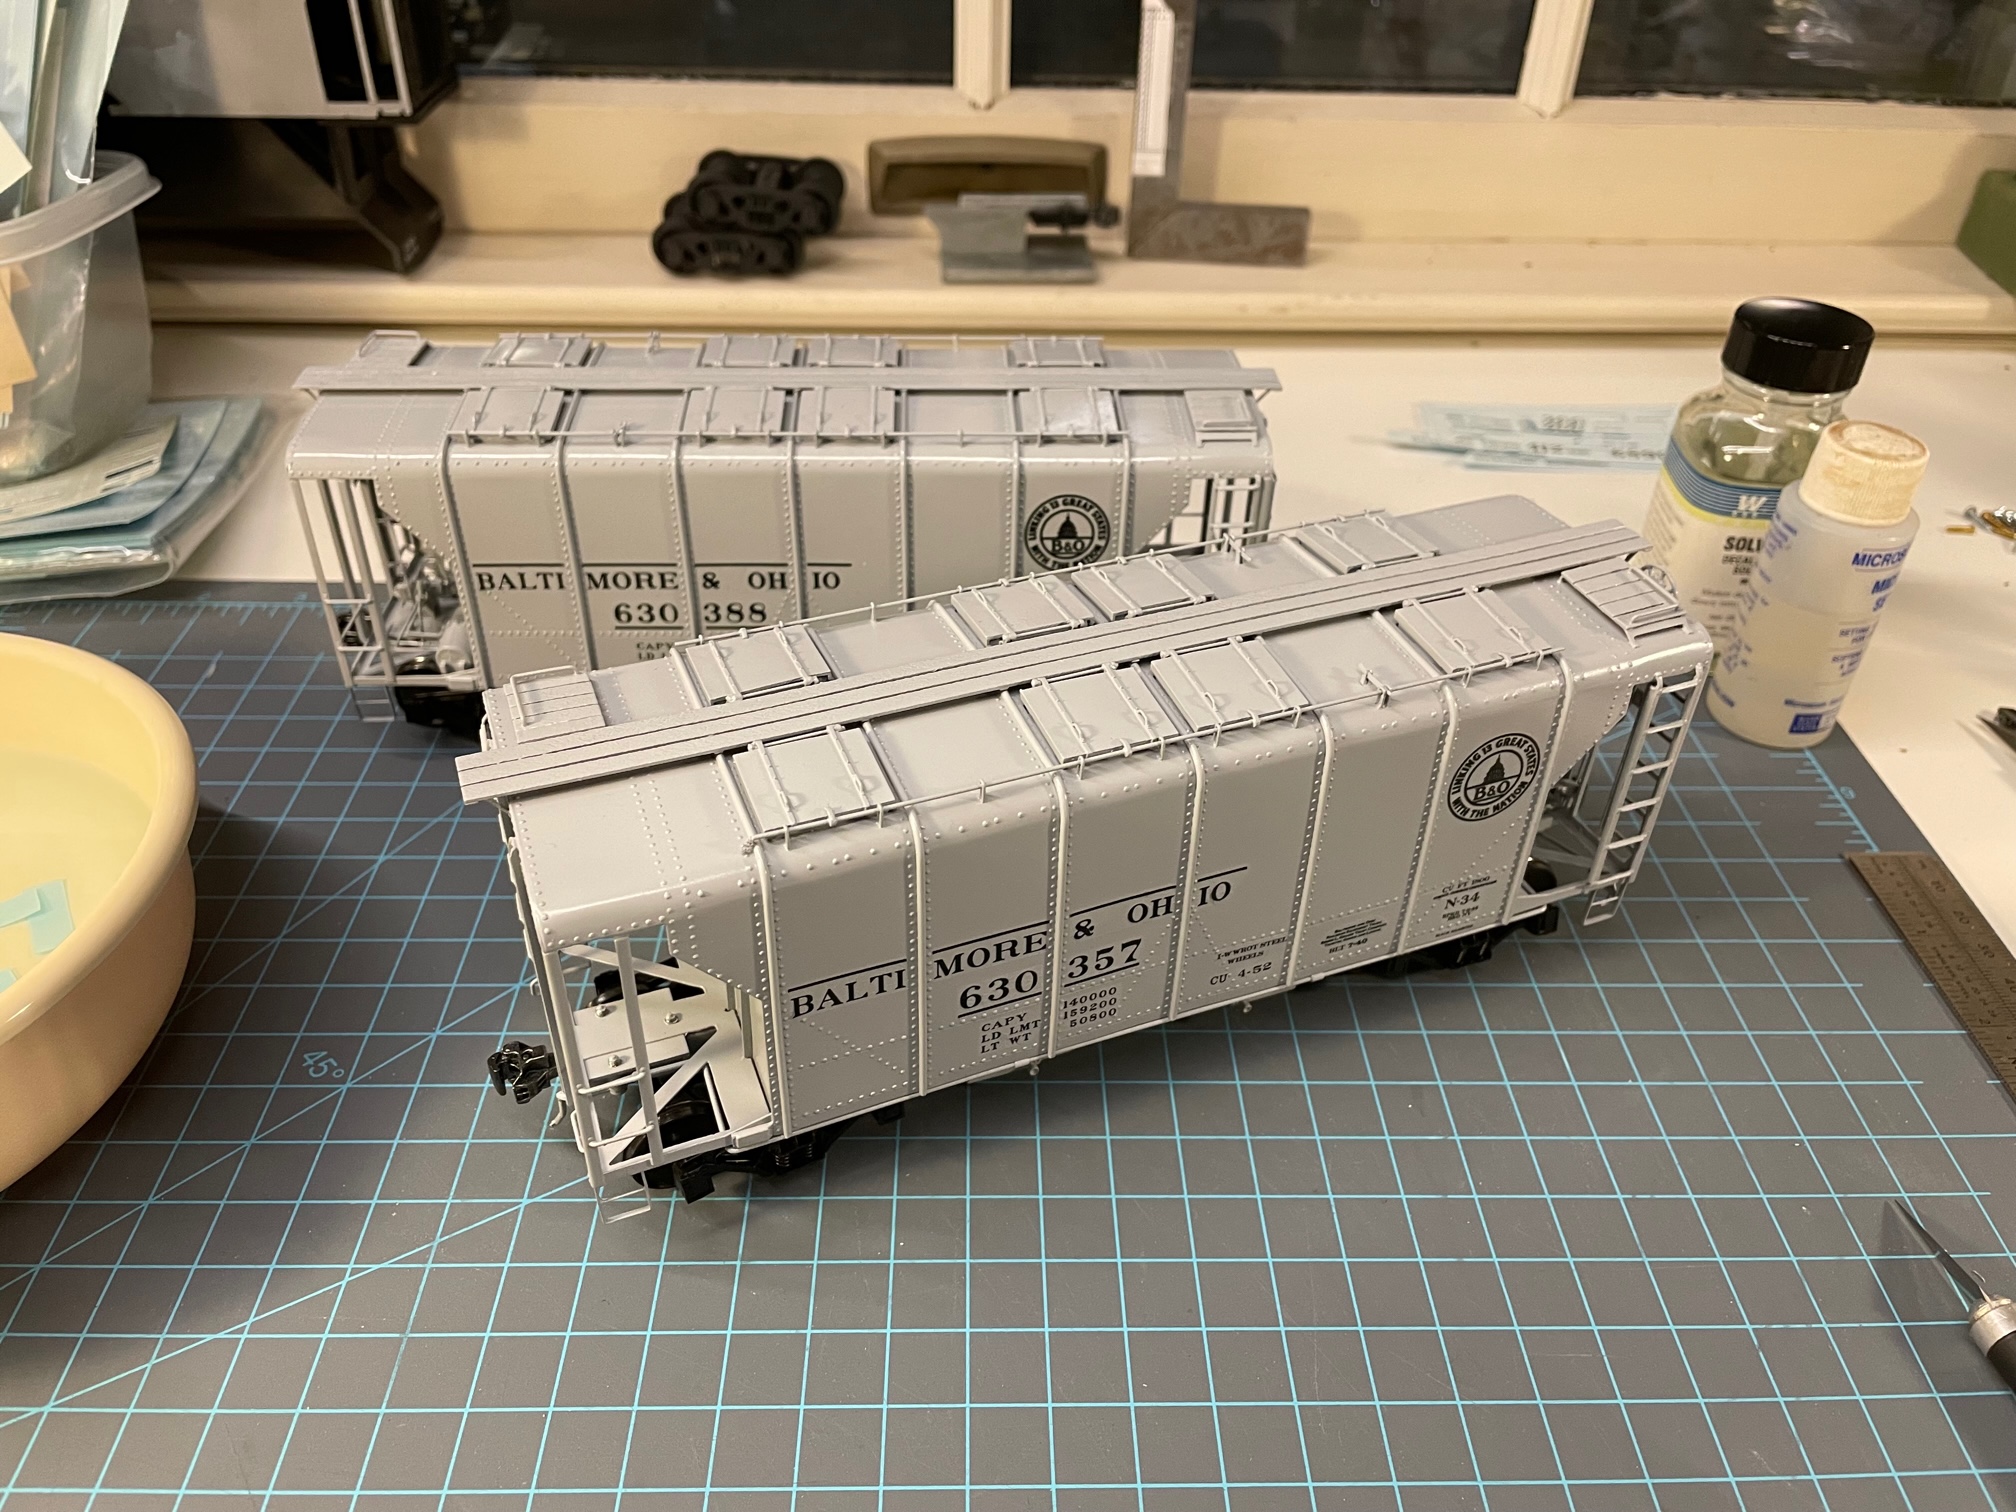
I haven’t been up to that much. Mostly working on some of the cars I painted last Summer. In the above image there is a mixture of cars being decorated and in the case of the two PRR H30’s, they were decorated back when I was modeling a PRR branch set in 1956. So I was changing the weight dates on the two cars to be correct for my summer of 1952 period.
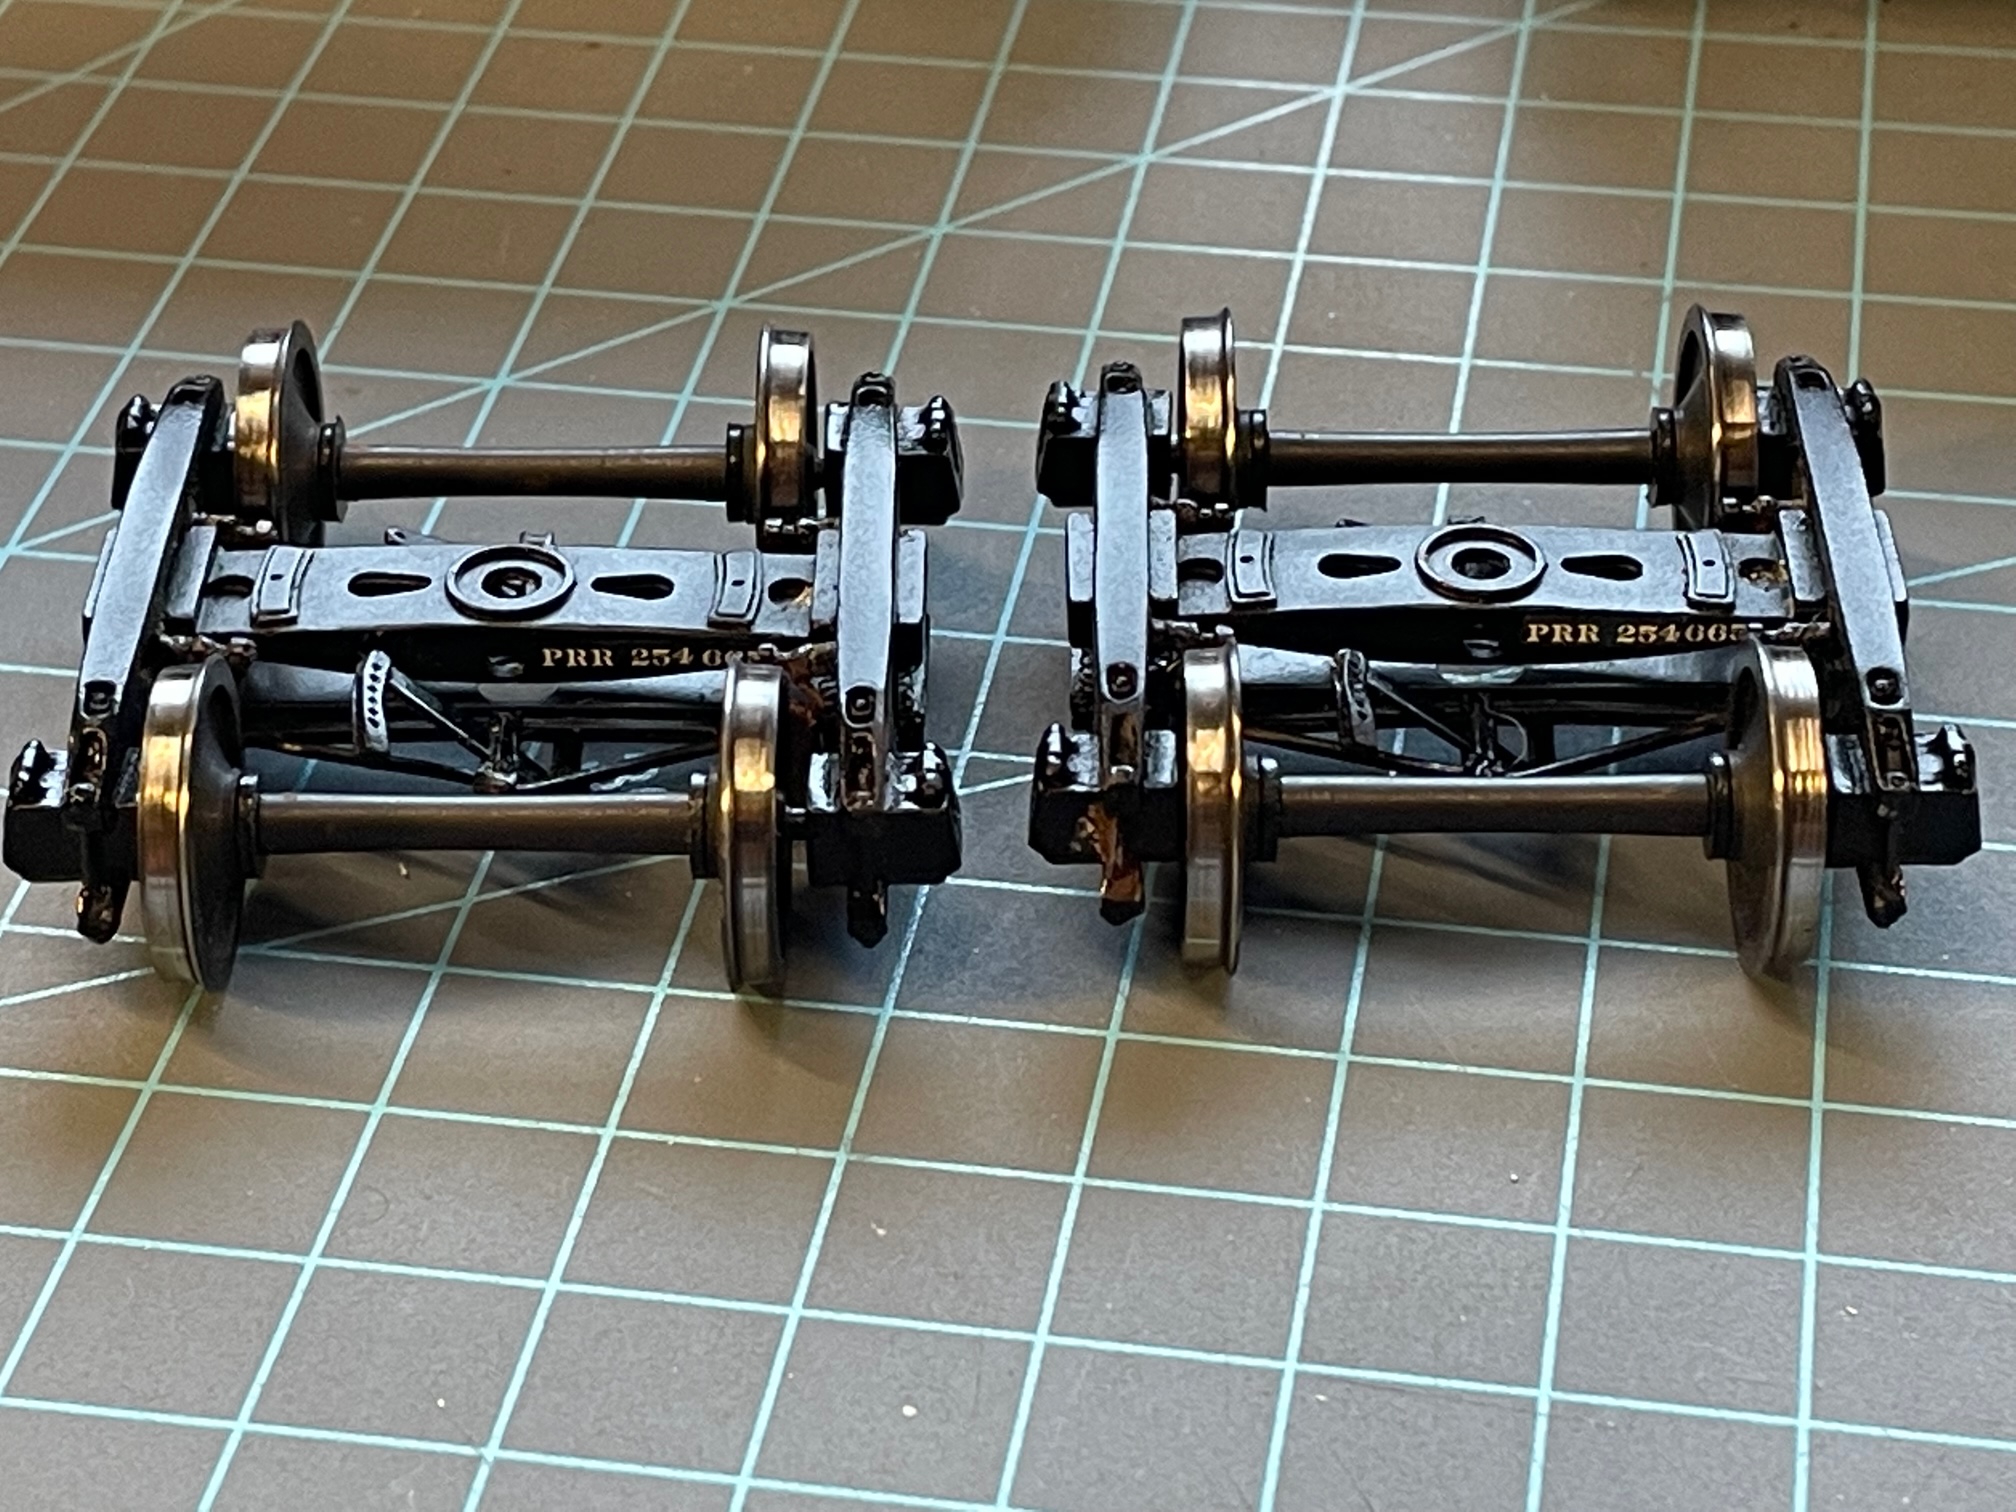
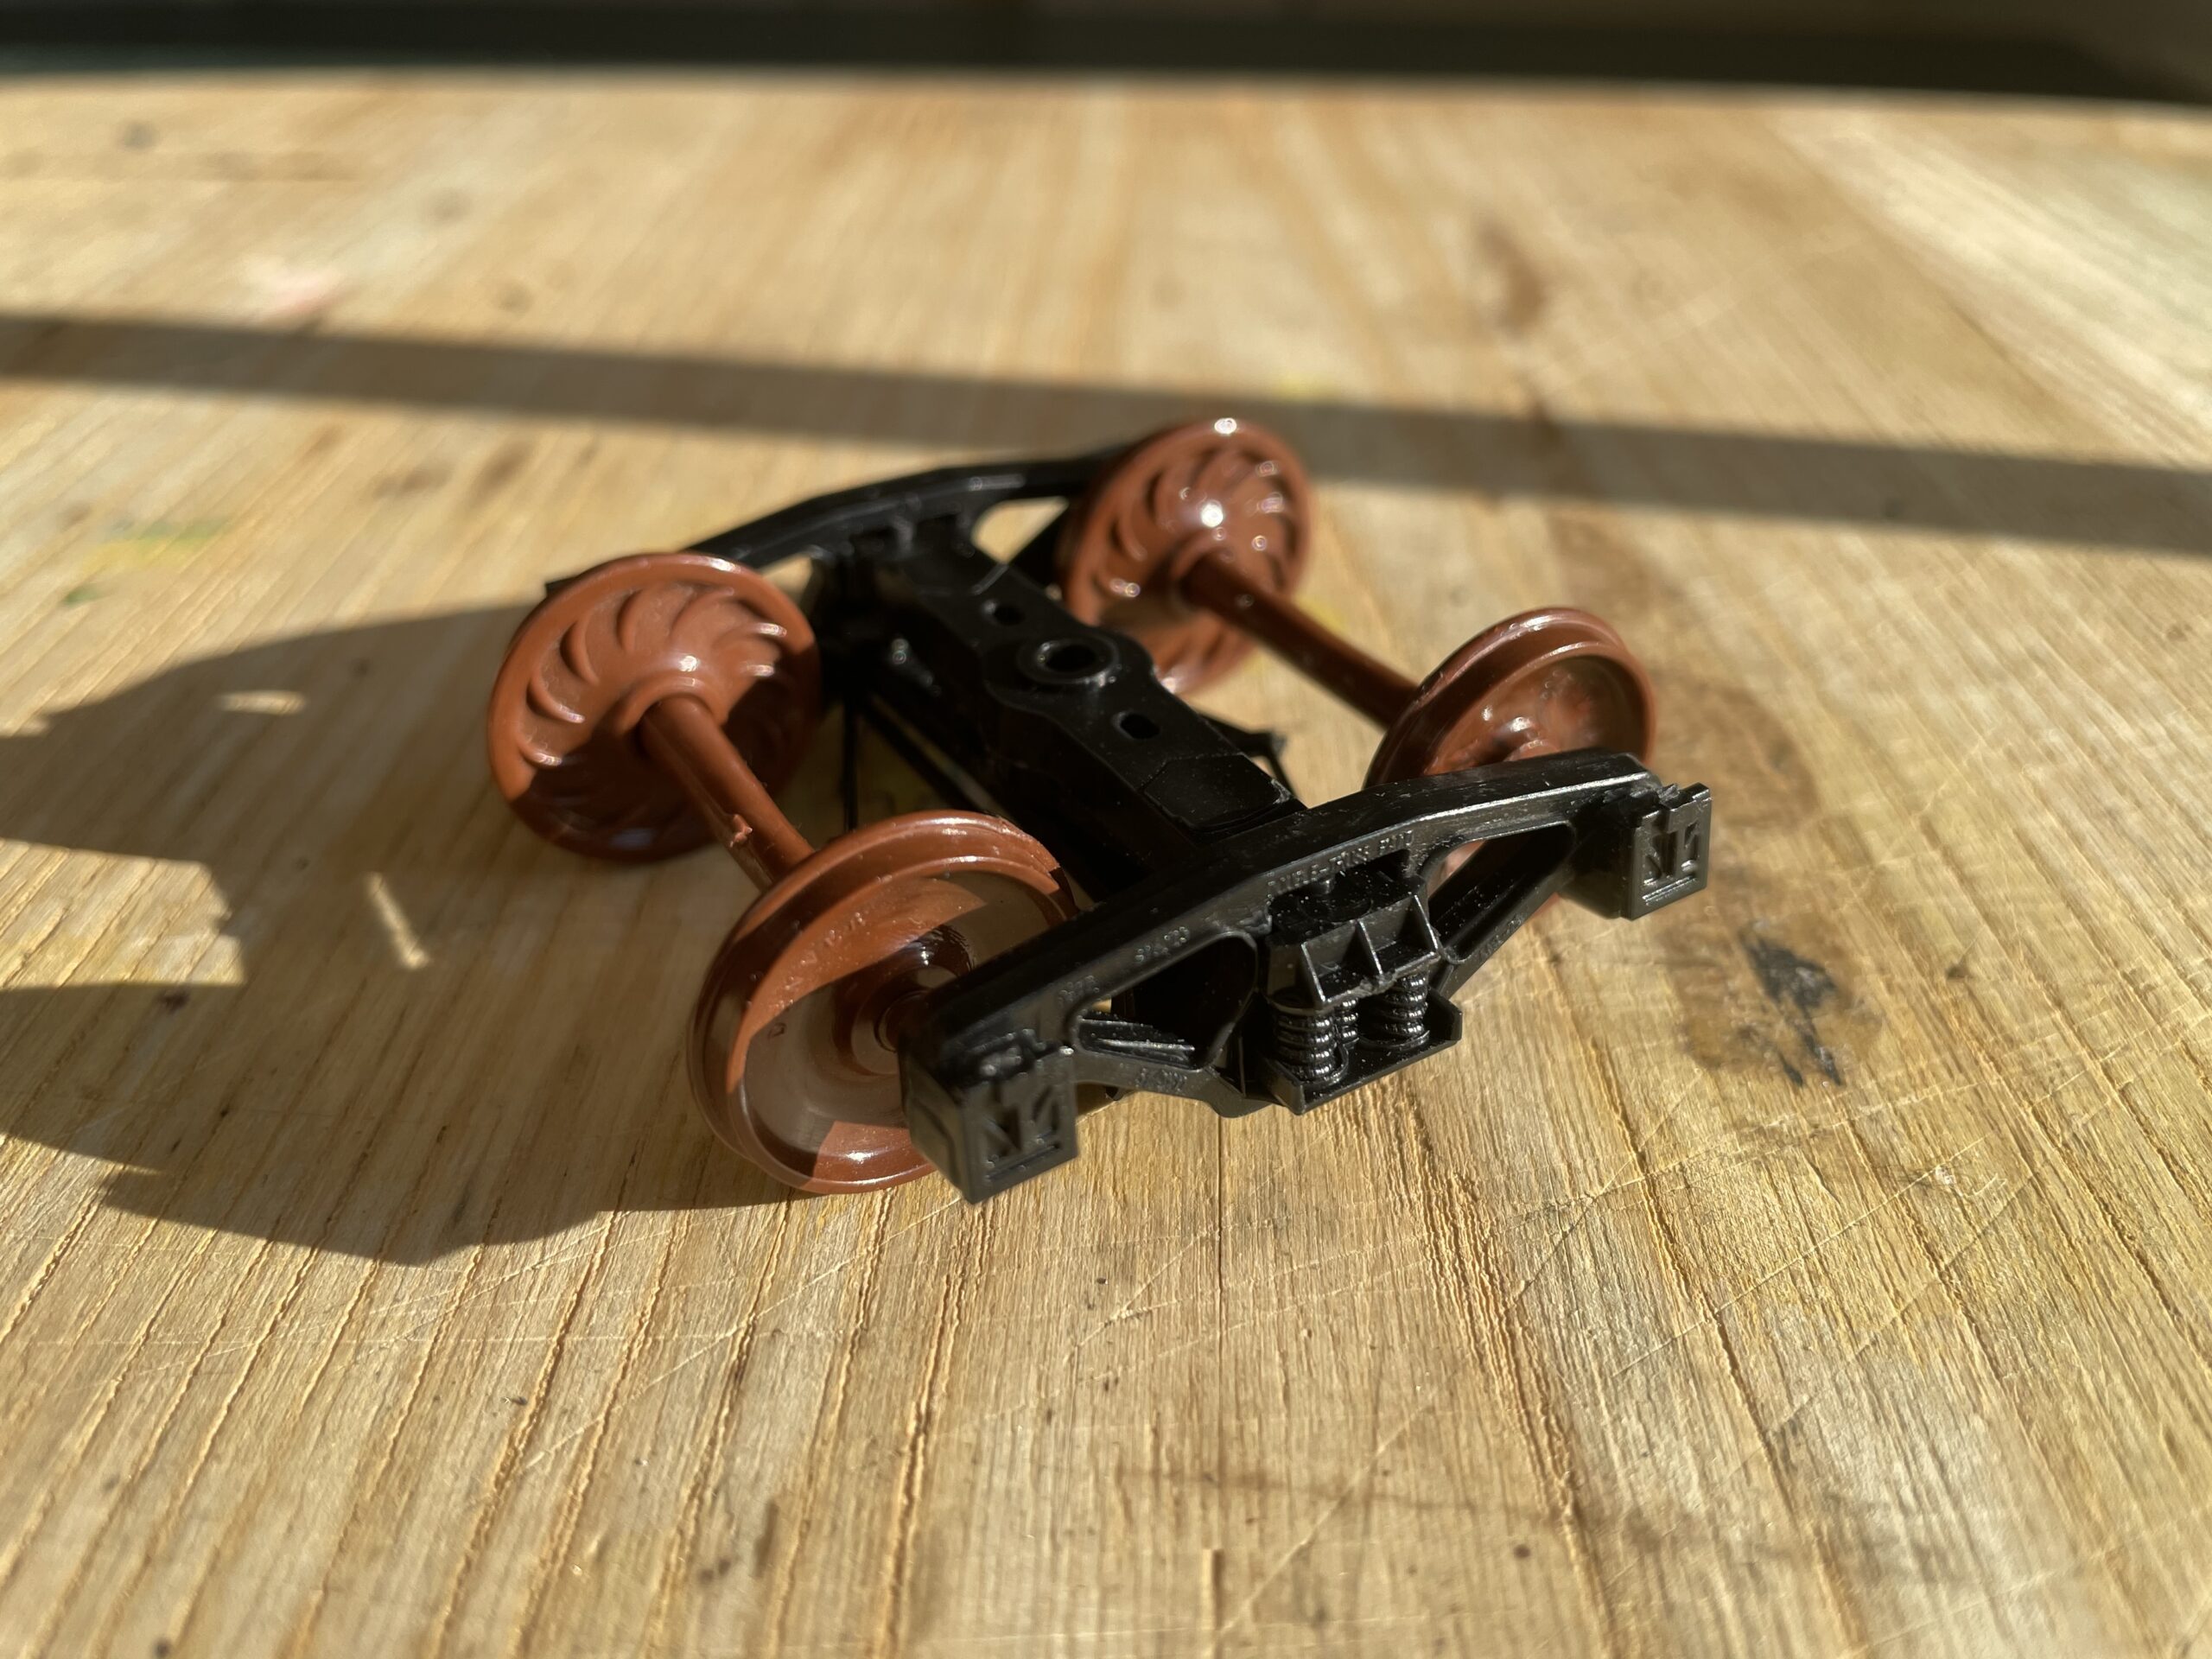
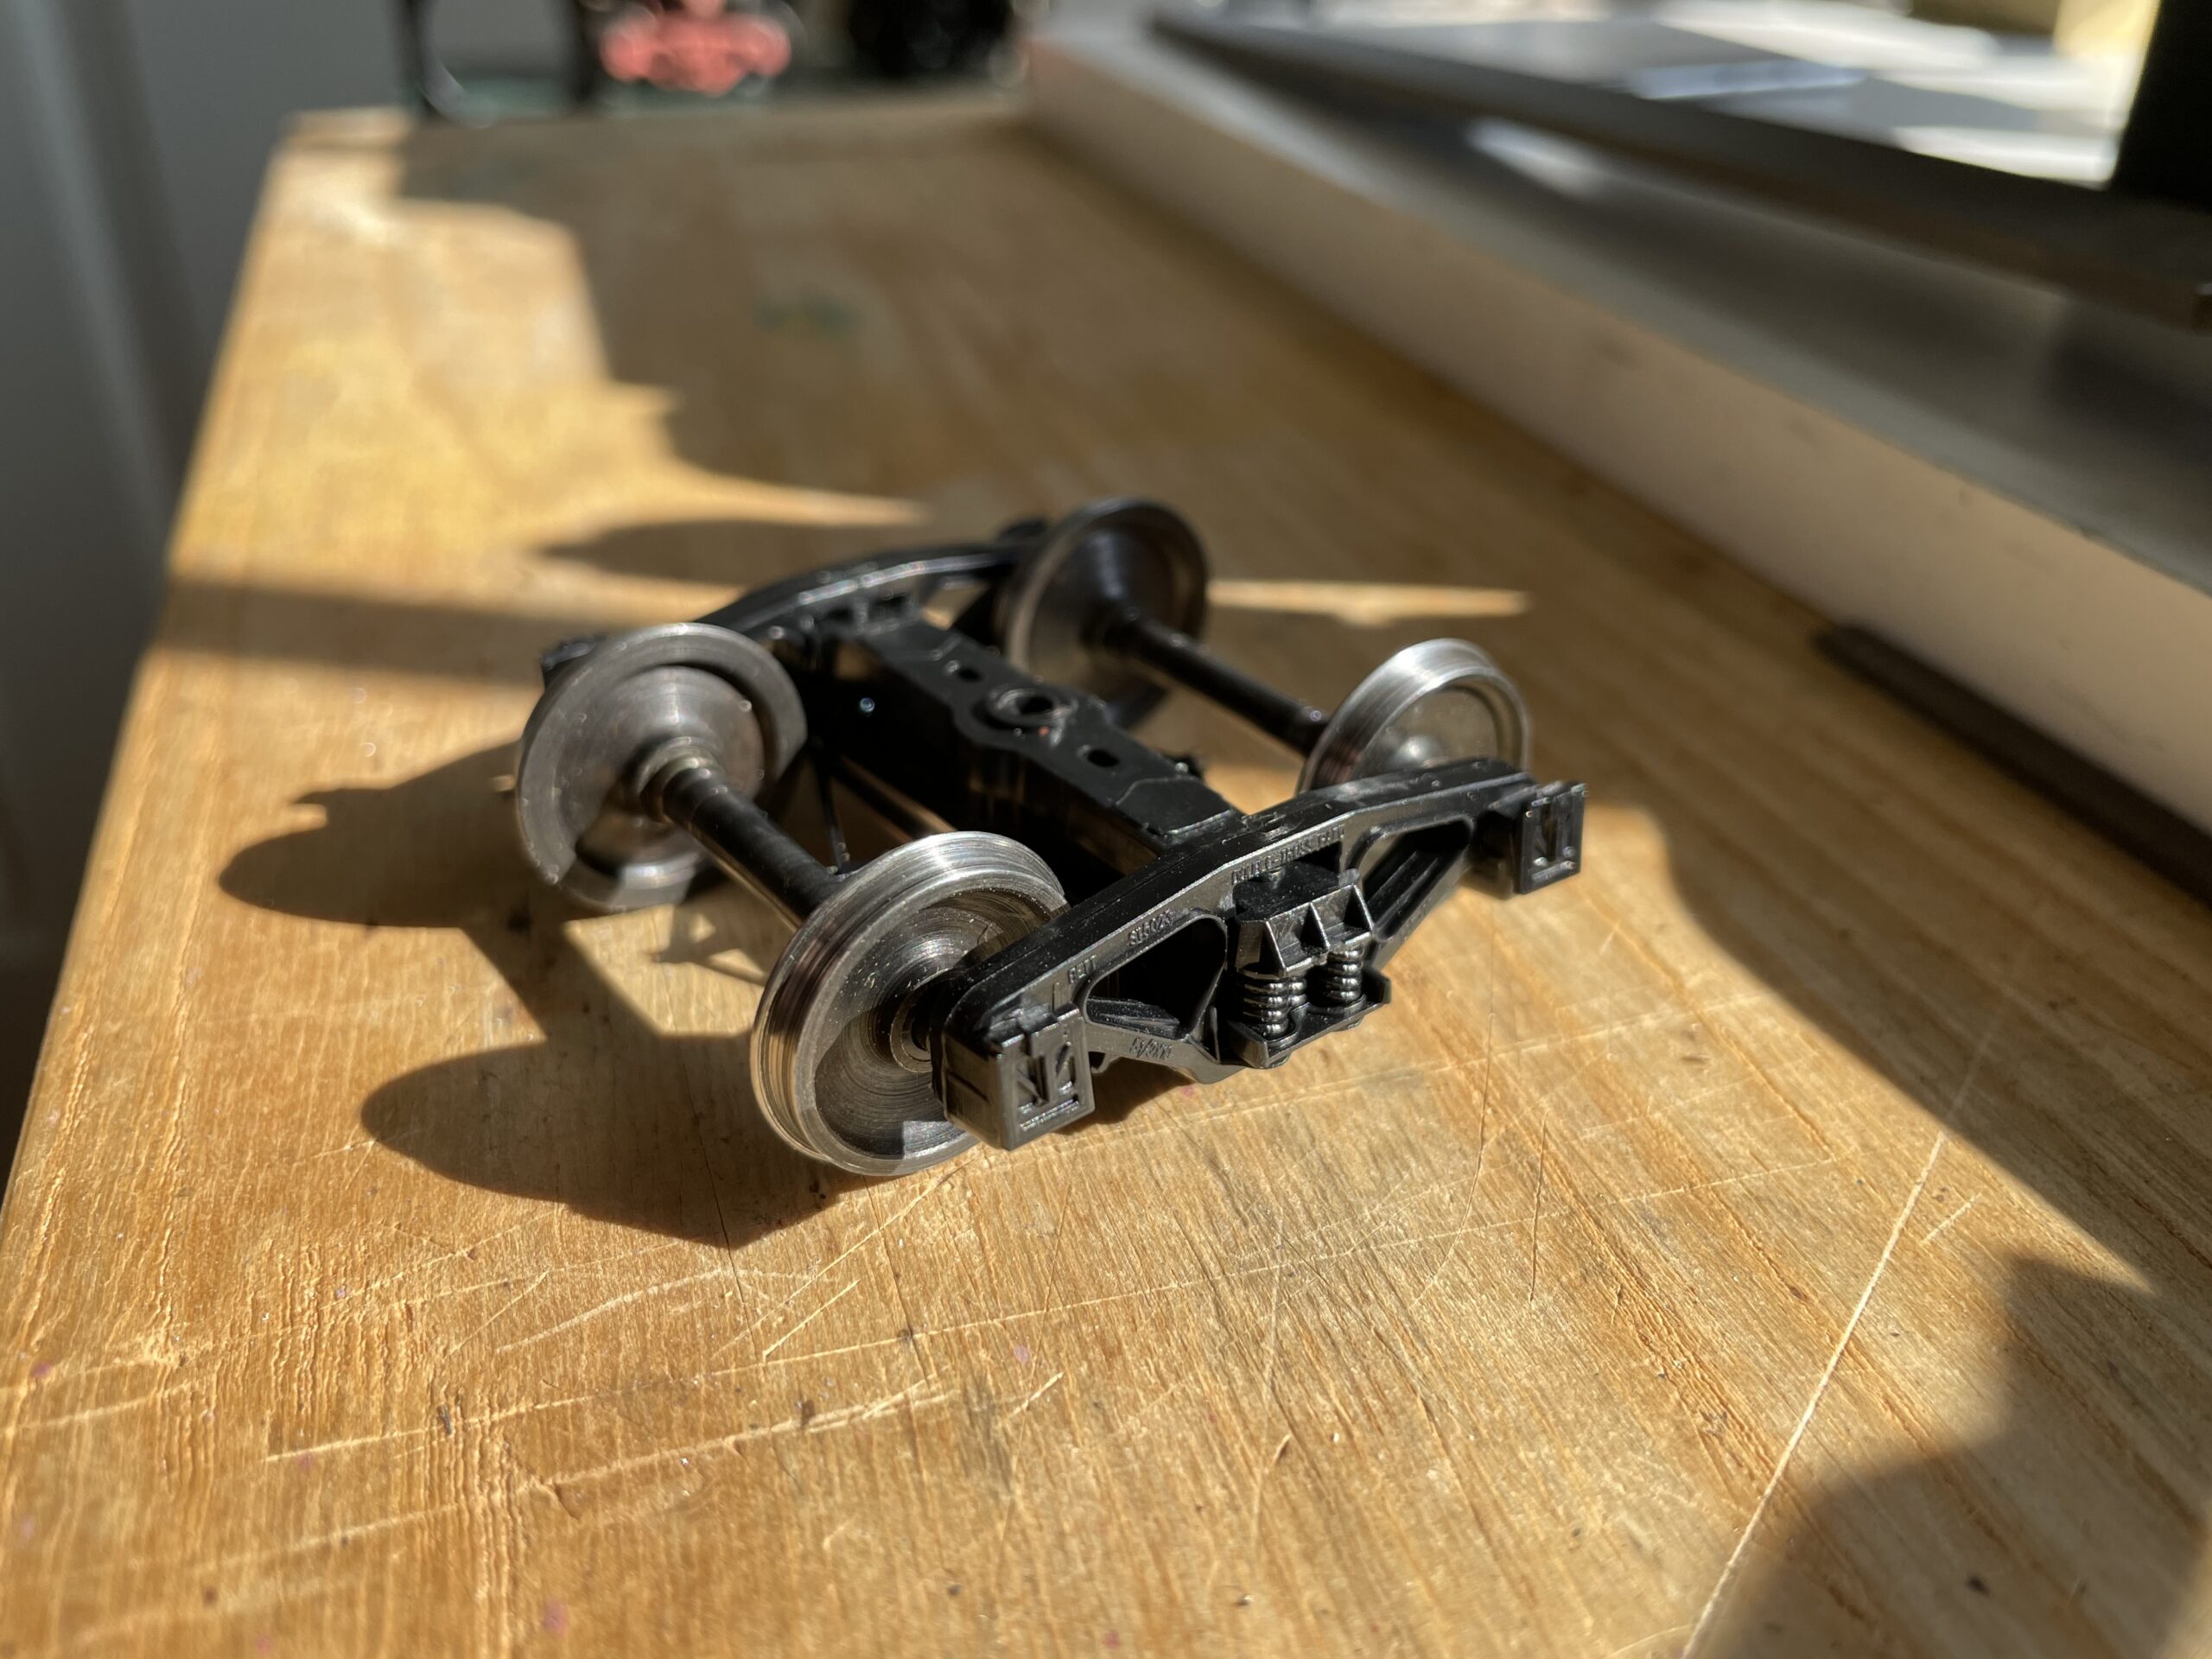
I went to work on the trucks, first thing was to polish the treads. Then, I noticed that they did not have the trucks numbered for the cars. So now they do.
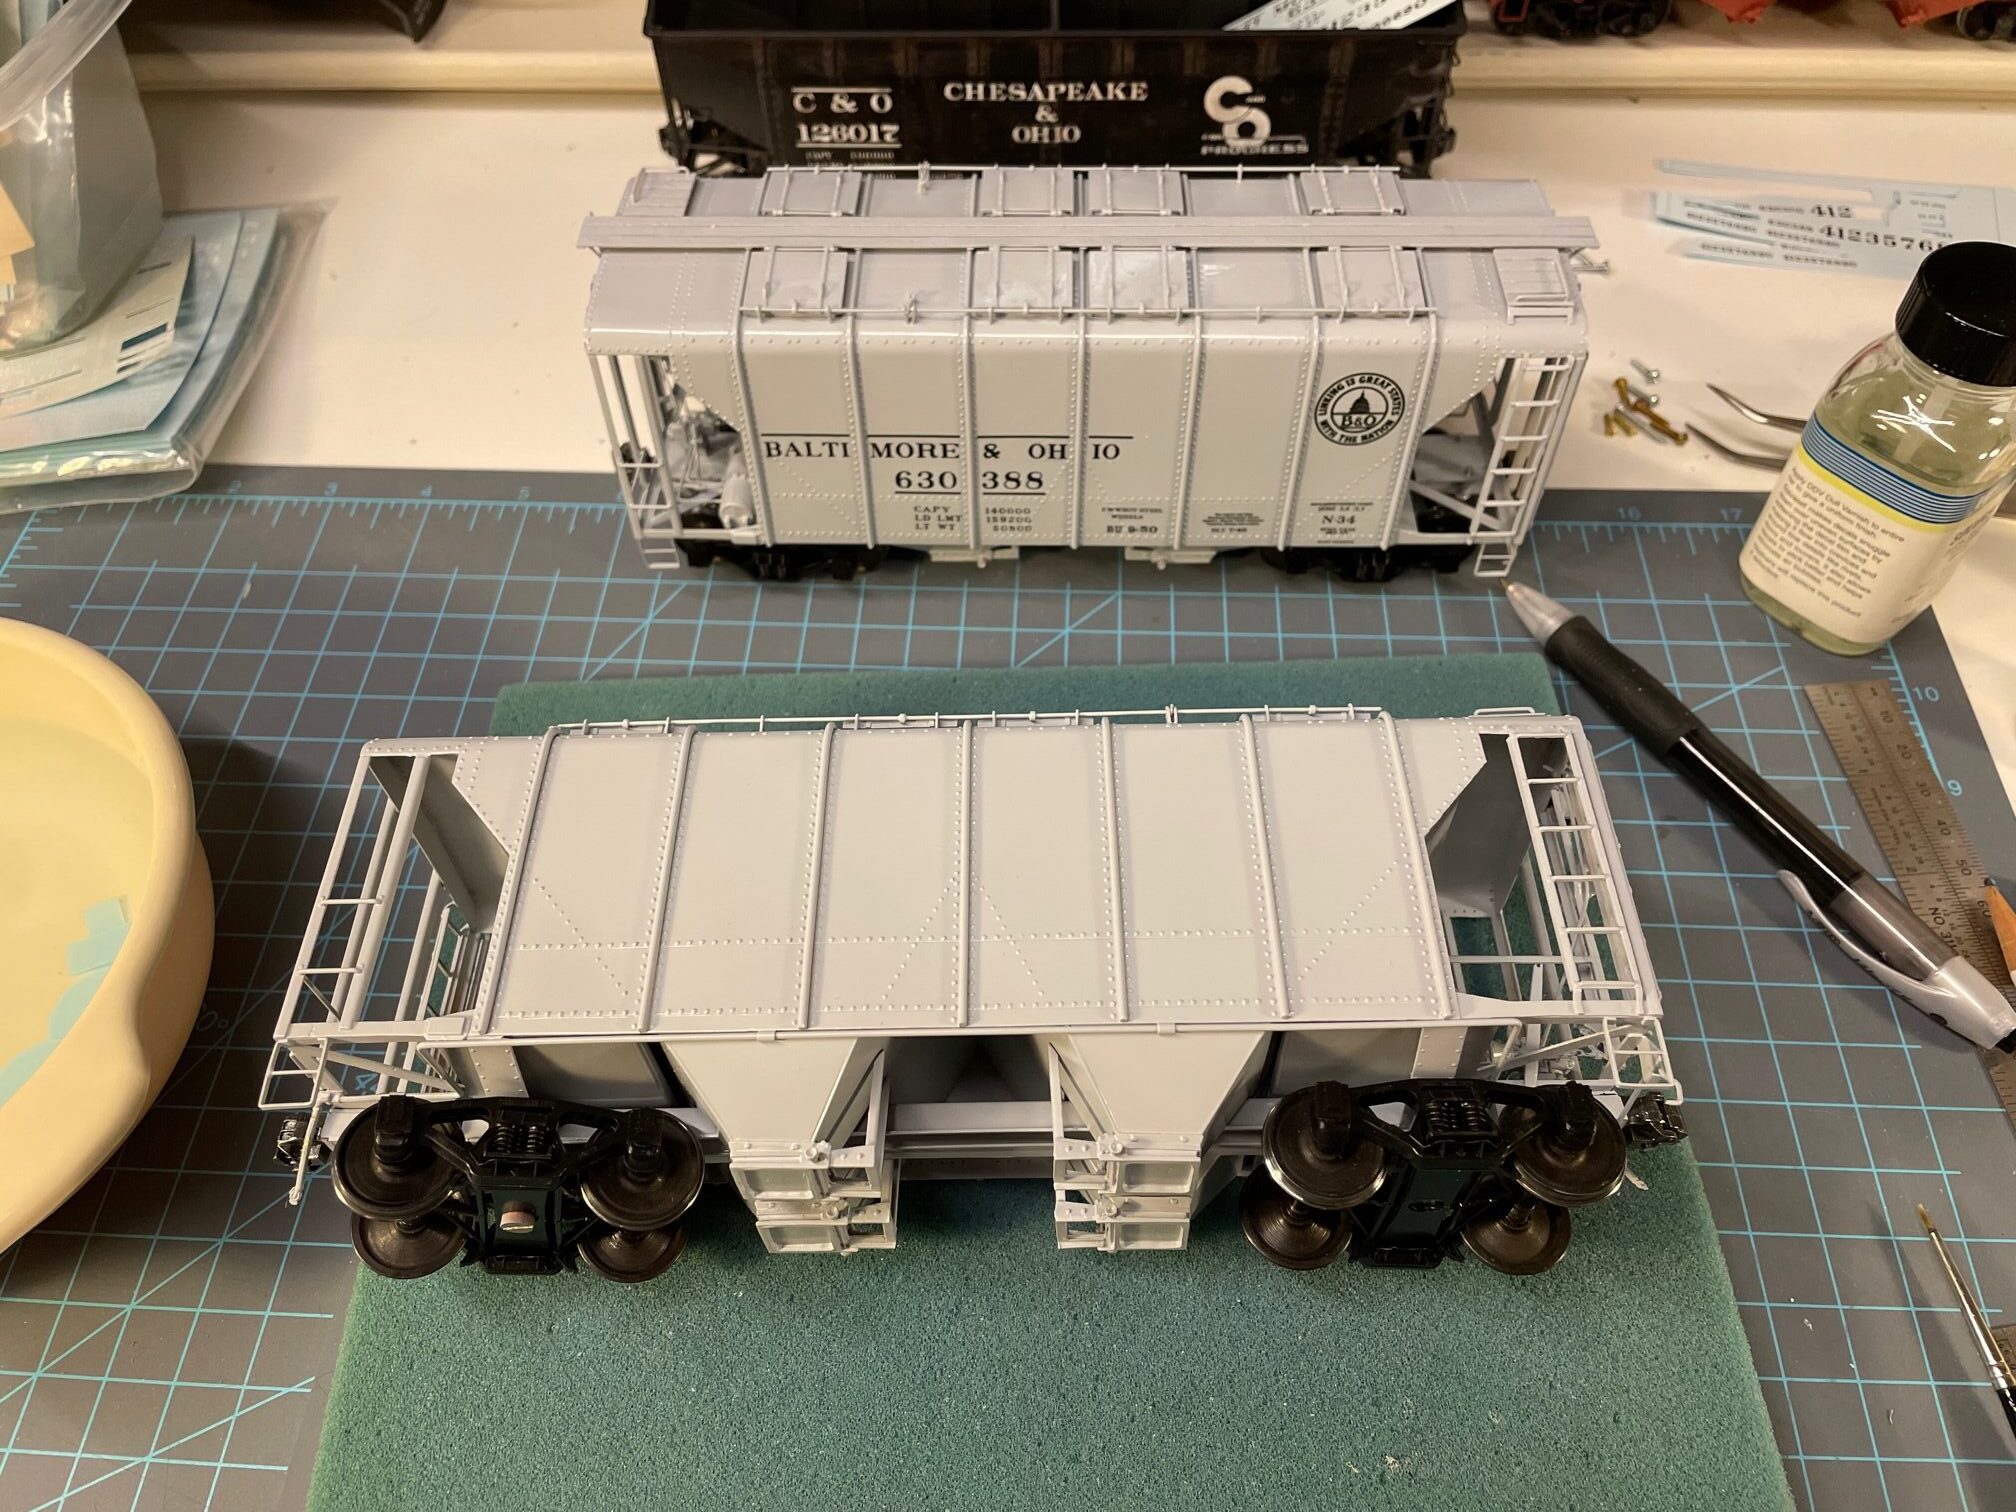
Here are a pair of Hallmark B&O class N34 covered hopper cars that were painted last Summer. They are nice cars but they do show their age a little. I found both of these cars unpainted at two different Cleveland O Scale shows at least ten years ago.
They came out nice. I used a combination of both Tichy decals and also K4 decals for the cars. Both set were not totally complete, together they were fine.
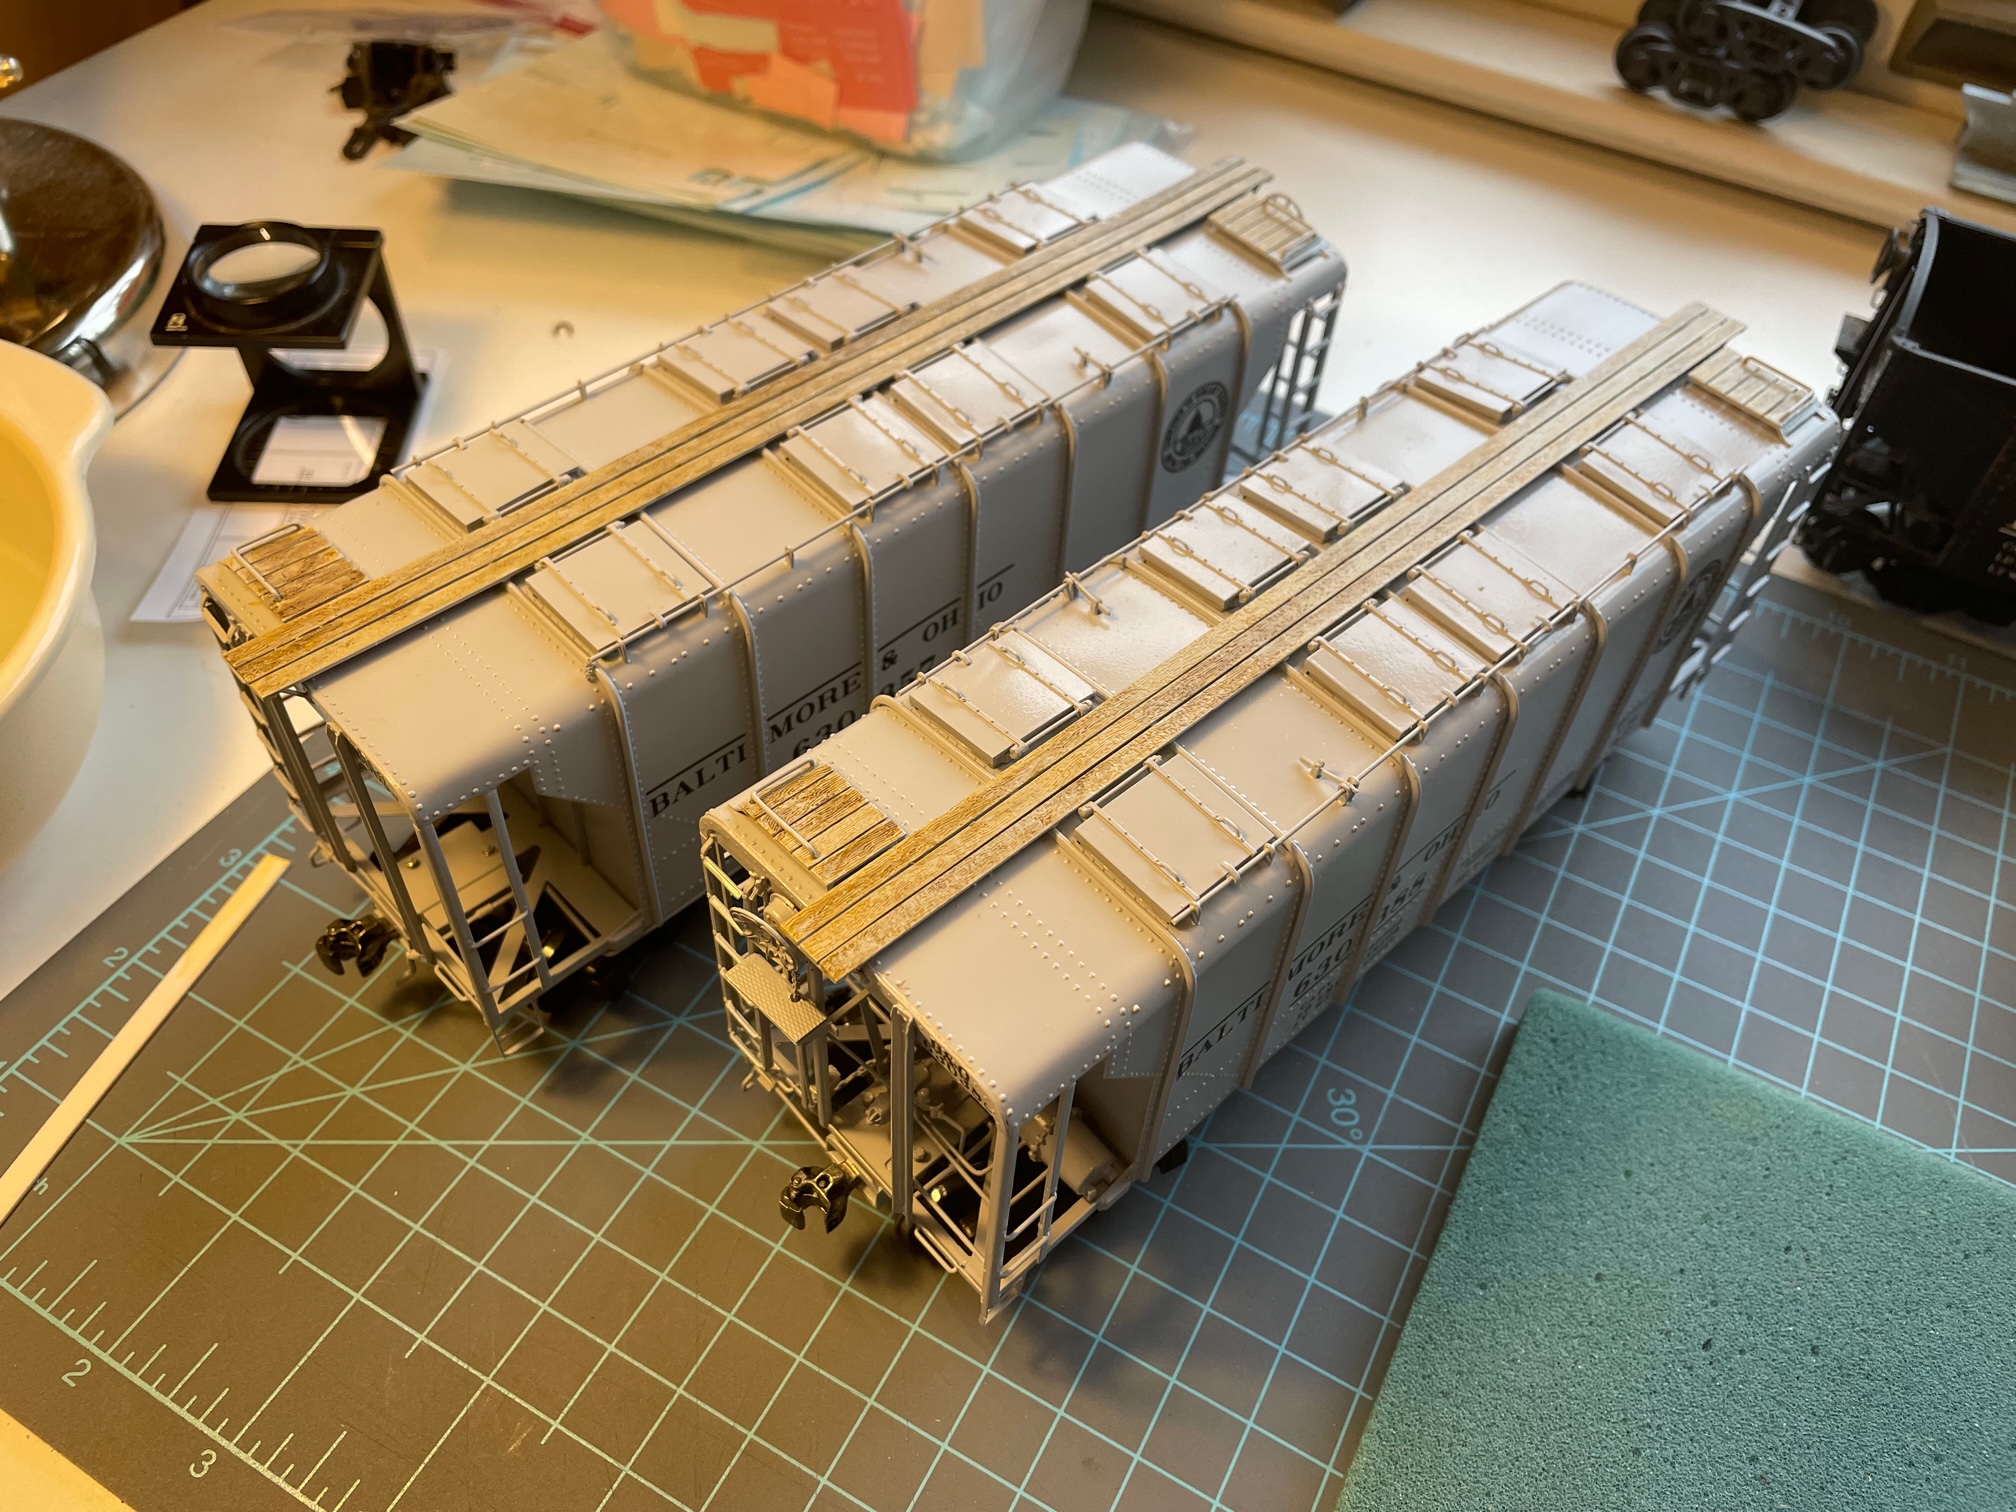
This last image shows a little work on the roof walks. Gene Diemling wrote about a product from AK Interactive in his post NEW PRODUCTS: A Few Good Things & Wood! I thought I’d try it out. After a couple of tests on some scrap plastic, I thought I’d try it on the B&O car. Almost there. I think it could use a thin black wash still. But I’ll wait until I get into some of the weathering on the cars.
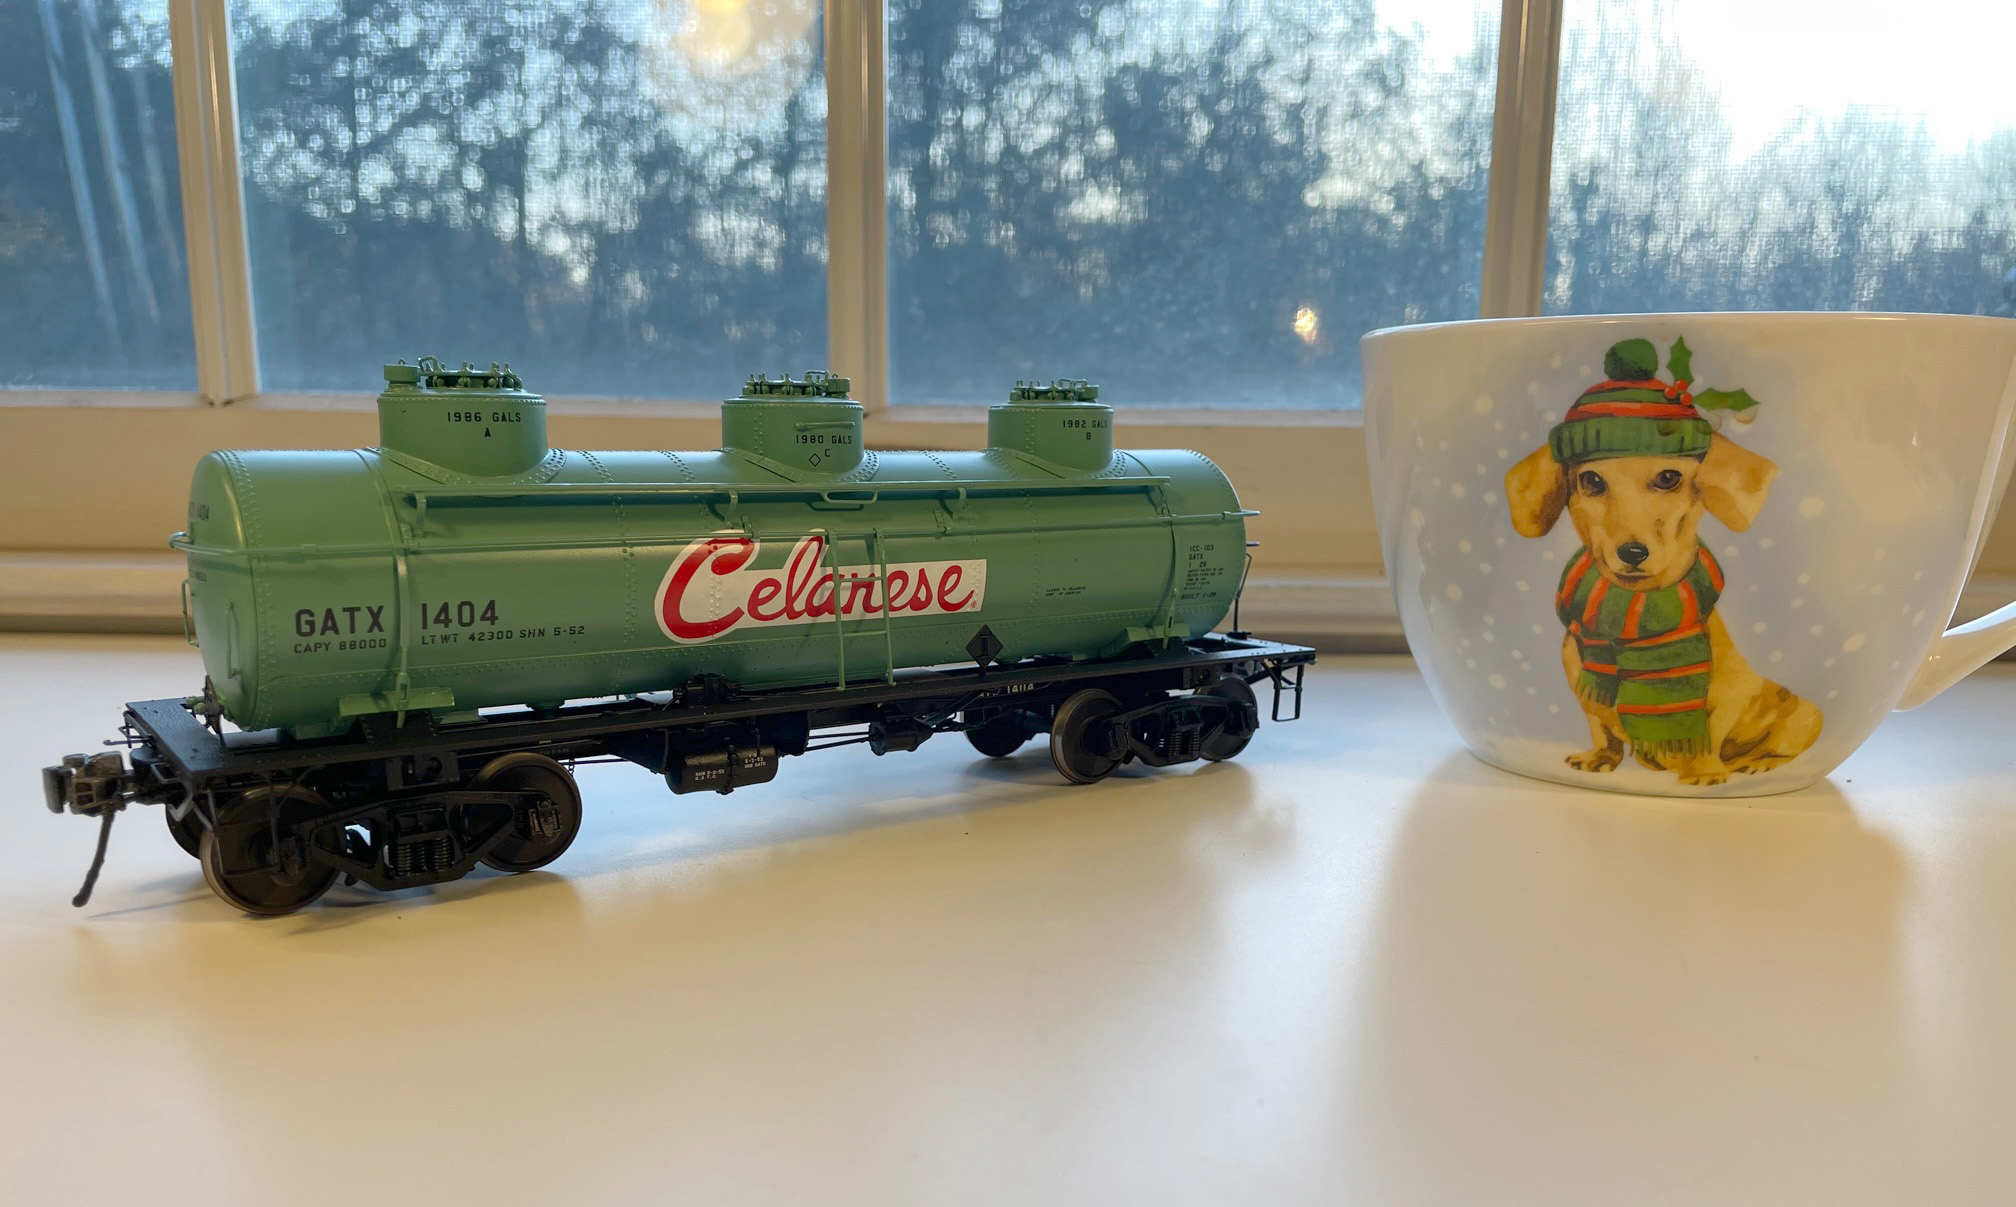
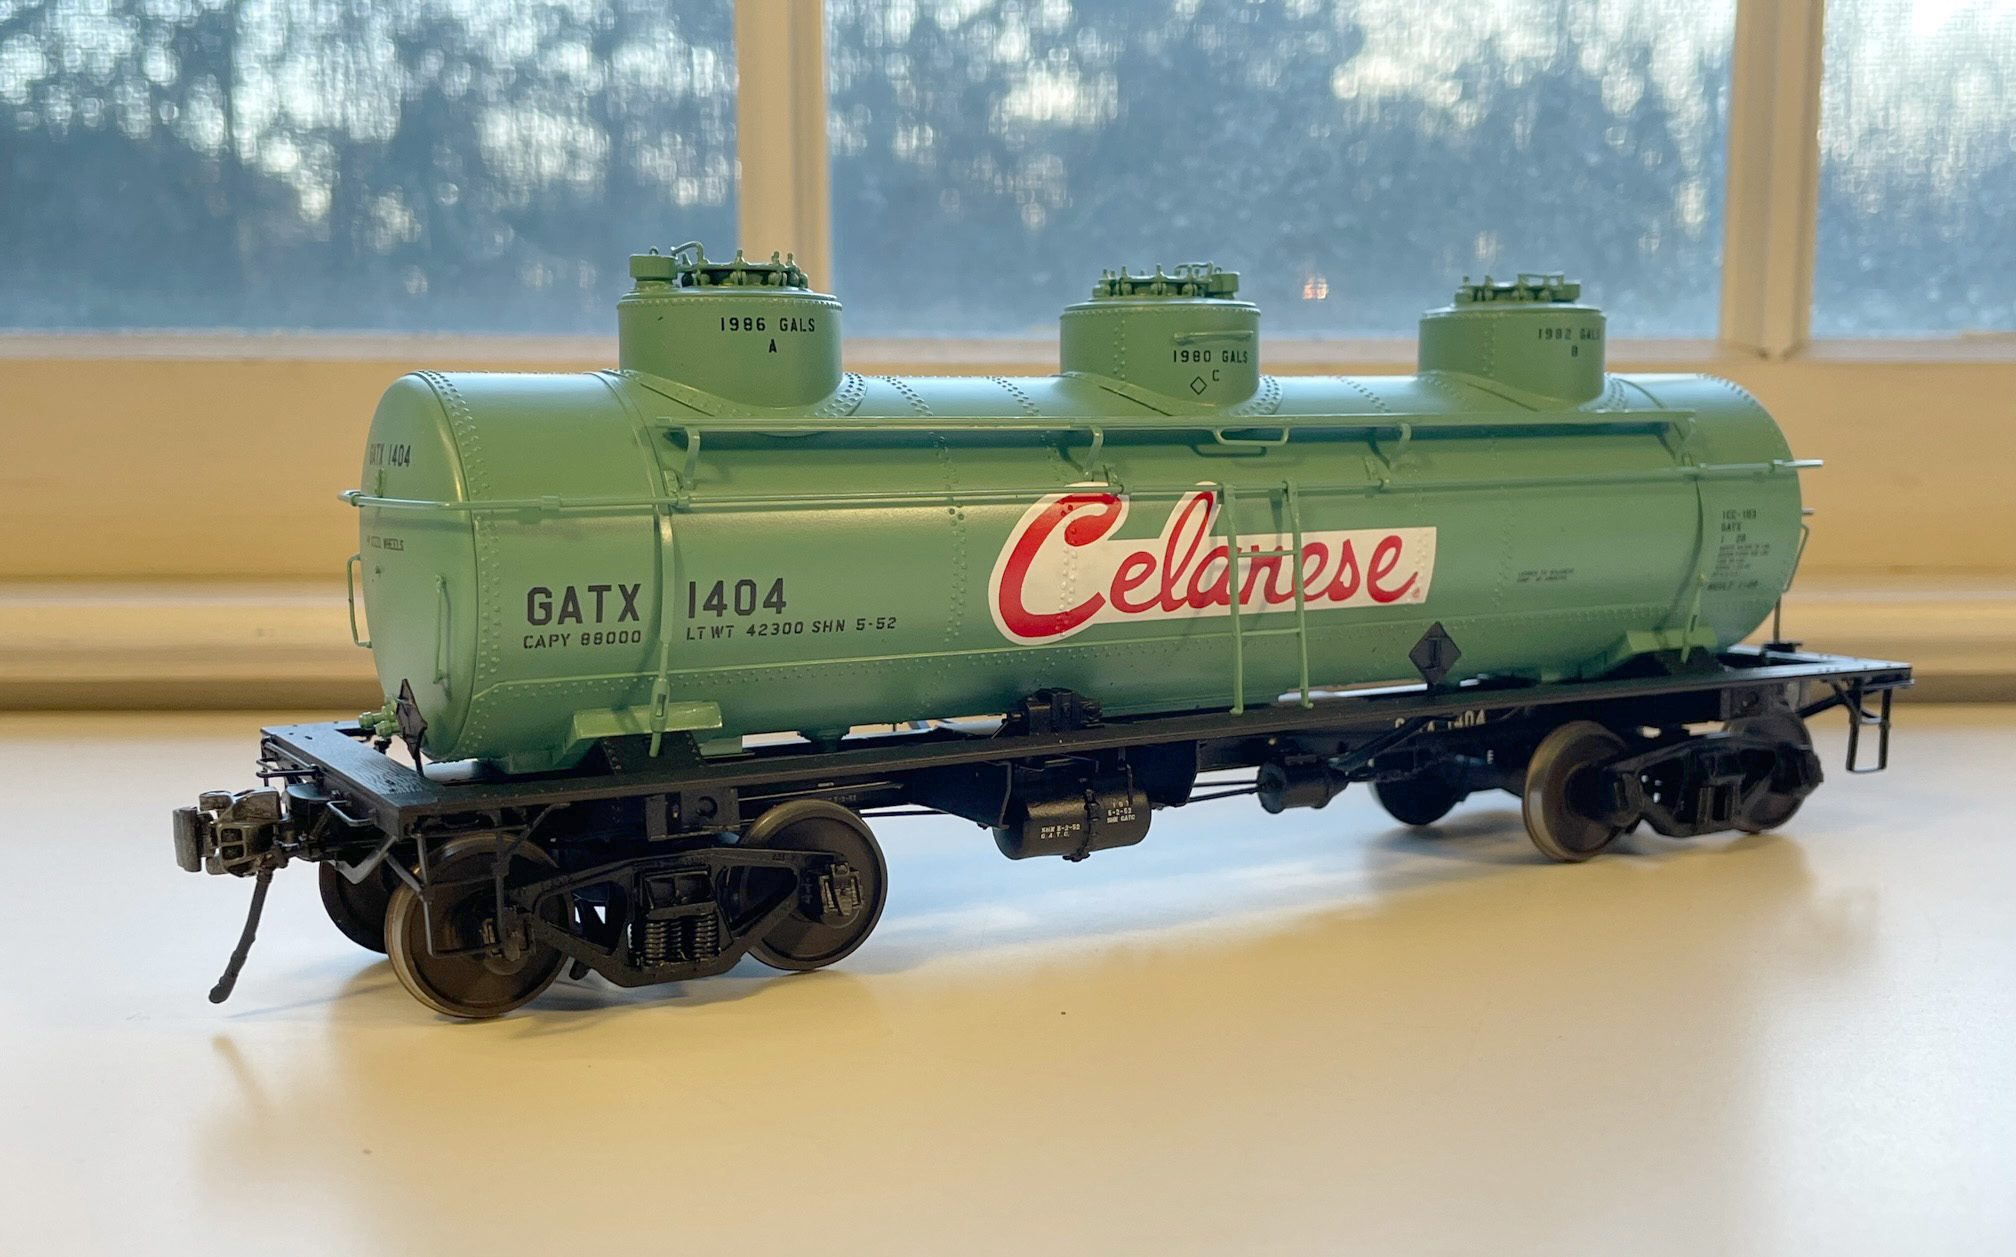
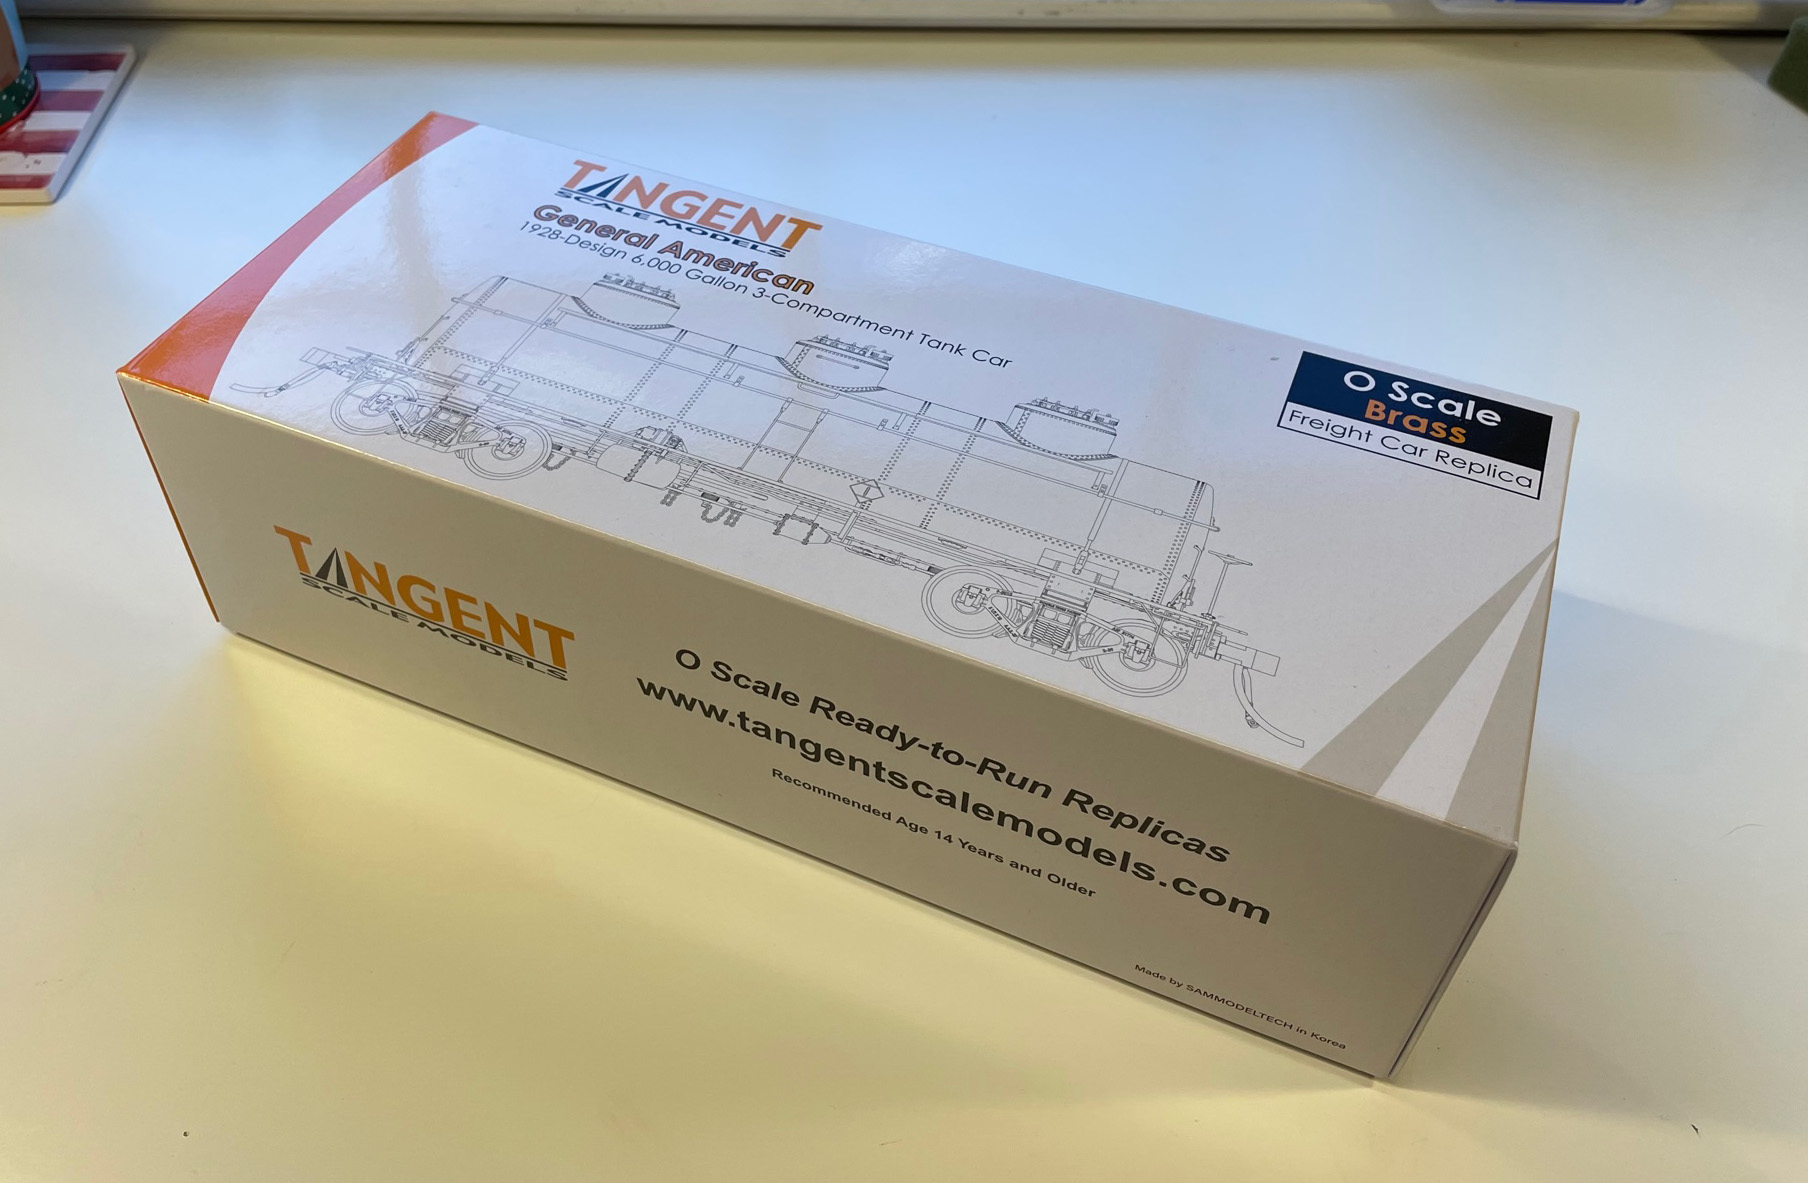
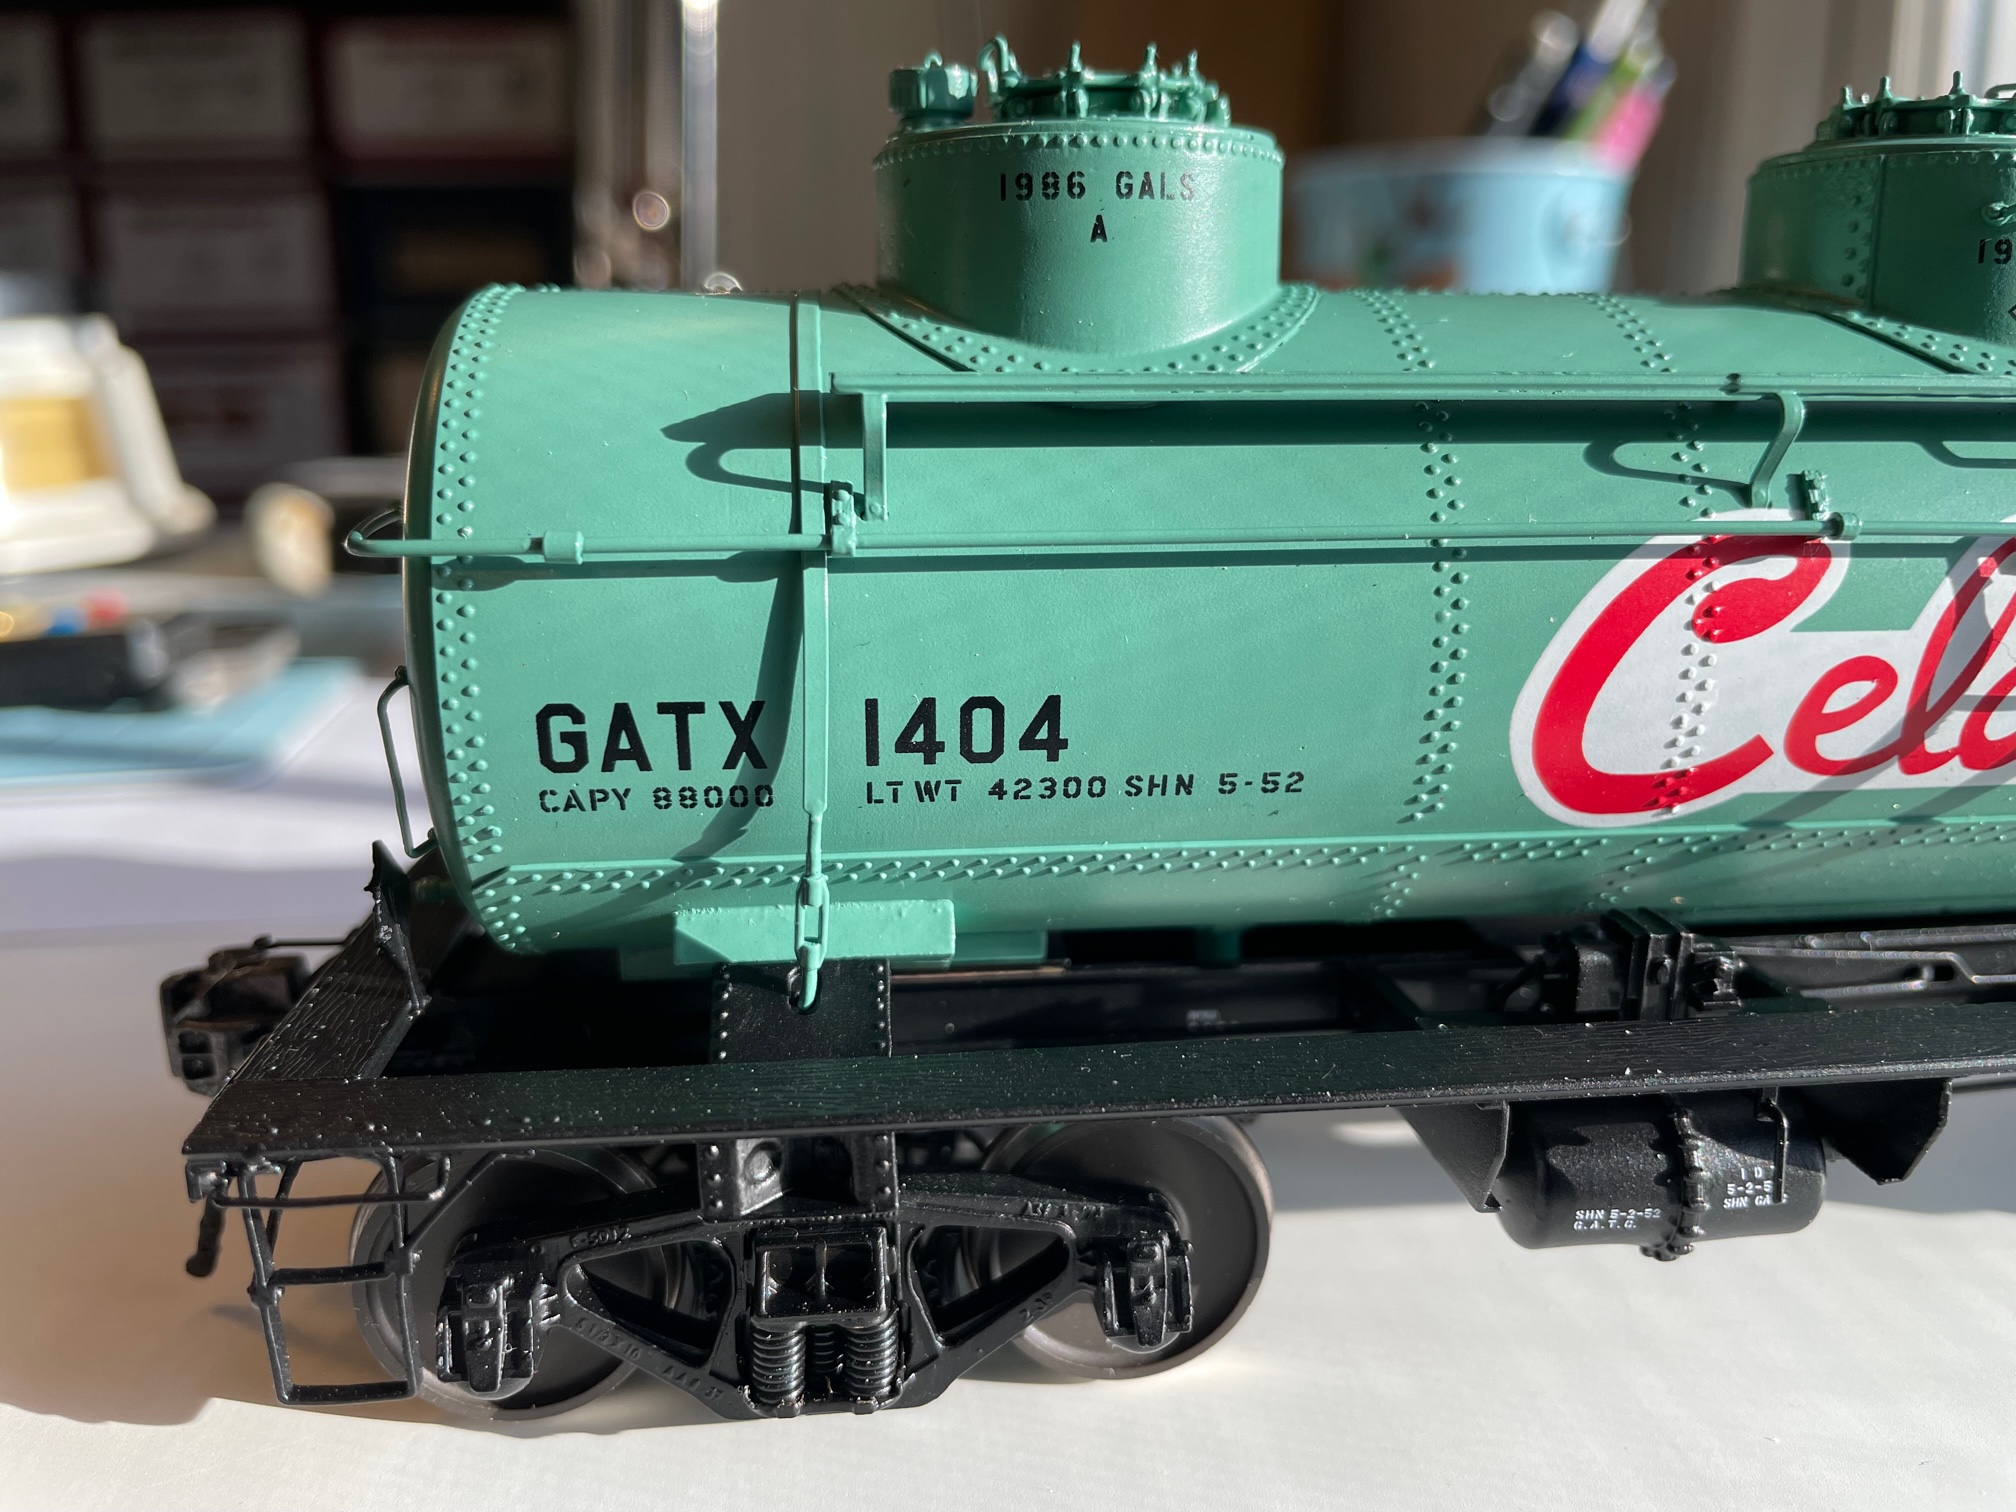
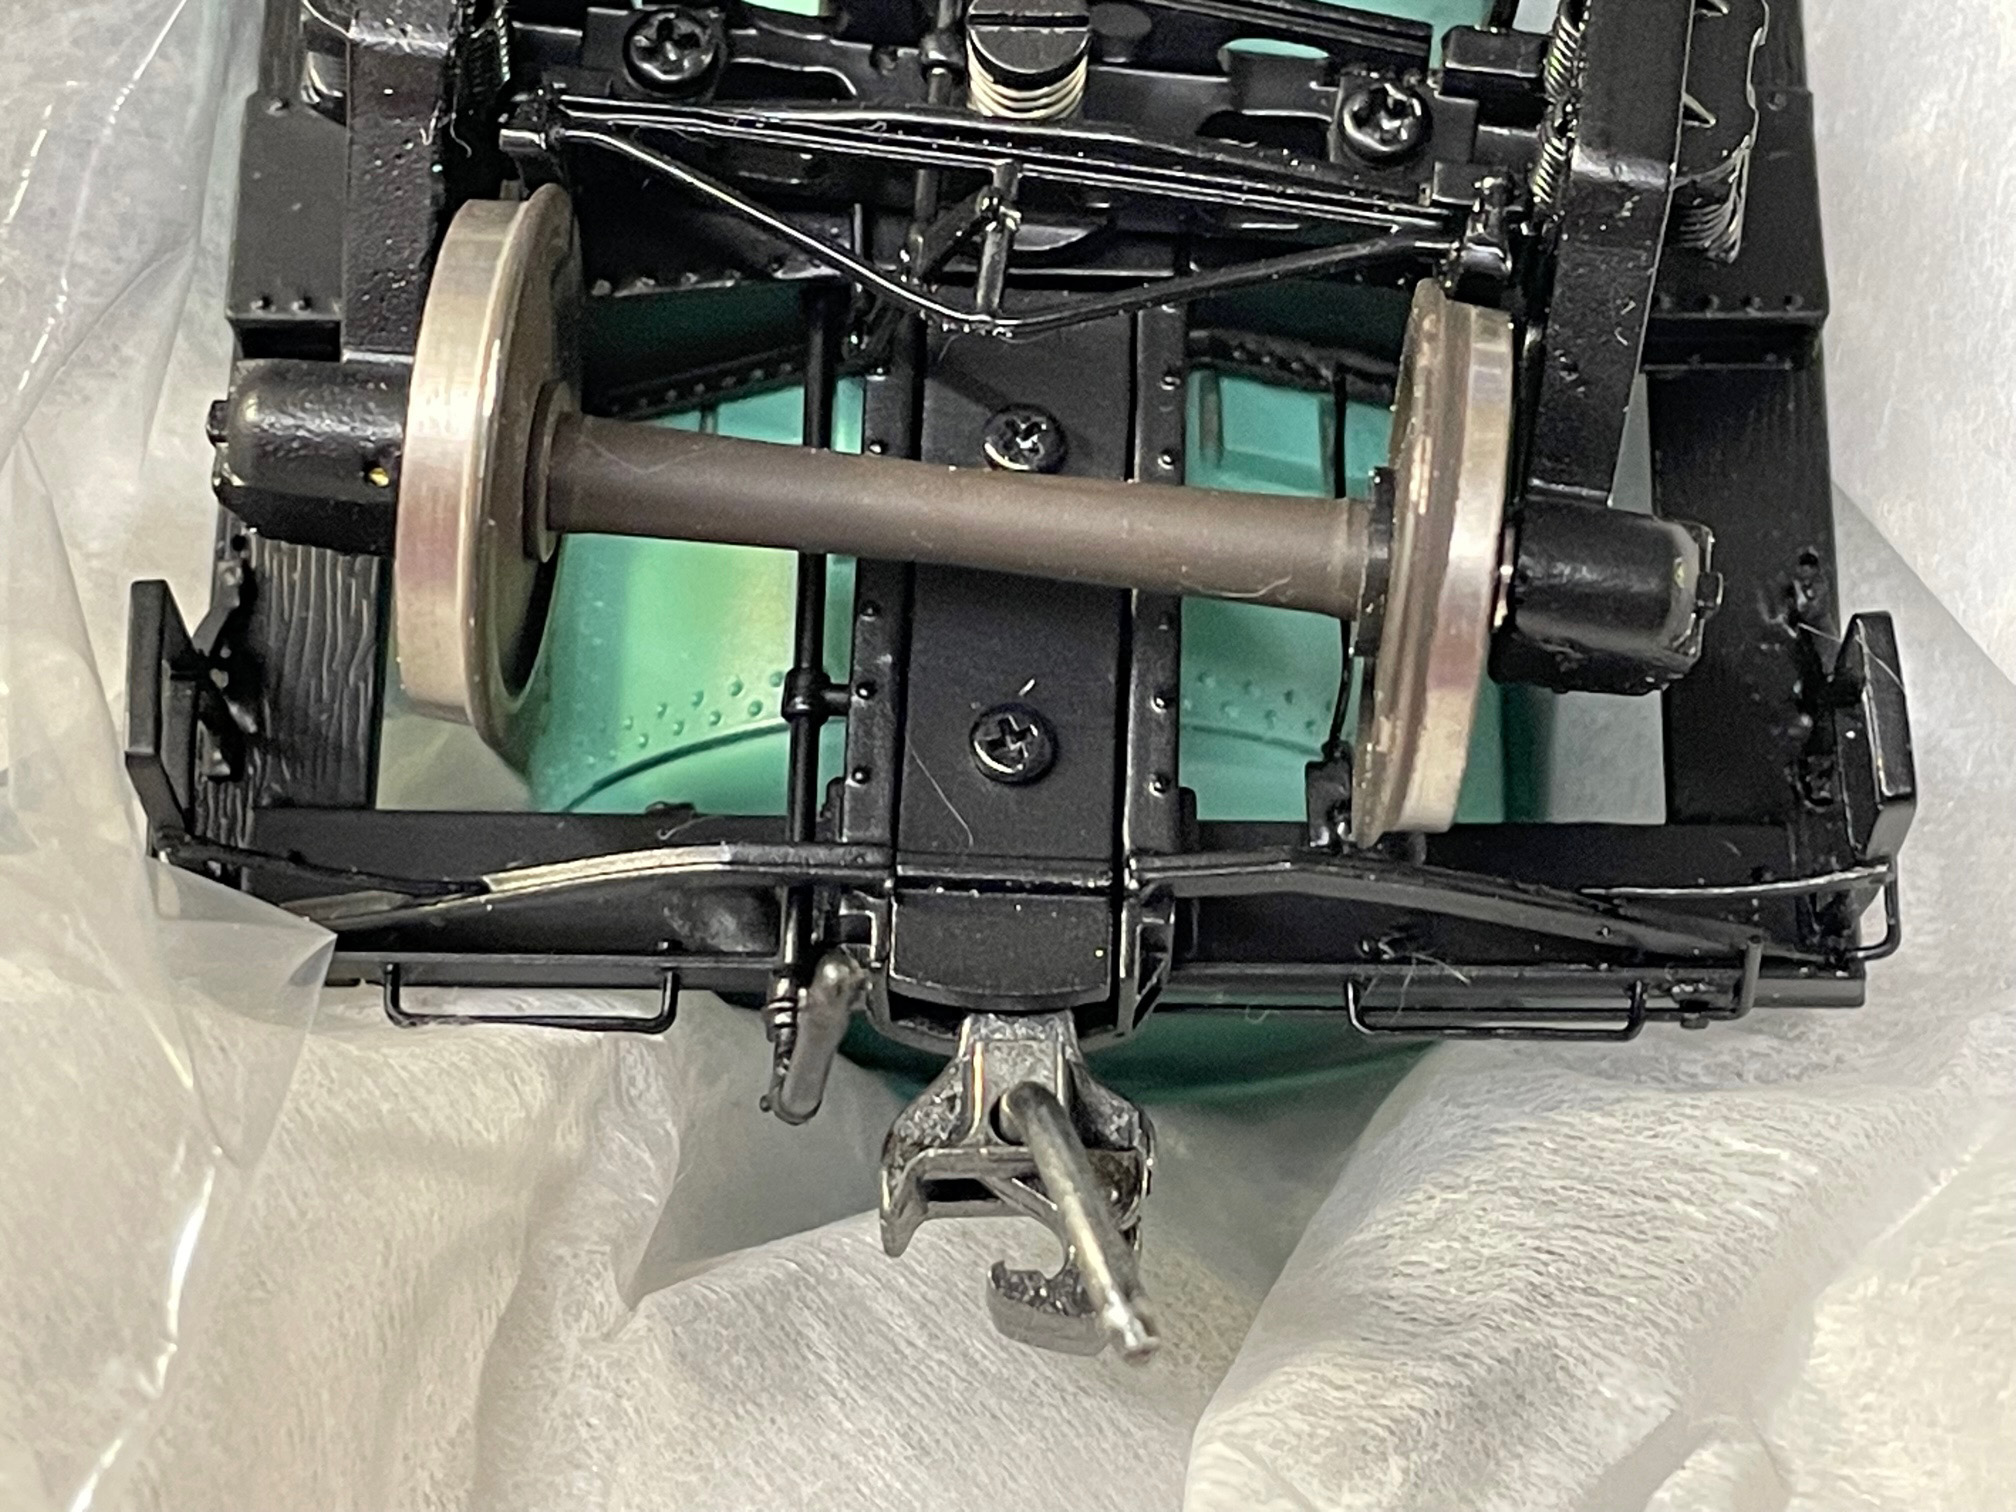
My General American 1928-Design 6000 Gallon 3-Compartment Tank Car from Tangent Scale Models arrived yesterday. This morning I’m enjoying my morning coffee in my dachshund Christmas cup looking it over this fine new model release.
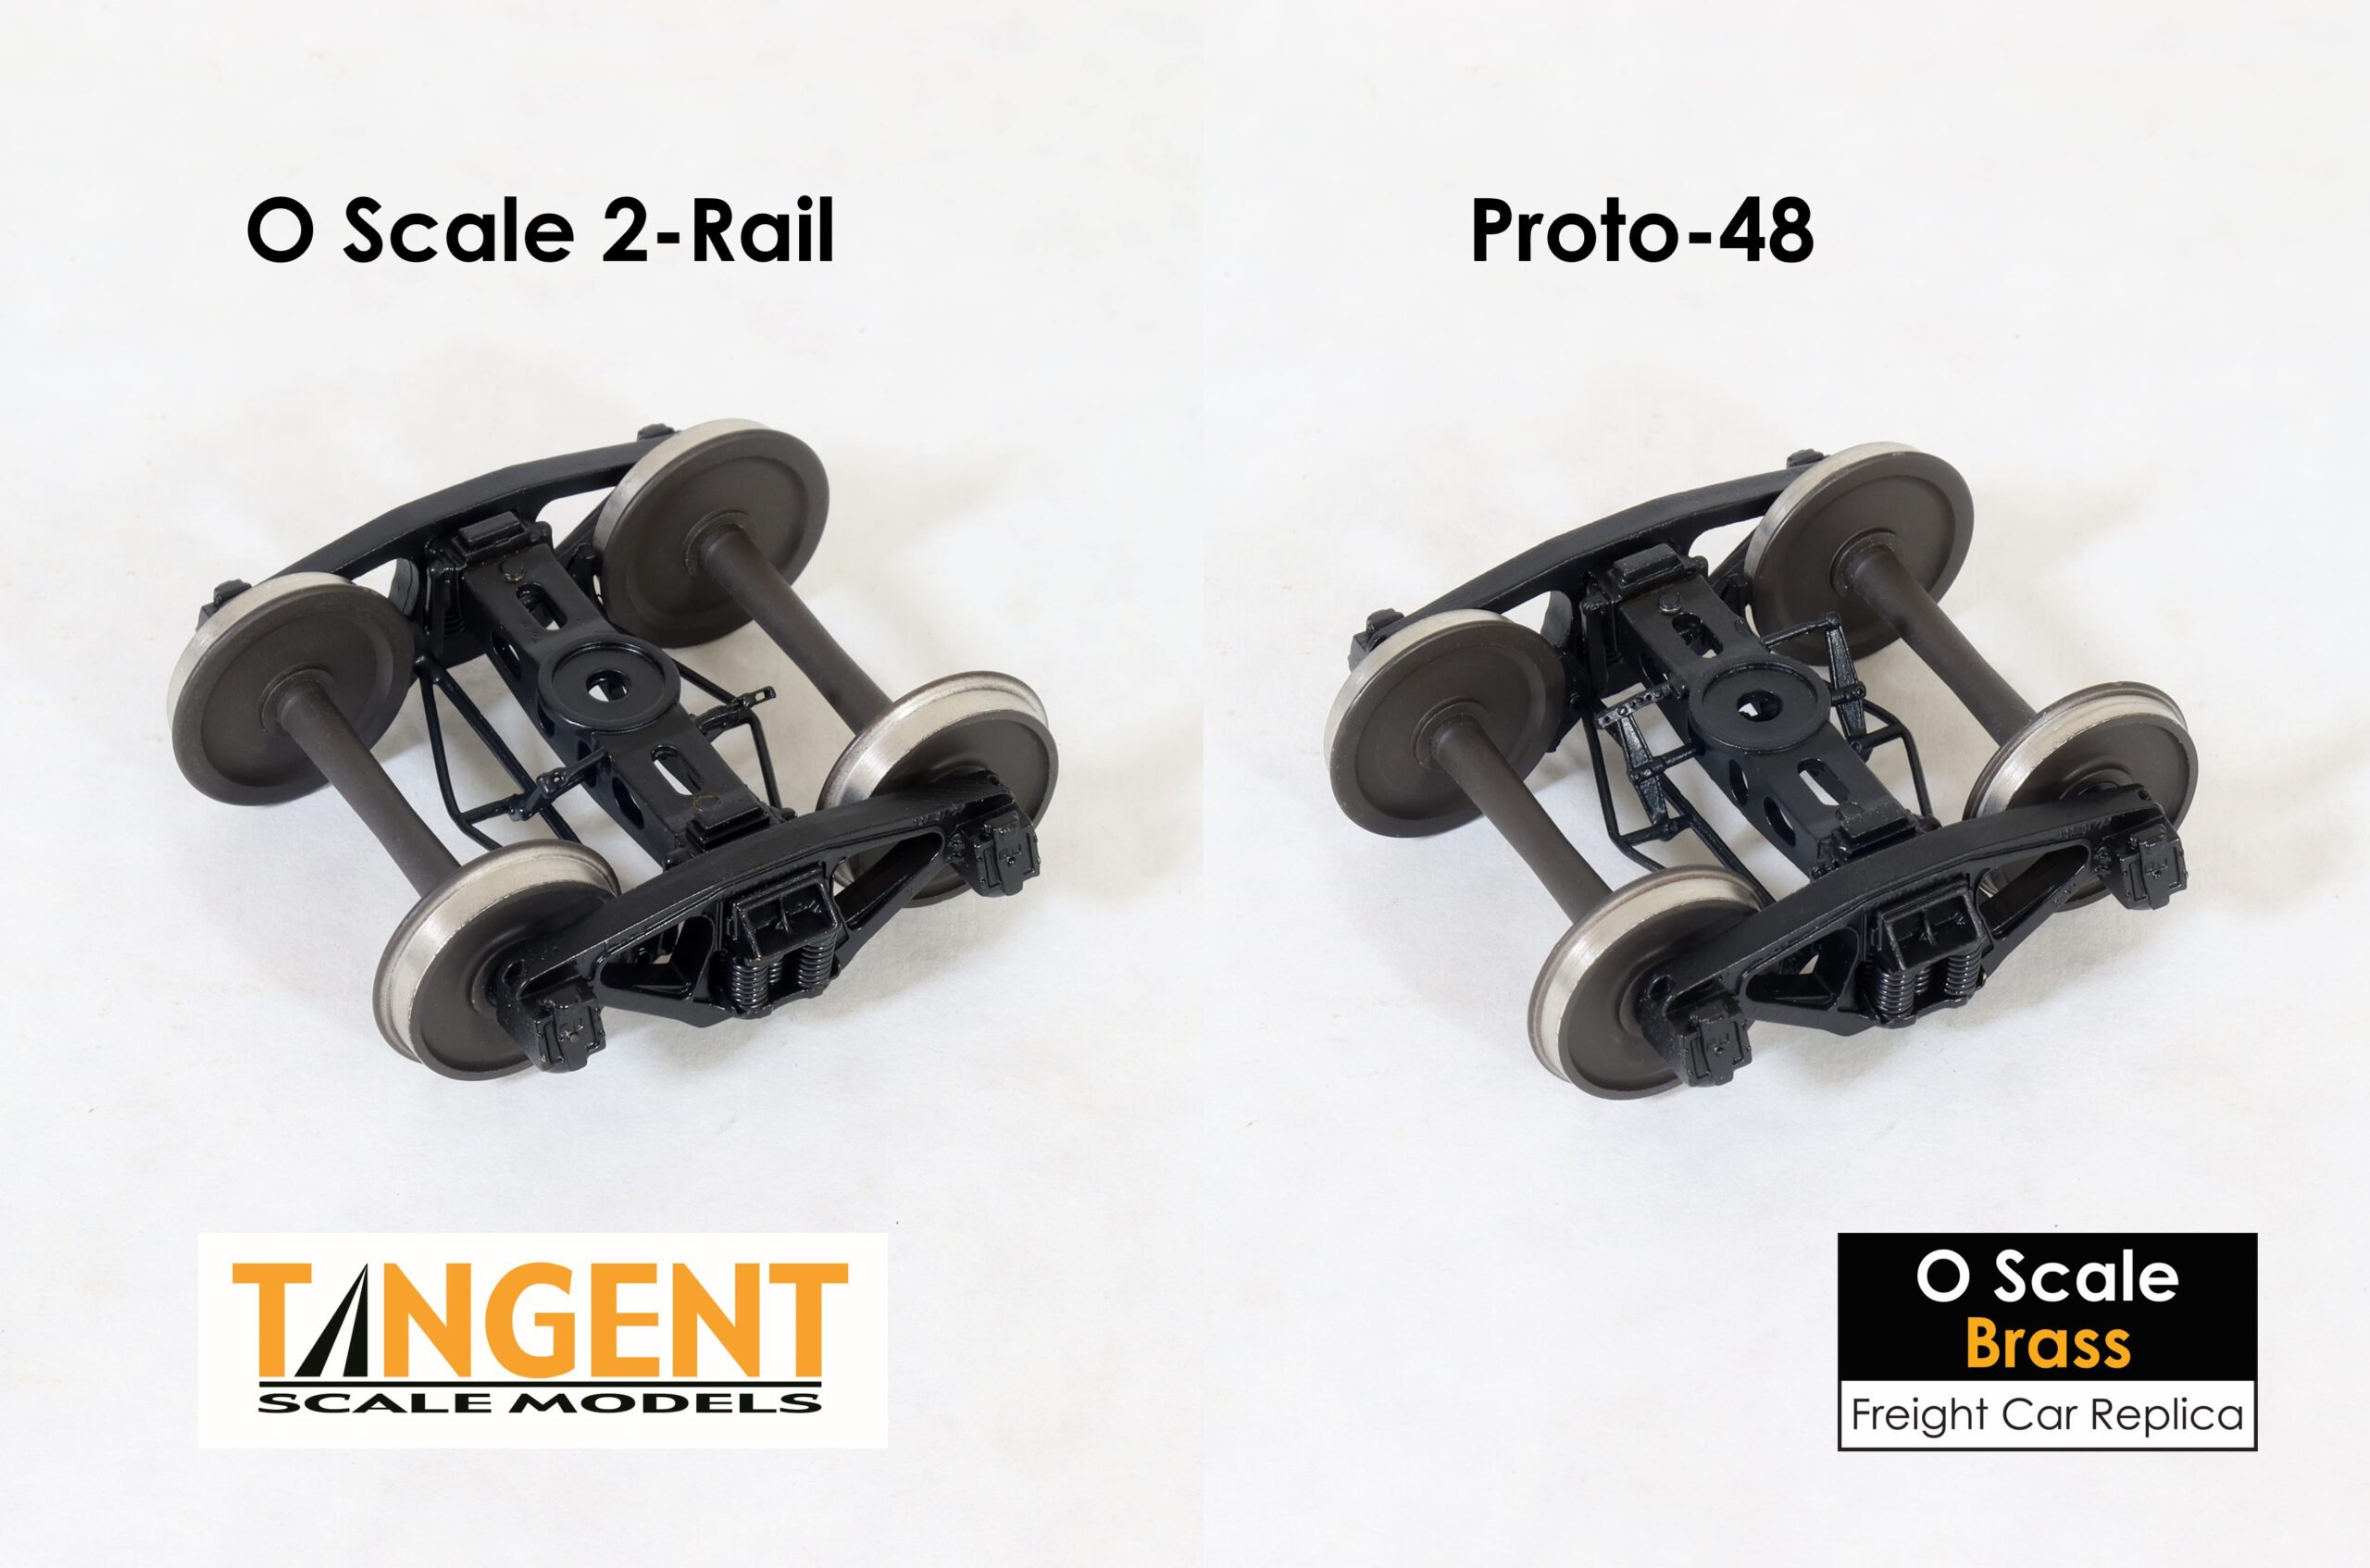
This is Tangent Scale Models first model released in O Scale. The model is offered with either O Scale or Proto48 trucks. They are not the first to do that in O Scale, both RY Models and Protocraft have sold their models that way.
First Impressions: It really is a nice car! It is well engineered, well decorated and a solid model. Handling it on the workbench, I can say it is not as fragile as some highly detailed O Scale models in the past.
Some things are different from most brass imports. Starting with the box. Much thinner construction than often seen in brass models. Yet strong enough to make the trip to the US and keep the model safe from damage.
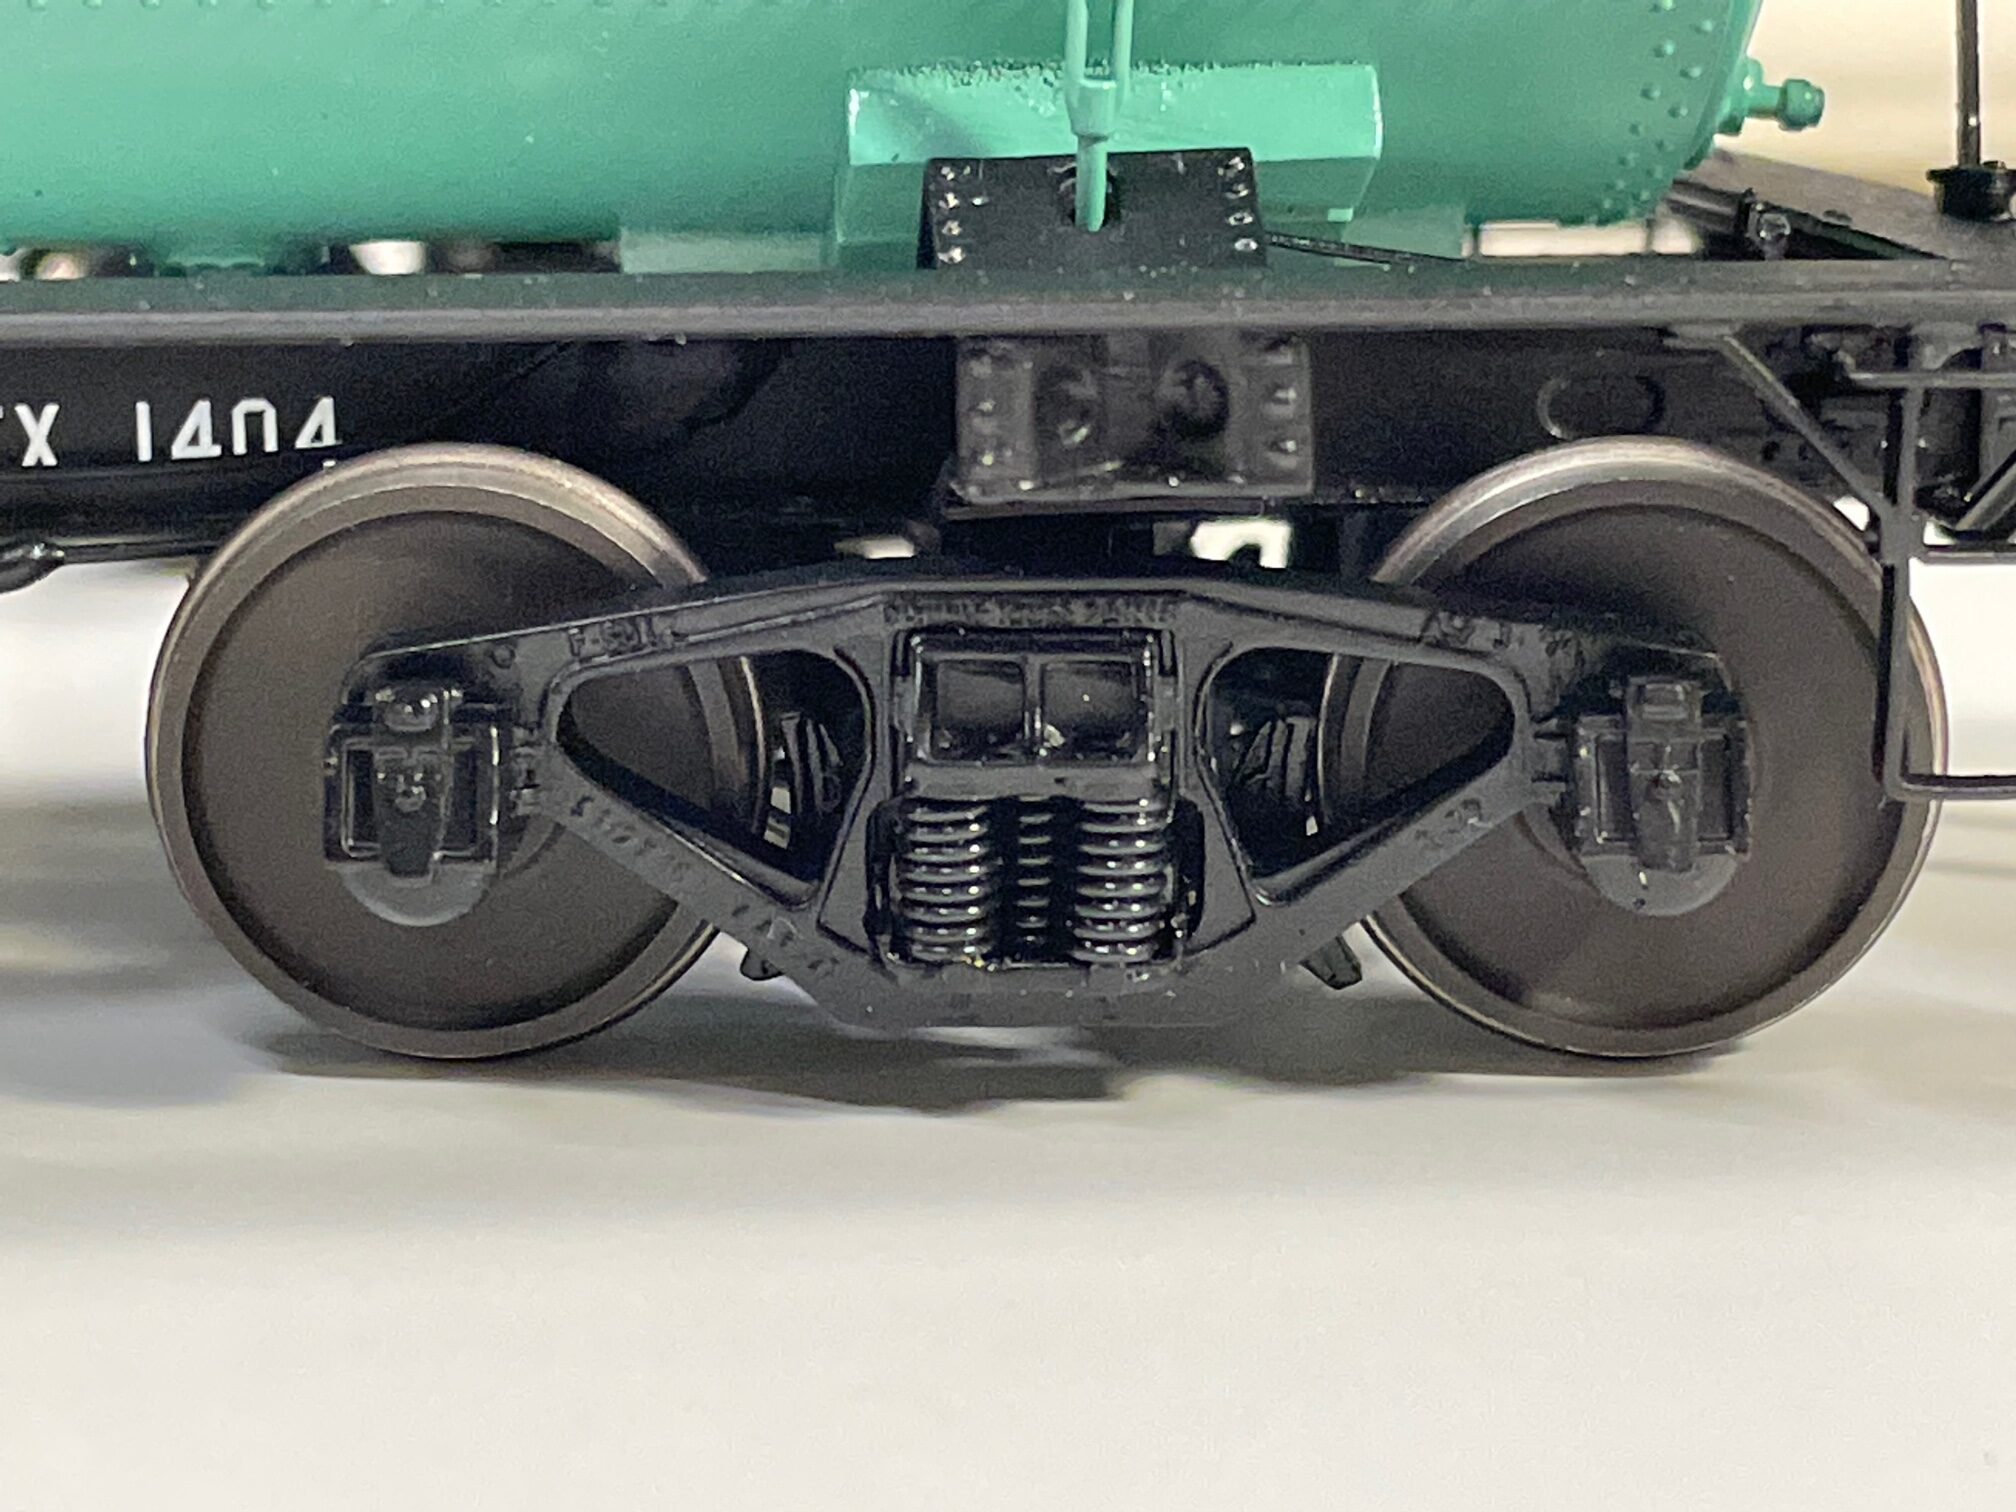
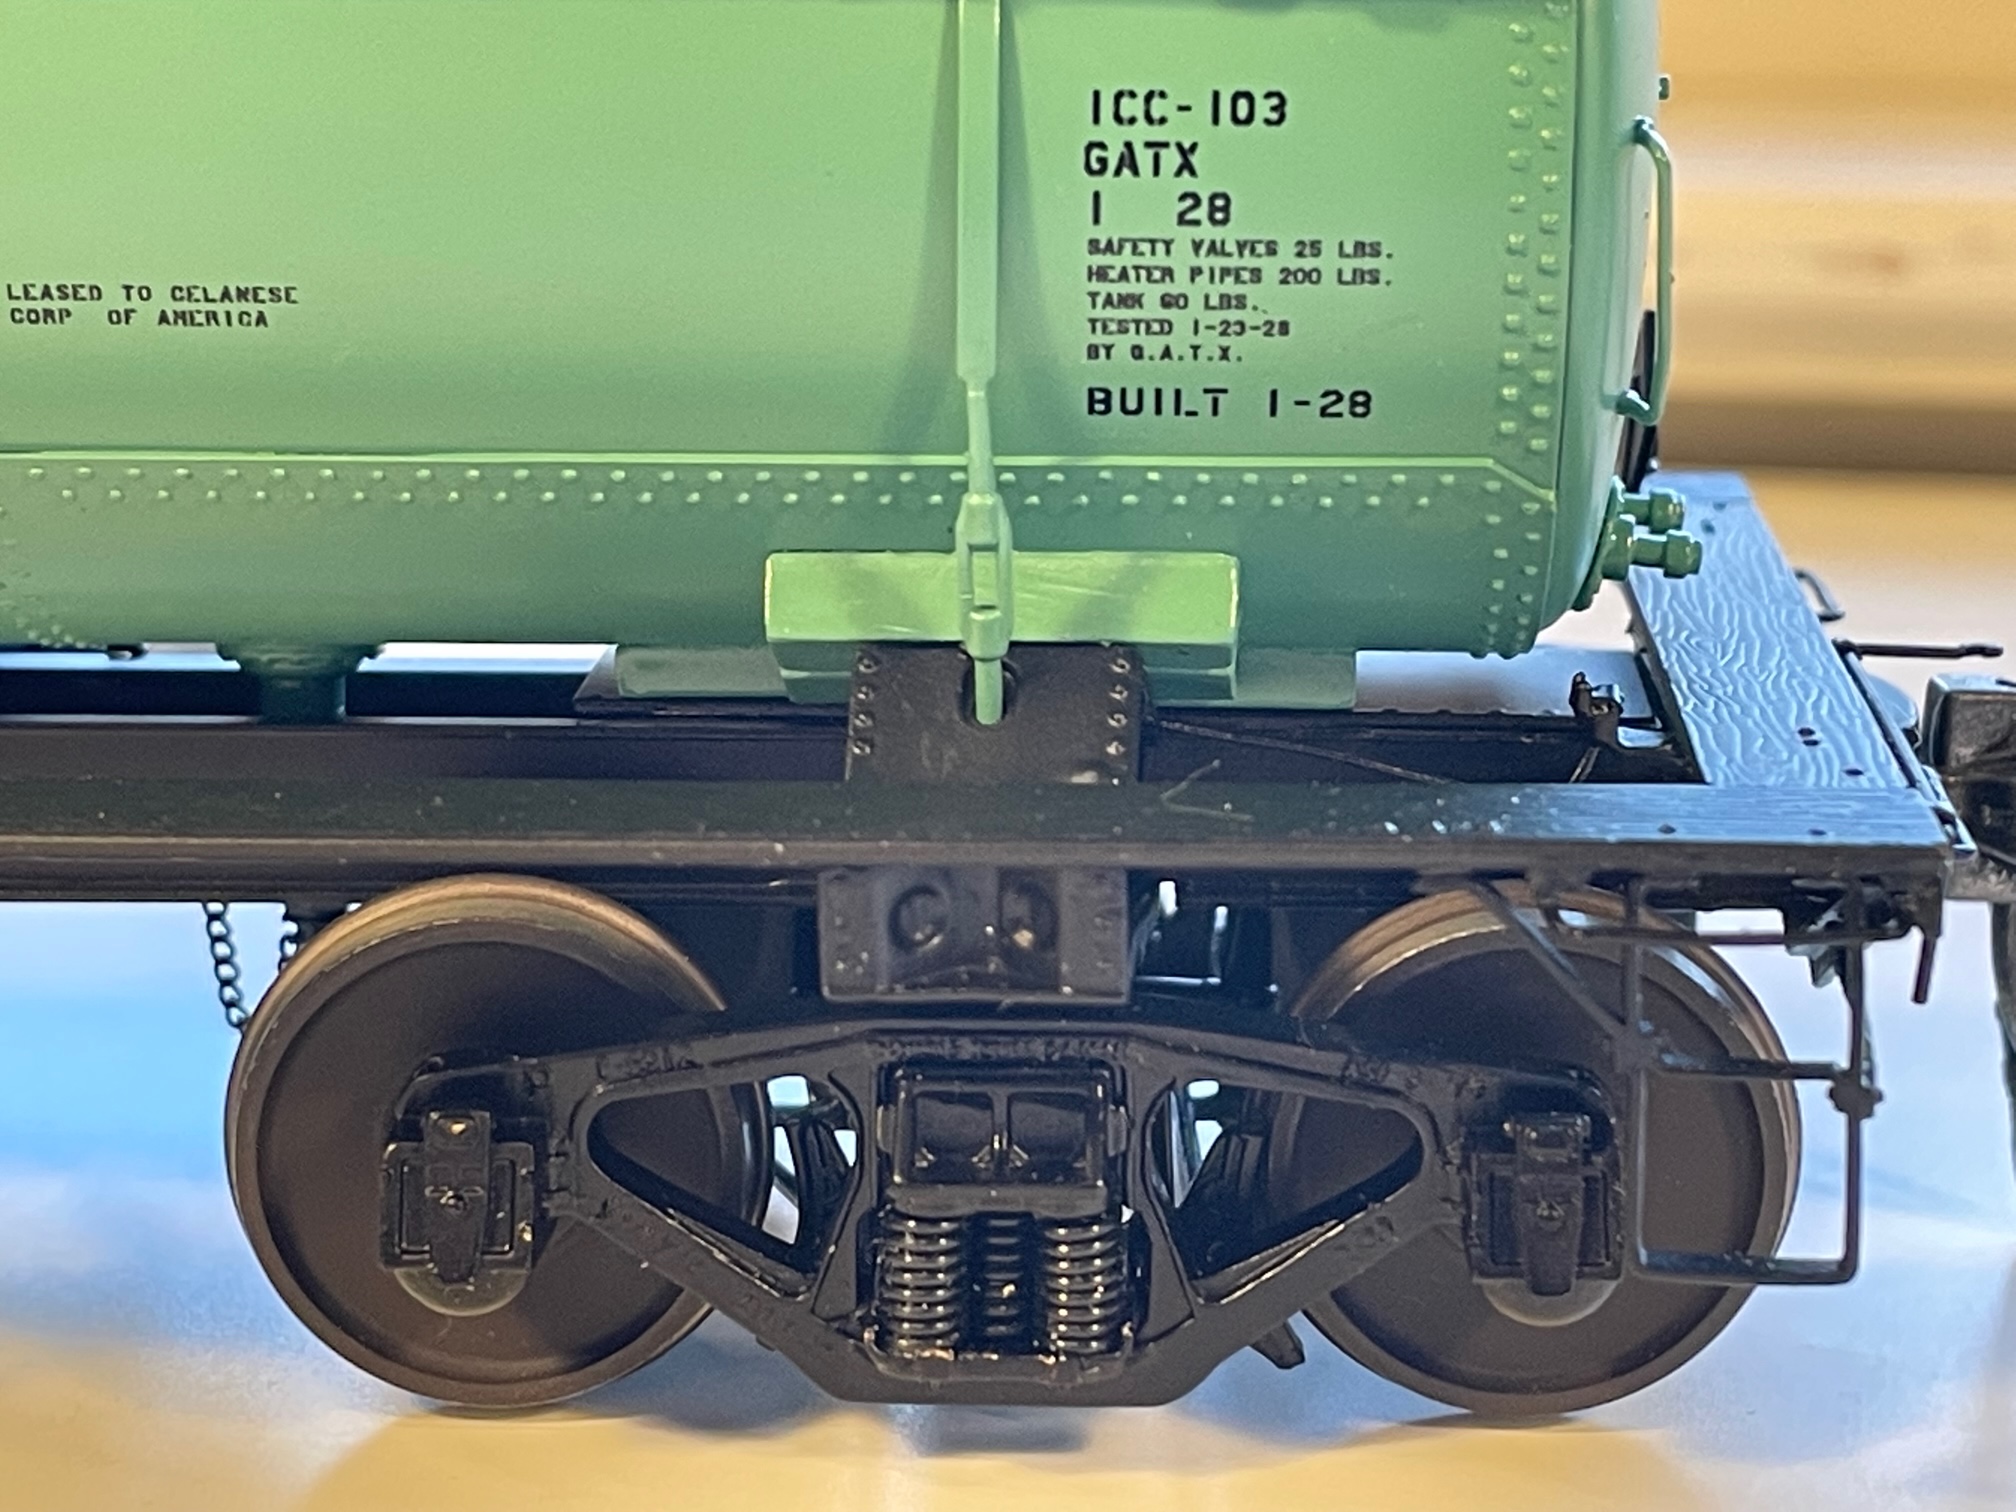
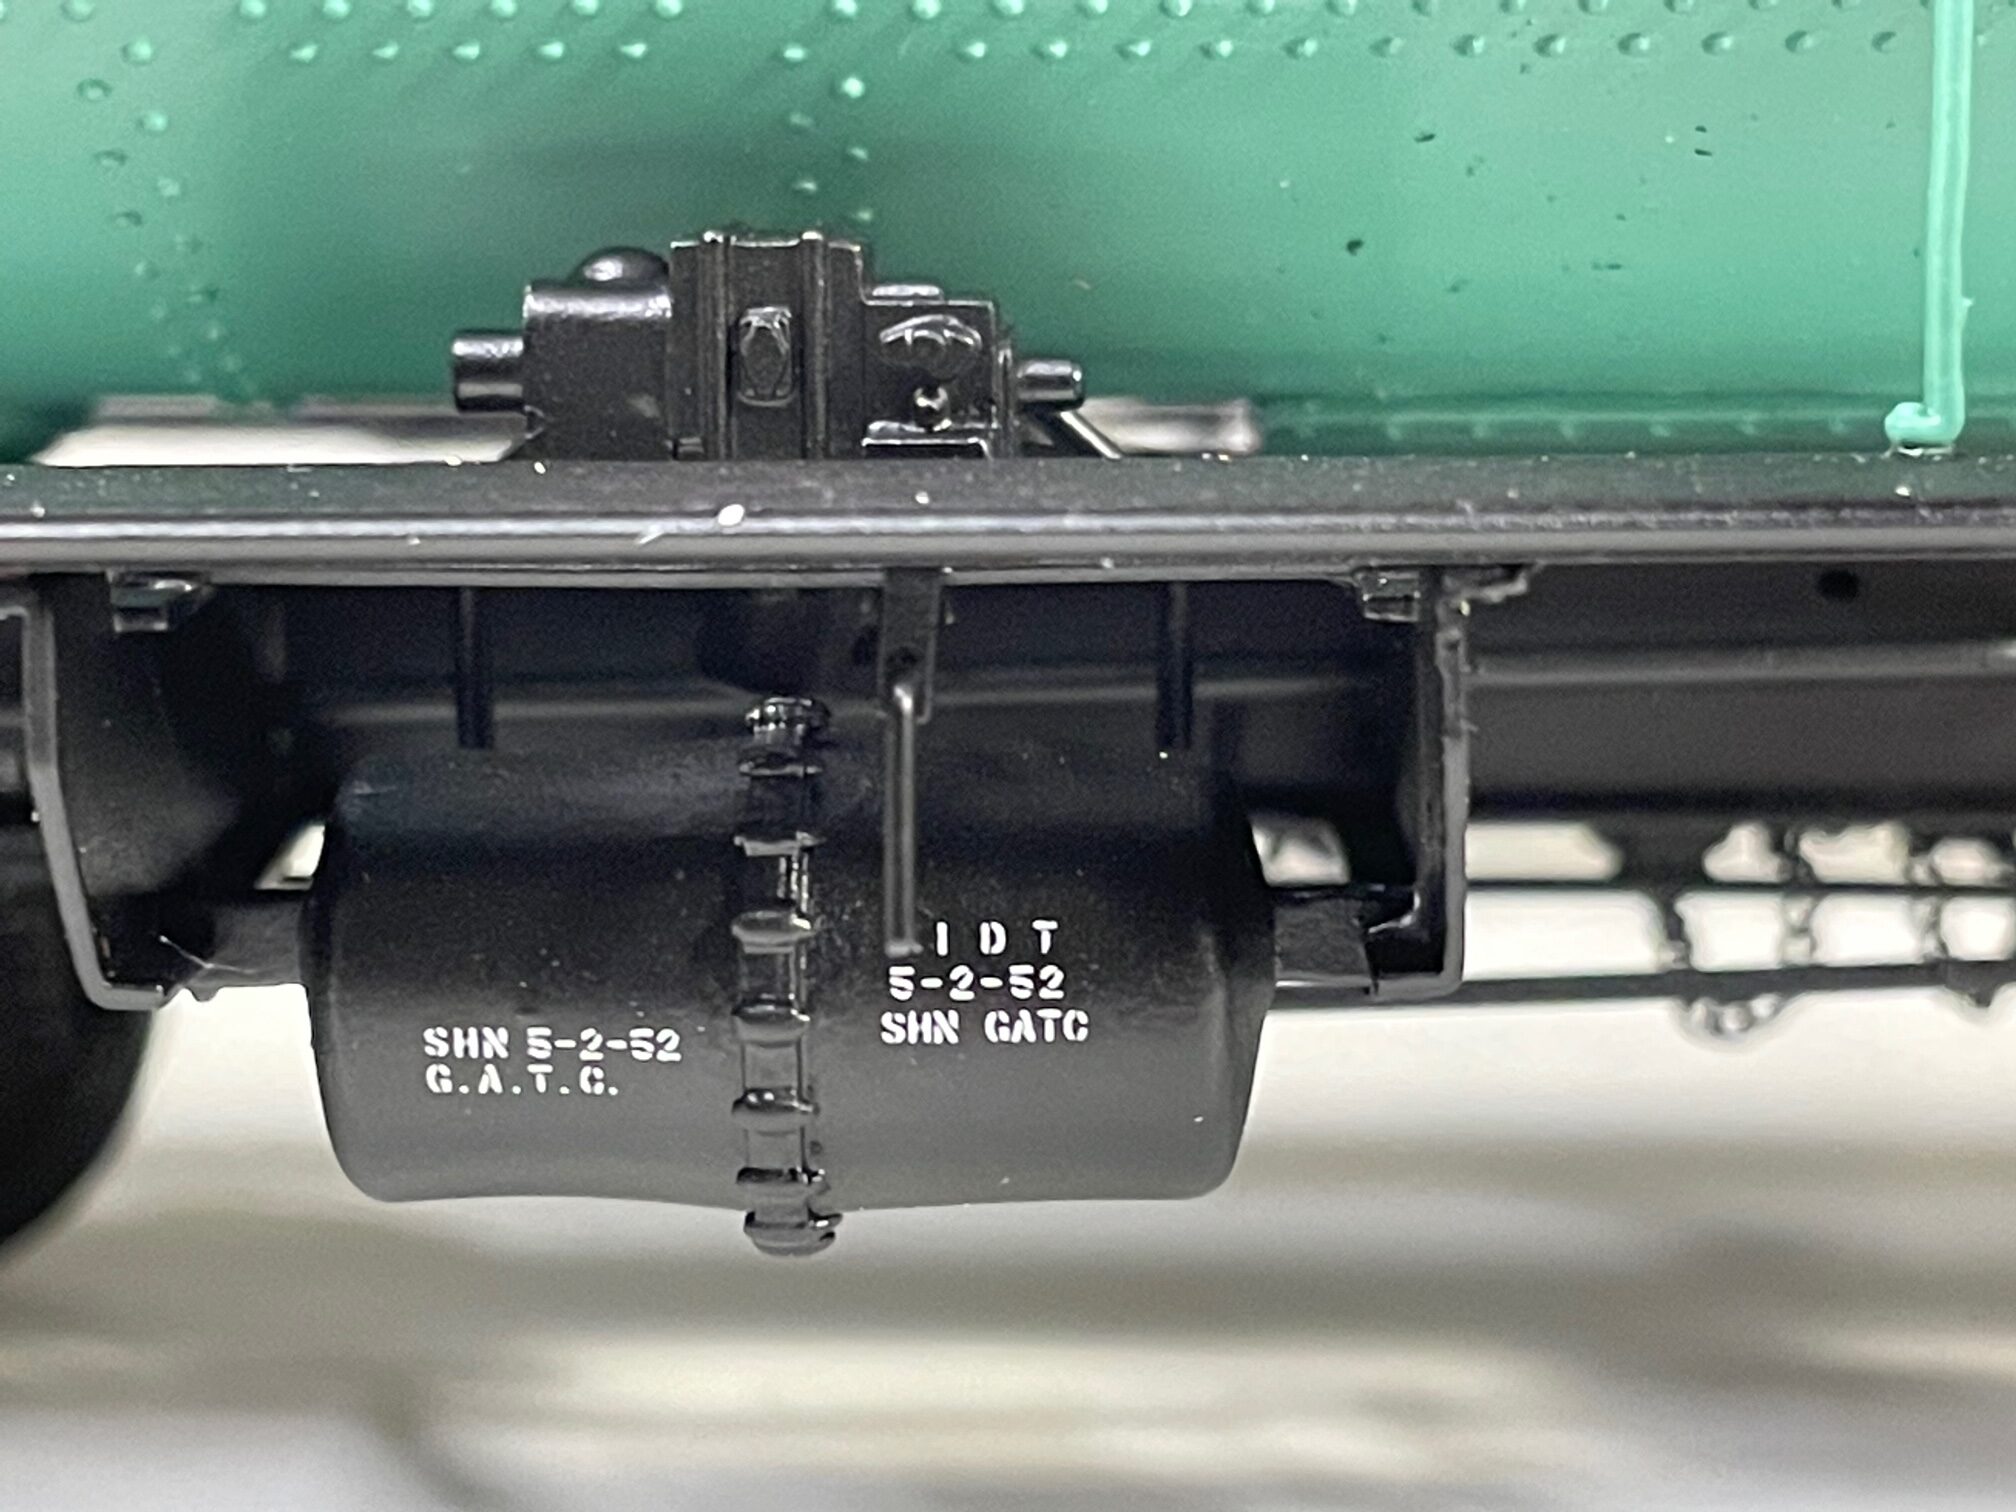
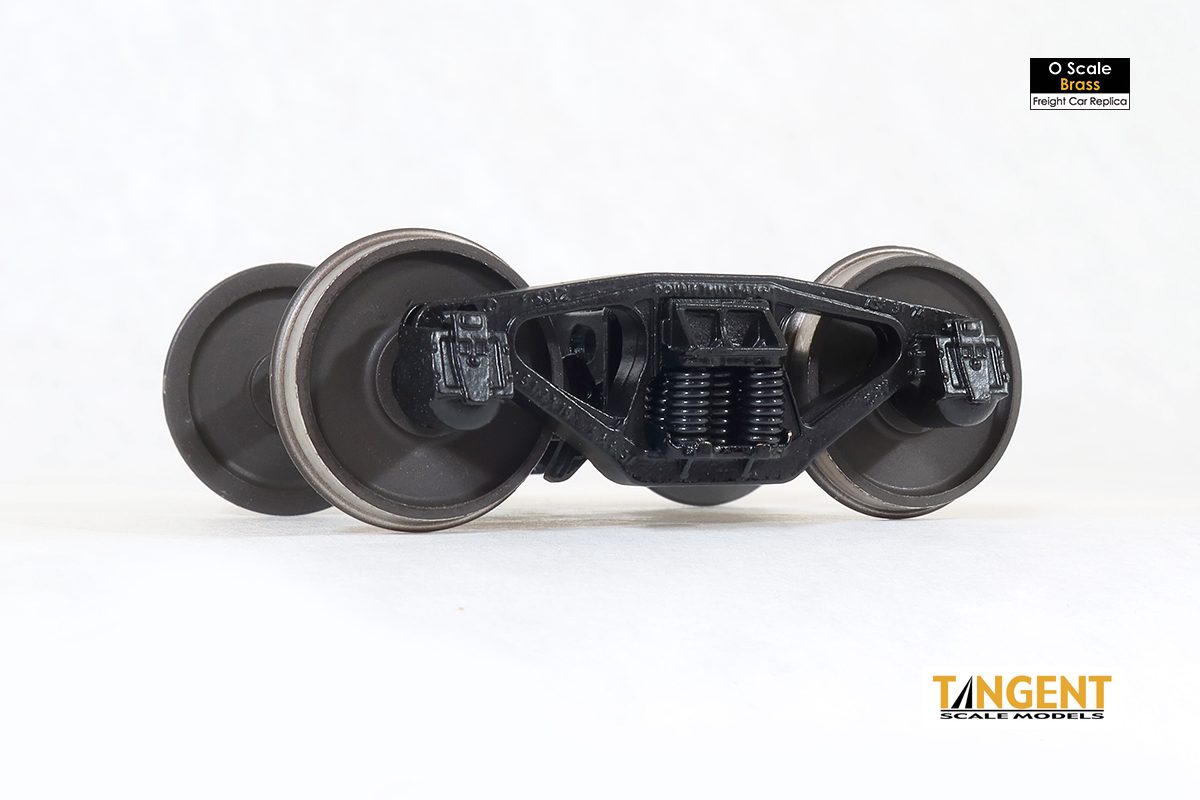
The Proto48 Trucks are nicely done and very free rolling. They have roller bearings in the journals. The spring cluster is nicely modeled compared to the usual ball point pen type springs used on some trucks. You can’t see through the spring cluster on the prototype and you can’t see through it on the model either.
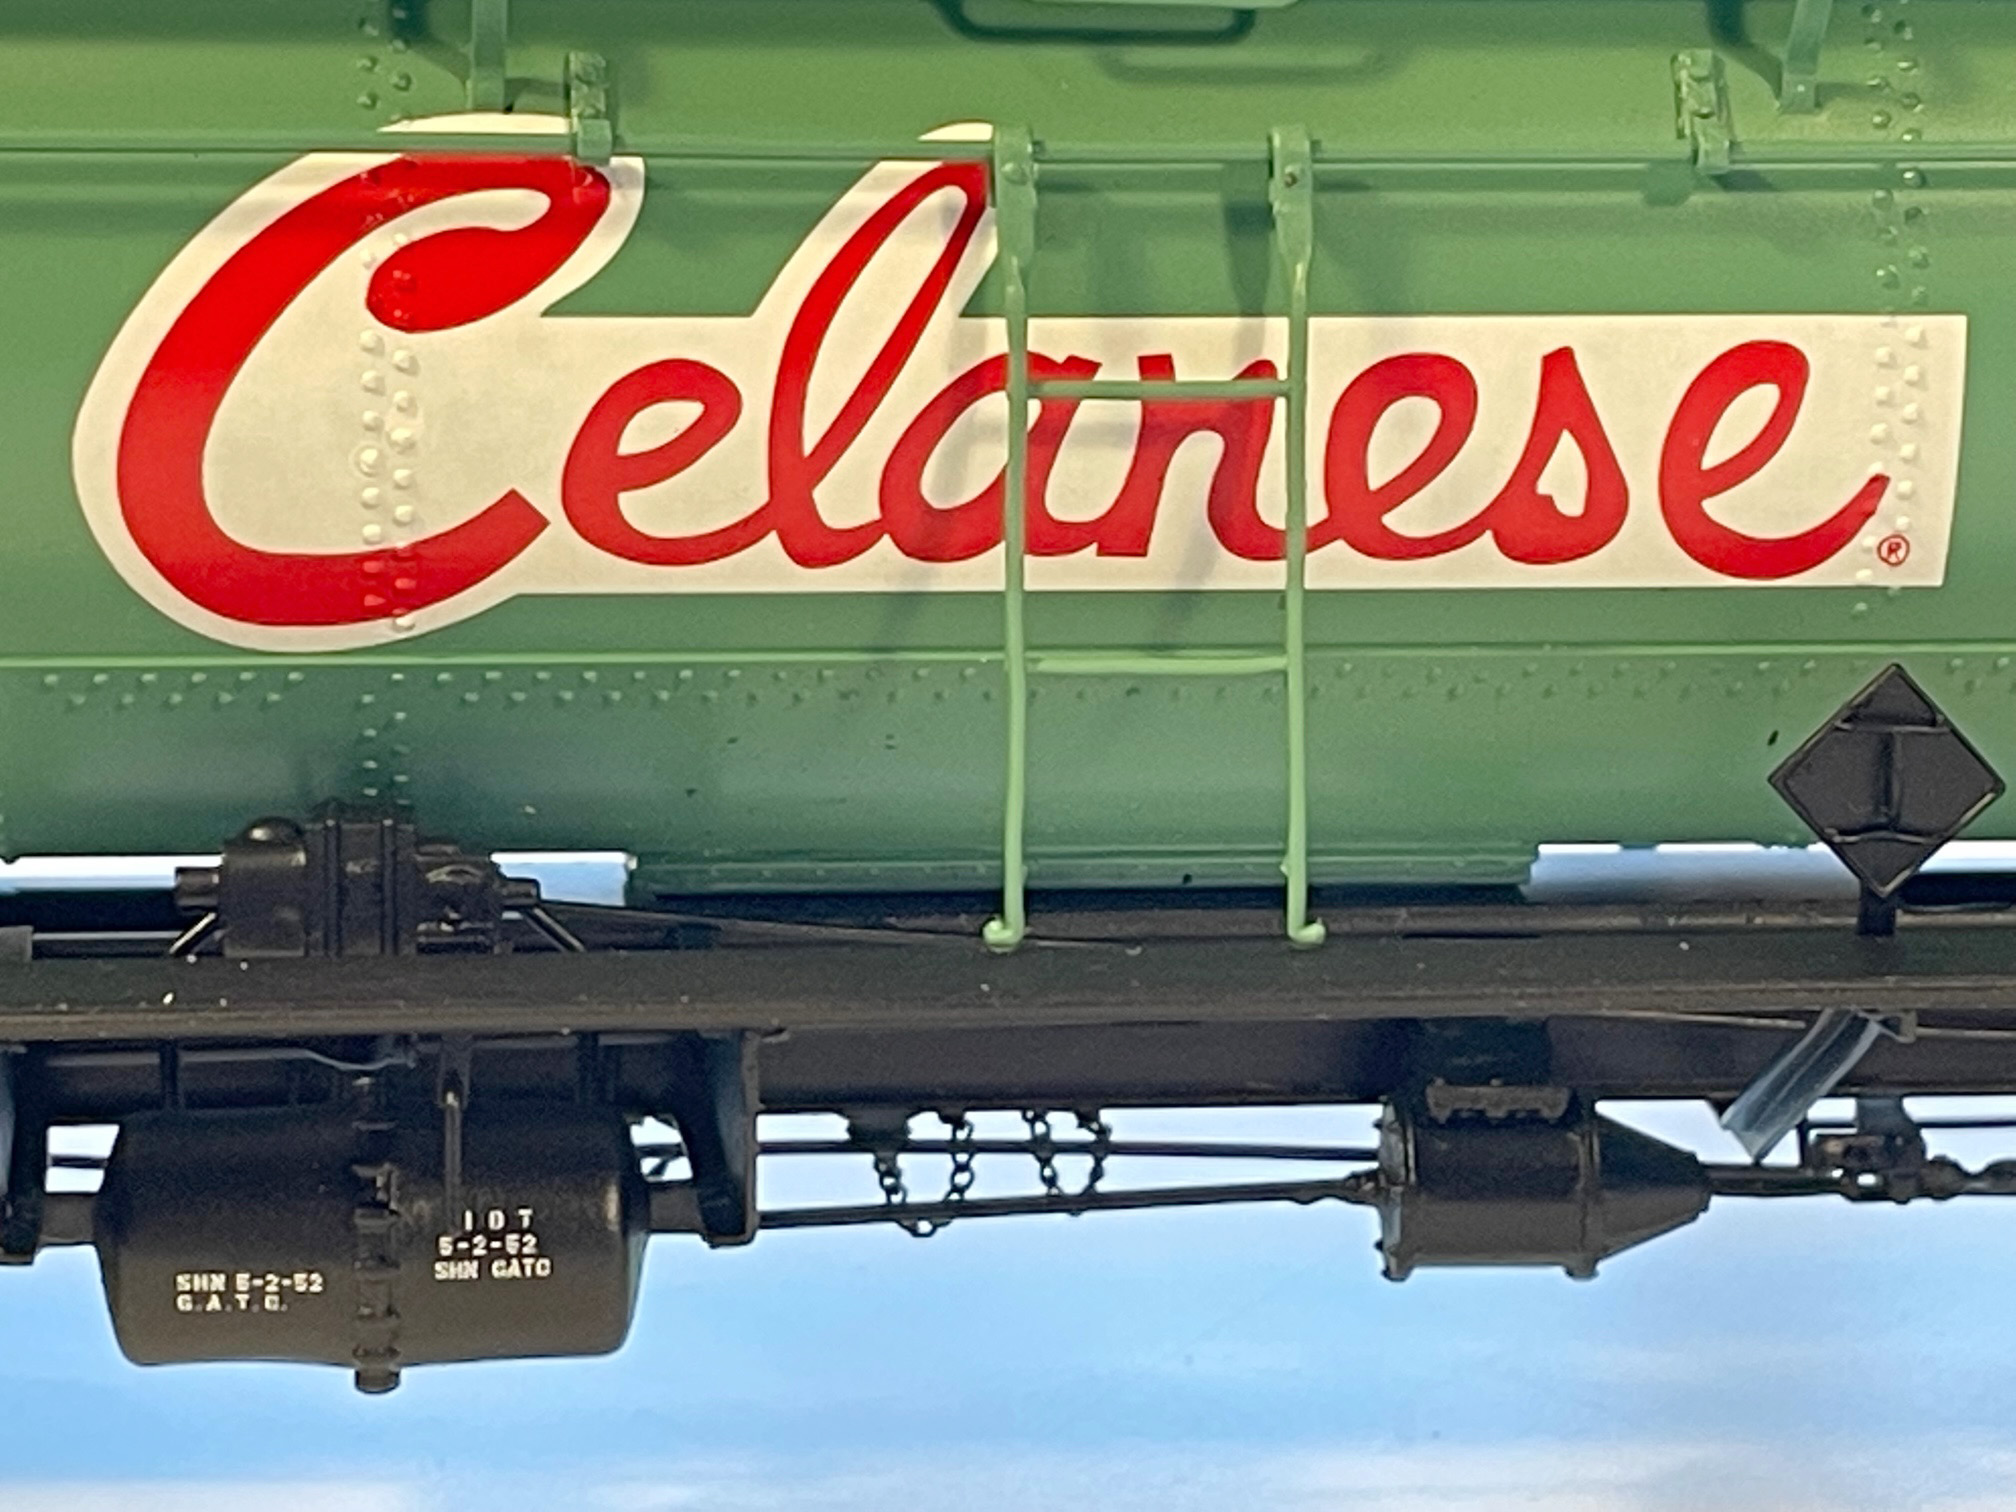
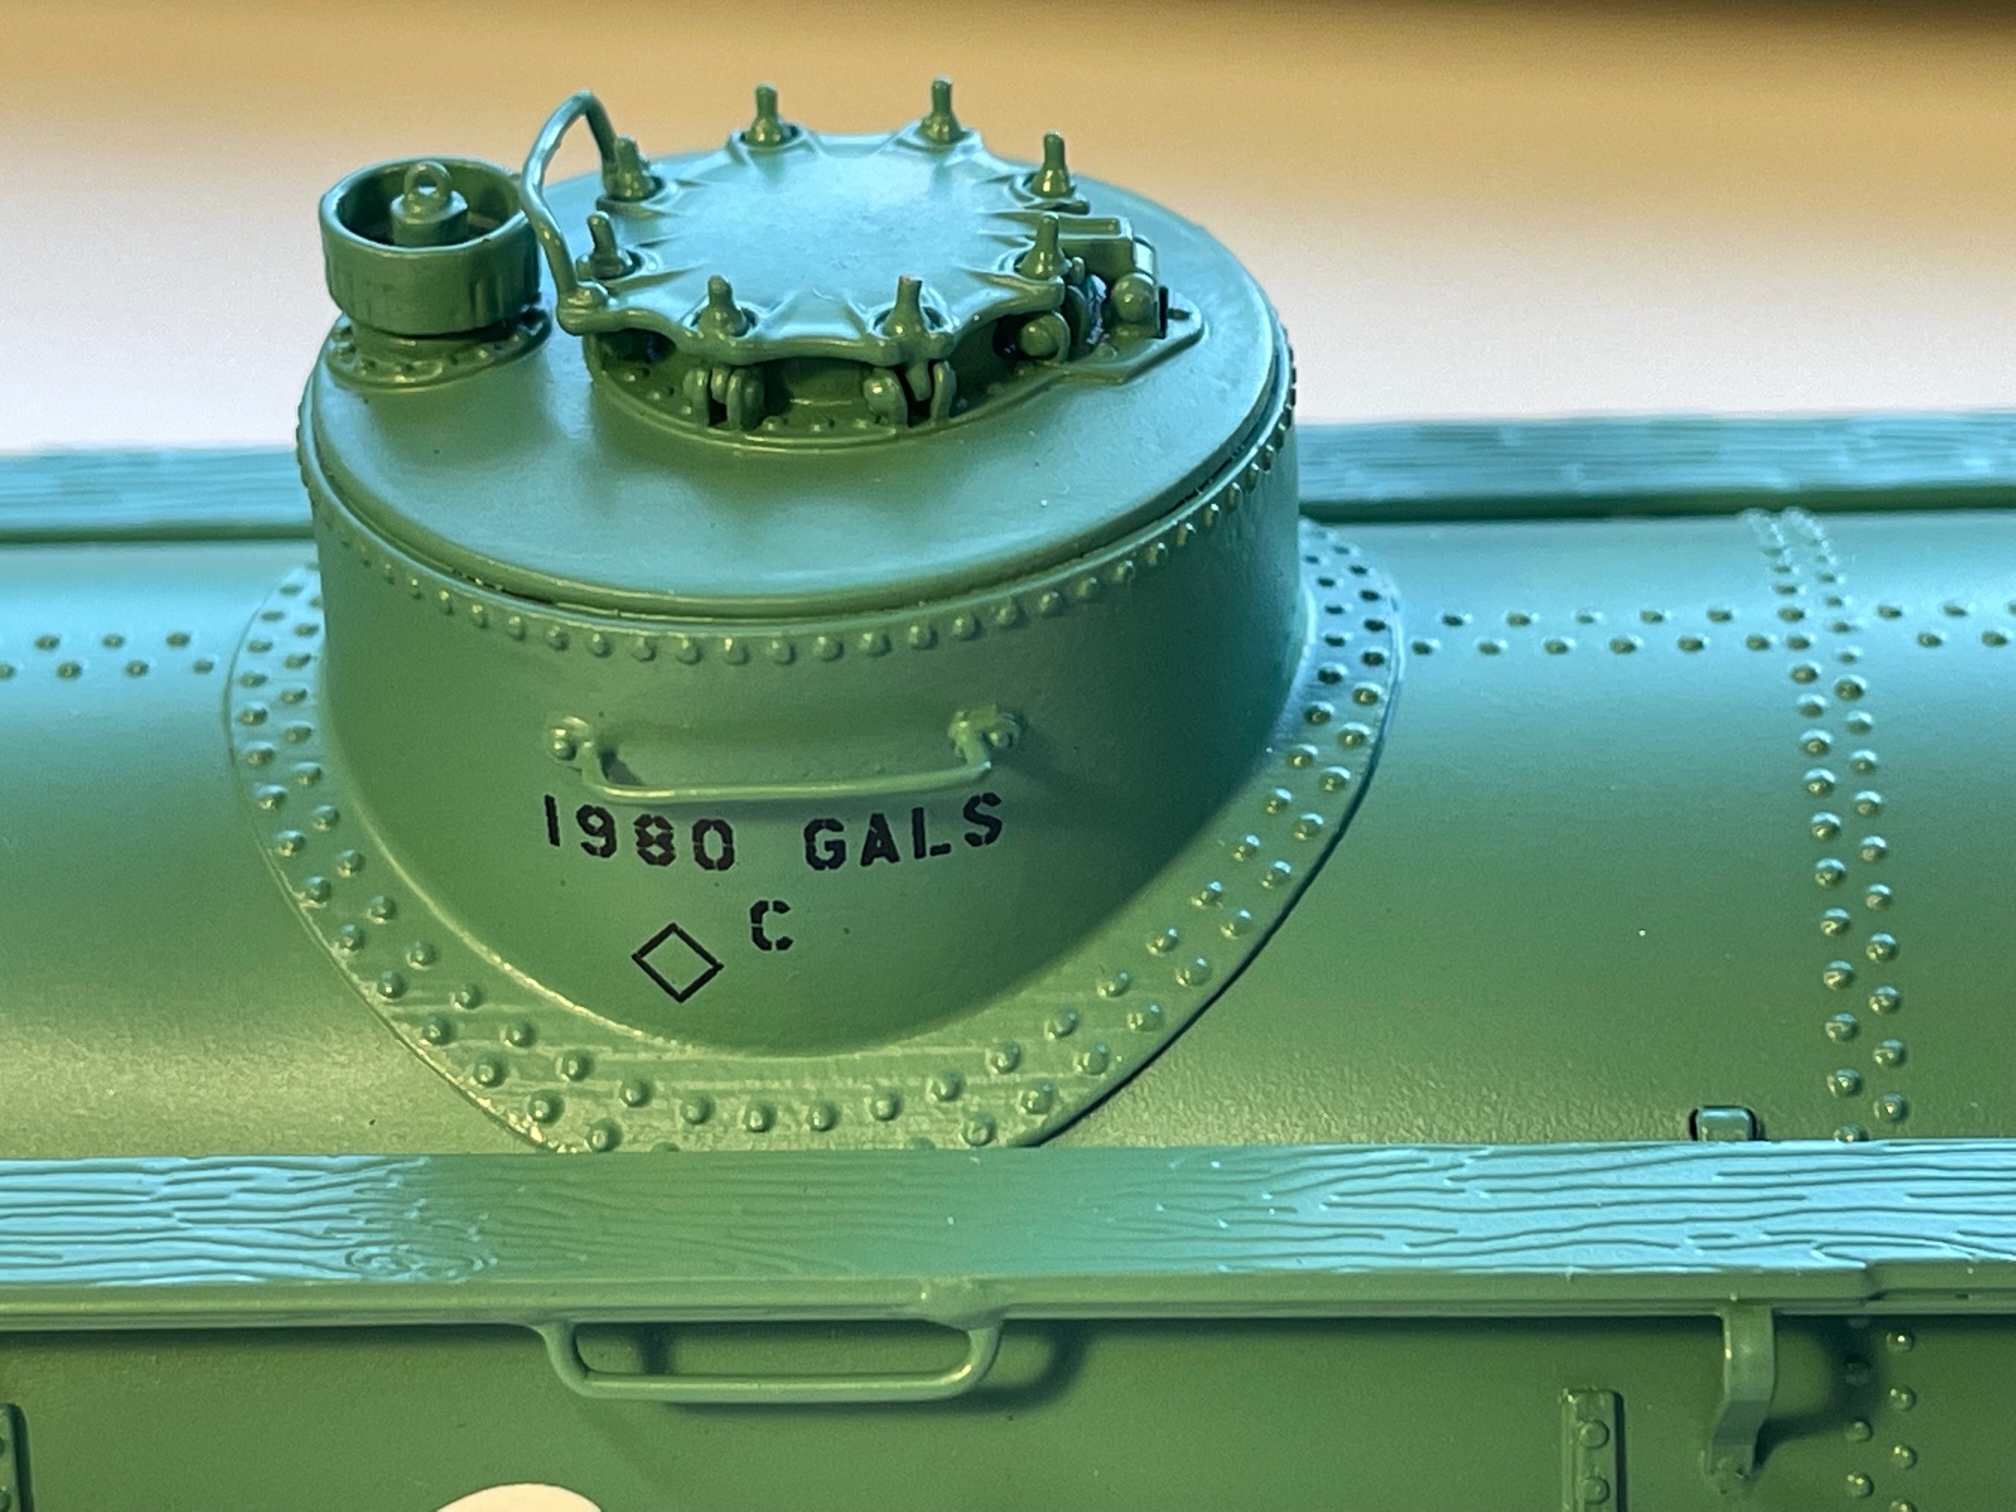
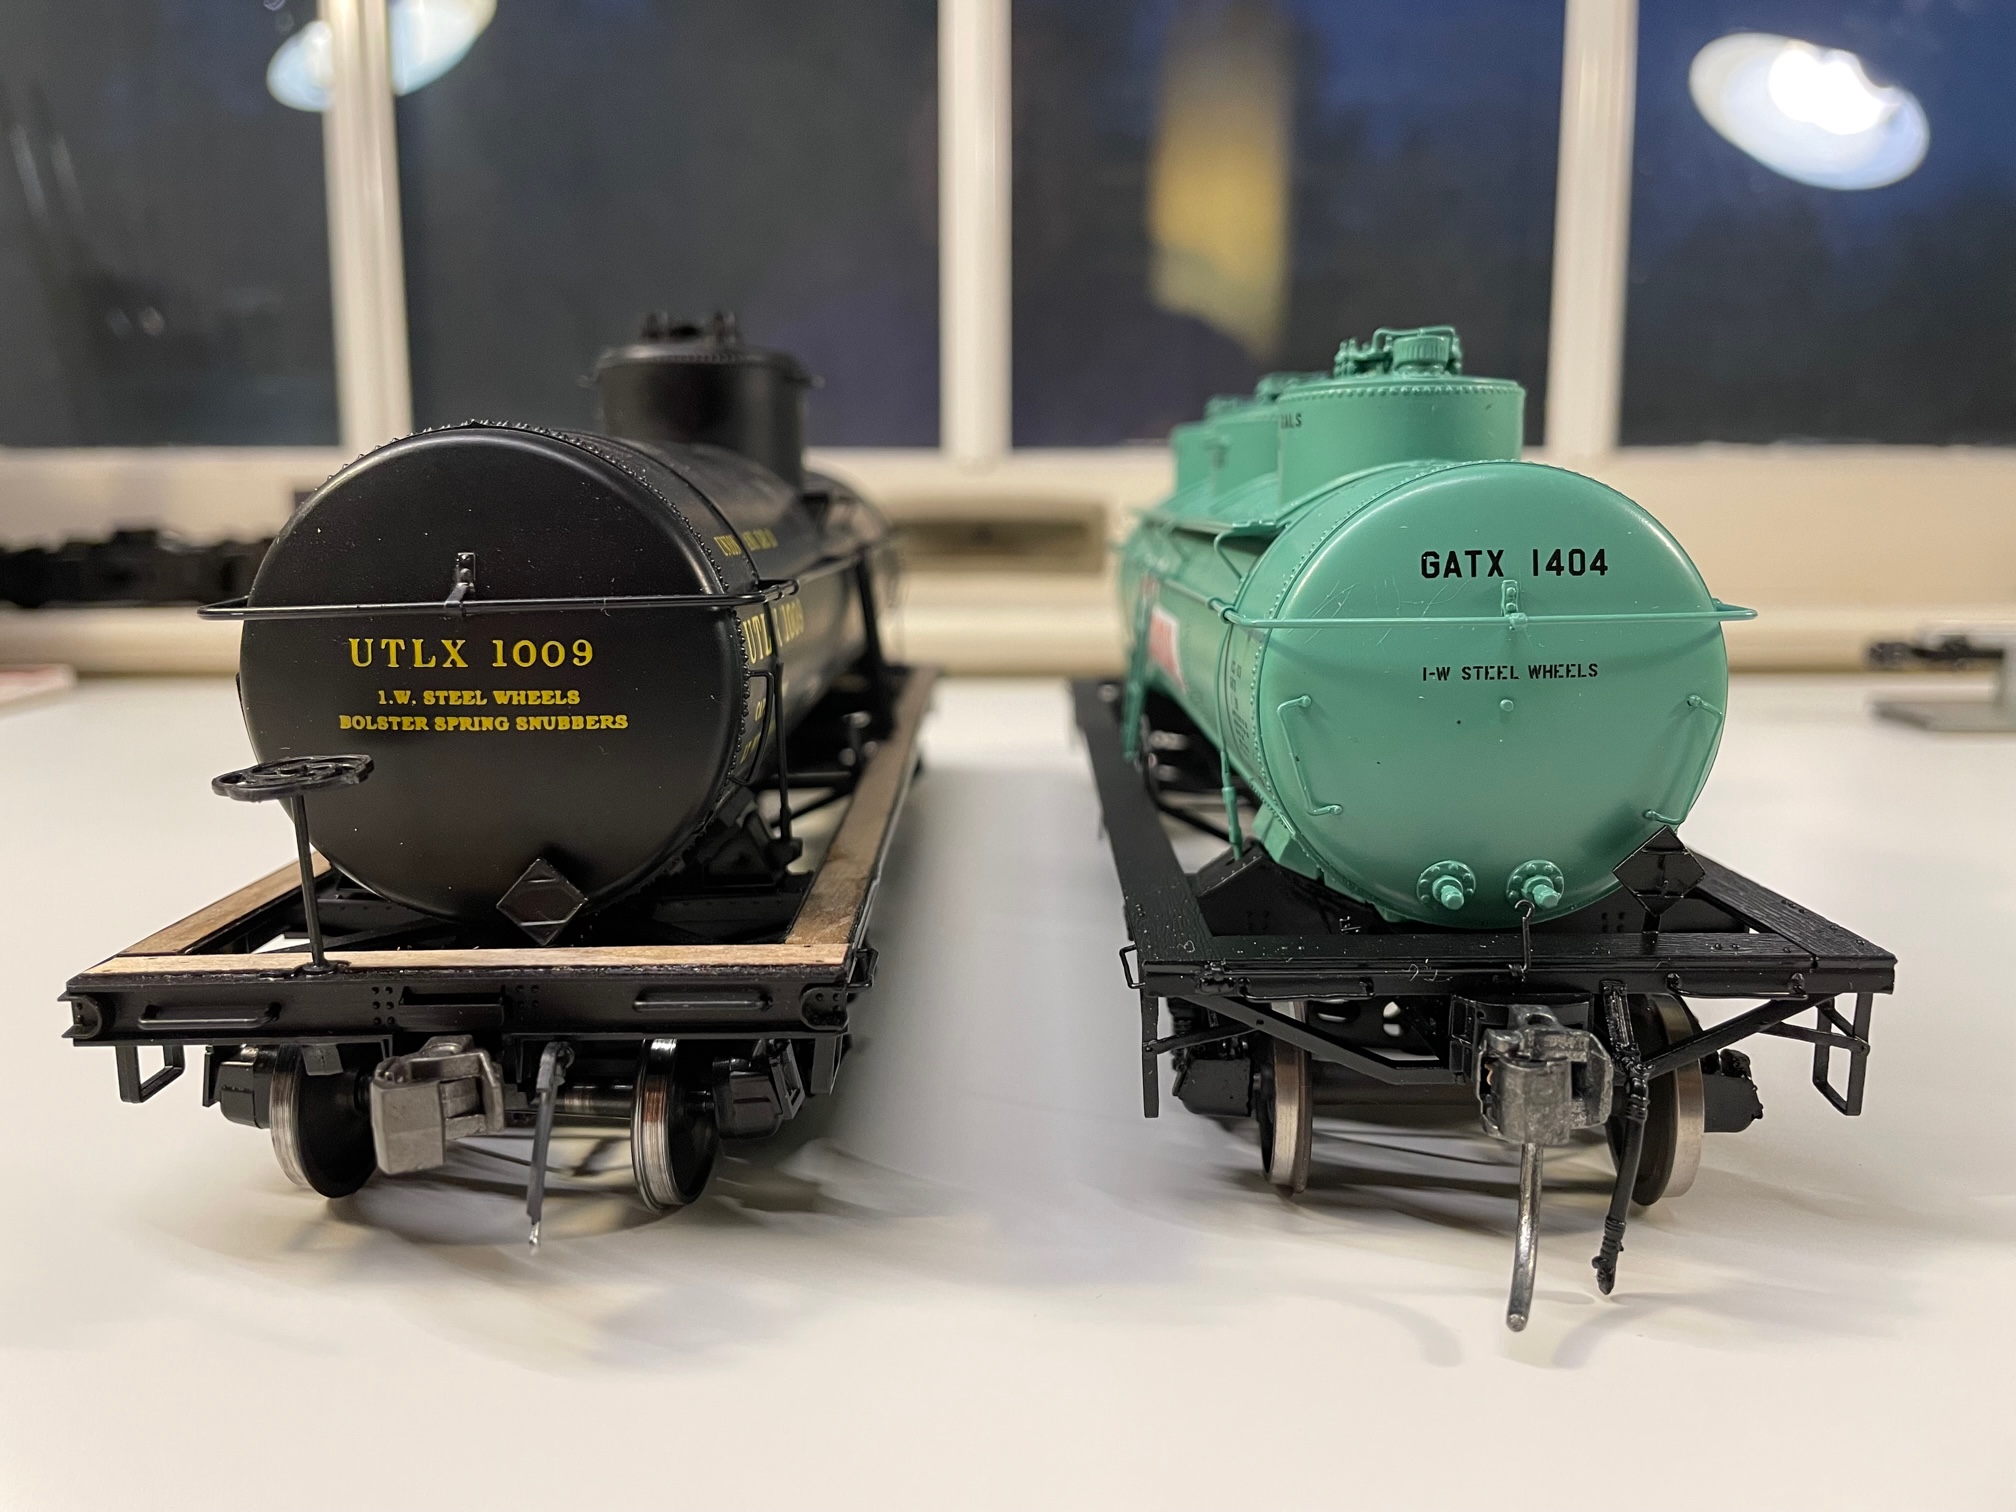
Here you can see the fine decoration on the model.
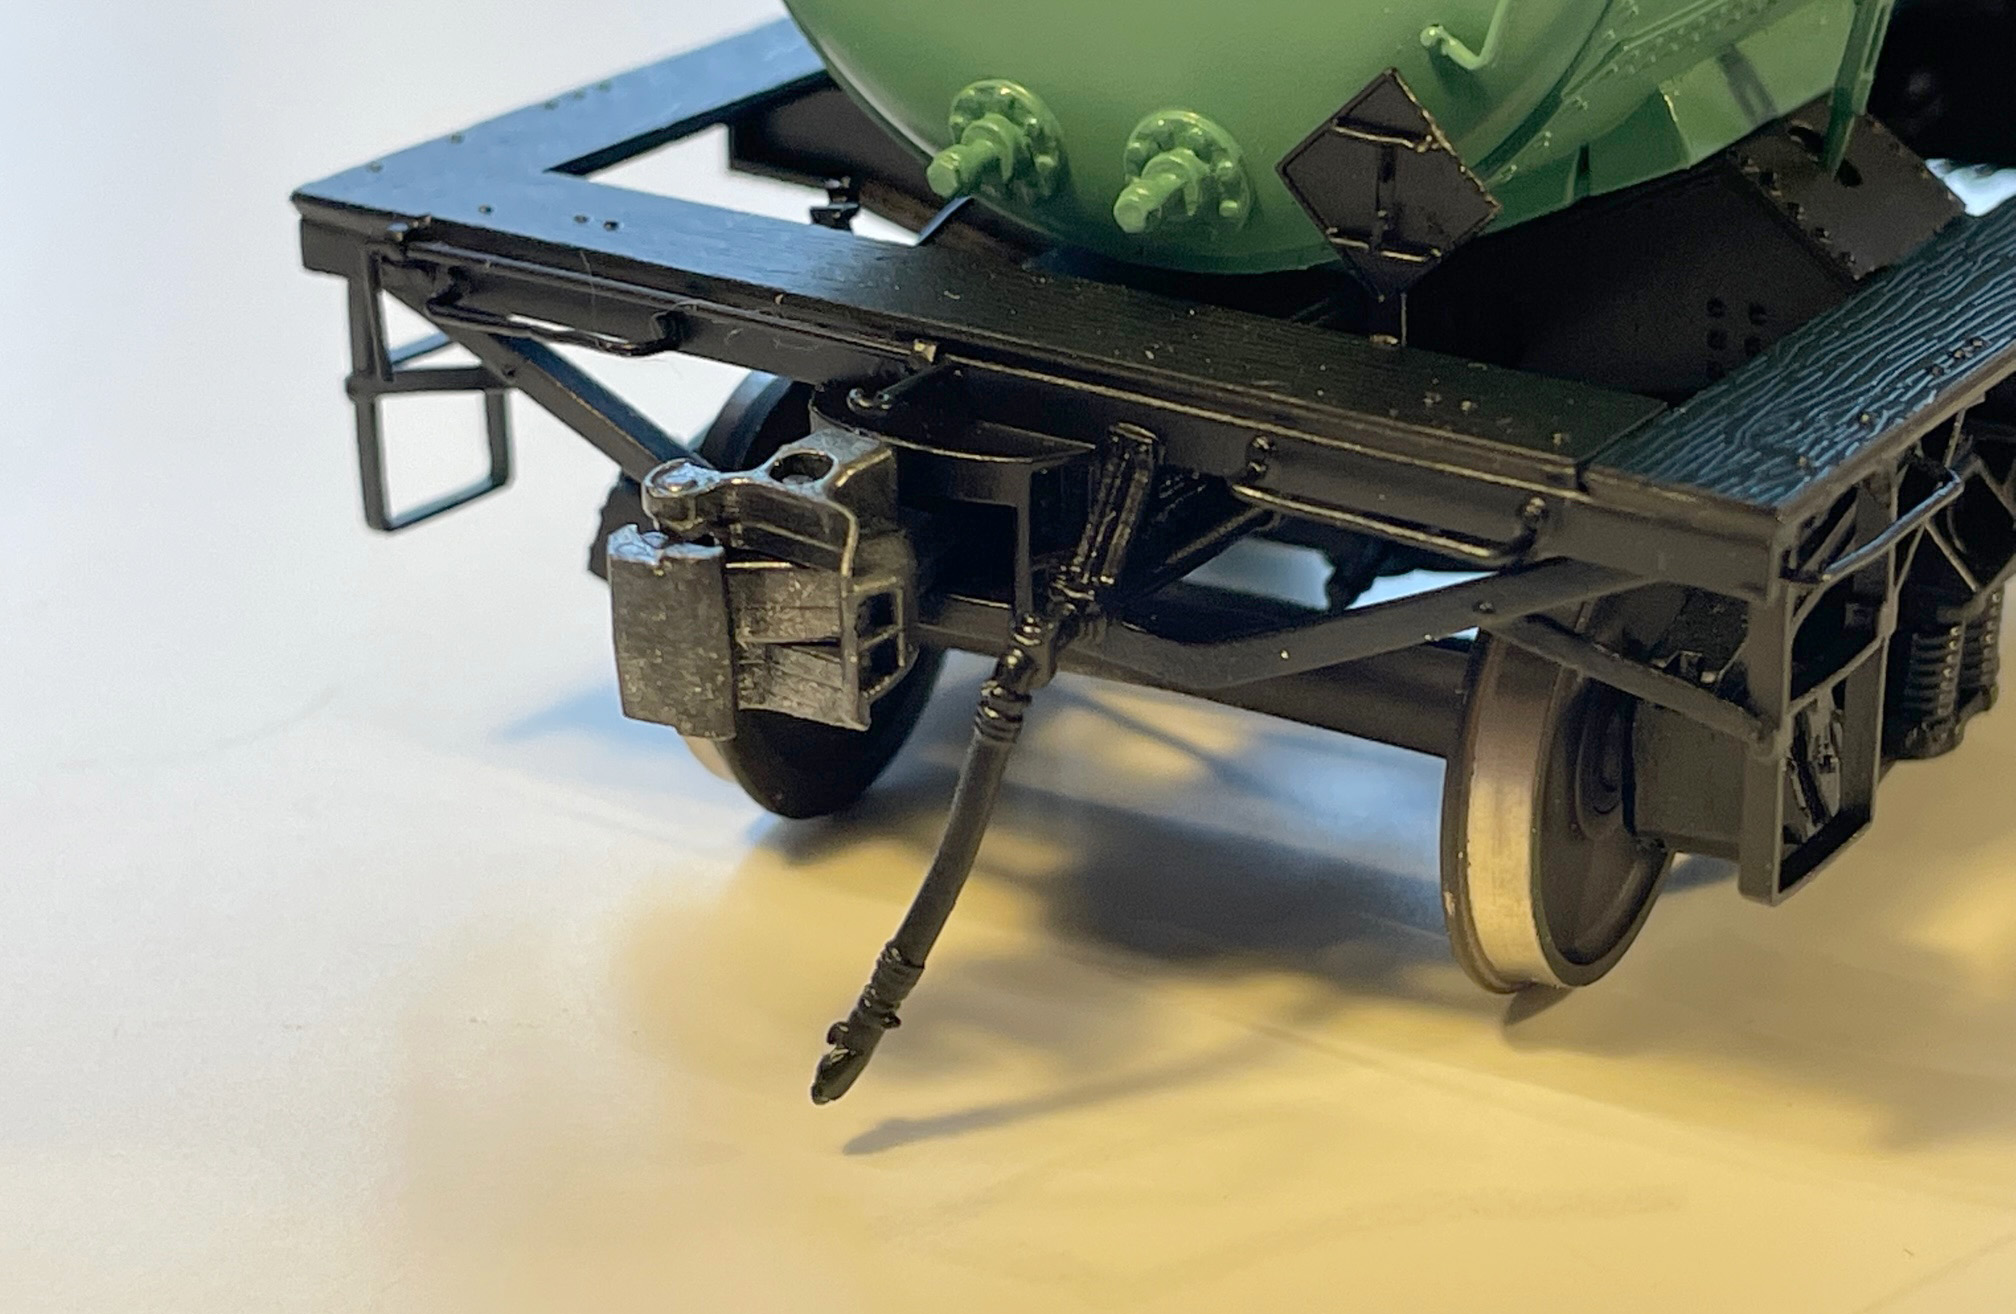
Now to point out some of the engineering standouts. The draft gear is nice. Rather than just leaving a place to mount the oversize Kadee coupler box the box and draft gear are one unit to the bolster.
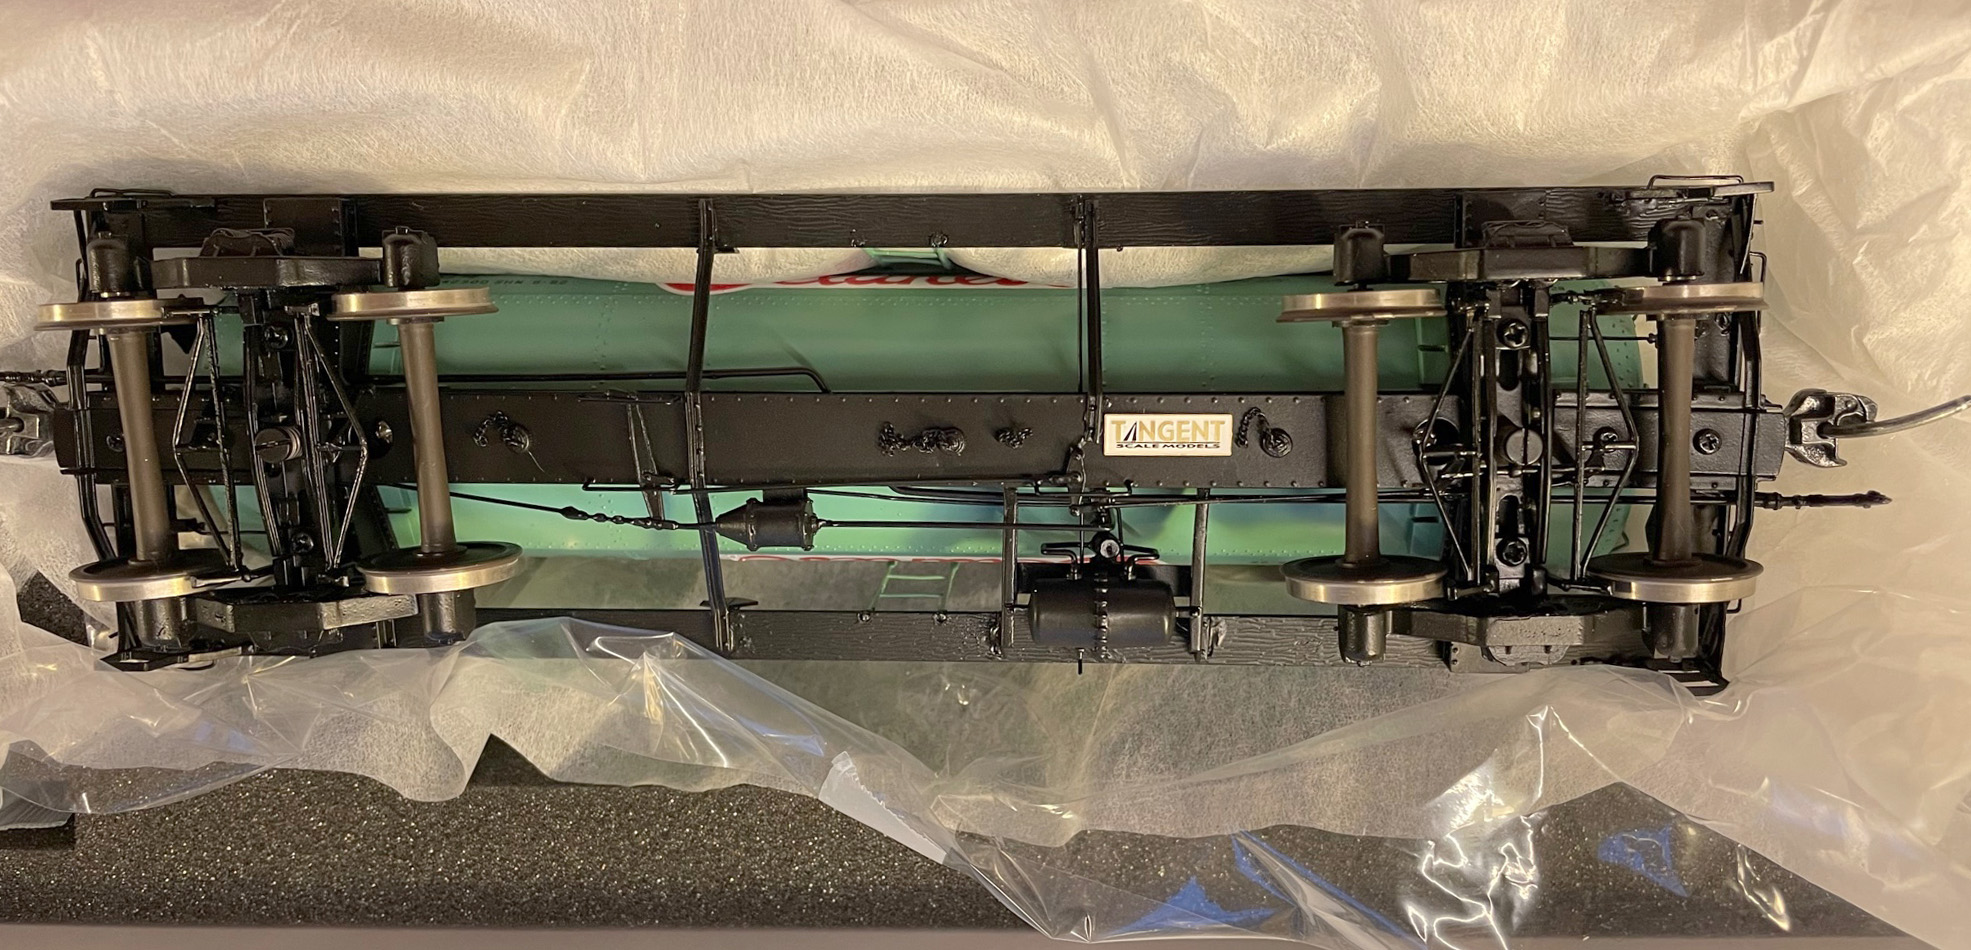
Here it is from the top.
I think it looks even better without the coupler pin.
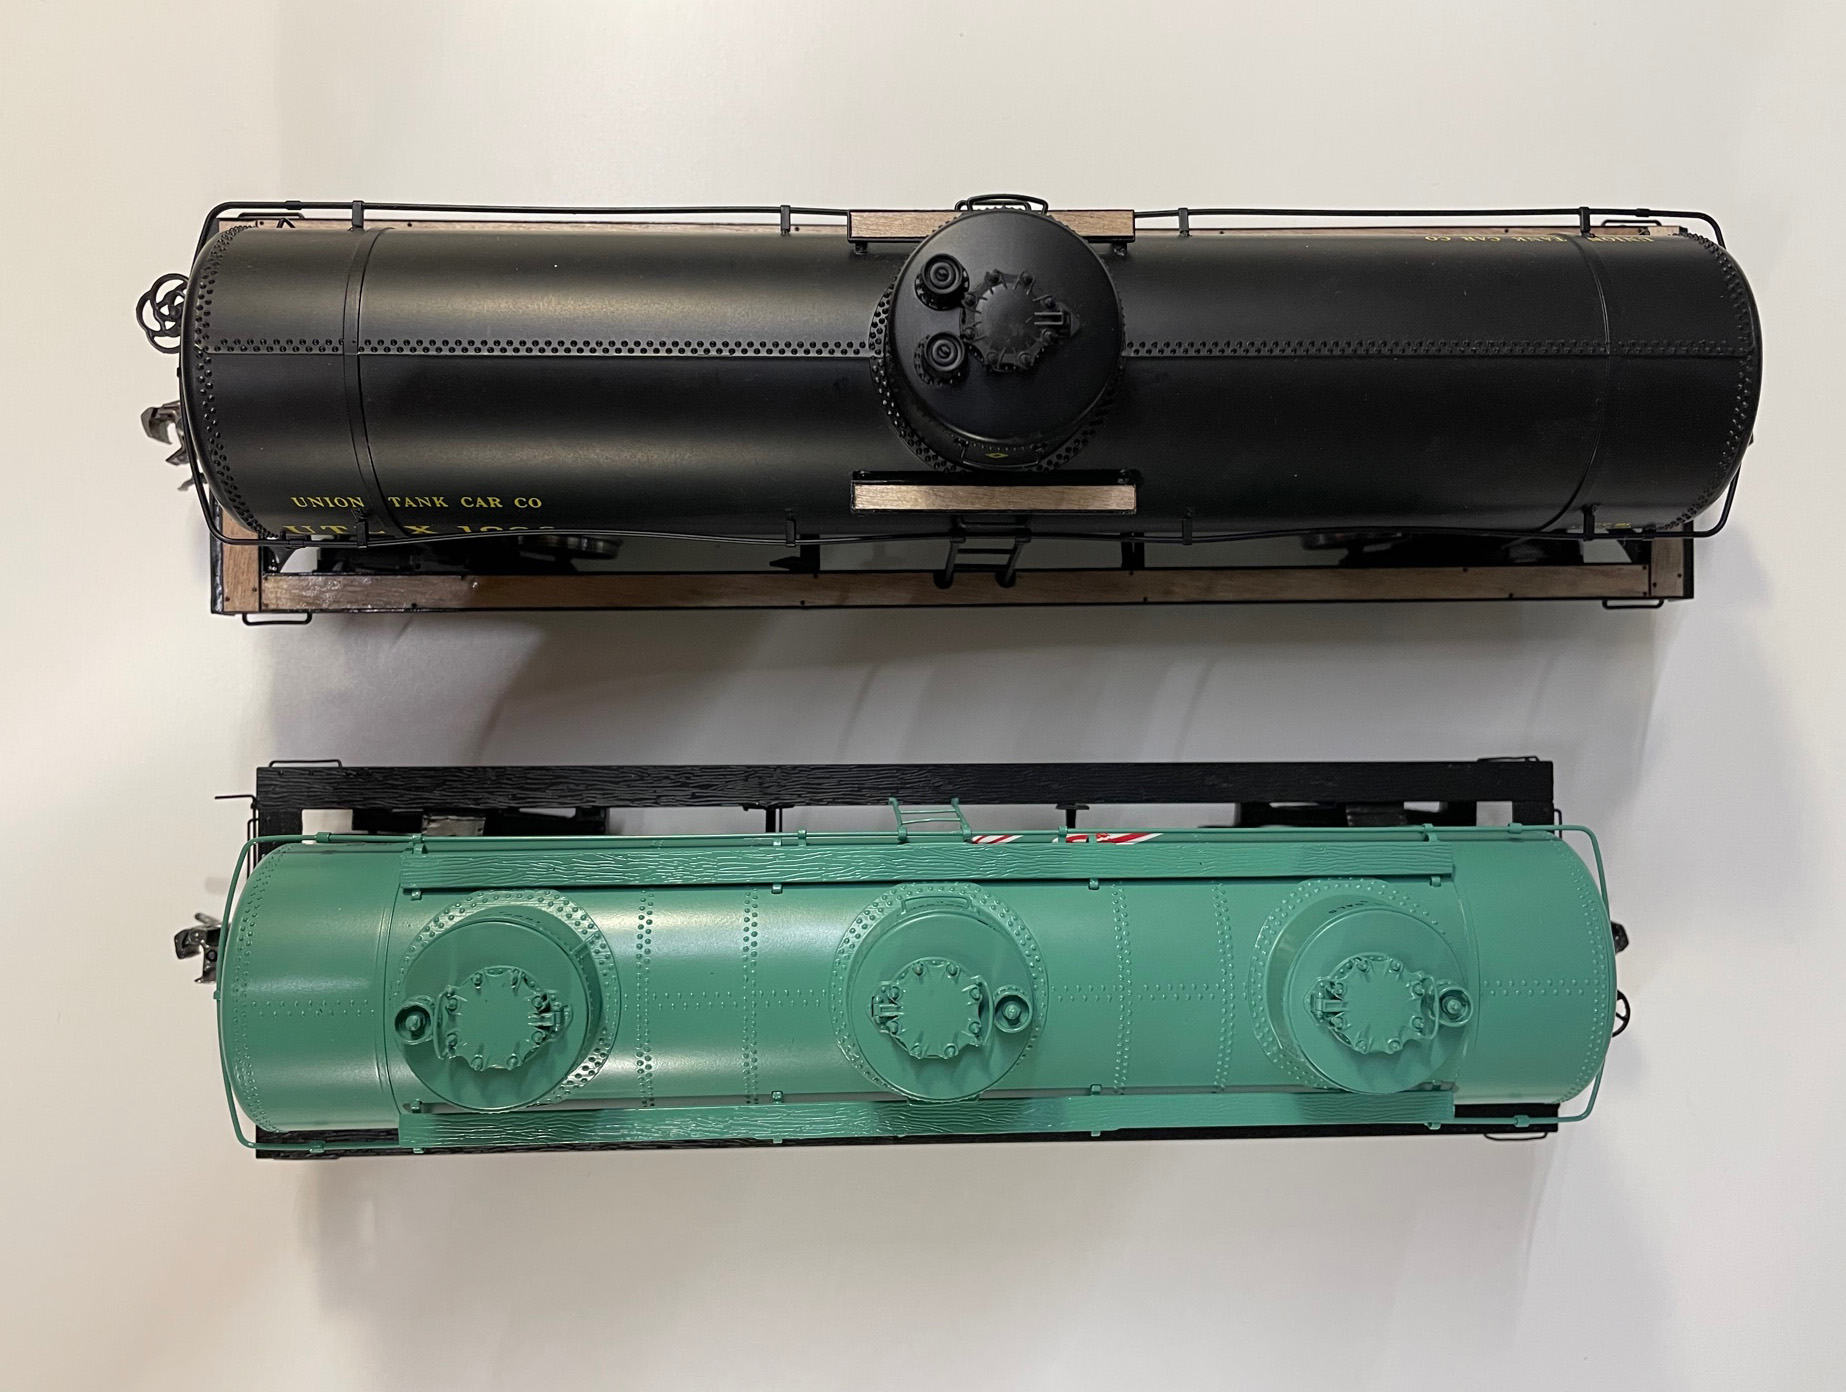
And now just for a comparison, here is the Intermountain ACF 8000 Gal tank car along side the new Tangent Scale model. You can see the Tangent model is shorter ad the tank diameter is smaller.
I normally go for more of the Plain-Jane types of freight cars. I almost ordered the 1958 version of the GATX black car. I could have easily backdated the dates to work for my modeling period of 1952. I chose instead to buy a car that I didn’t have to modify at all. Looking at how nice the lettering is applied to the car, I’m glad I did.
Some people might think the the asking price is high. If you consider the added price of a custom paint job and a pair of Proto48 replacement trucks, the price comes in under what some undecorated 30 year old brass cars from Pacific Limited currently sells for. I think this new release from Tangent Scale Models is a bargain.
Since the Tangent Scale Models announcement the other day, a few people have been very vocal that they wanted a different model produced. Well if that is truly the case, they can drop the cash and invest in a new company and produce whatever they want. They don’t seem to do more than just complain anyway. I’m waiting for their announcement of a new company and a new model release.
O Scale / Proto48 has a new manufacturer, Tangent Scale Models announced the release of a new model of a GATC 6,000 Gallon 3-Compartment tank car. They are now available from the Tangent Scale Models website.
The models are hand-crafted in brass in Republic of Korea by SamModel and are offered in both O scale 2-Rail and Proto-48 configurations.
Tangent Scale Models has offered the modeler a choice of O Scale or Proto48 models with the release of their new 50 ton truck.
Tangent Scale Models has a fine reputation in HO and N scale. I am glad they have taken the chance on the O Scale/Proto48 market with this fine new offering. One of these is in transit here now. I’ll have more thoughts and photos of it after it arrives.
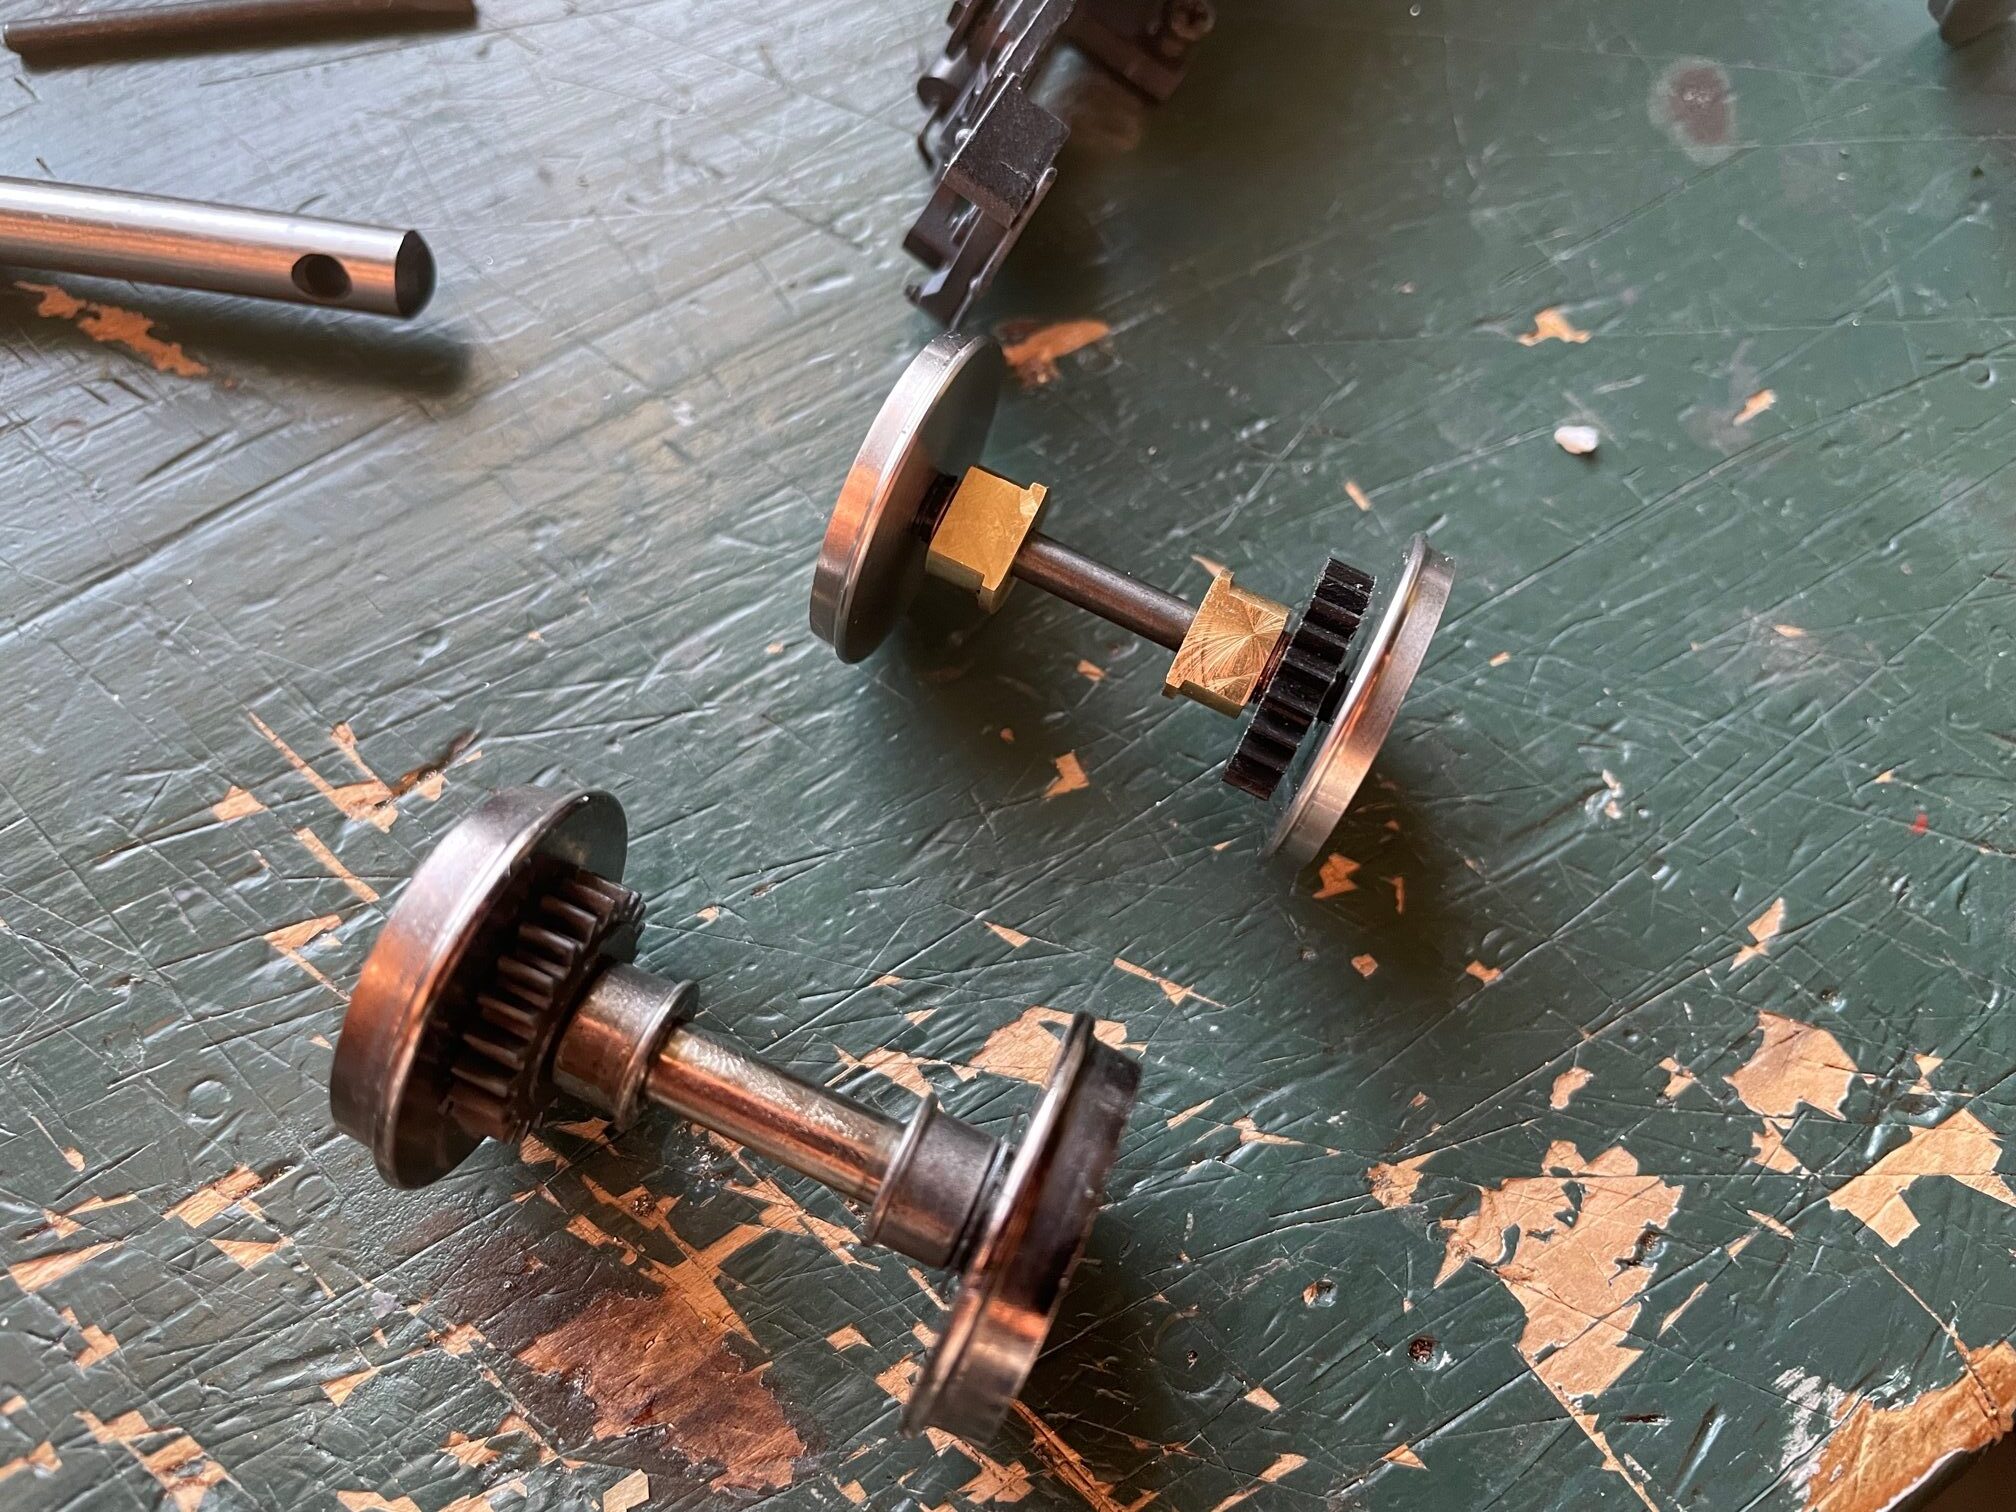
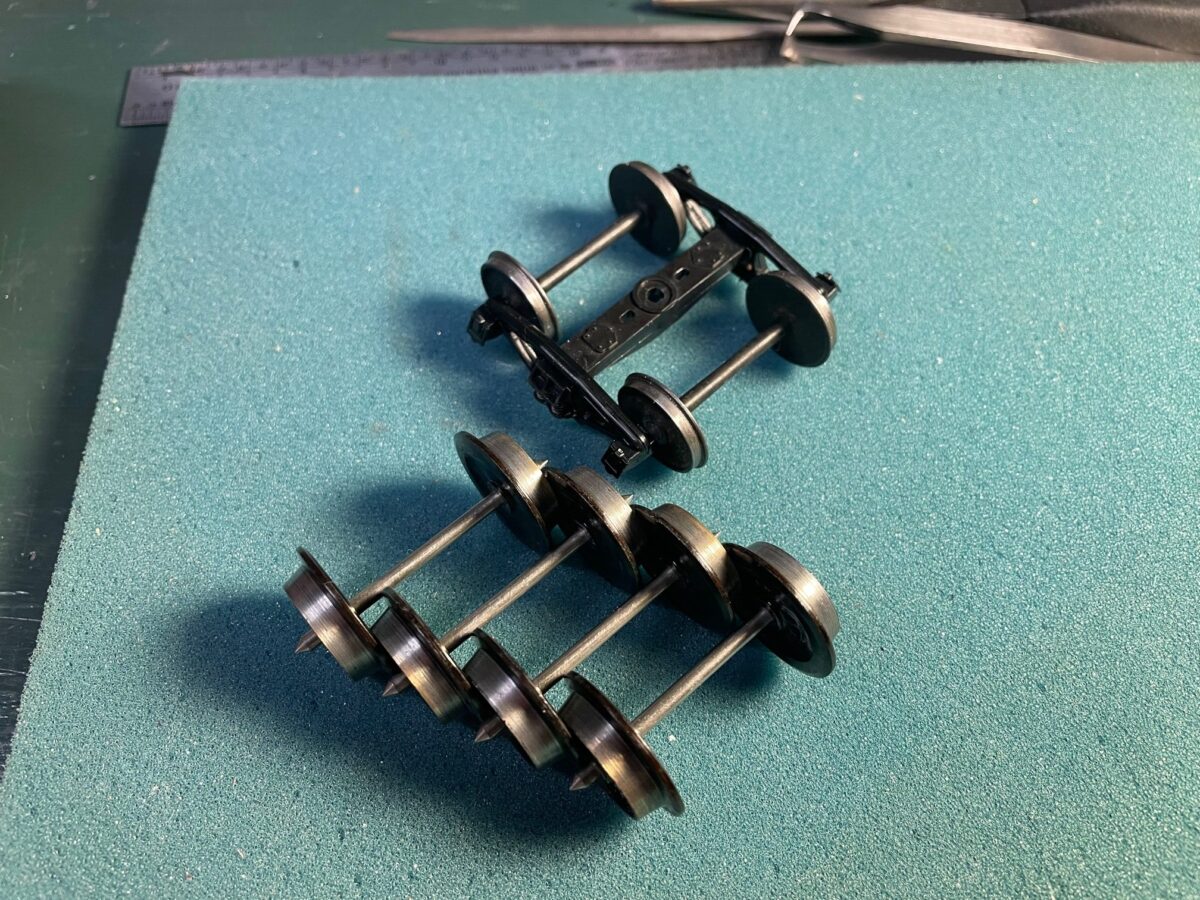
Original Atlas O axel assembly and the NWSL Conversion Wheelset
“Drop-In Conversion Parts” that is such a nice phrase. It’s not always a reality.
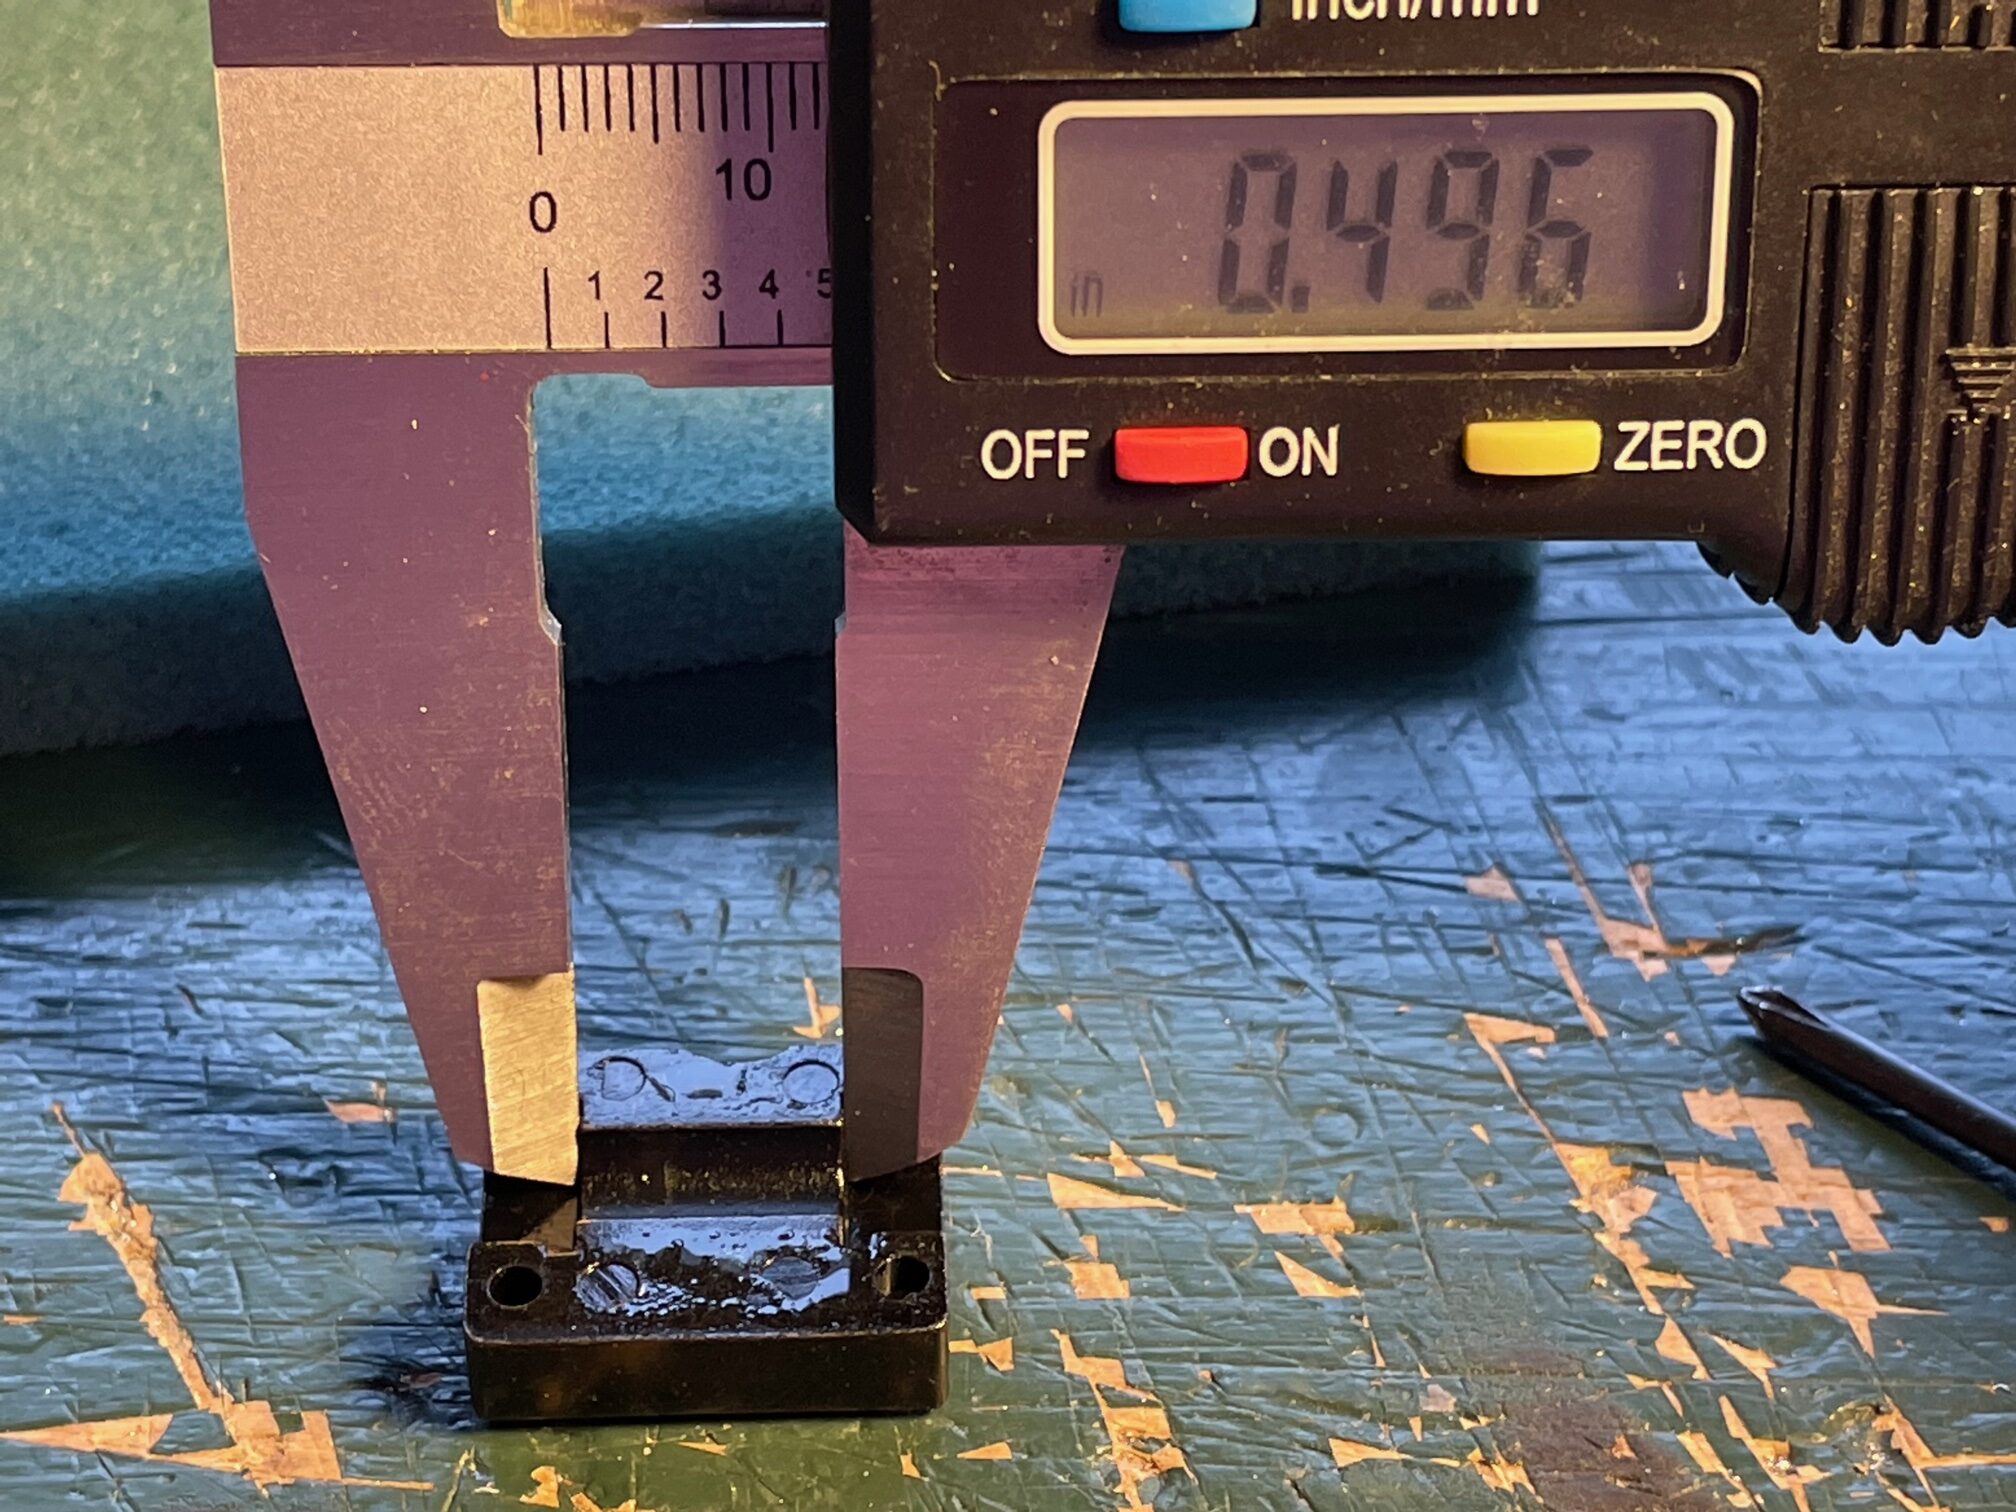
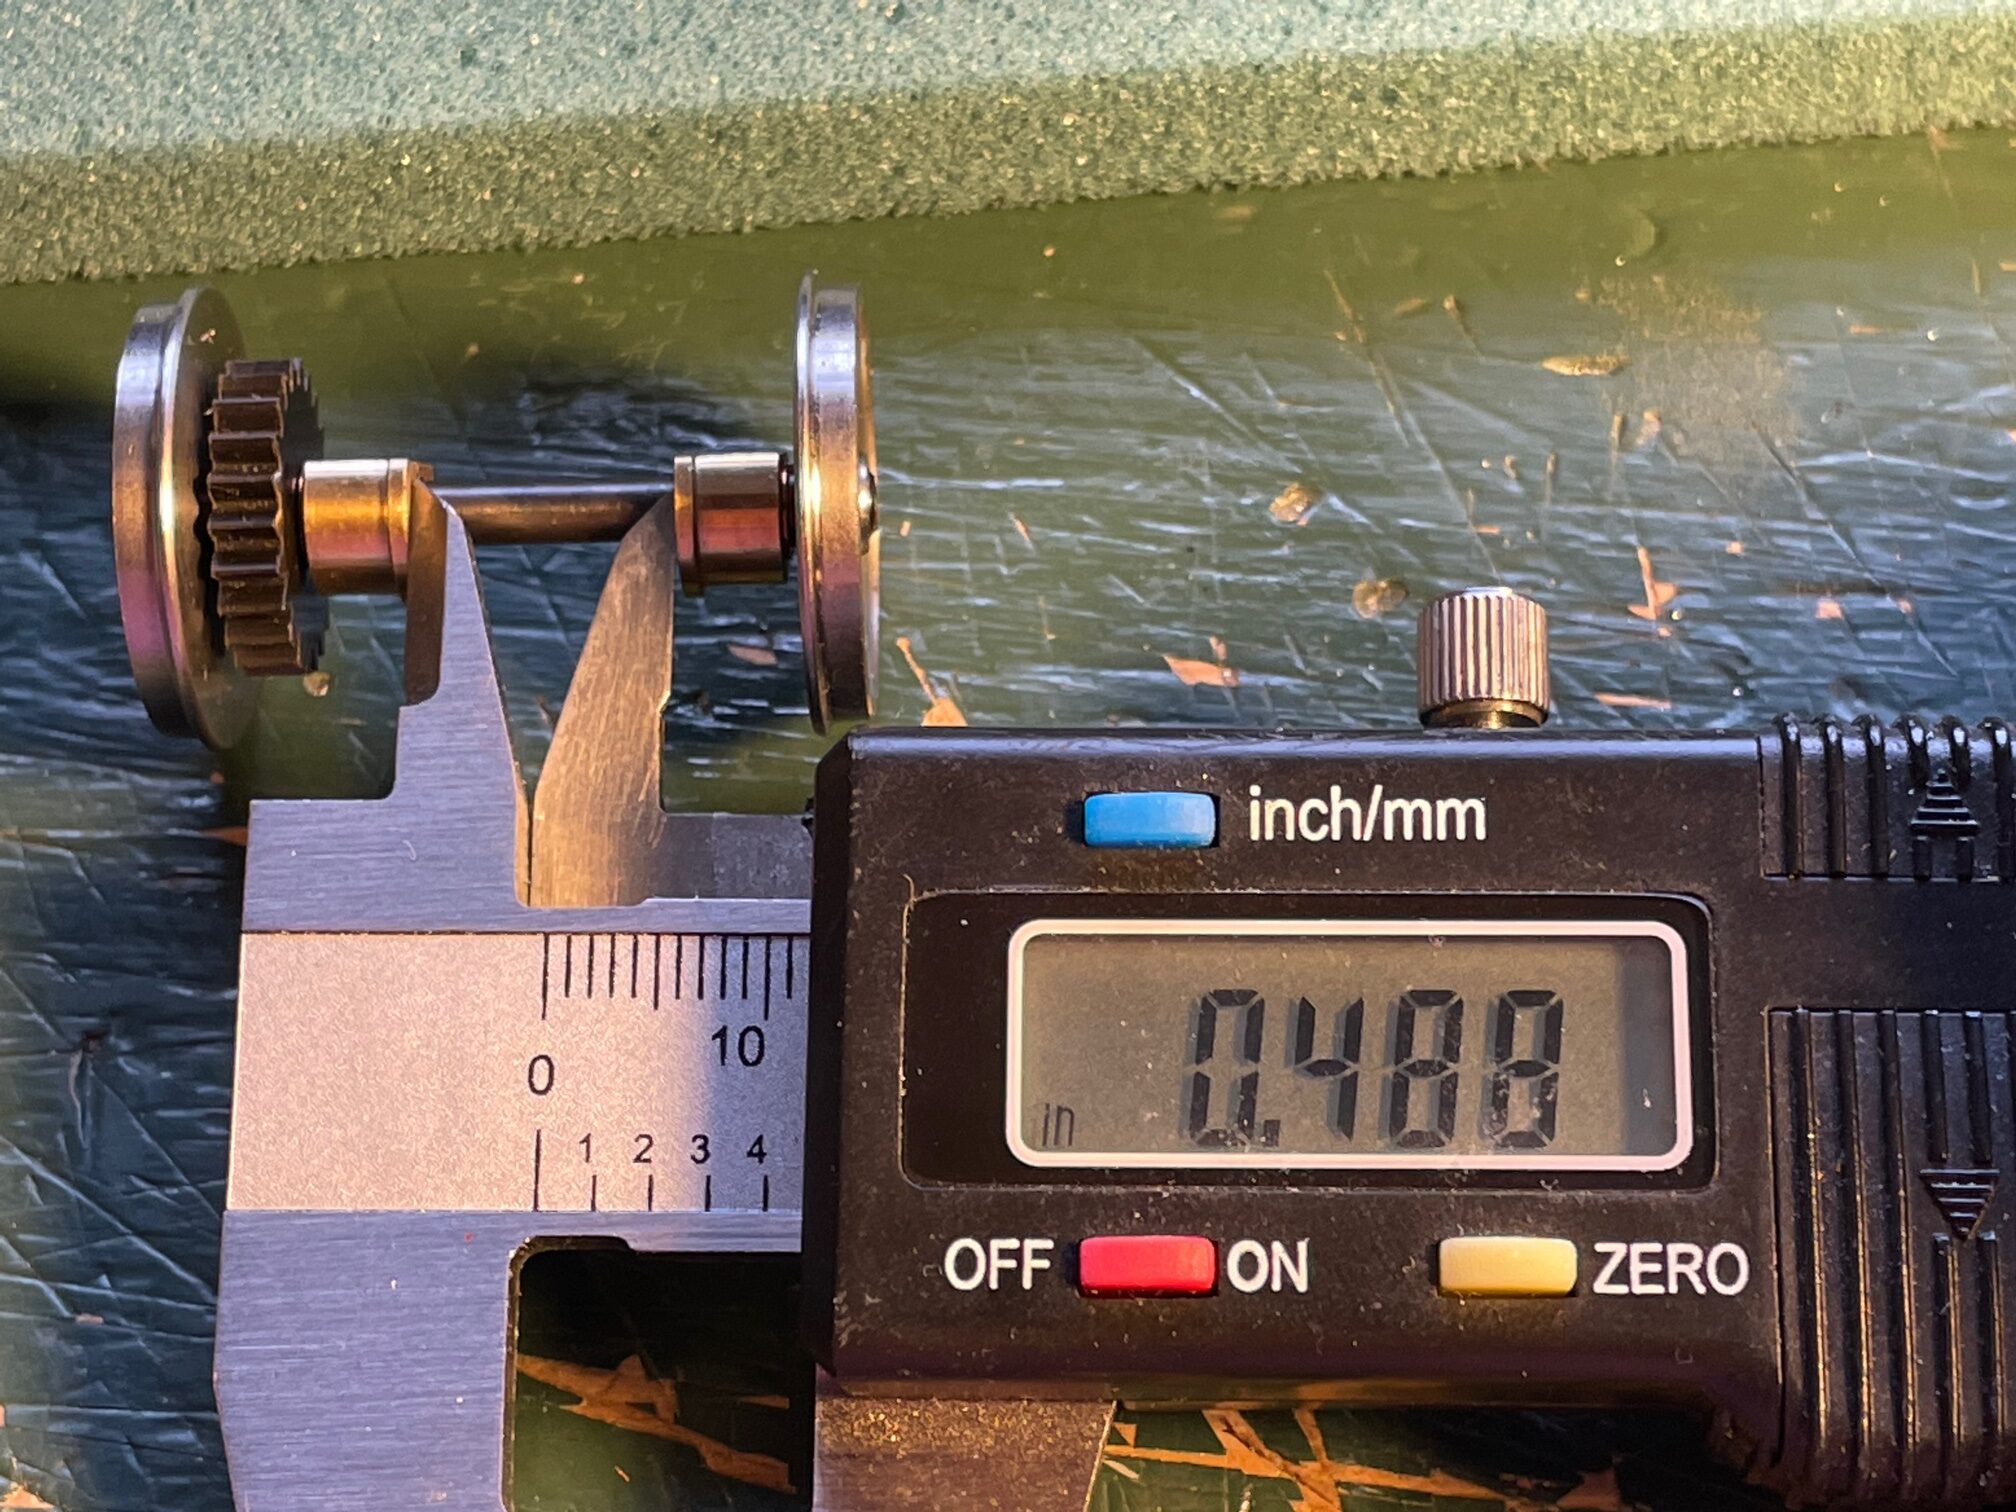
If you read yesterday’s post you know of my troubles installing the NWSL conversion wheelsets into the Atlas O F3B. To recap the back to back of the ridge on the bushings needed to be at least 0.496″.
The NWSL parts had a back to back measurement of 0.488″ – 0.490″.
I know it’s only 0.006″ – 0.008″ difference but that is the difference of them fitting or not.
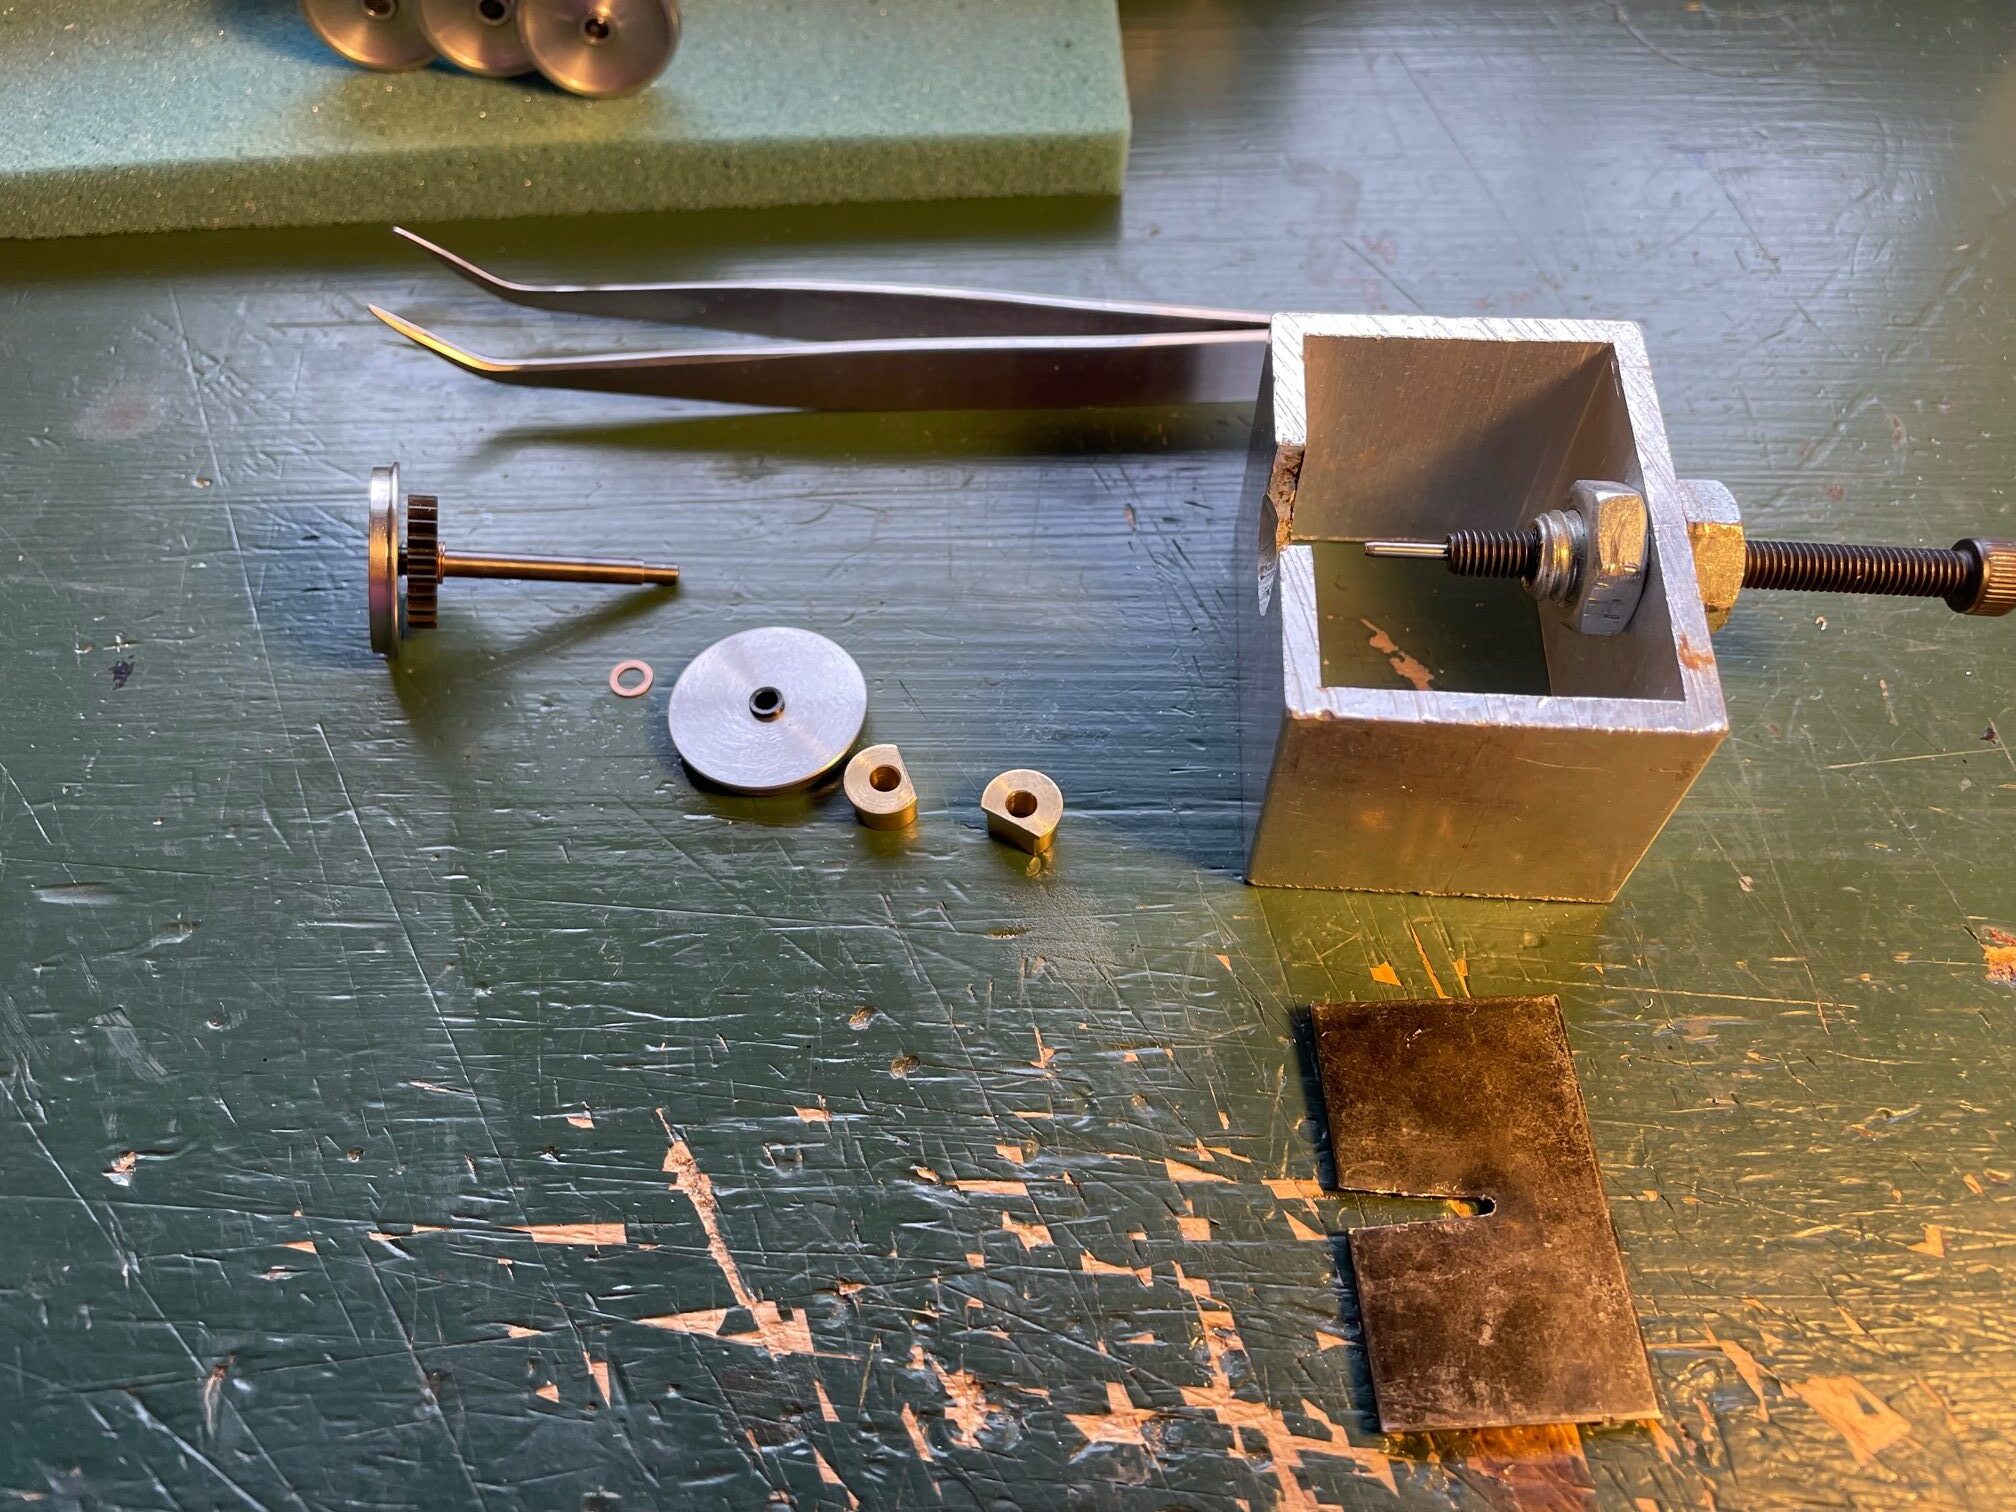
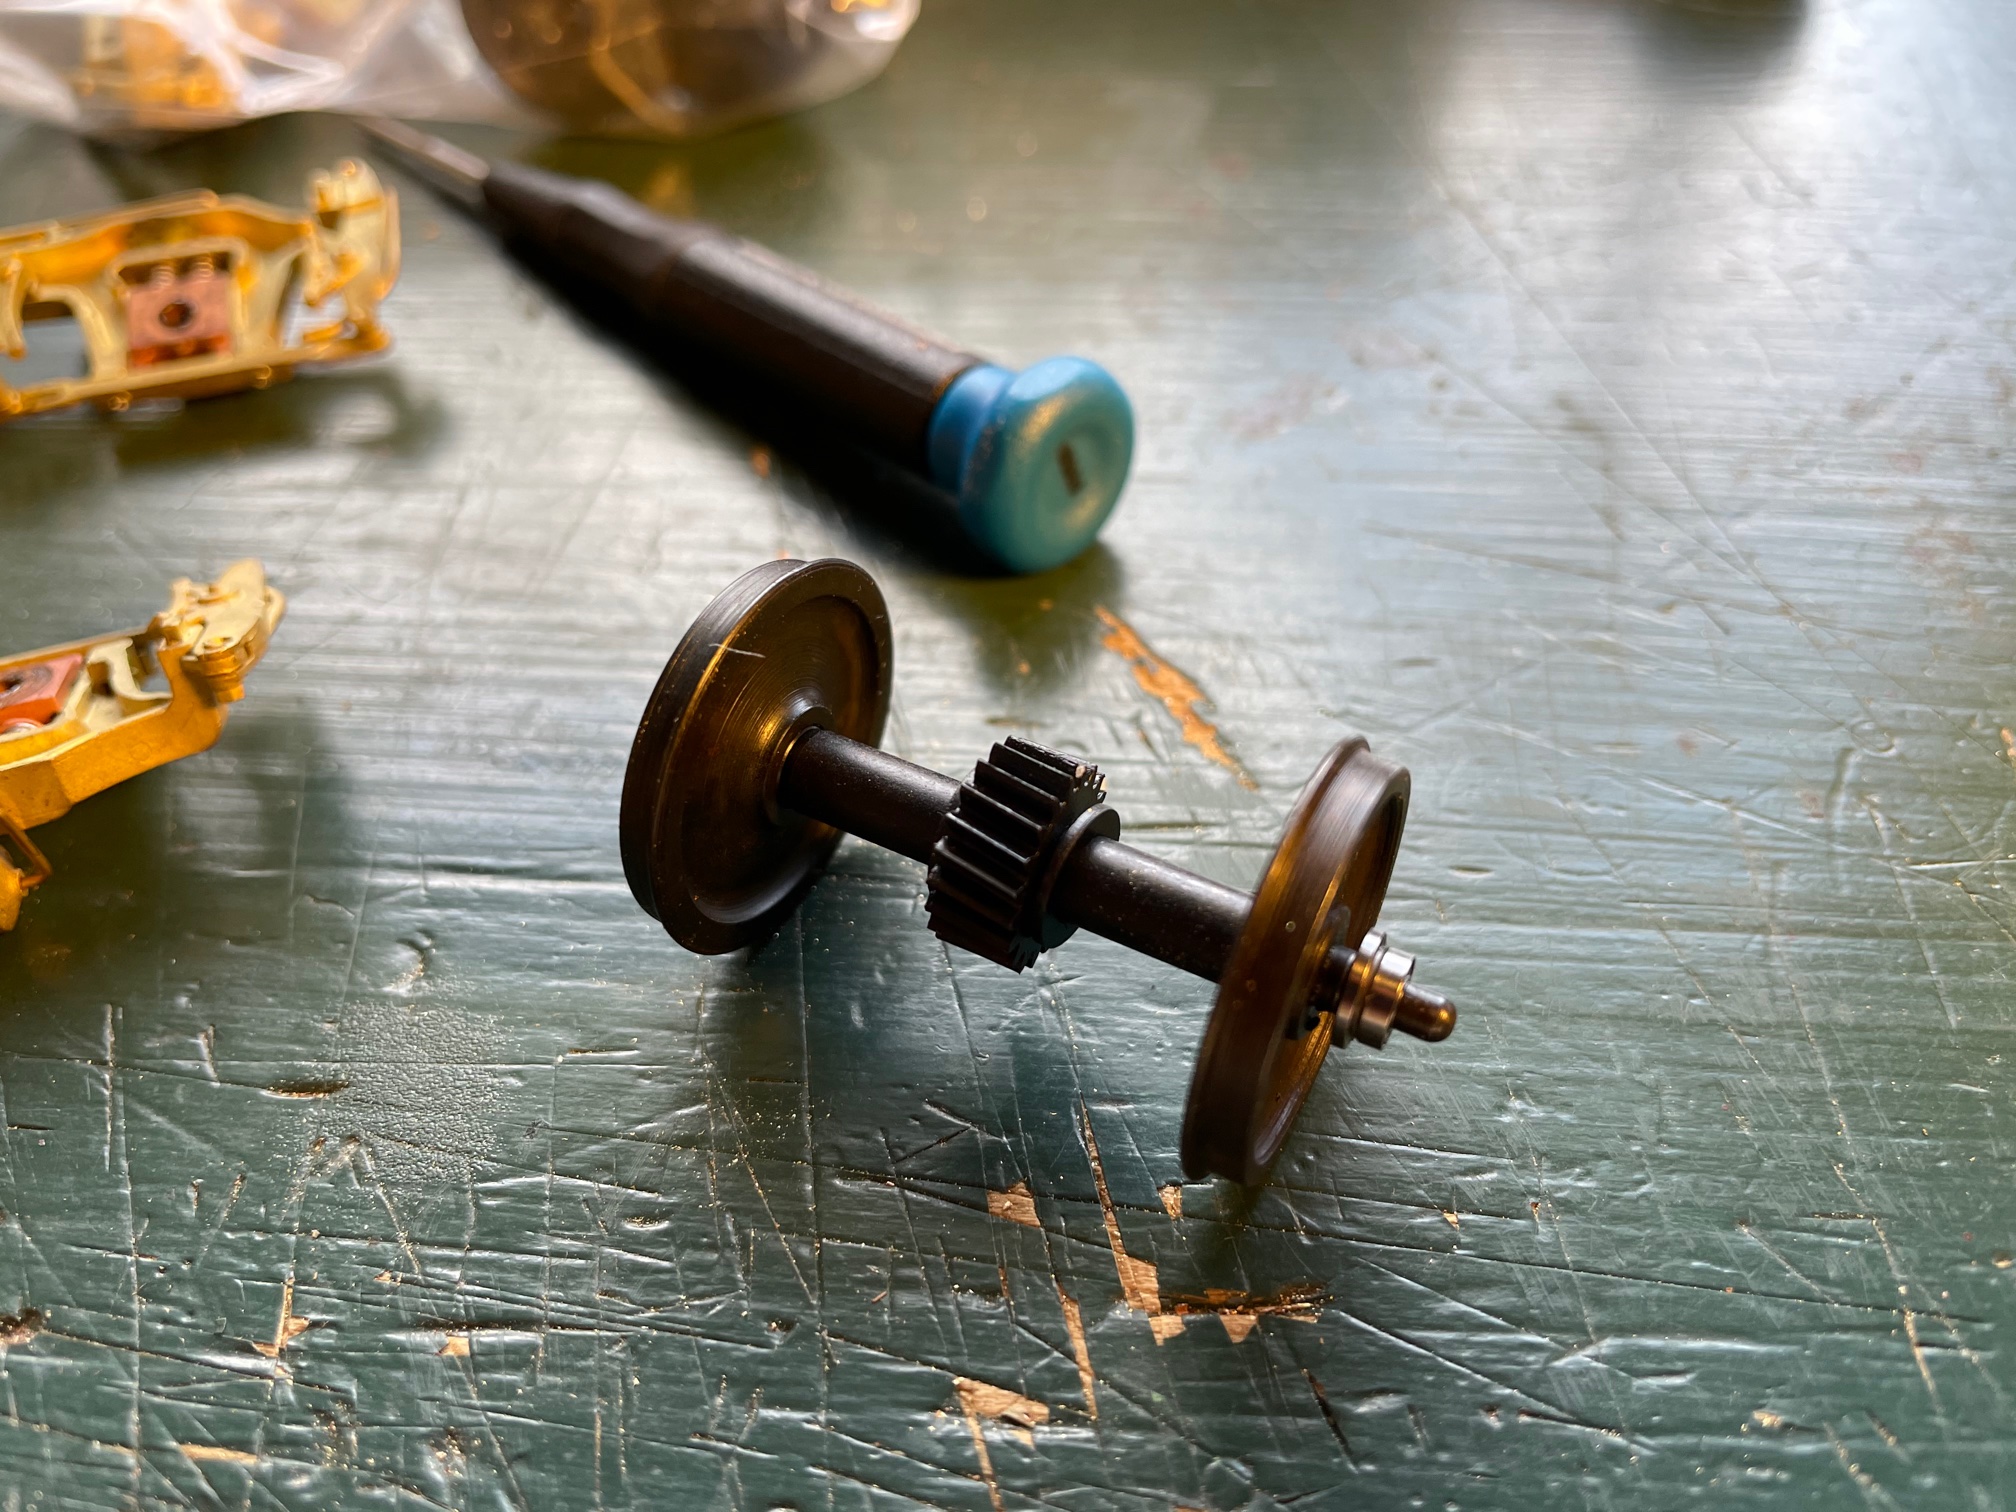
Time to disassemble the first axel.
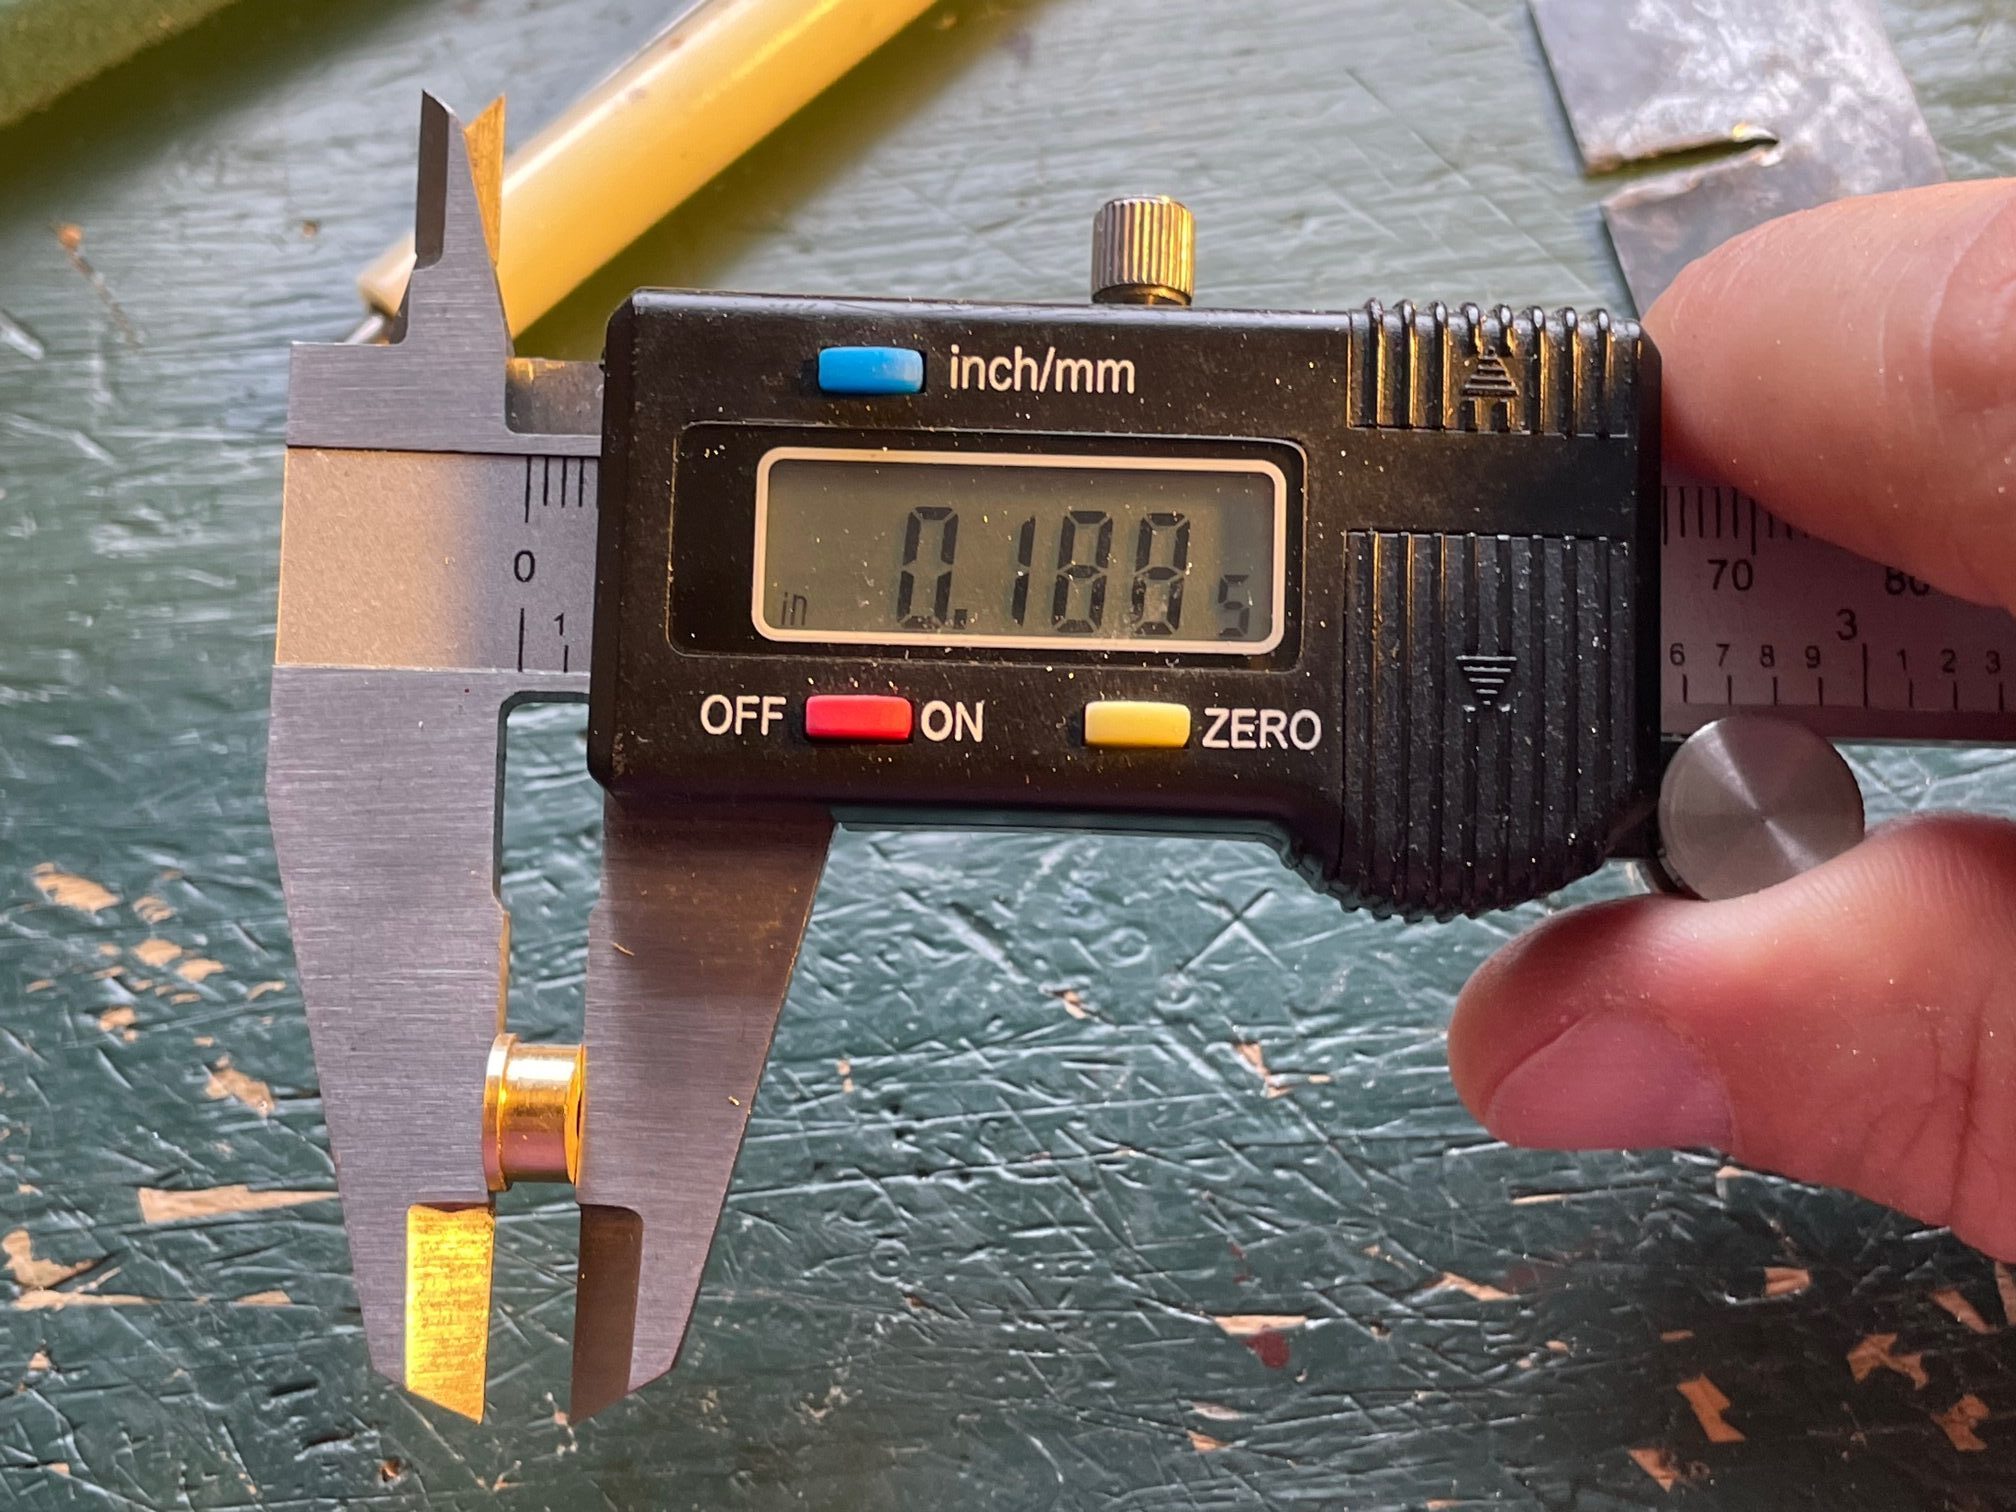
This was the before measurement for the bushing.
This is the bushing’s measurement after it went on a diet.
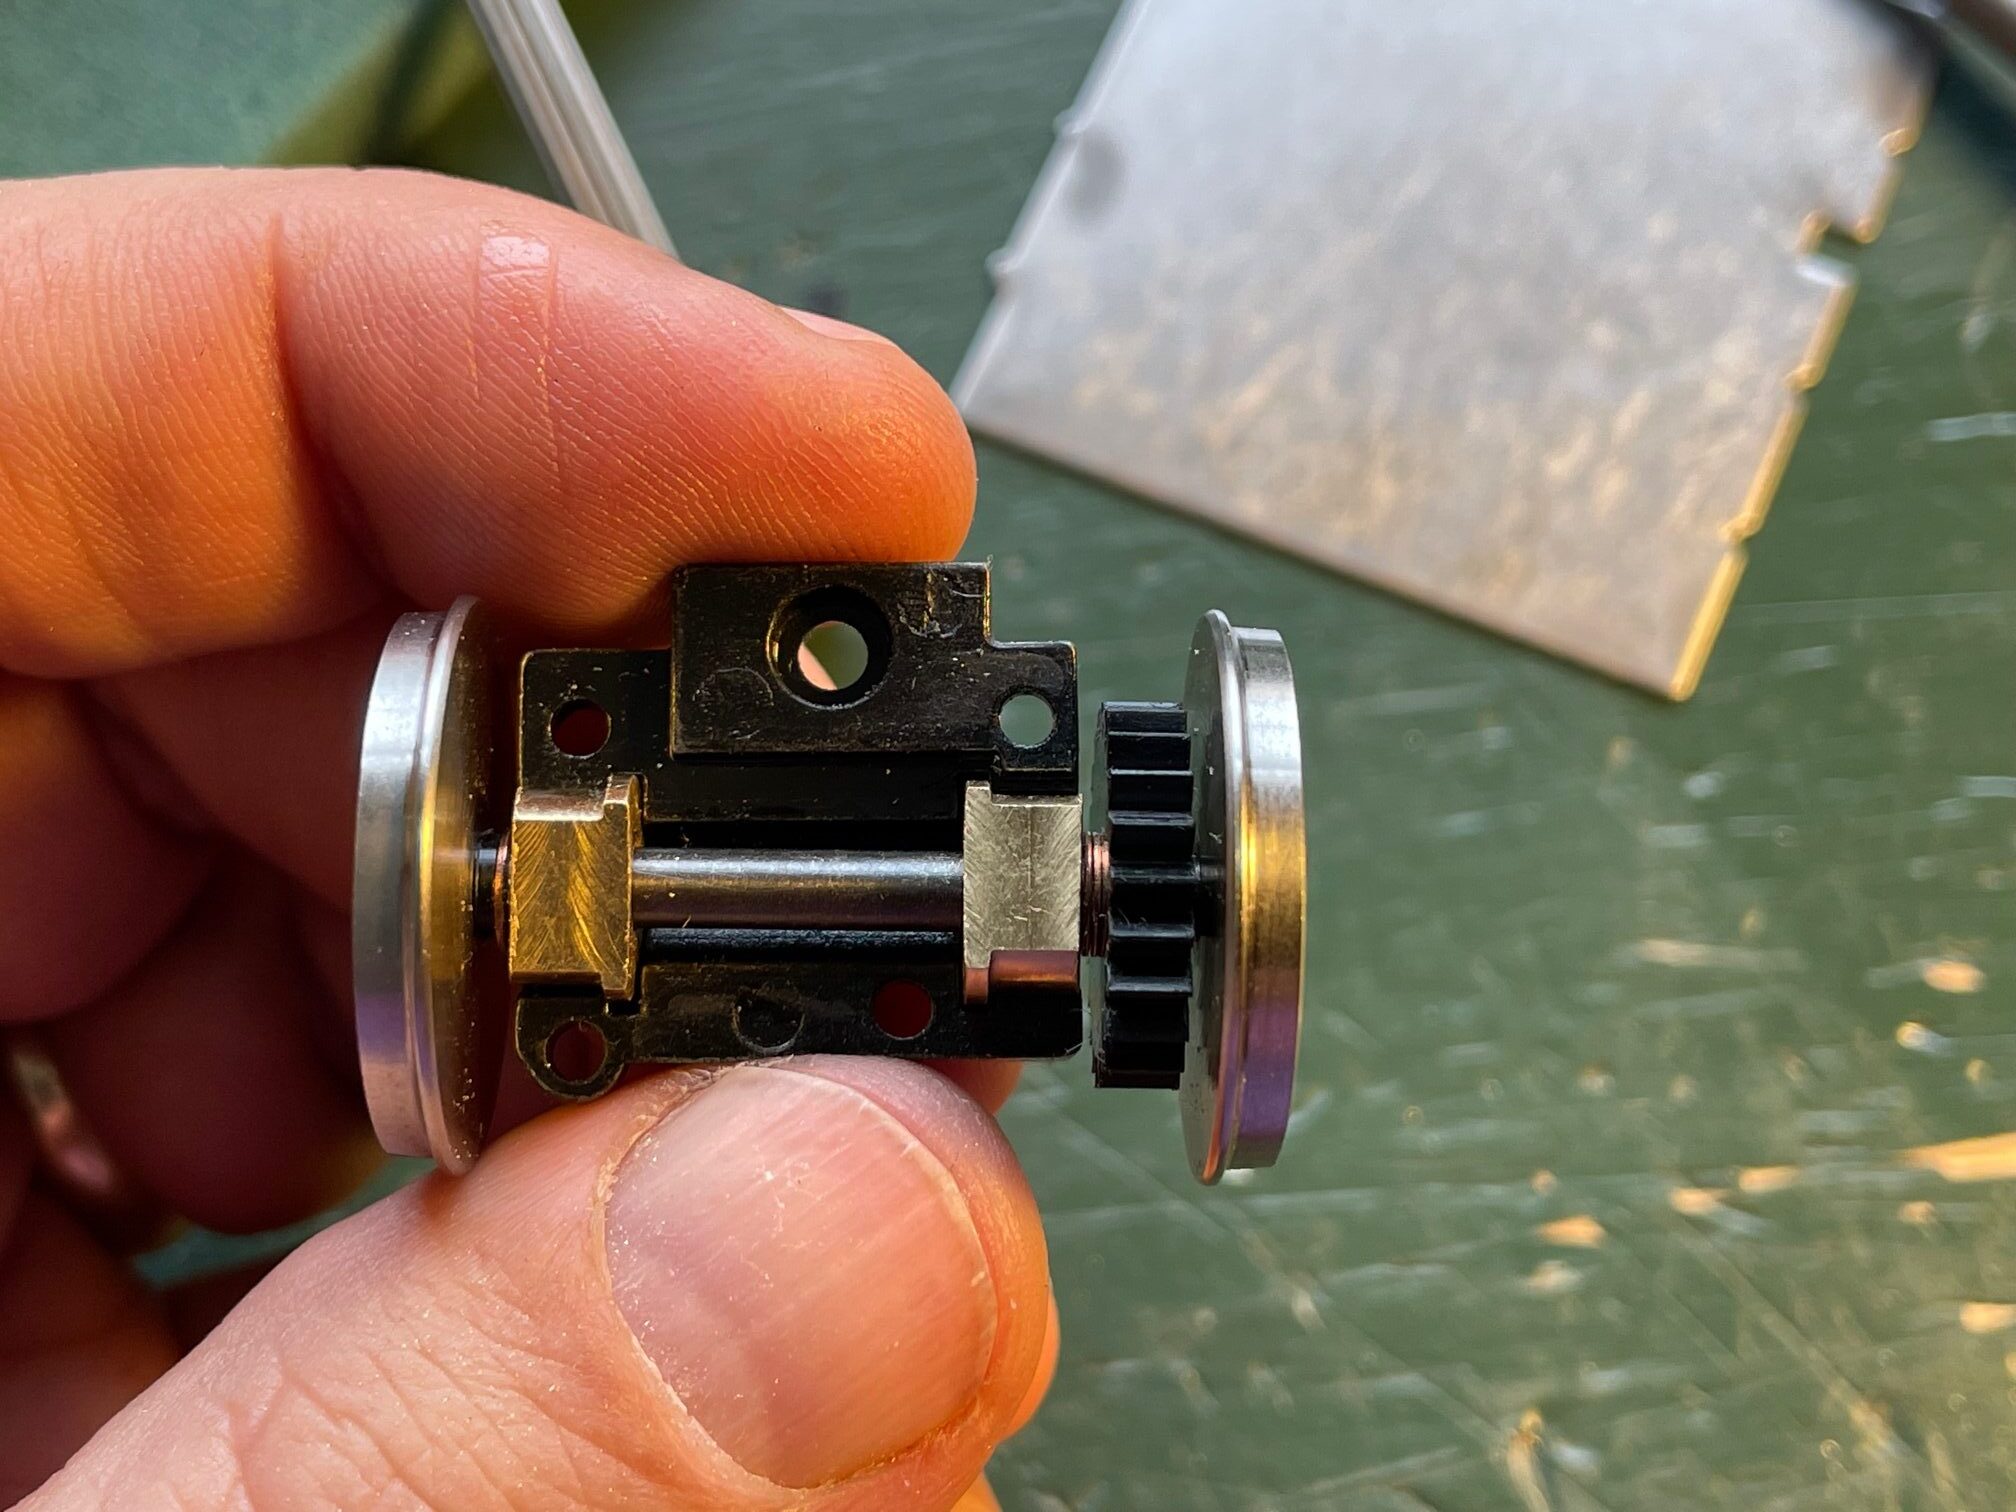
The new back to back measurement. And the most important thing….. They ACTUALLY were a drop-in fit into the grove on the top cover.
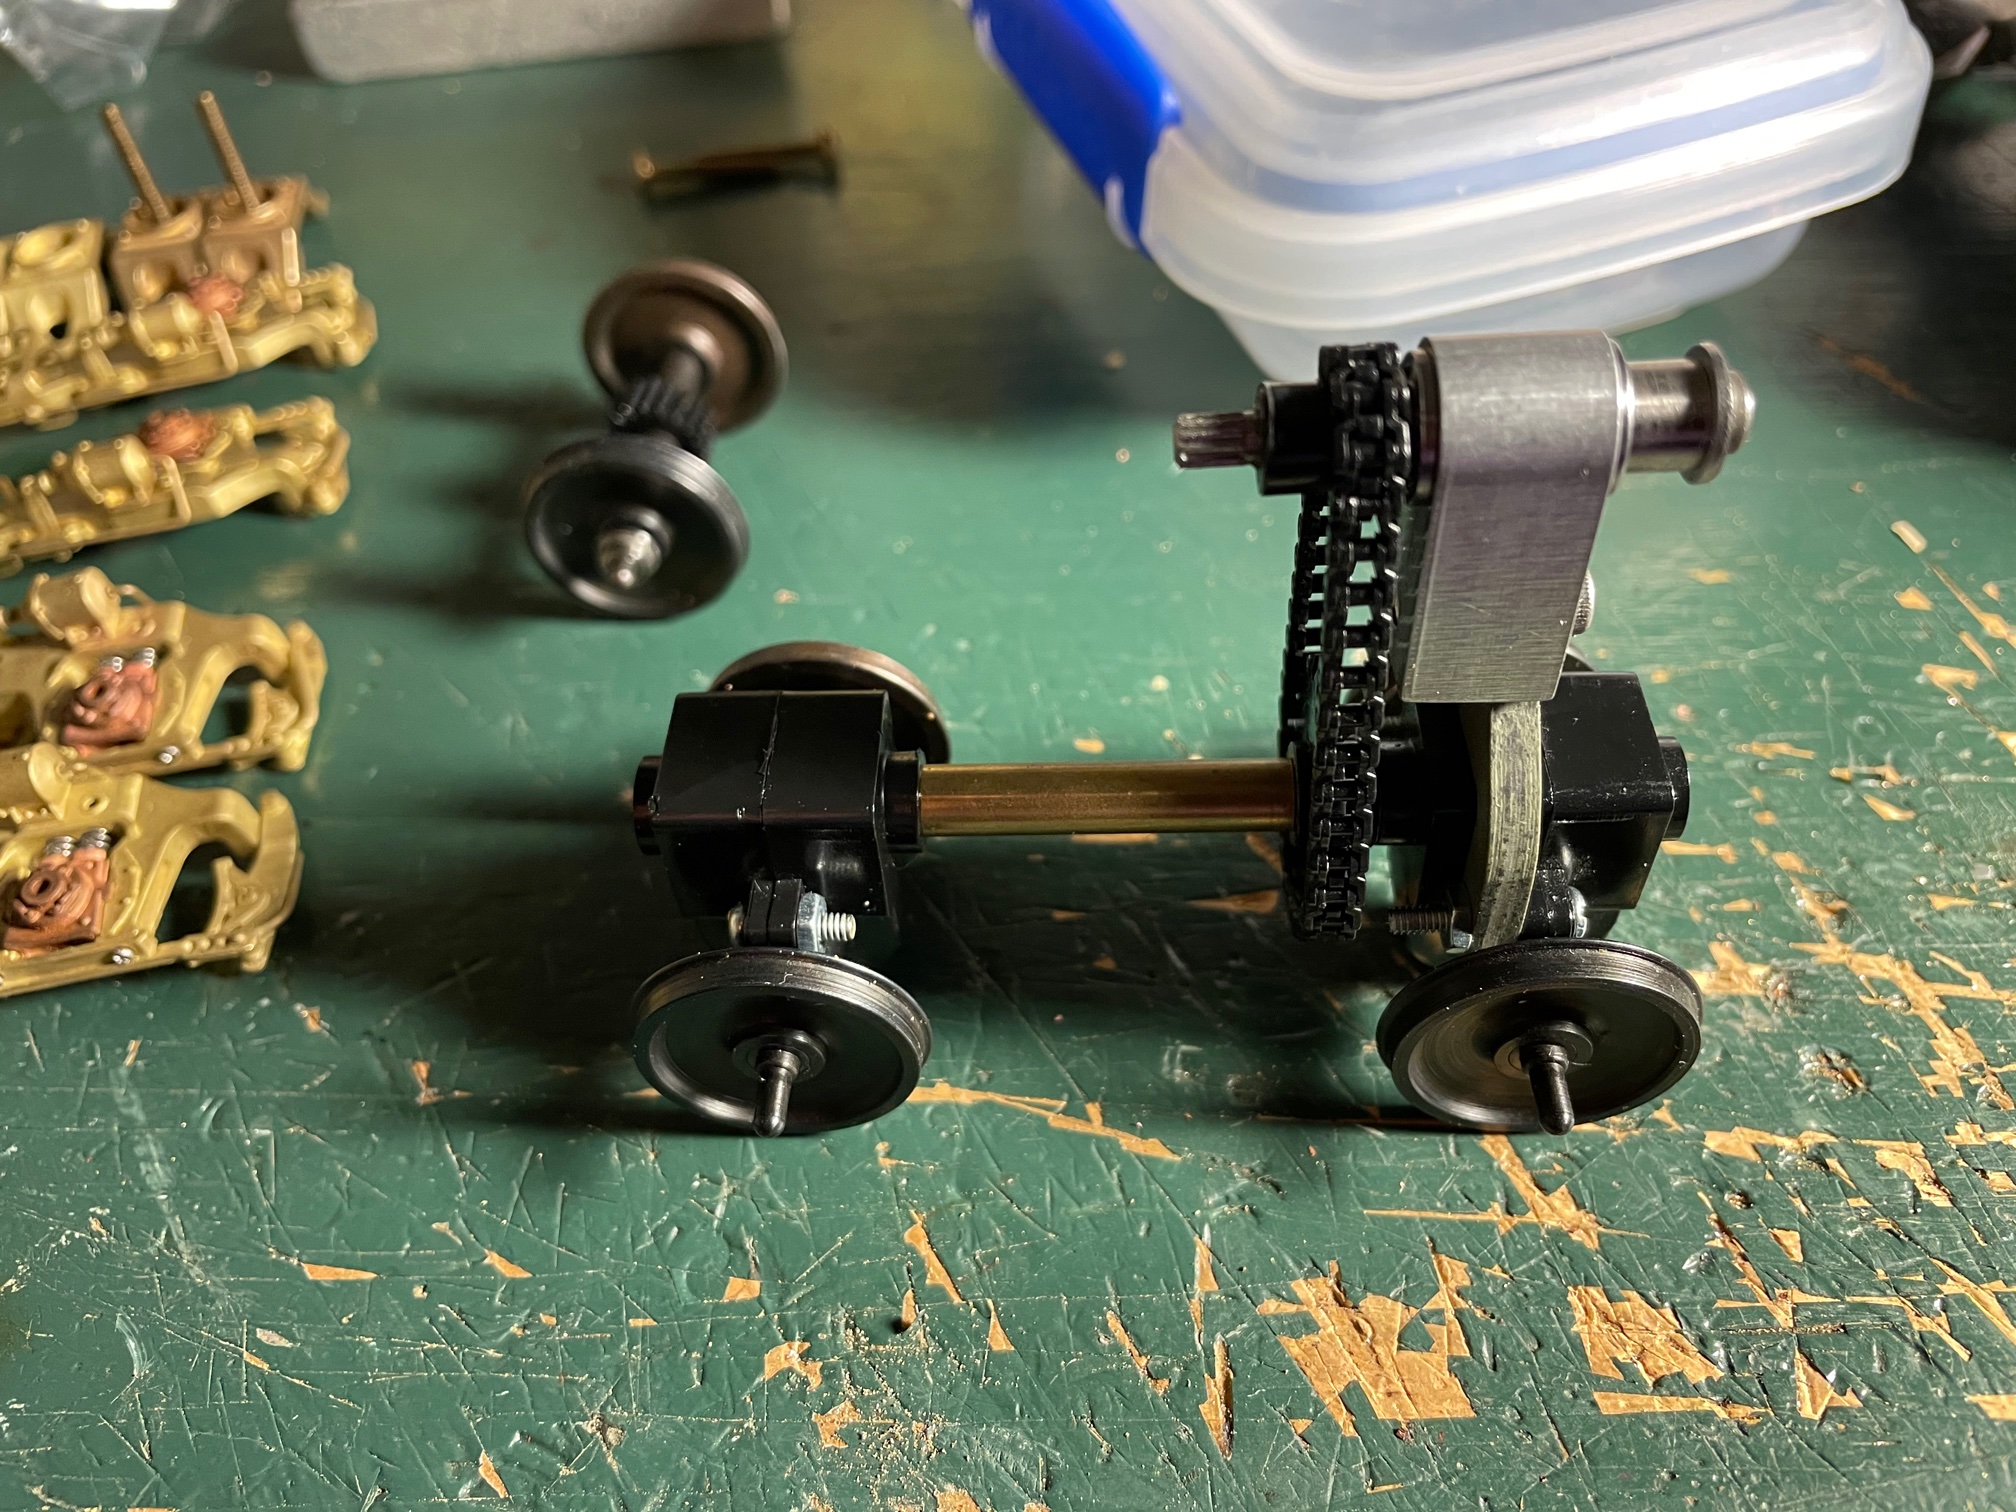
After modifying the two axels that didn’t fit, I had to open up the one truck where the axels did fit. I knew they were a very tight fit and just thought they would benefit from also being modified in the same manor.
I am happy to report that this last photo shows all four axels modified and installed. Next time I work on this model, those side frames need to move a lot closer to the wheels, but that is work for another day.
Truth be told, it took about the same amount of time to write this post as it did modify the bushings to make the axels fit properly. So it really wasn’t a big deal at all.
I’m still bothered that the conversion parts did not fit as delivered from NWSL. I’ve been modeling in Proto48 since the early ’90’s, I know there is no instant gratification in Proto48. We have to actually work on our models.
What if I was a newcomer to Proto48, this experience would have been very discouraging. It could have easily made me question if modeling in Proto48 was worth the extra effort. Sometimes the newcomer to Proto48 needs some simple wins to give them the motivation to keep going and try more difficult projects. This type of Proto48 conversion should be one of those simple wins.
Last night I was changing out wheelsets on a Weaver N5c cabin car. In about fifteen minutes, I had the trucks off, the three rail wheelsets out, new axels in place and the trucks re-instaled.
Afterwards, I had the old three rail wheels sitting on the workbench next to a Proto48 truck still on the workbench from working on the turnouts from the earlier posts.
Seeing the SIZE of the wheels next to the Proto48 truck explains it all for me. I know why I model in Proto48.
The funny thing is, most Proto48’ers look down on the truck in the photo. It is a Red Caboose truck with no brake shoes and NWSL Proto48 wheelsets with no back of wheel detail installed. All that being said, the truck still looks great next to the three rail wheels and it rolls almost as good as the expensive trucks with roller-bearings on each axel.
You mileage may vary, and that’s fine. Enjoy the hobby.
It’s took a while to get some paint of the trucks. Then it took a while longer to get them back in the work line. Some of those freight car projects just go so much faster that it feels like you have actually finished something.
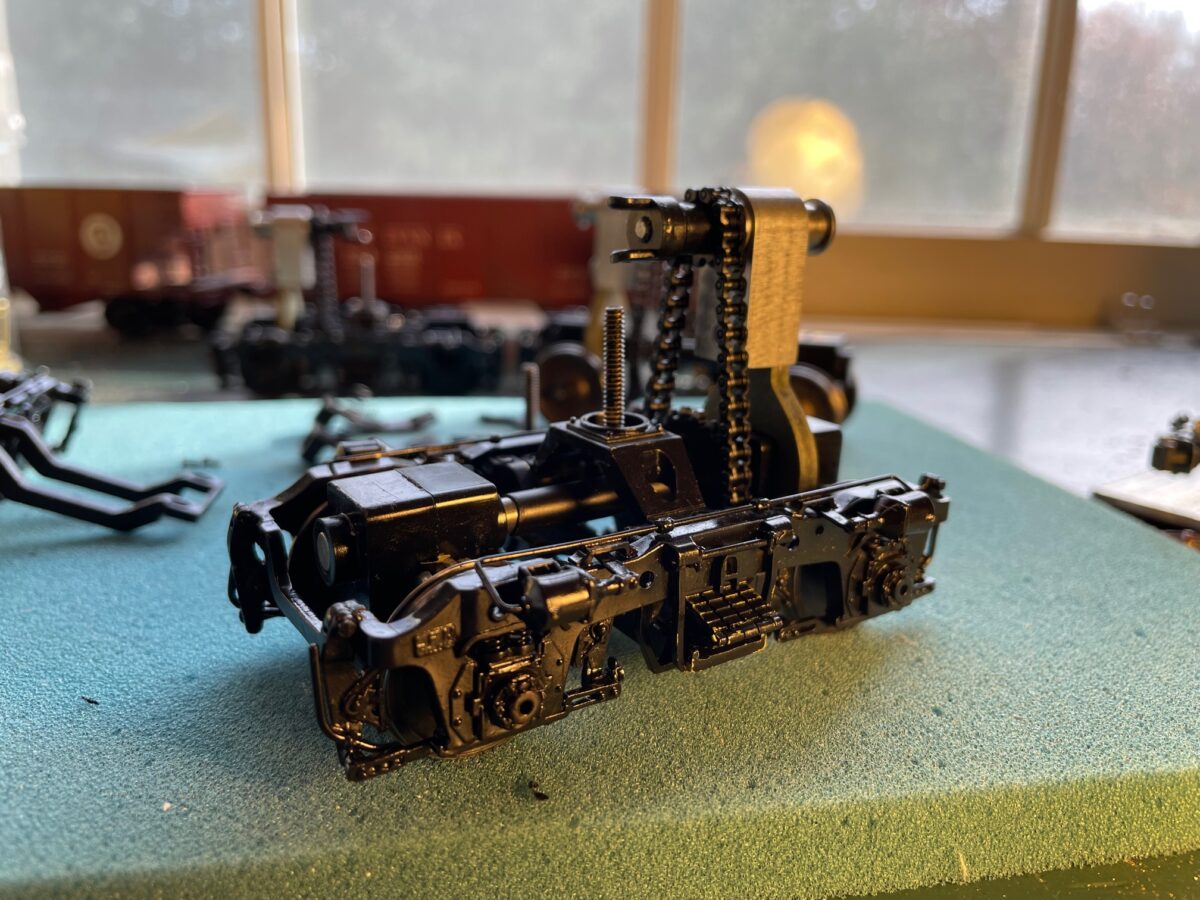
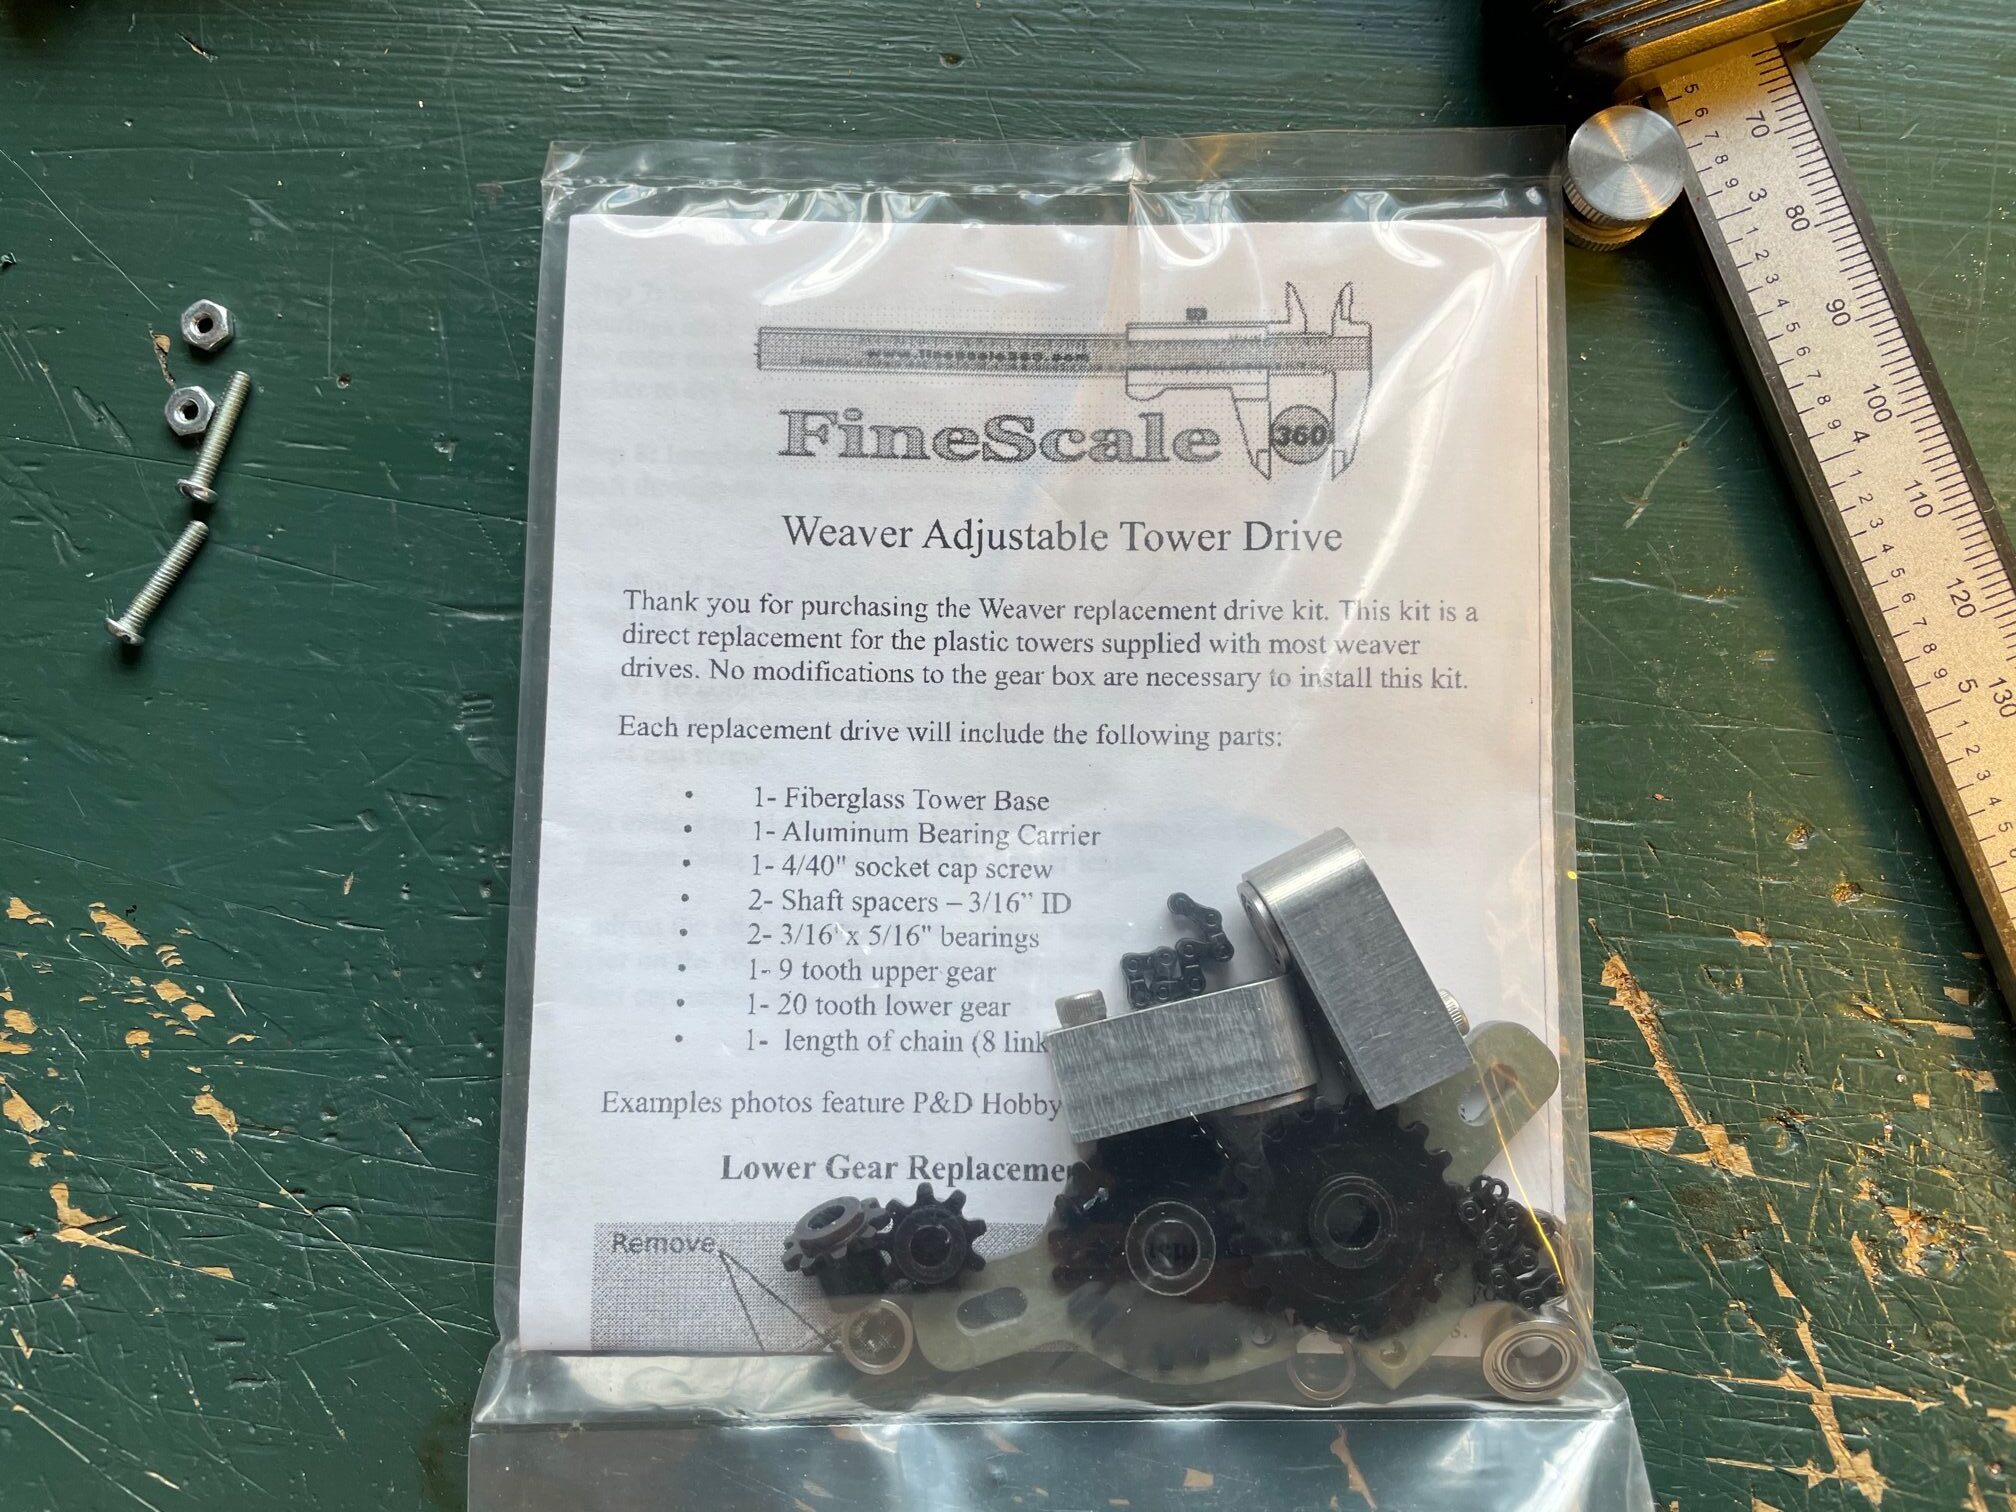
Anyway, these two pair of trucks have had new axels from Protocraft installed. Yes, they are now available from Right-O-Way but I’ve had mine on the shelf since they were a Protocraft product. I also installed ball bearing from Bearing Direct on the axels and also the FineScale 360 Weaver Chain Drive Replacement Kit.
I have to say that these are a pain in the ass to reassemble. Things seem to be moving in so many directions at the same time. It’s difficult to get them all to fit together without something moving. They are taking longer than I thought they would to reassemble.
And for anybody that might be questioning why I have a nice shinny black on the trucks instead of all kinds of weathered blacks/grays/rust. For my modeling period, the Summer of 1952, these units are less than a month old. I don’t think the railroad would have been happy if they had been delivered with well worn trucks.
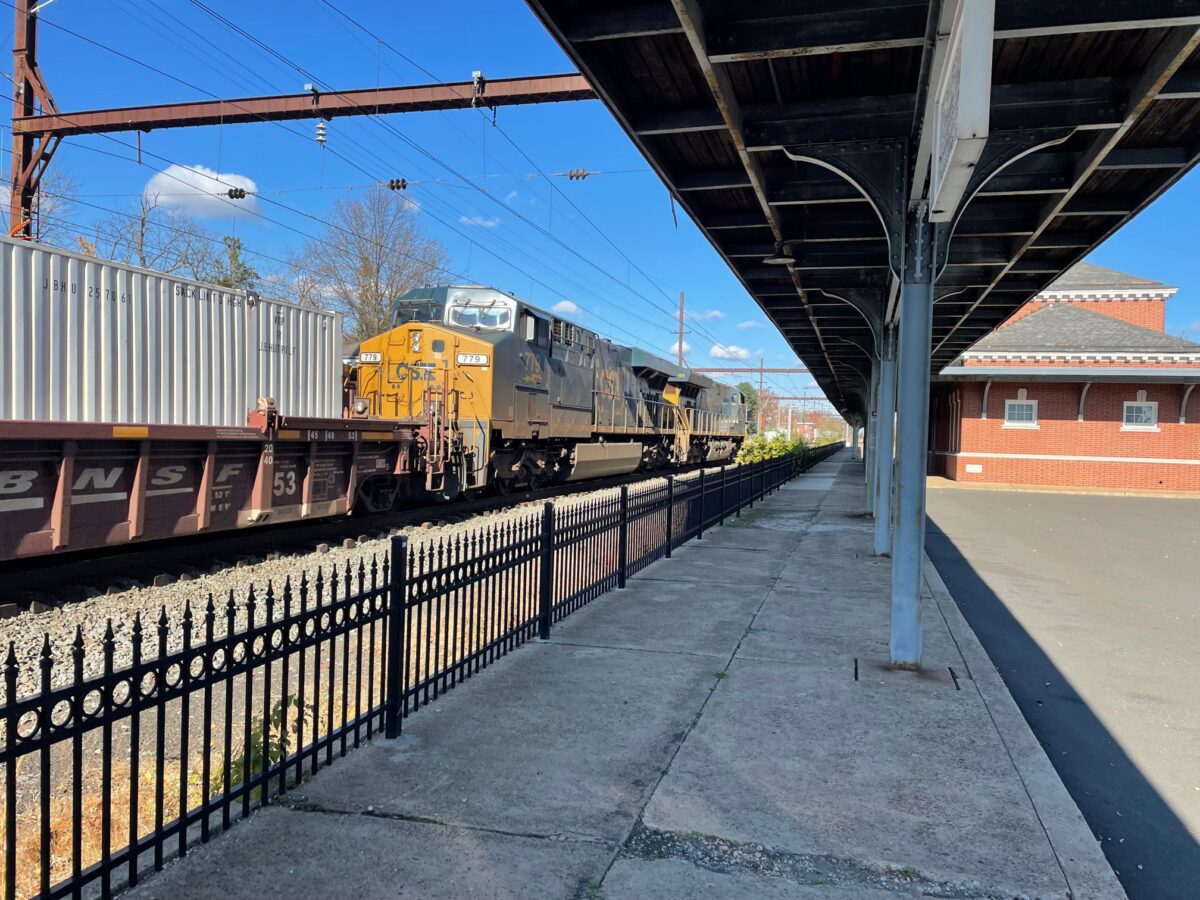
I am back at work a couple of days a week until the end of the month. This has meant getting out at lunchtime to West Trenton Station. This week I got to see a CSX stack train head North through the station.
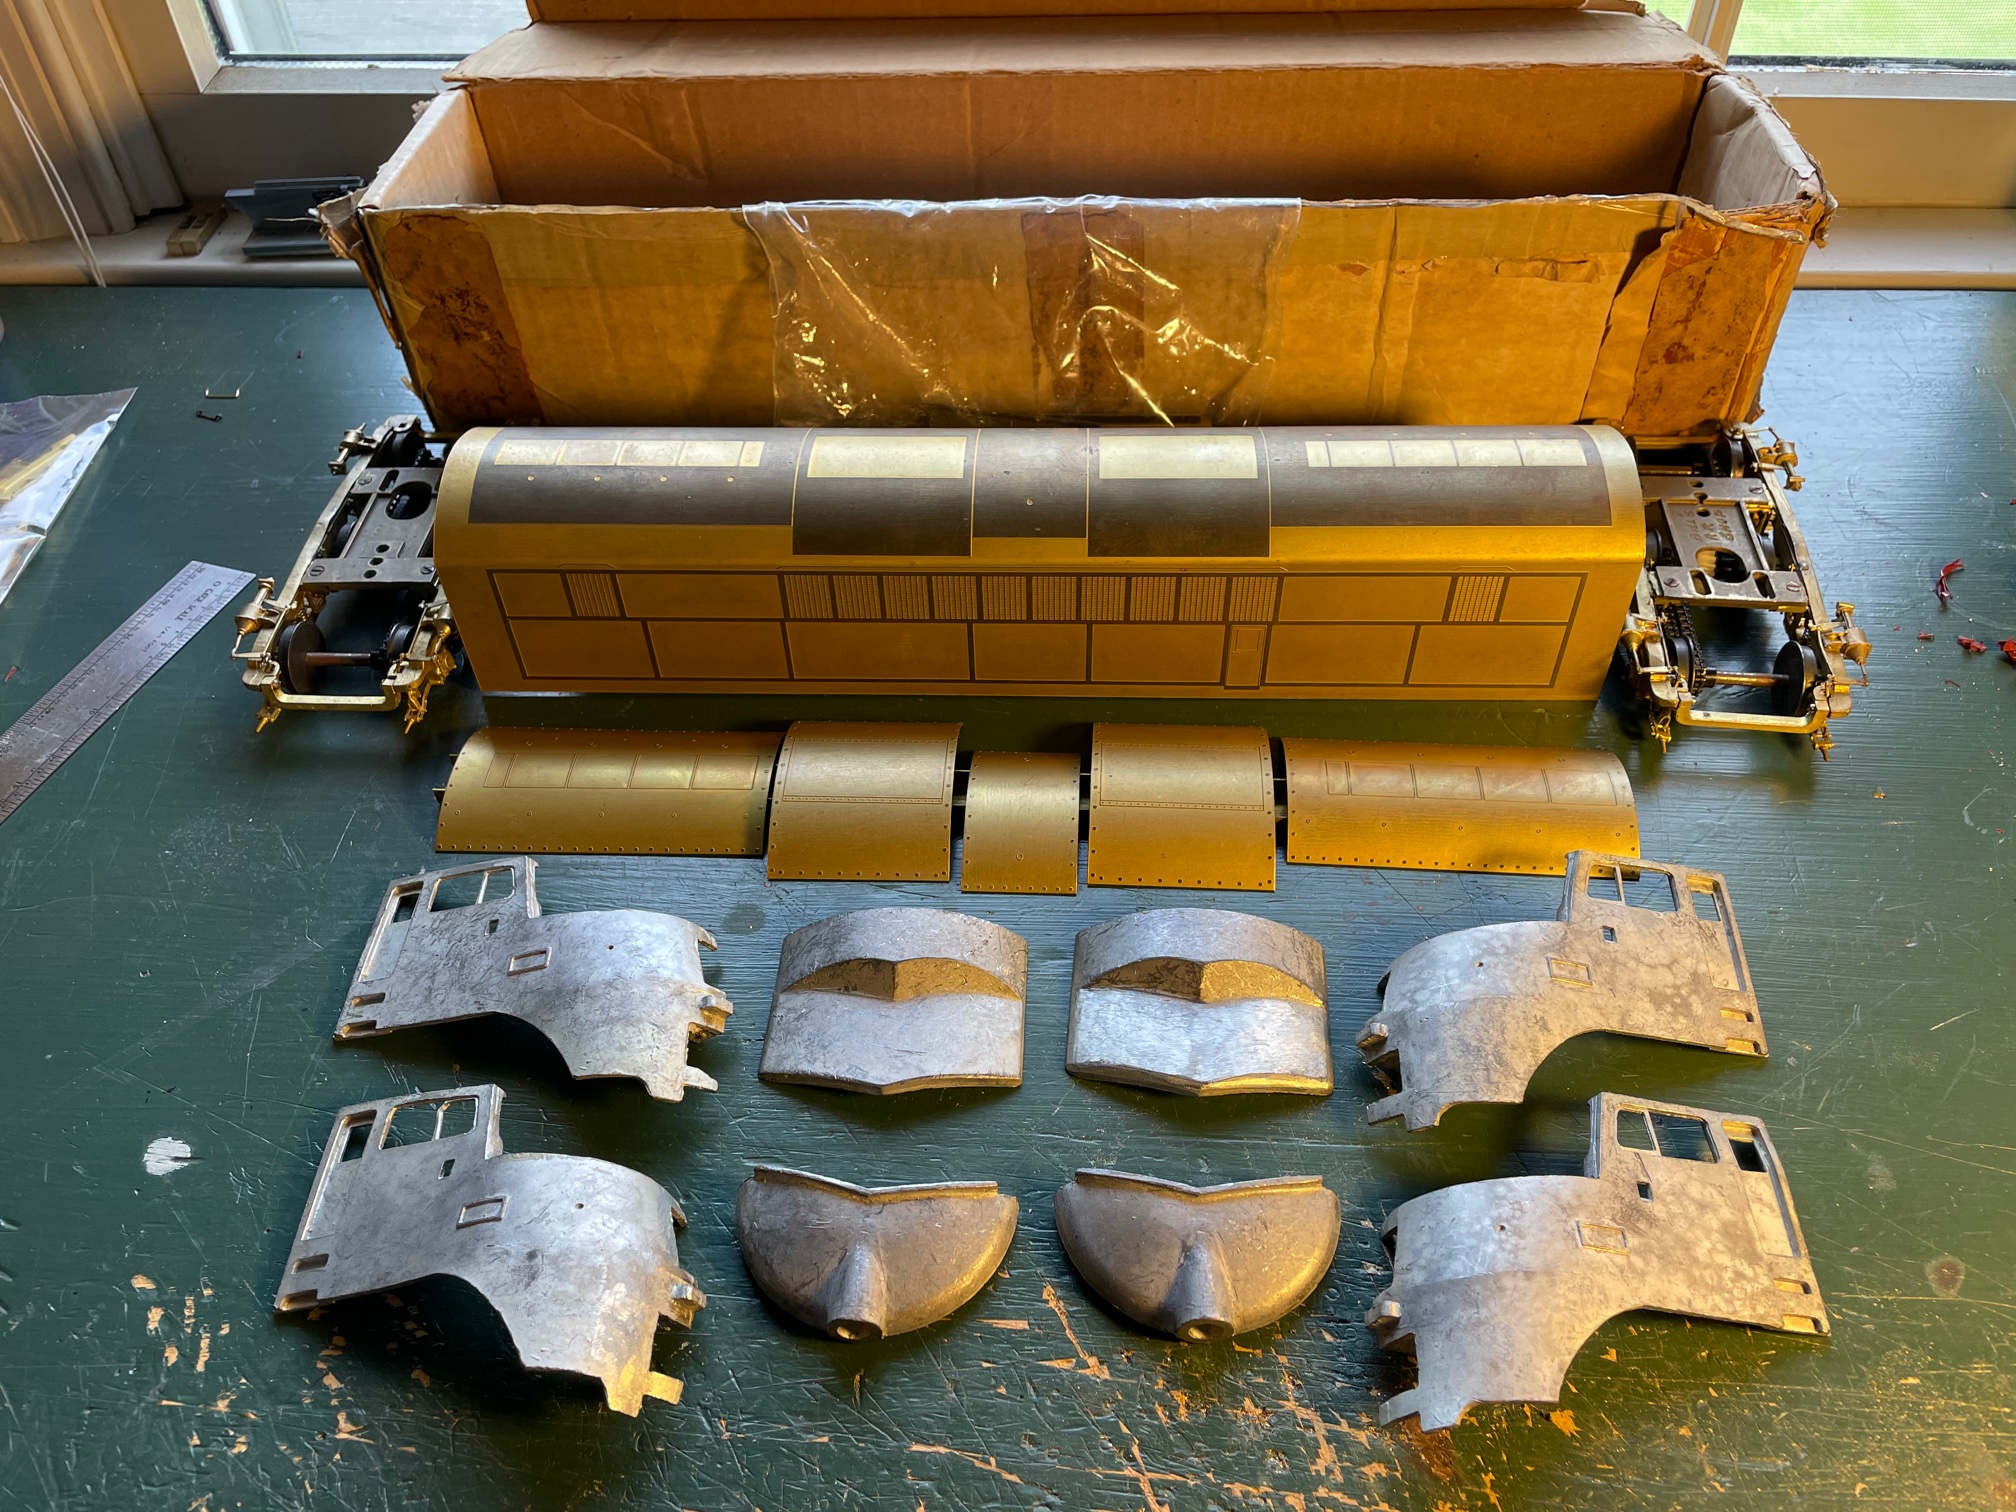
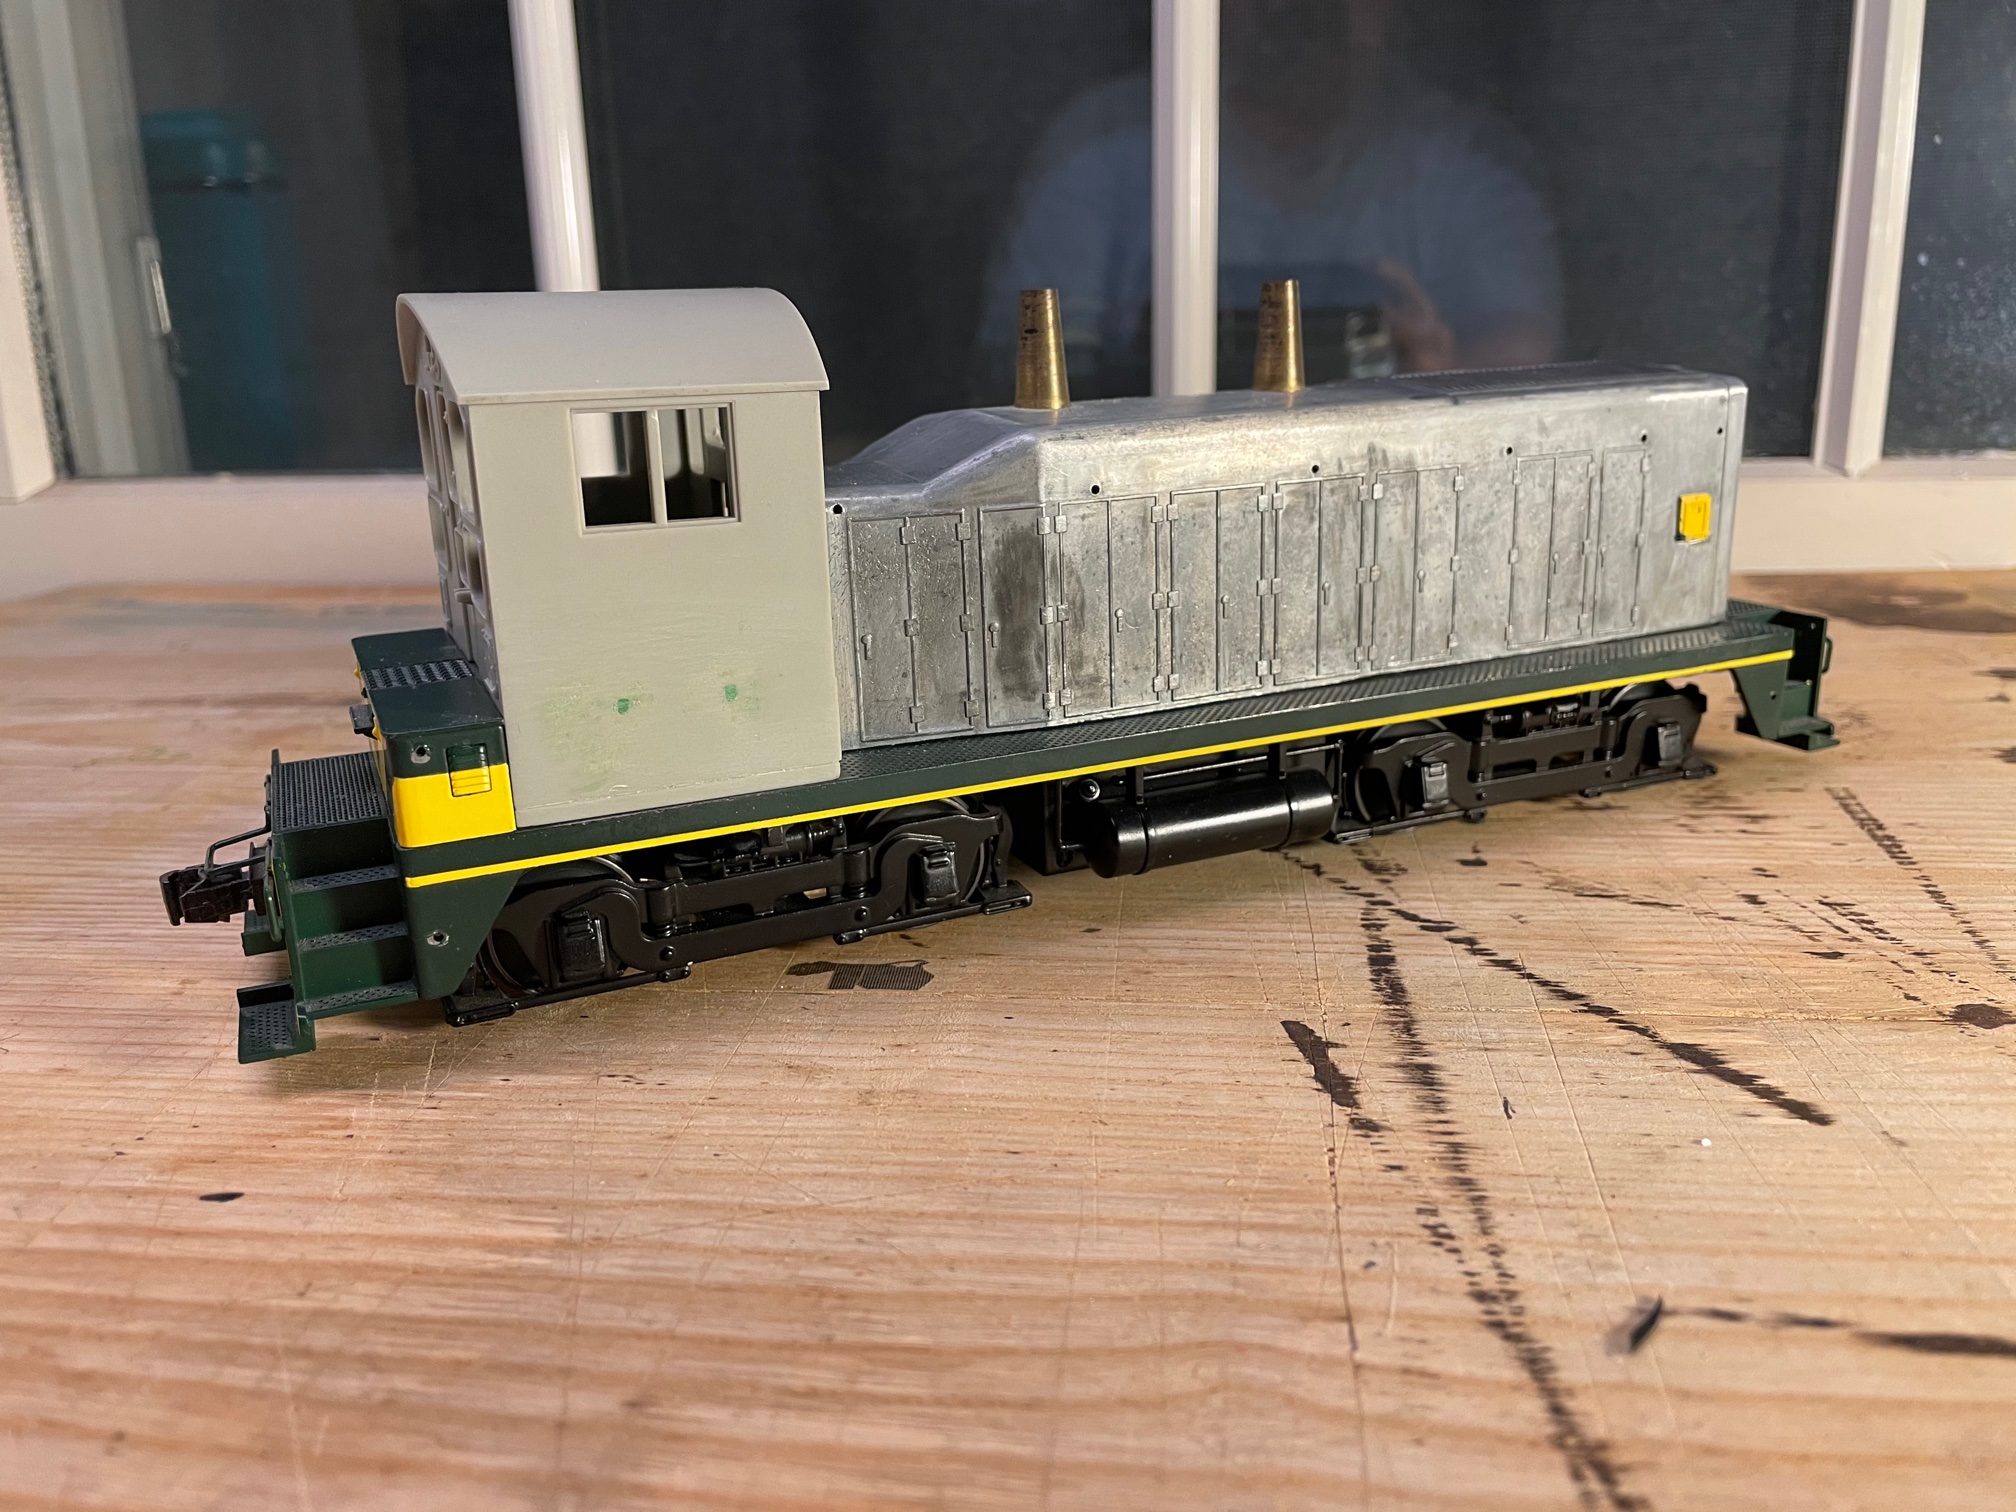
Well I got the Locomotive Workshop Baldwin kit home and took a good look at it. It is mostly complete. You can’t see the parts bag behind the body etching. The nose casting are softer then I remember from other kits. They will require some work to fit the four pieces together.
I’ve built other LWS kits in the past, to say they are basic is an understament. I had a friend refer to them once as a scratch building project disguised as a kit.
I’ve wanted to build the CNJ DR 4-4-1500 “Baby Faced Freighters” for a long time. This would give me the two nose castings I would need for the project. I could just use them as is and build the freight units, but I still think I want to build the double ended passenger unit. So I’m planning build one nose up and have resin castings made for the project. At any rate, it’s not at the top of the project list right now. Back into the box to wait a little while before starting that project.
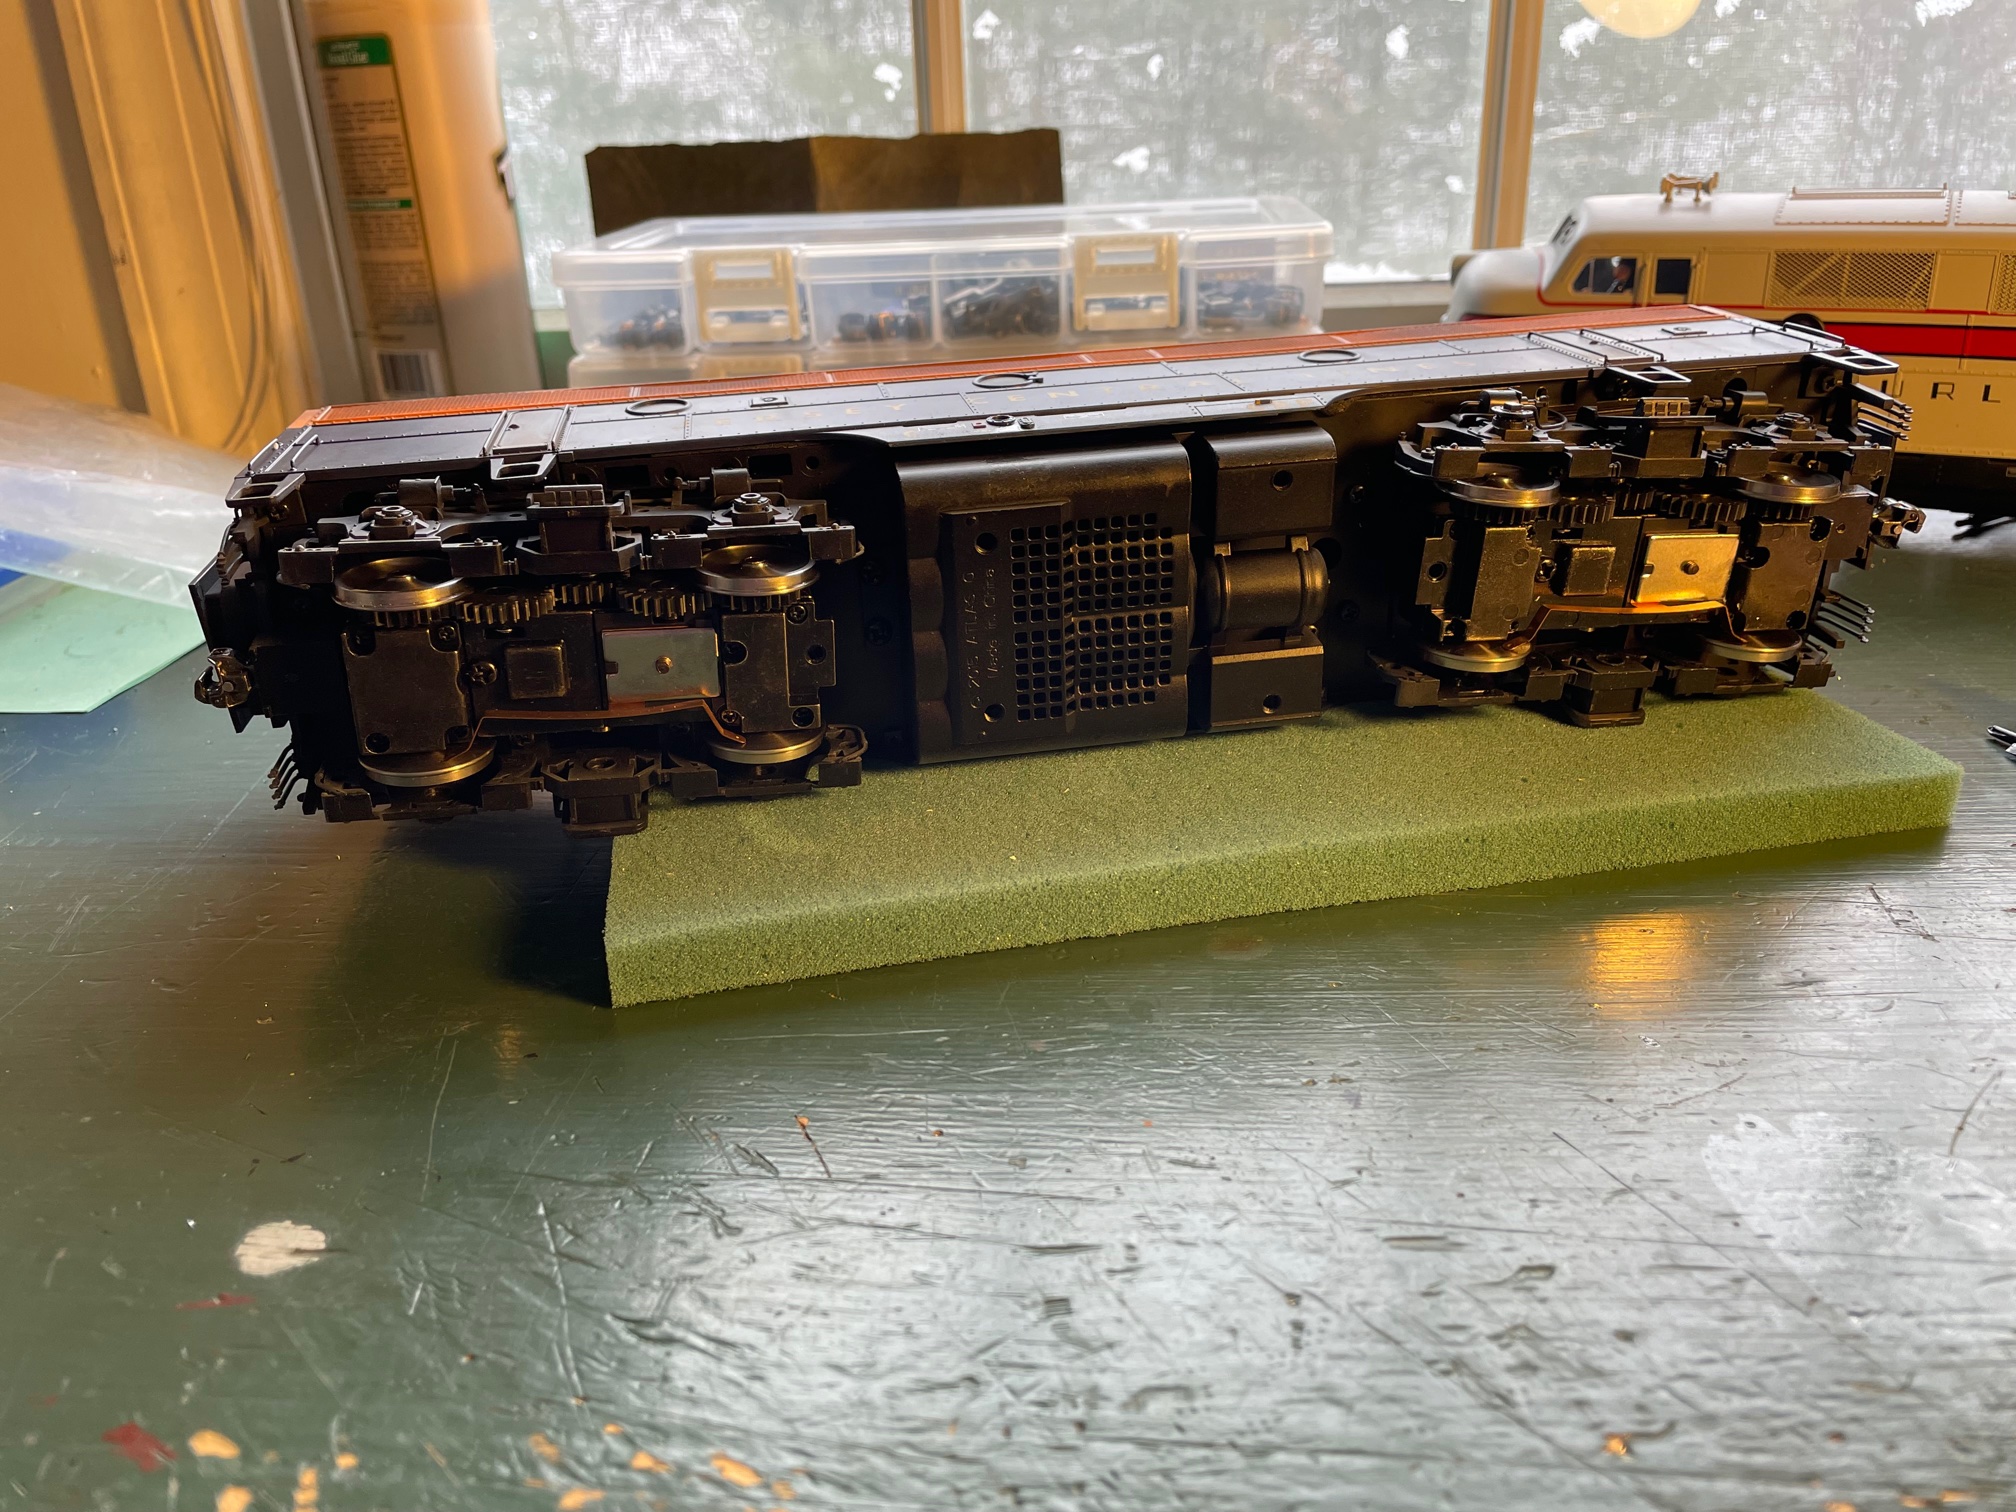
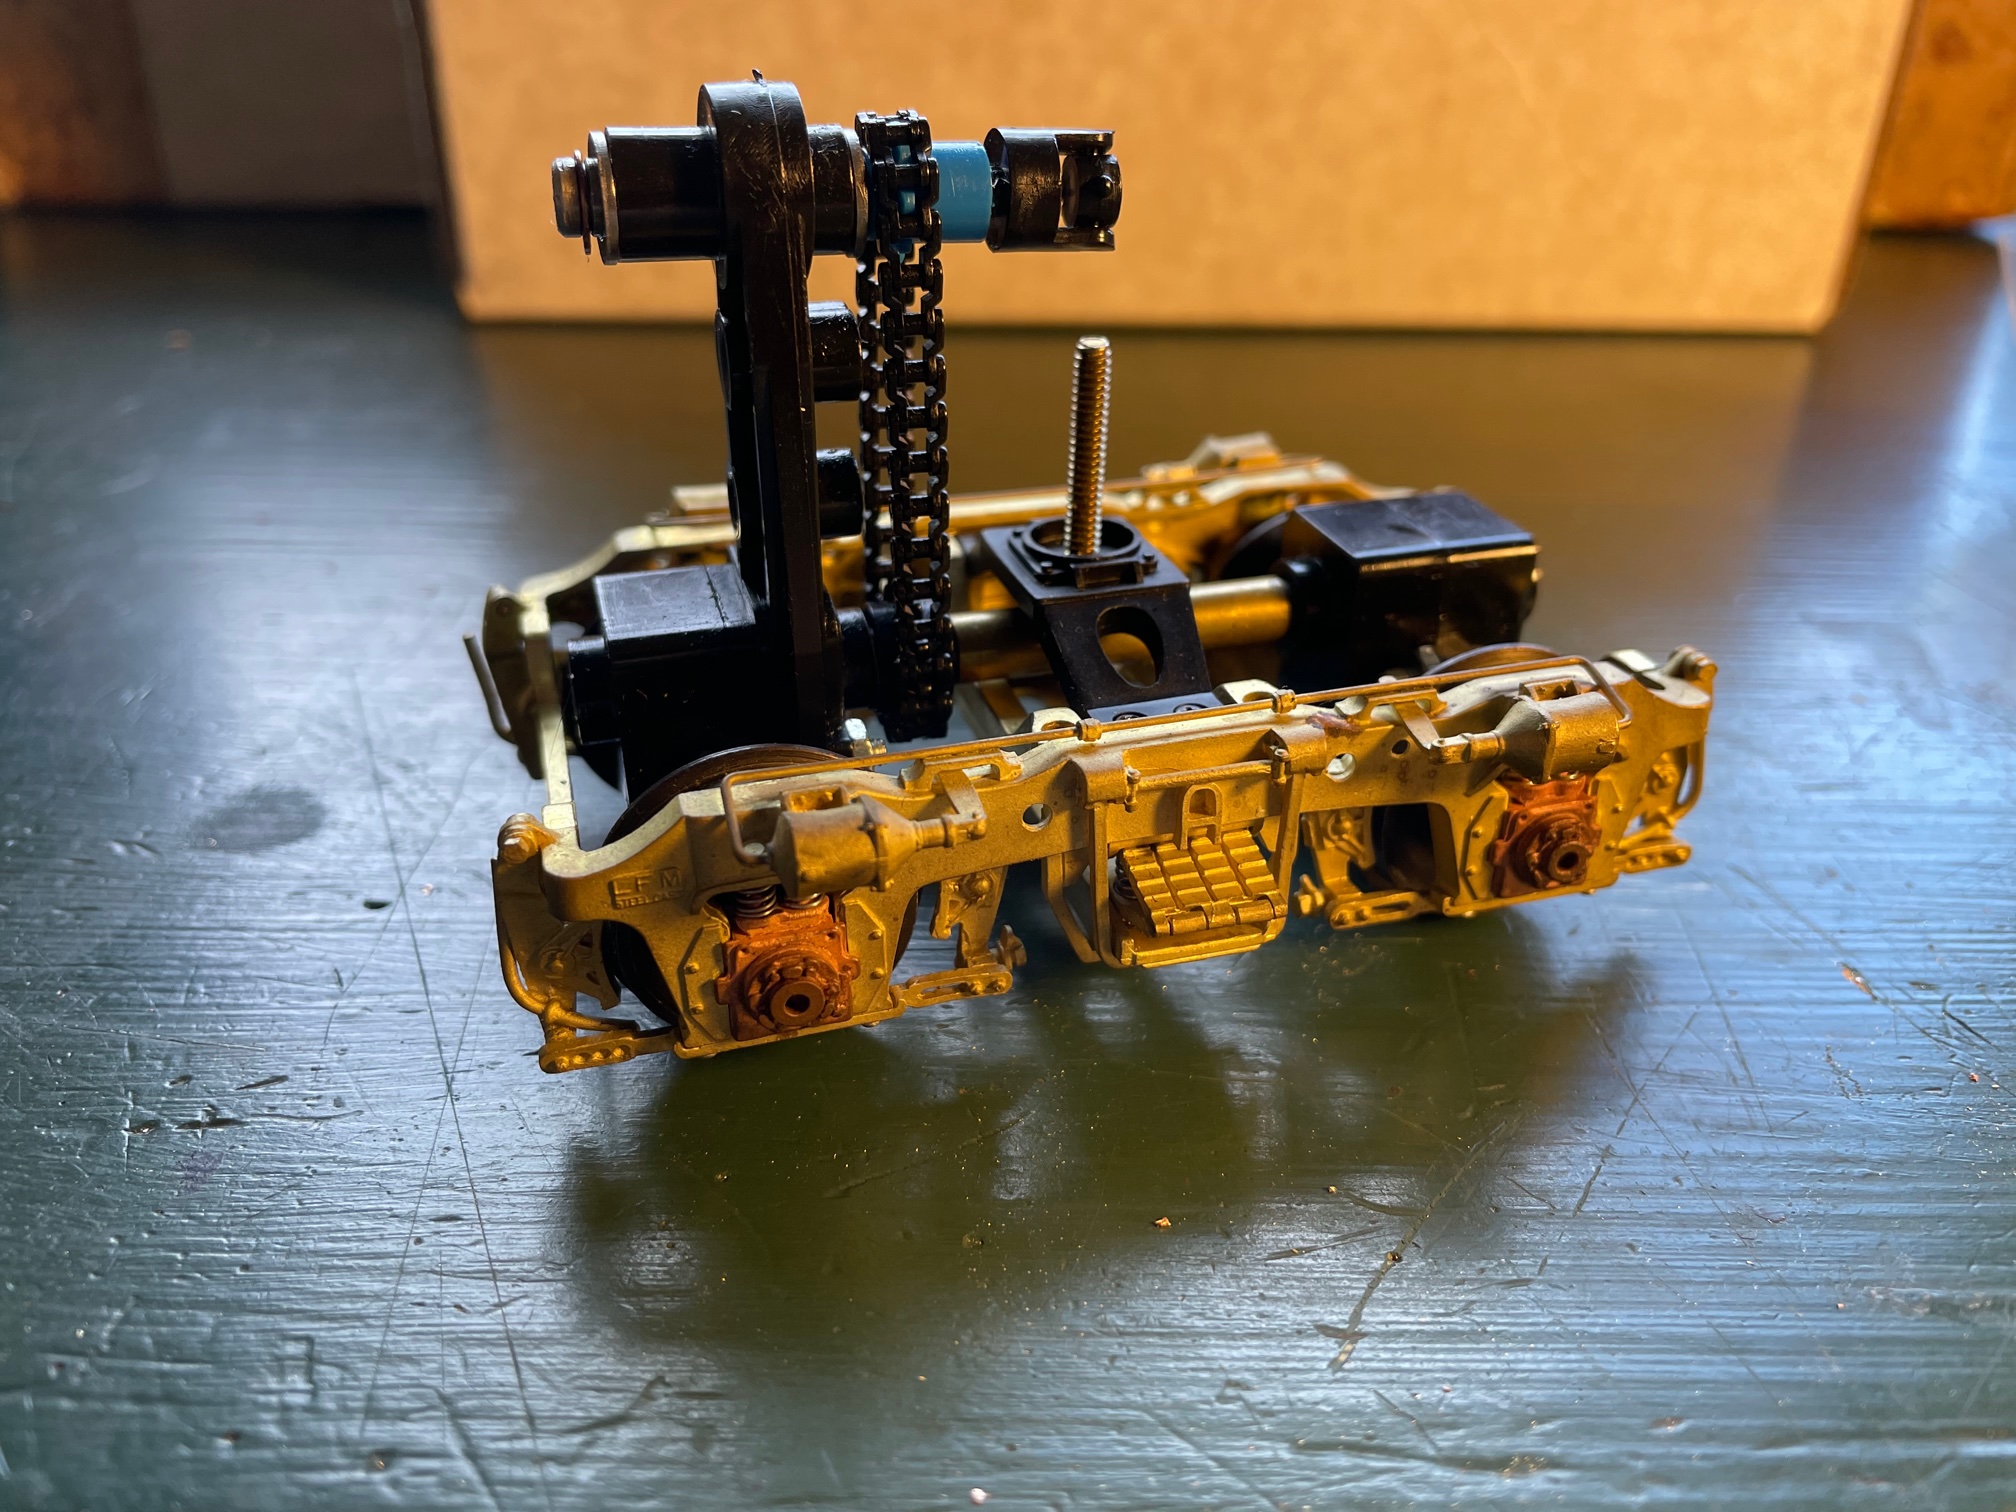
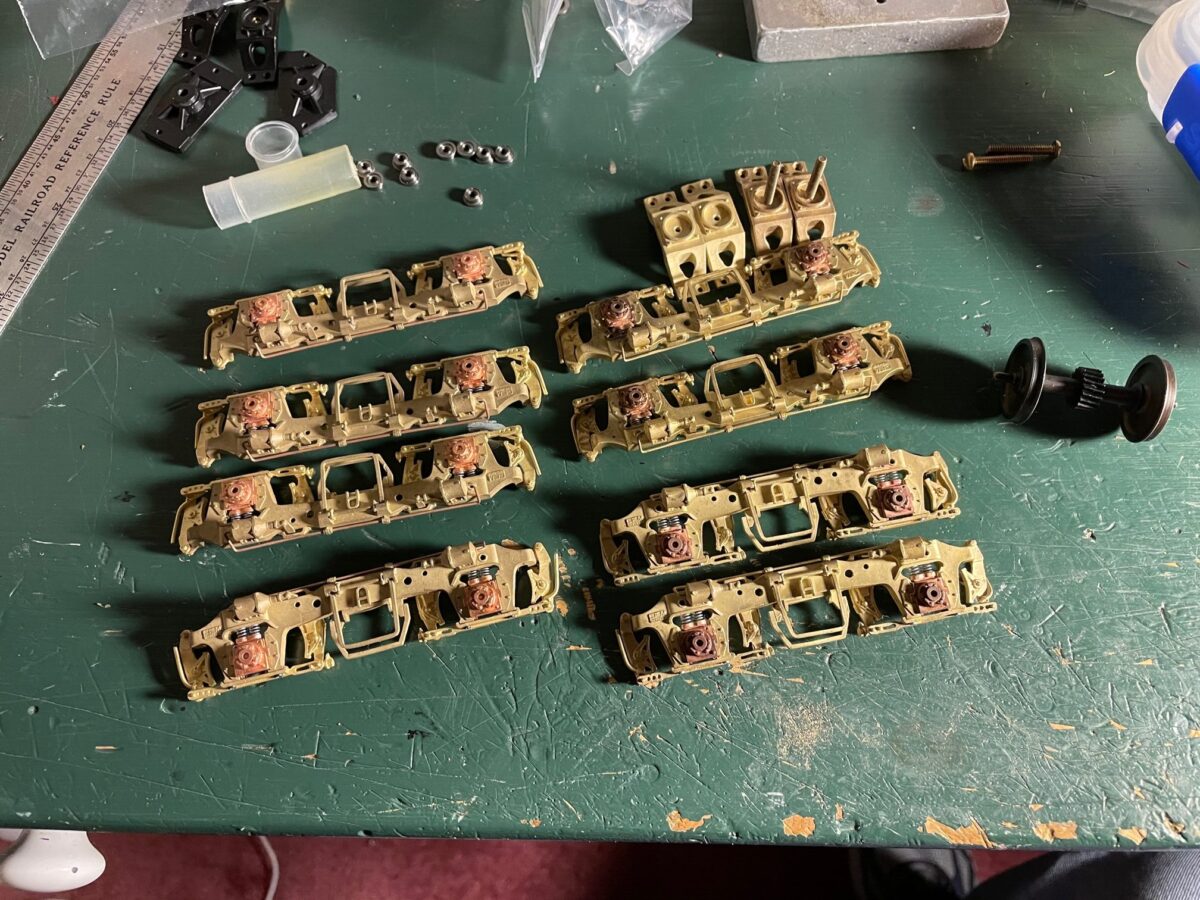
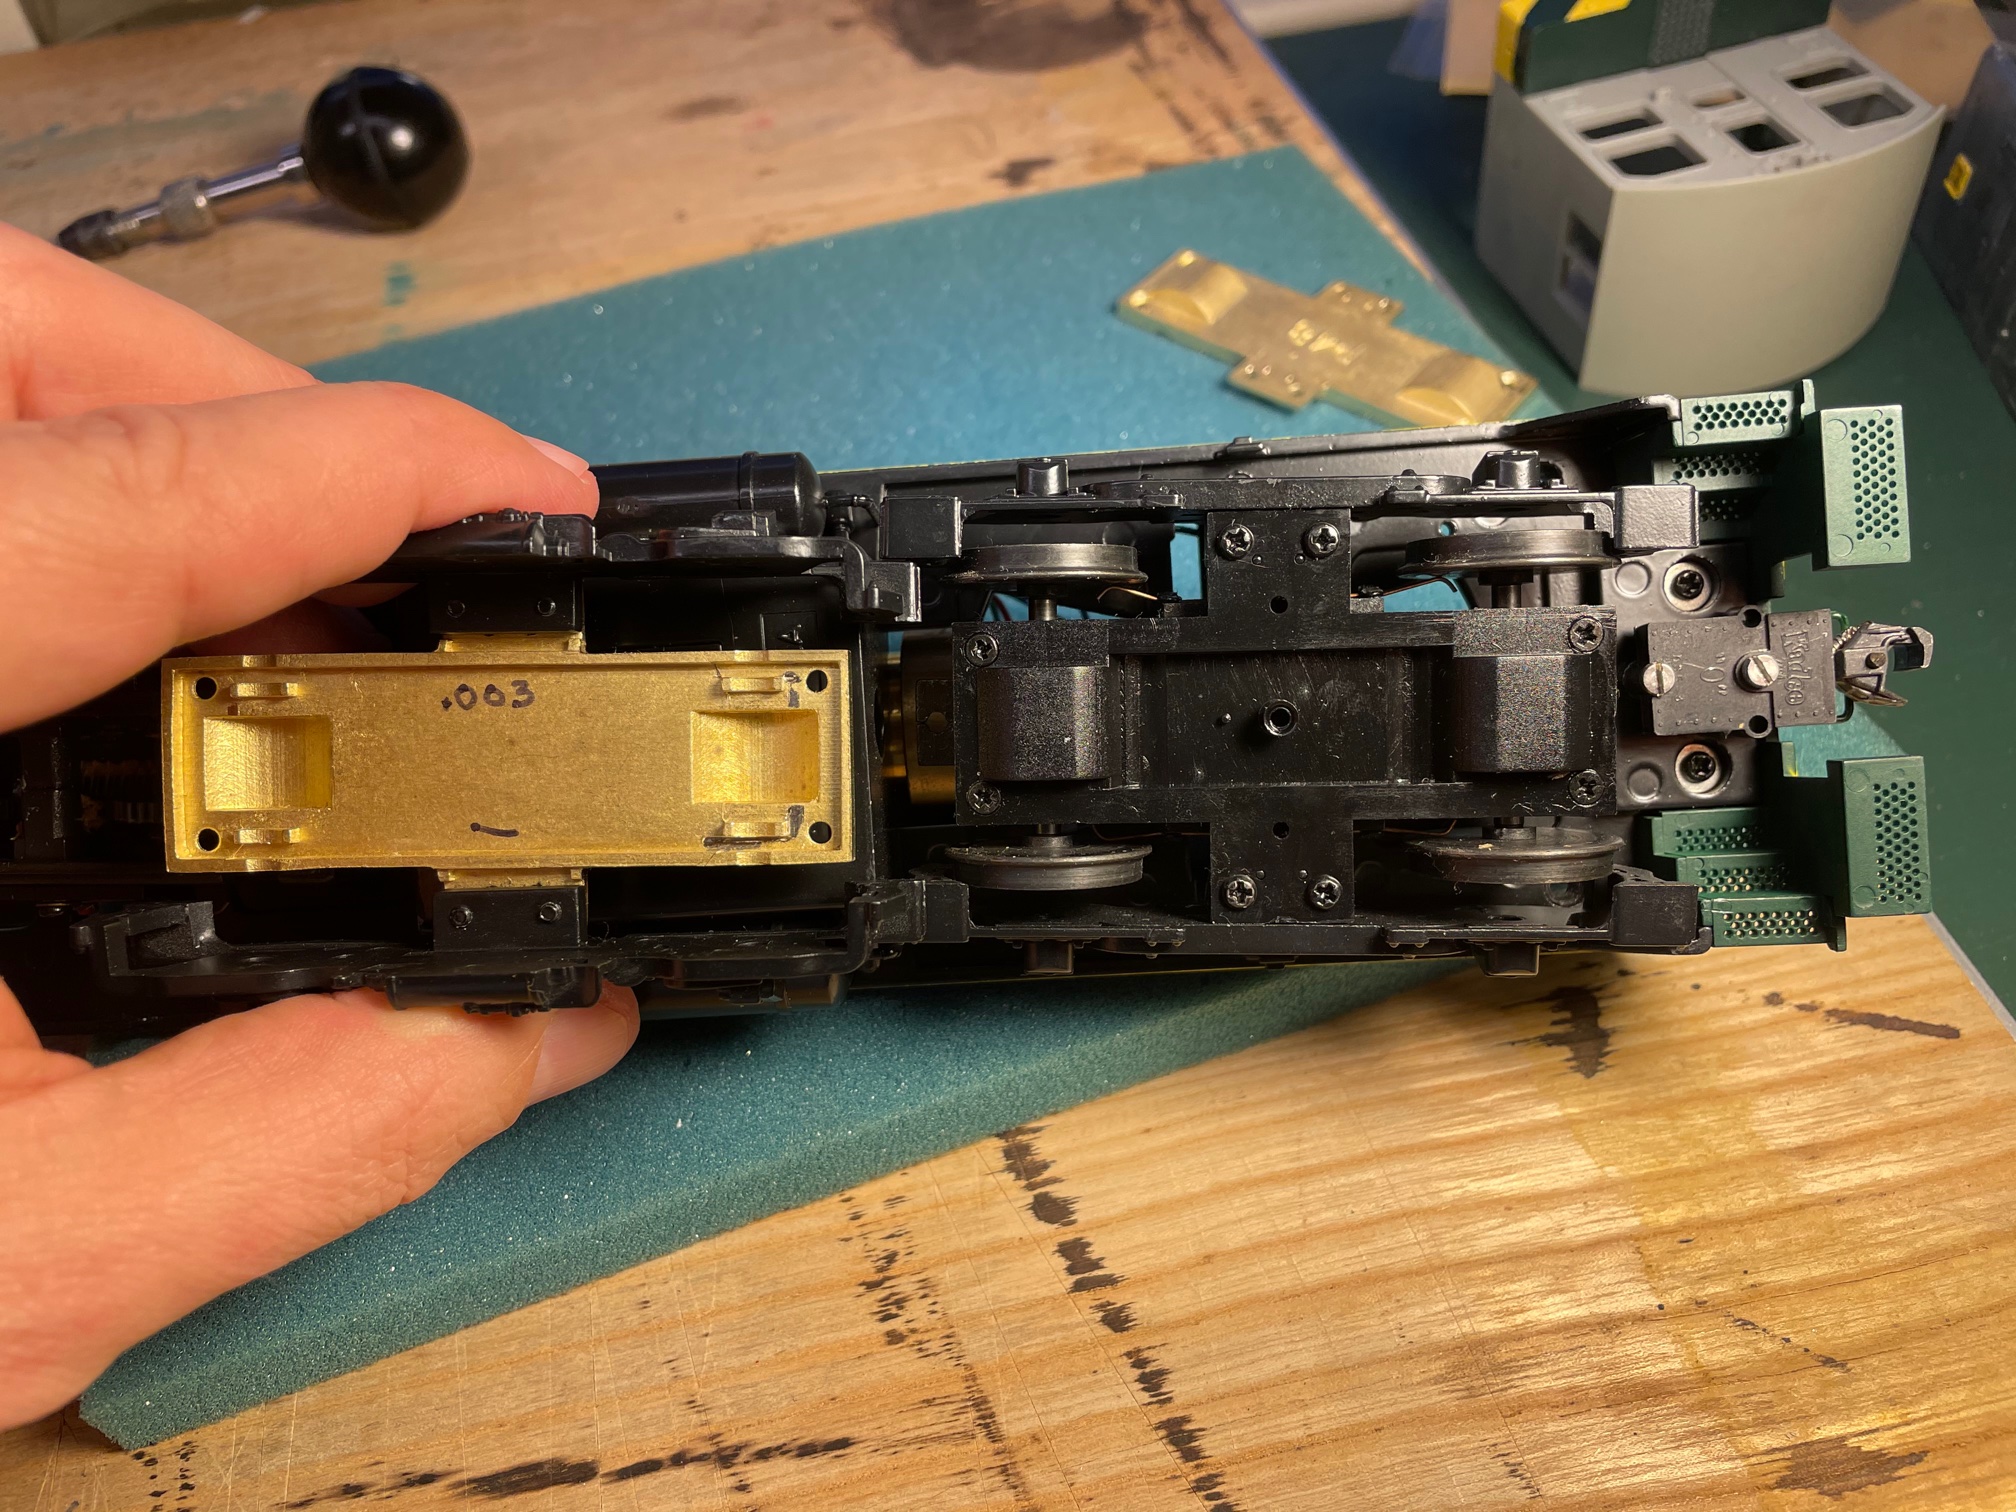
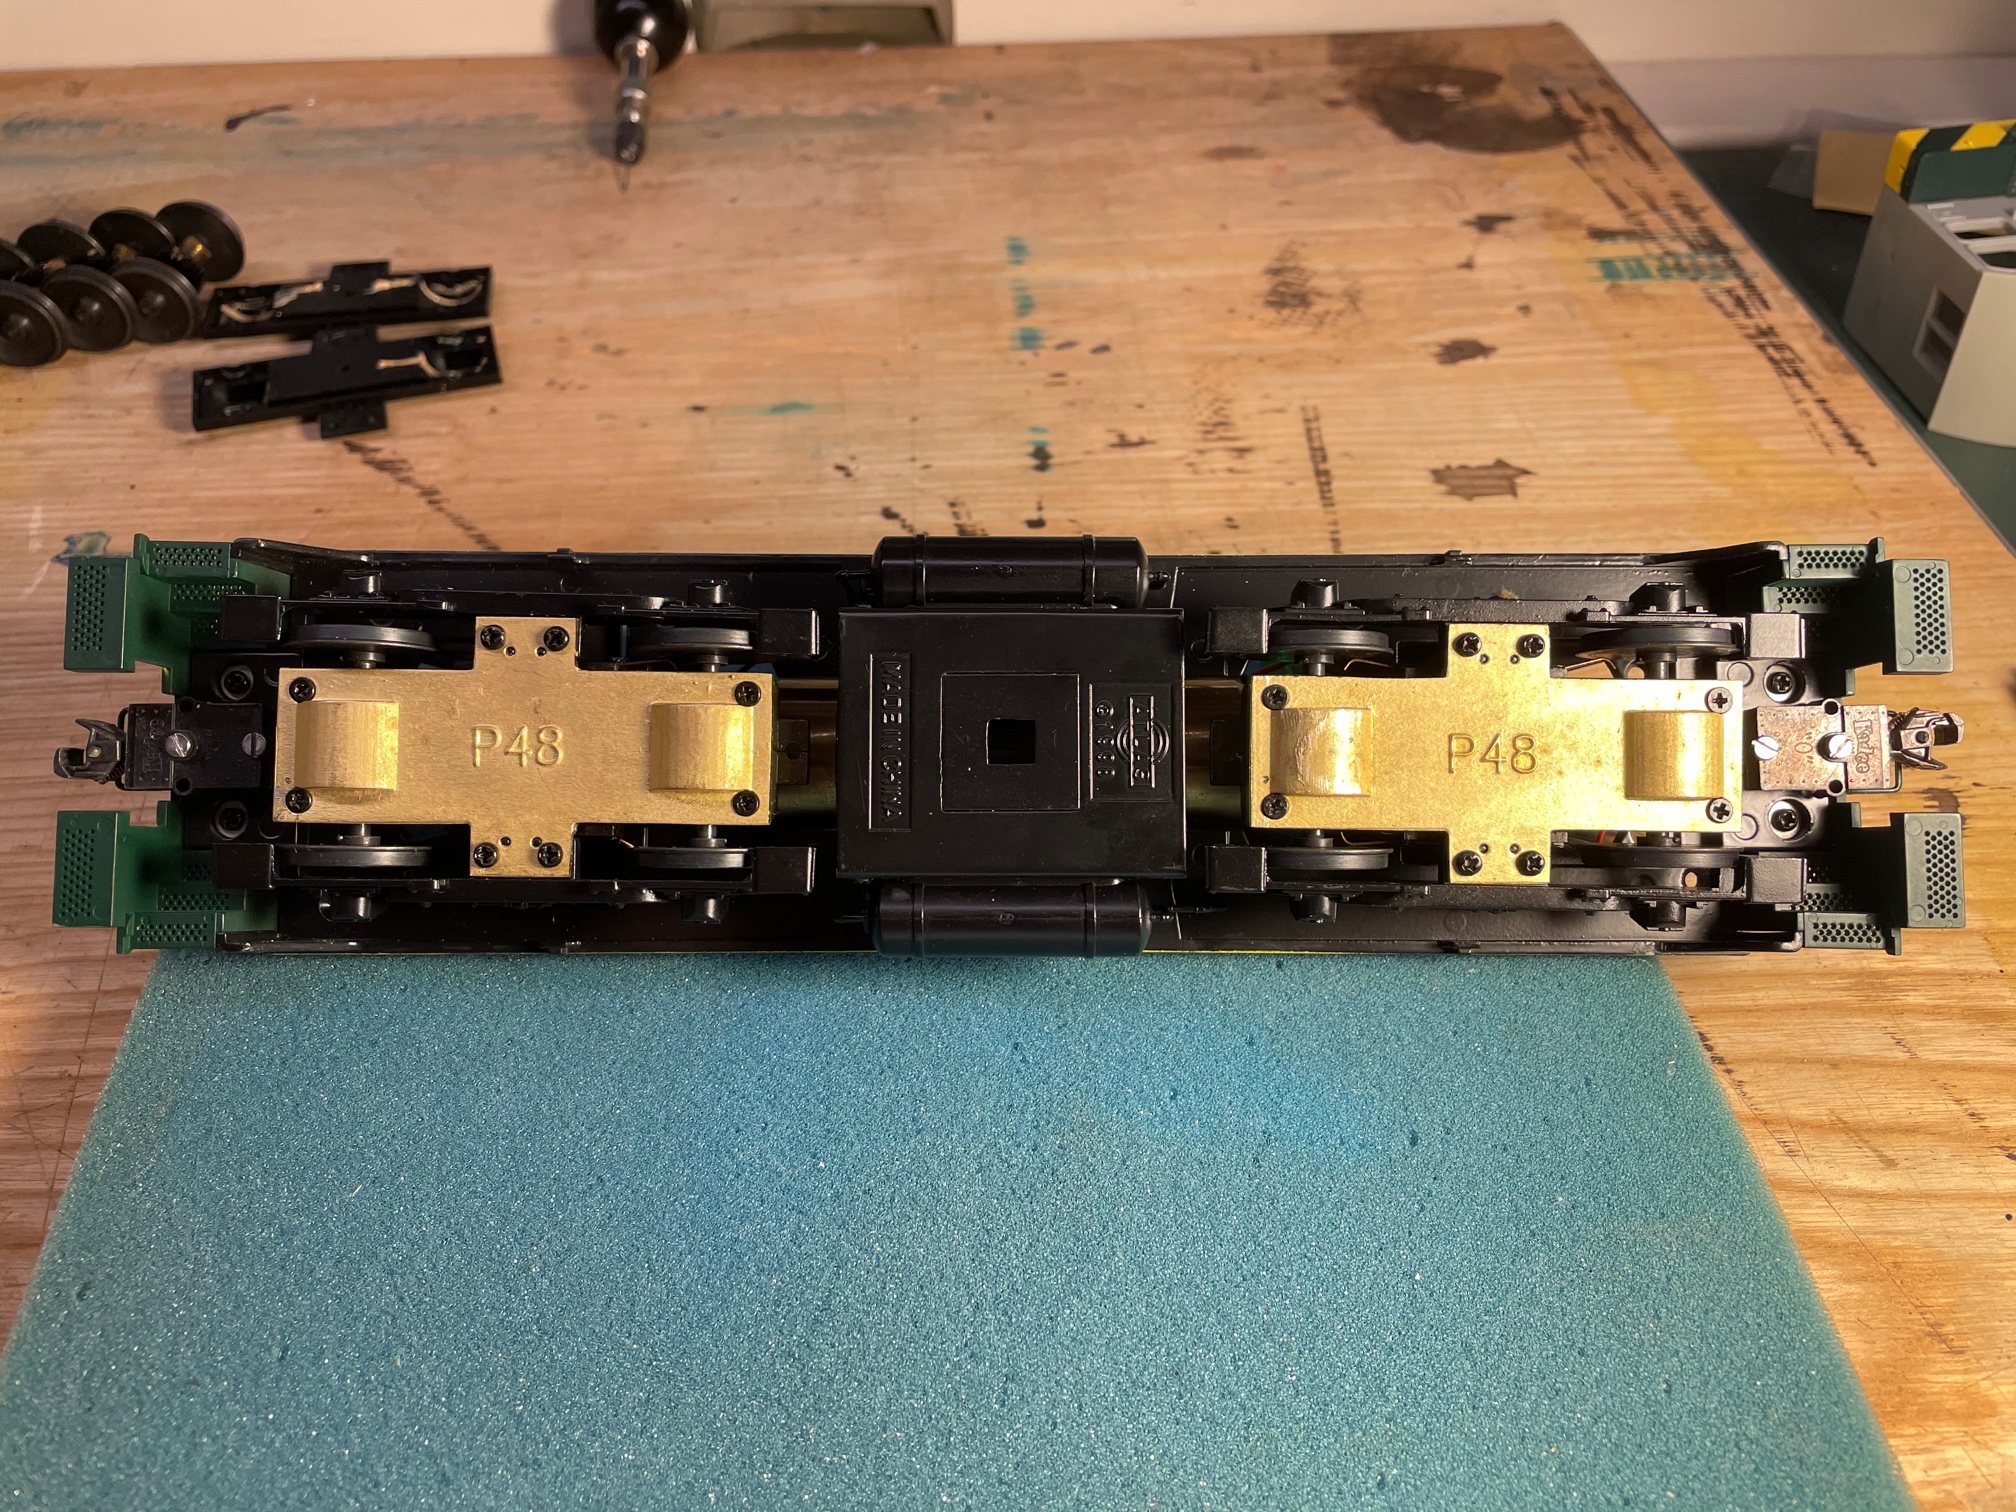
I’ve been working on pair of GP7’s recently. I’ve managed to find a pair of the Atlas O GP7 shells. I am replacing the long hood assembly of a Red Caboose GP9 with the Atlas O GP7 long hood to build my GP7’s.
I am working on the drives first. I’ve been acquiring the parts for this build for a while now. Even before I bought the Atlas O shells.
I started with the P&D replacement drives for the Red Caboose GP9. The two drives have been waiting their turn on the workbench for a while. Funny that when I examined the gear towers of the drives. The top gear of both towers in one drive had cracks. Not a problem as I had planned to replace the gear towers anyway.
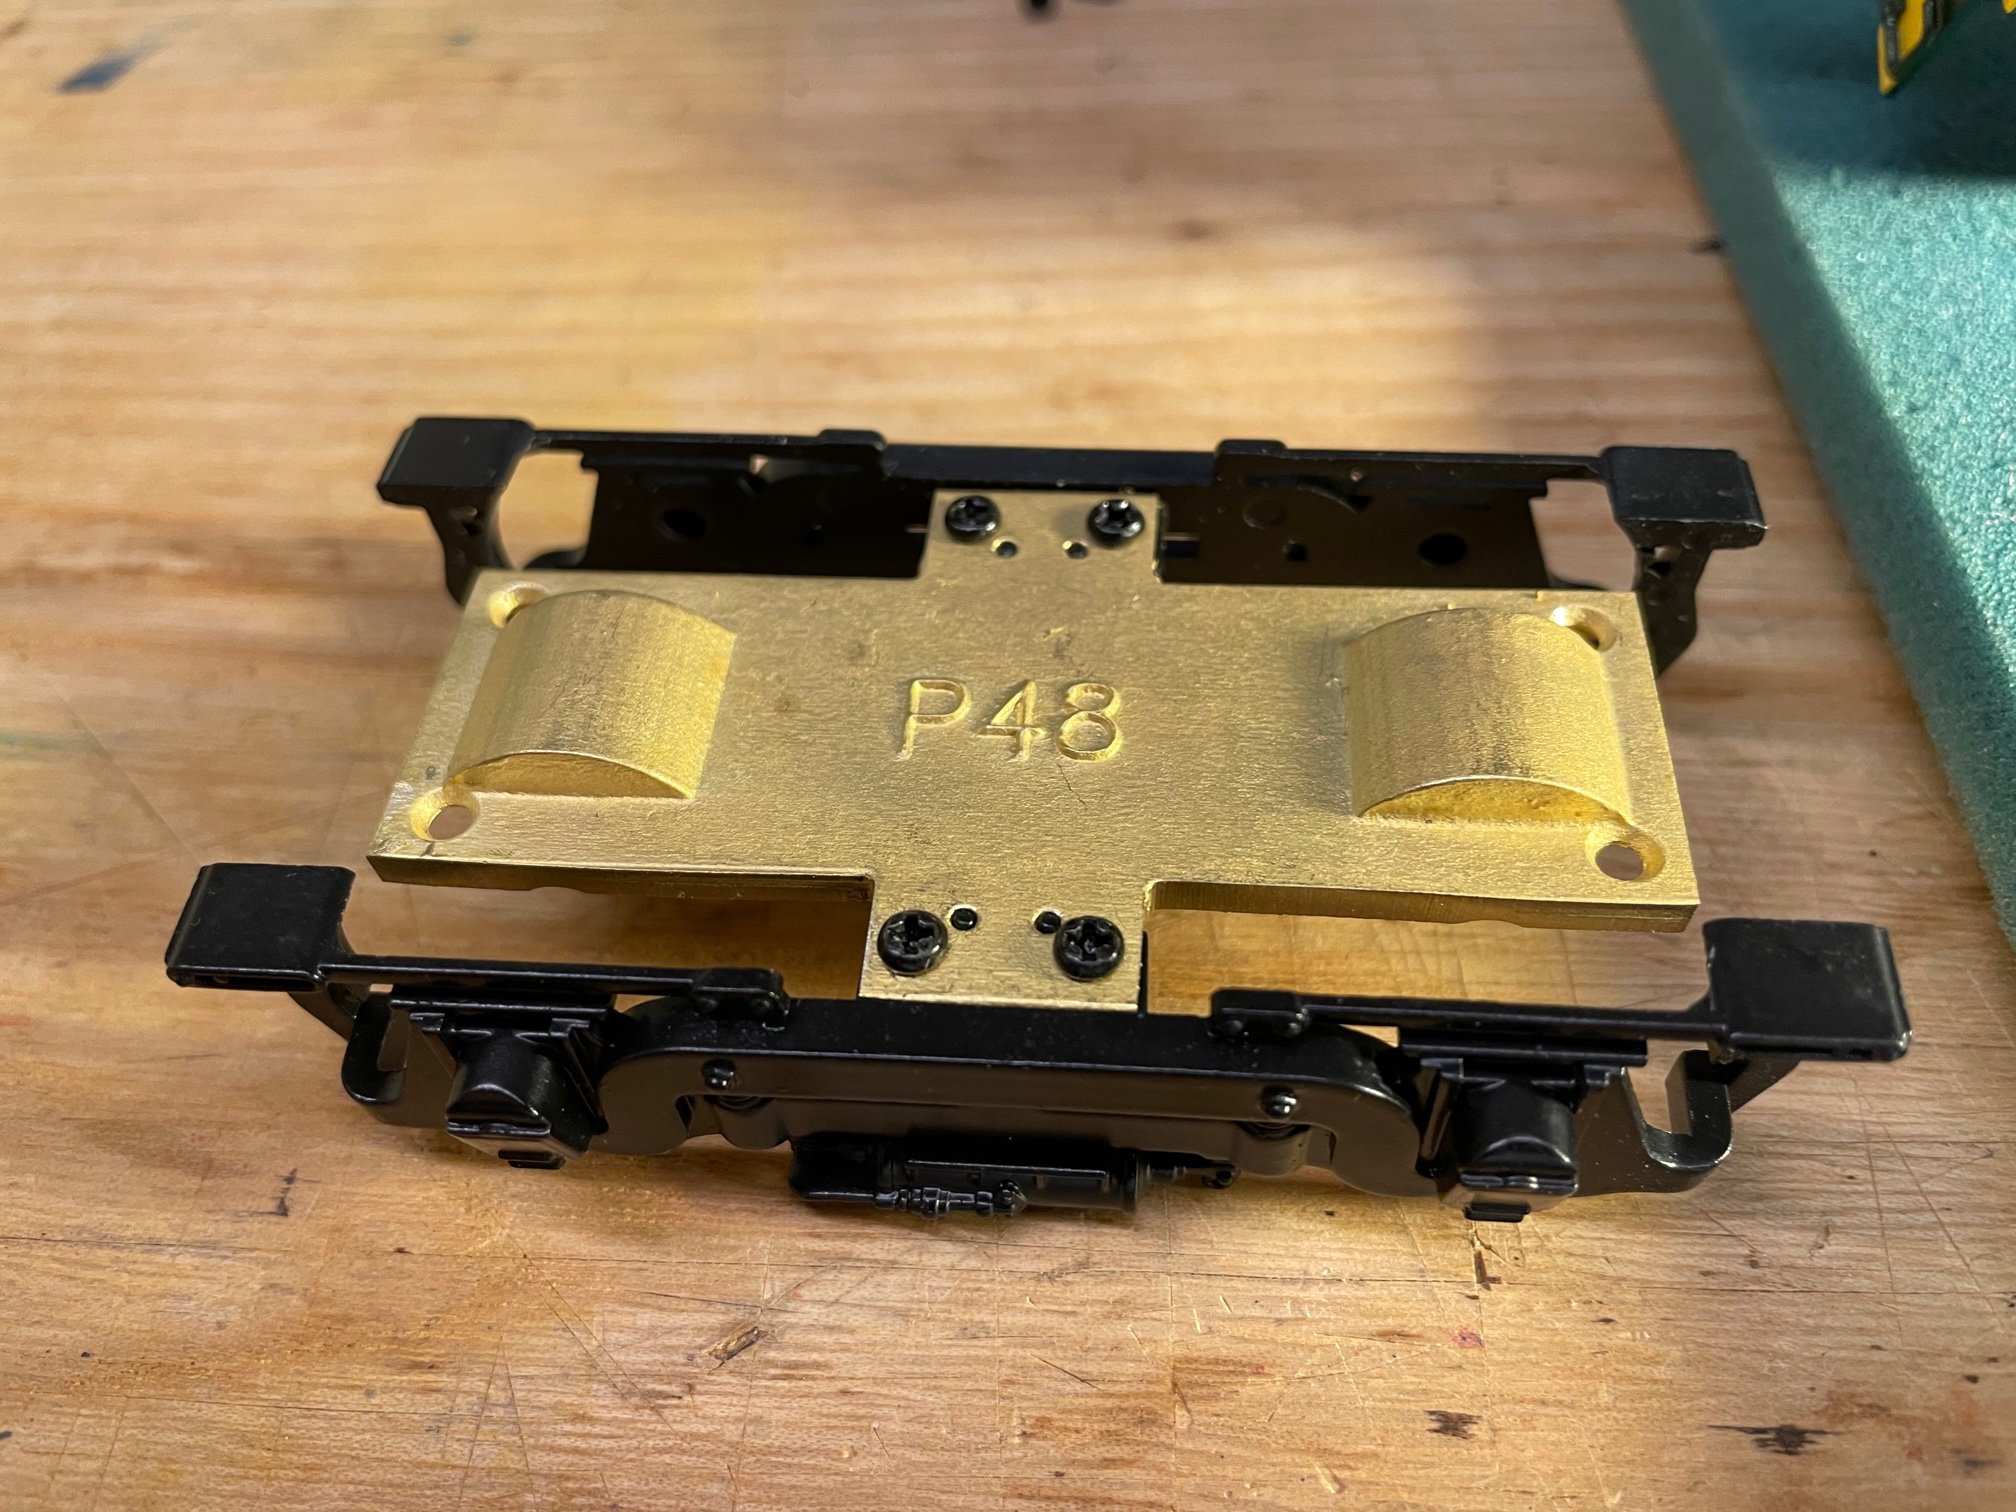
I am using the FineScale 360 Gear Tower and also a set of Right-O-Way conversion wheels and truck castings for the P&D EMD Blomberg truck. This conversion set might go back to when these parts were sold be Protocraft.
Since you have to disassemble the truck to install the conversion parts, I thought it would also be a good time to install ball bearing on the axels. You can see one of the ball bearings on the axel below. I’m using a FR133-ZZ Flange Mini Ball Bearing from Bearings Direct.
The model’s bearing in side frame have been modified to fit the new ball bearings on the axel ends. Next step is to paint and reassemble the trucks.
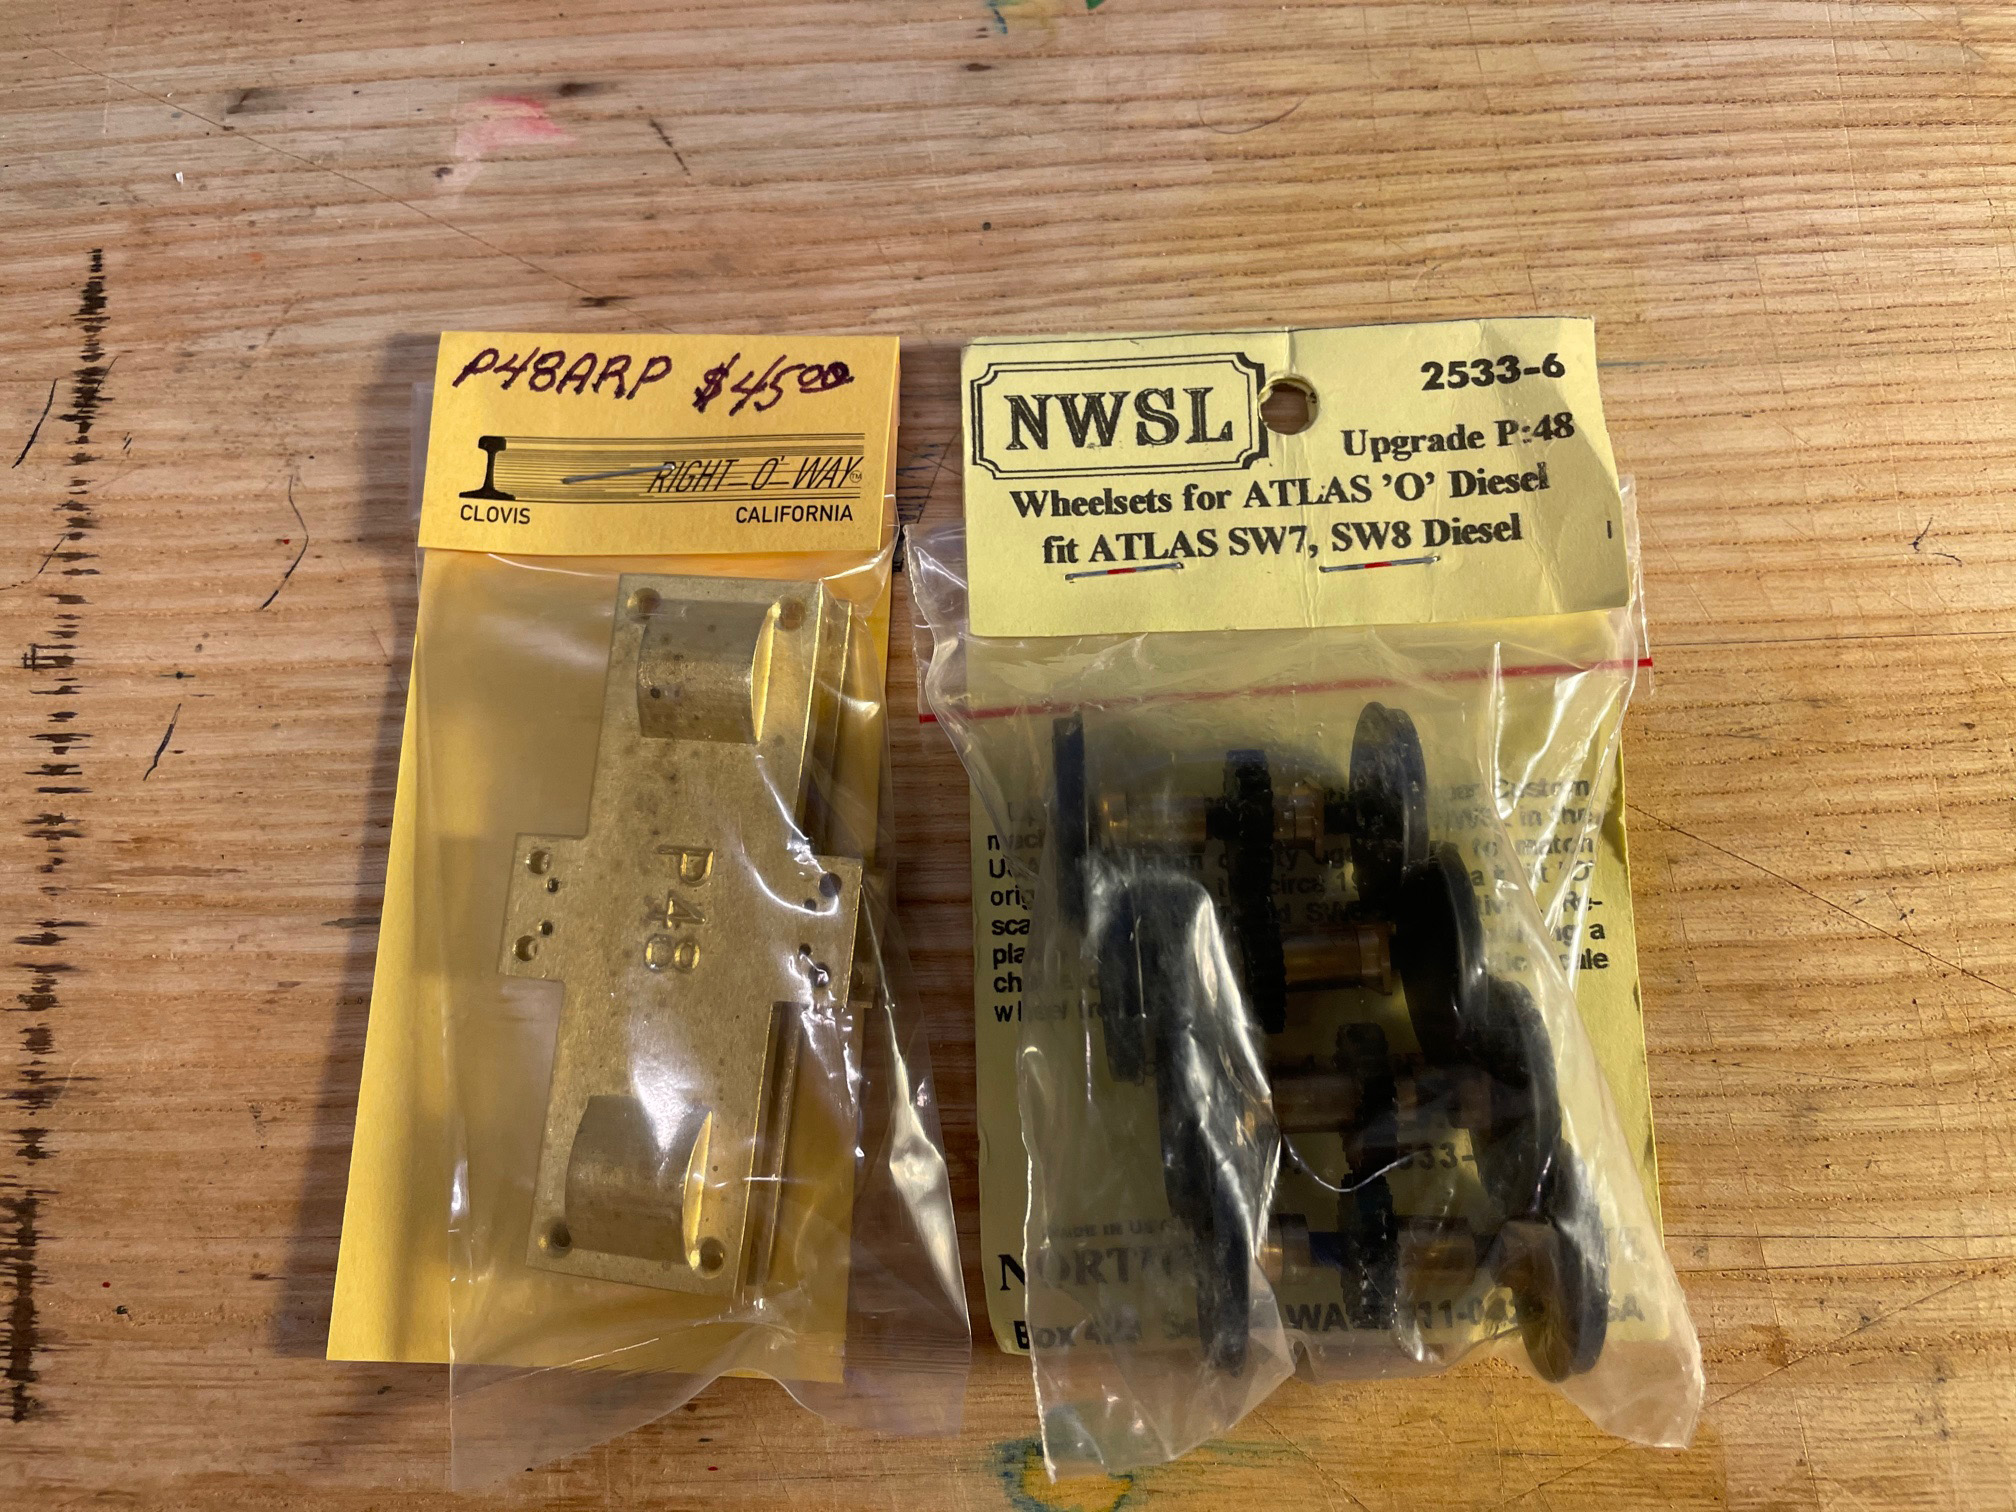
I have two Atlas “O” switchers, I thought my one project drive had been converted already. But when I got a phone call from a friend asking about Atlas SW wheelsets, I checked the model and it did have an upgrade set of wheels but they were the .145 NMRA wheels.
No problem, I had a set of P48 wheels on the shelf for a while (check out the old packaging), but the retainer plates I just got in a couple of weeks ago from Right-O-Way.
The retainer plate replace the original Atlas part. They are very simple to install, just unscrew the original plate and replace it with the new one.
Here you can see how much the ROW retainer Plates pull in the truck side frames. It’s a very simple conversion, four screws remove the retainer plate and four more hold the side frames.
I really should have painted them BEFORE installing them. But my “mistake” allows you to see them more clearly.
All done. My Frankenstein SW9/NW2 project back together. Still not sure this project will continue or be turned back into an SW9.
The Right-O-Way Proto48 Retainer Plates combined with the NWSL Proto48 Conversion Wheelsets really make this a simple and much improved looking conversion. I’ll time it next time, when I do the other switcher. It could not have taken more than a half hour to complete. The only tool required was a Phillips screwdriver.
Right-O-Way sells the retainer plates by themselves or with the conversion wheelsets. They really do make a big difference in the appearence of the trucks.
It’s funny how sometimes the simplest of things will lead you down a rabbit hole. I am continuing to clean the train room and put stuff away. I noticed an Intermountain truck I had assembled with San Juan plastic Proto48 wheelsets sitting in it. They fit perfectly and roll great. But they are plastic wheel sets so you can’t polish the wheel surface and plastic wheels tend to pick up a lot of dirt.
Having that truck in my hand and a having a clean workbench, led to pulling out a Protocraft wheelset to look at. Which led to measuring the wheelsets and then the next thing you know out comes the wheel puller and more mearuring to see if the wheels could be placed on the San Juan axels. Nope, they would need to be machined to fit properly, not a quick solution.
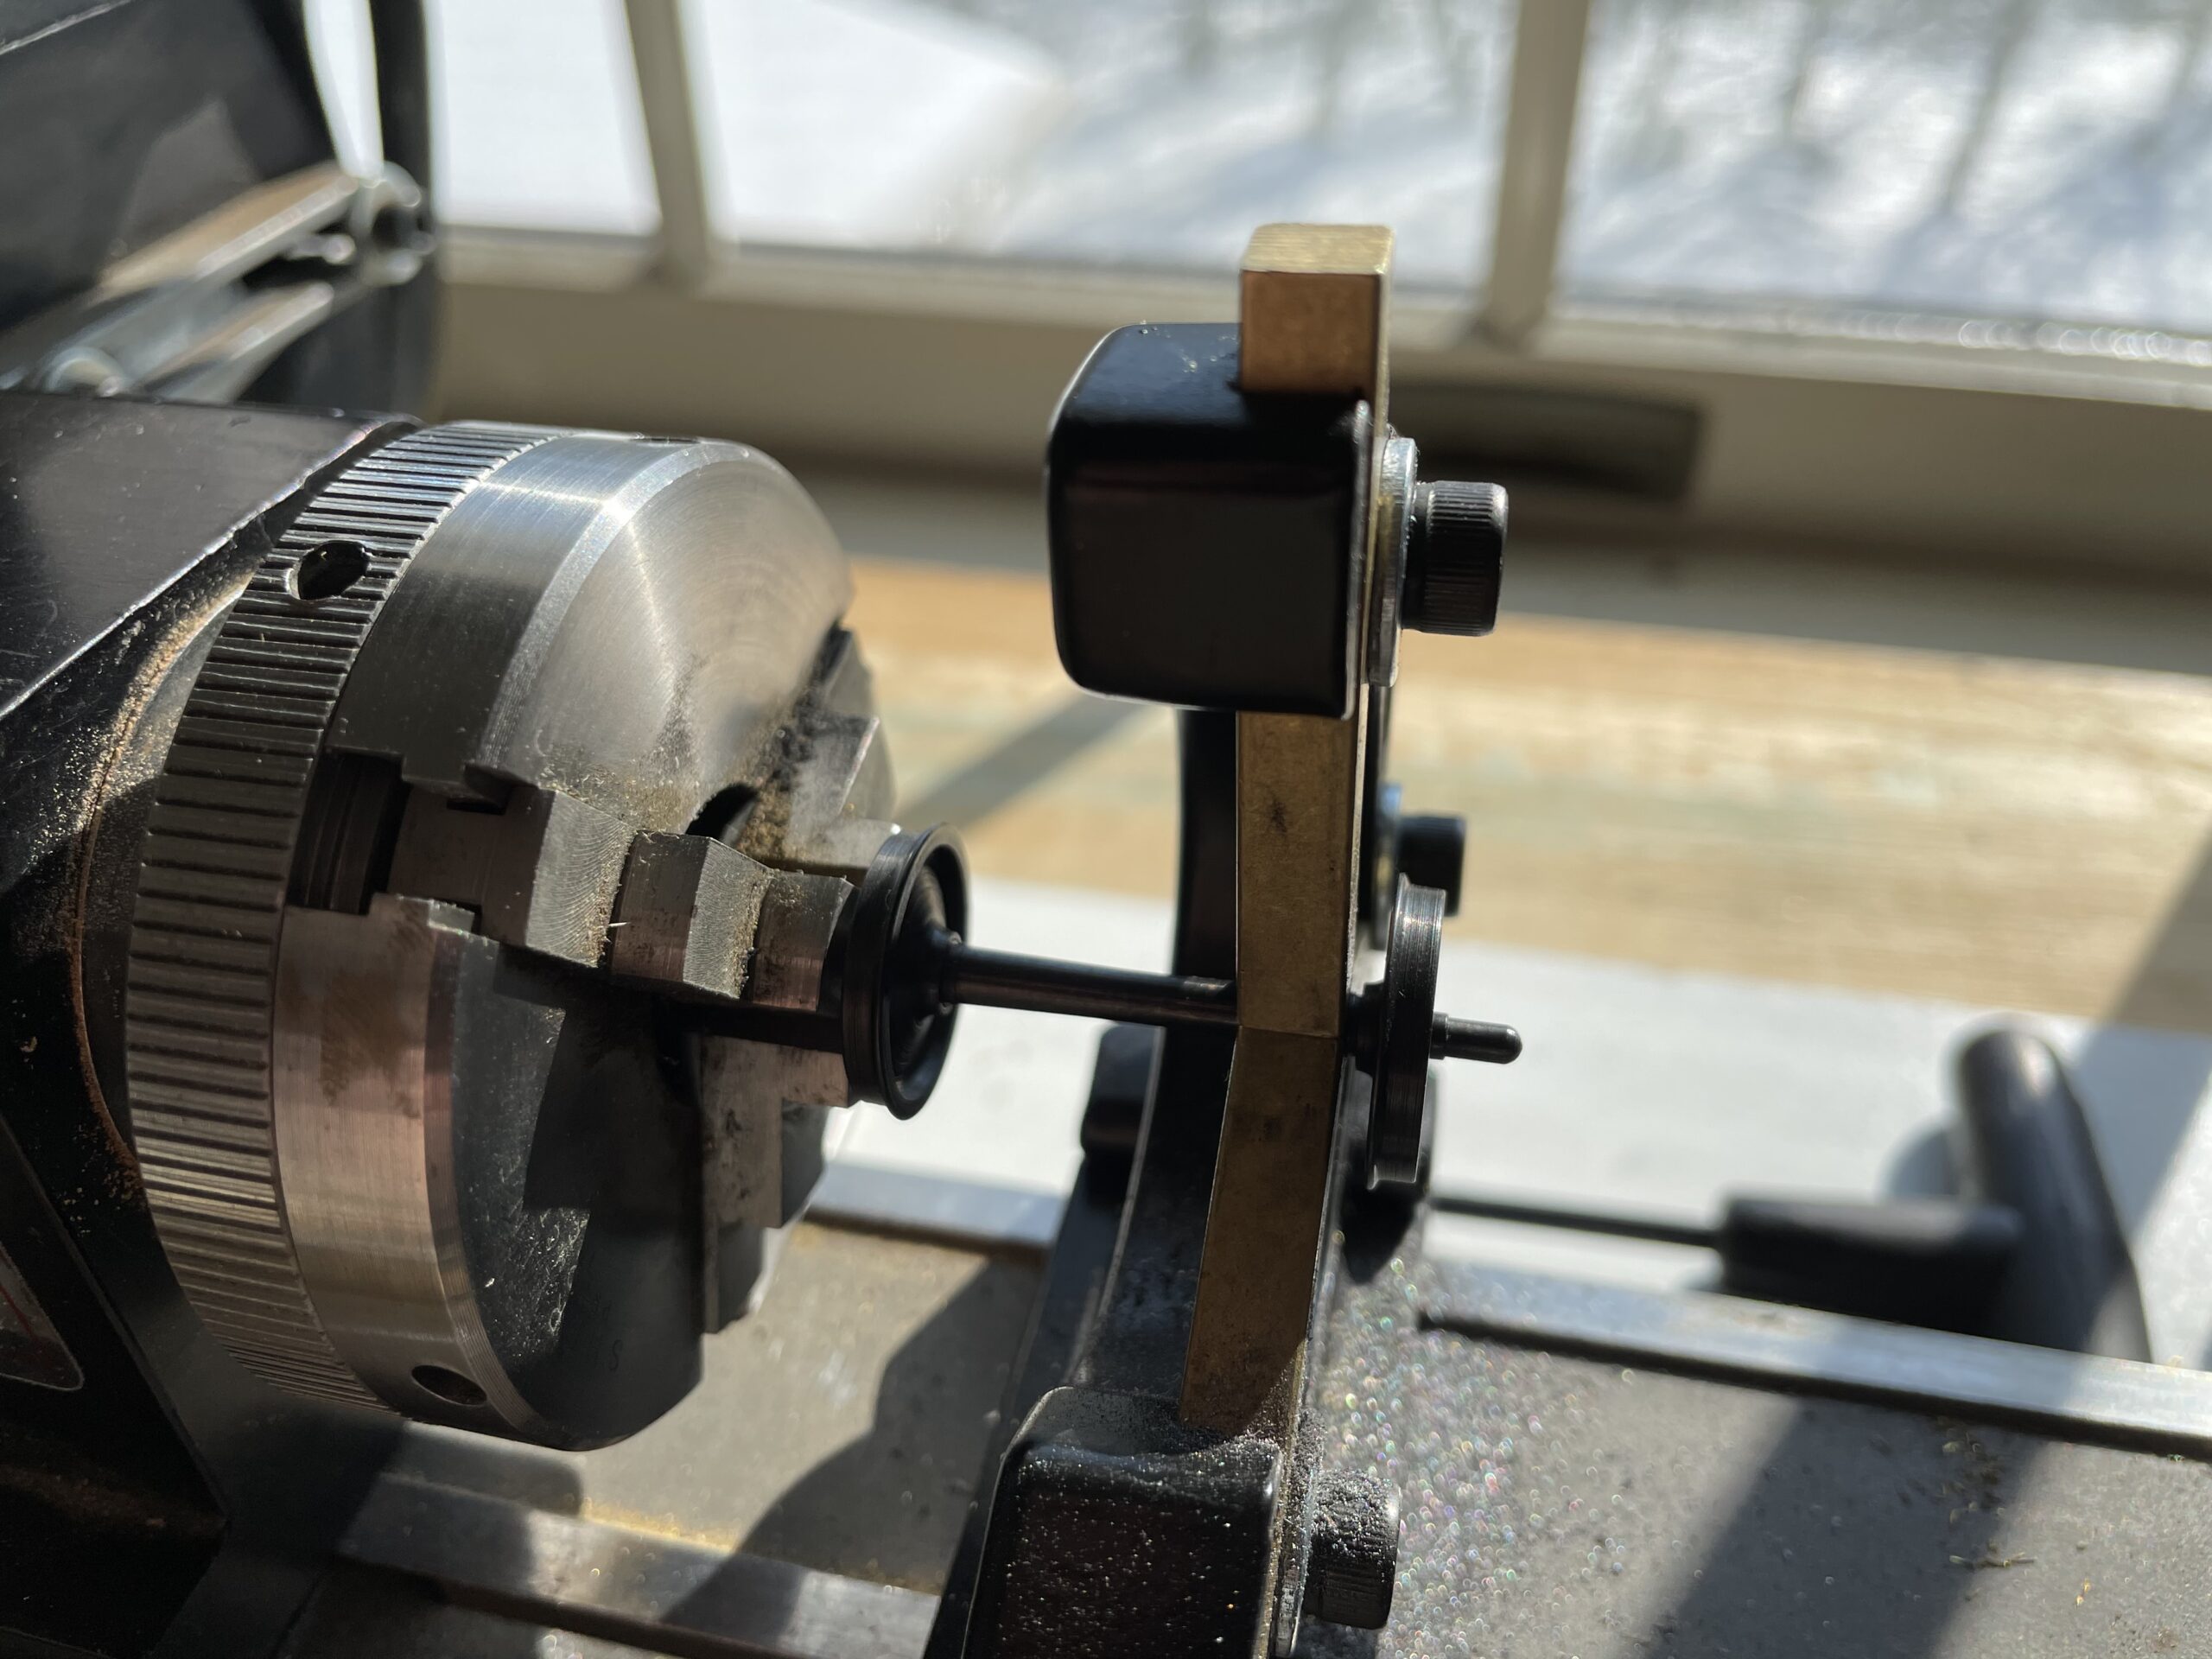
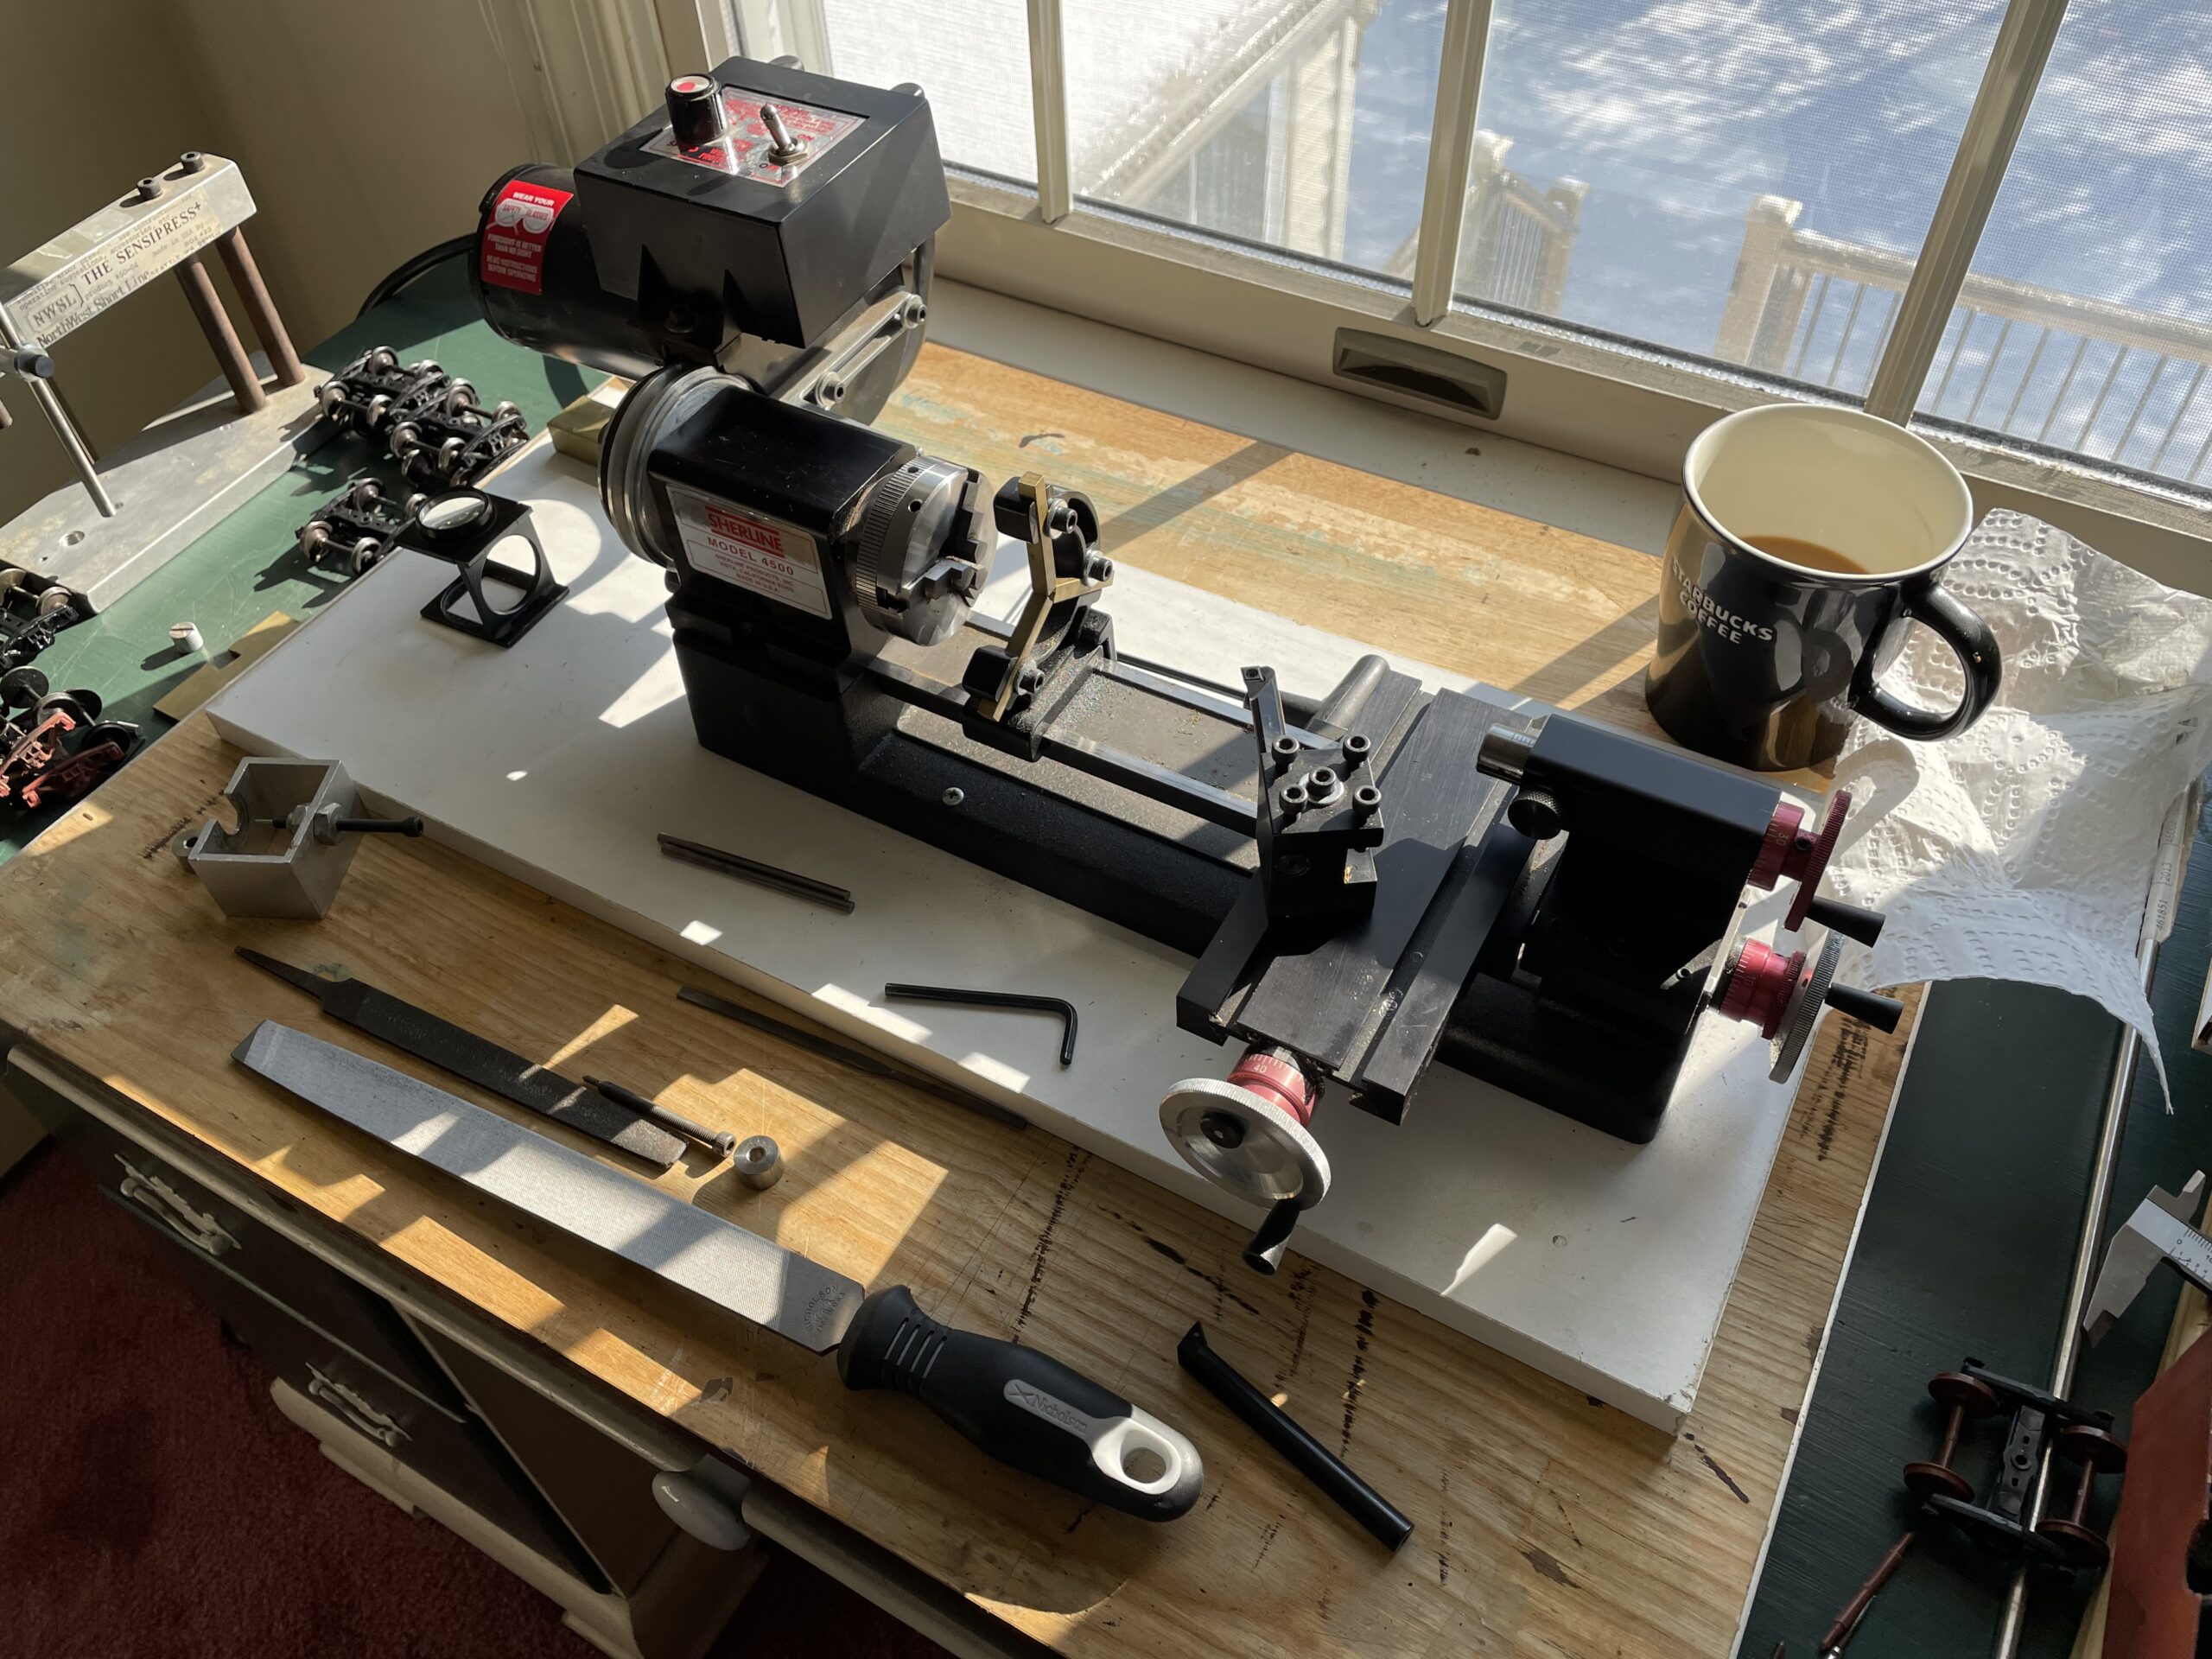
This led to thinking about adding a point to the ends of the Protocraft axels. Which meant the Shereline lathe came out onto the workbench. Which led to the question, how can I hold that tiny axel in the lathe?
I looked at trying to hold Protocraft axel in the chuck. Not the best of ideas because of all the erregular surfaces of the protocraft axel. Might have worked with a straight axle. Which led to should I make new axels? No, this is meant to be a simple solution. Which lead to finding my collets…. which lead to a whole other search. Turned out they were where they should be and I just looked right past them. That really wasn’t the best way (for my set up) to hold them either. Which led to thinking about a set up I’ve used to polish wheel treads using the chuck and a steady rest.
Now before the machinists in the crowd start rolling their eyes, I should remind you that I did not take metal shop in High School, I took art classes. And as a machinist, I turned out to be a good Graphic Designer.
Well it worked, but putting the wheels back on the axel turned out to be more to think about. They were is perfect gauge from the manufacturer and when the day started. A simpler solution was needed.
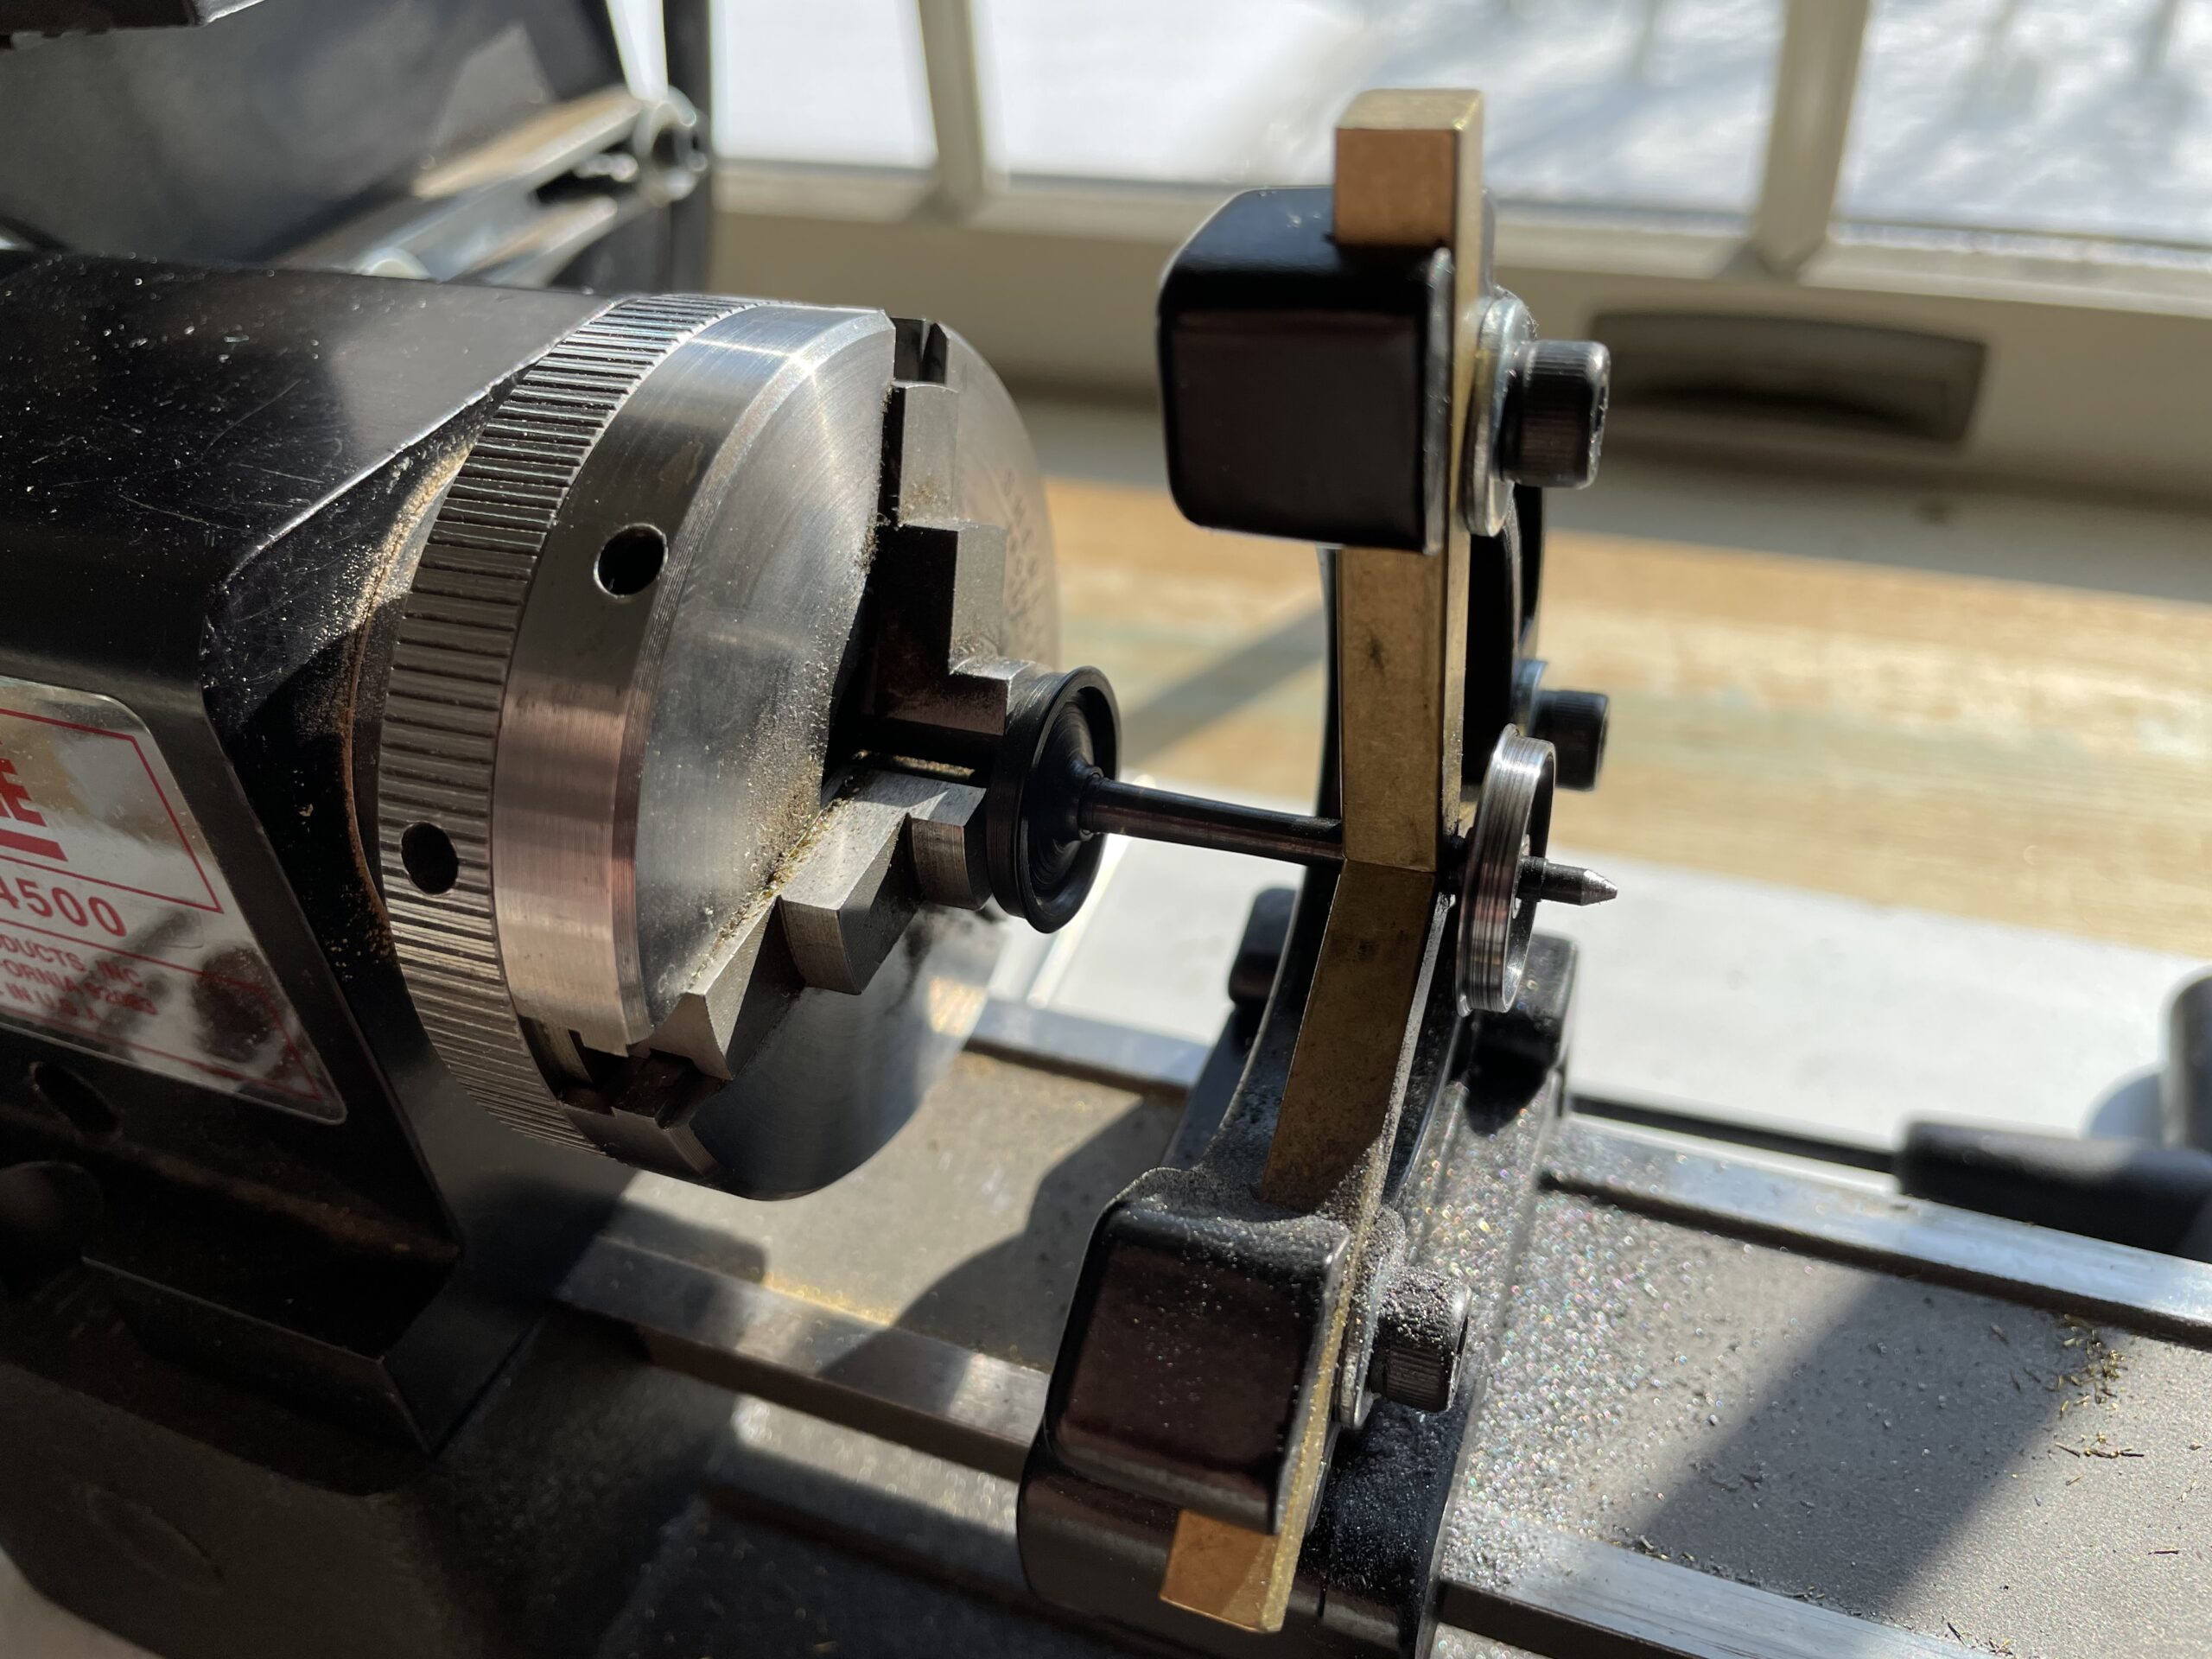
As you can see I found a simpler solution, leave the wheels mounted on the axels. The axel is held by the chuck, supported on the other end by the steady rest. The wheel treads get polished and a file is used to add the point on the axel.
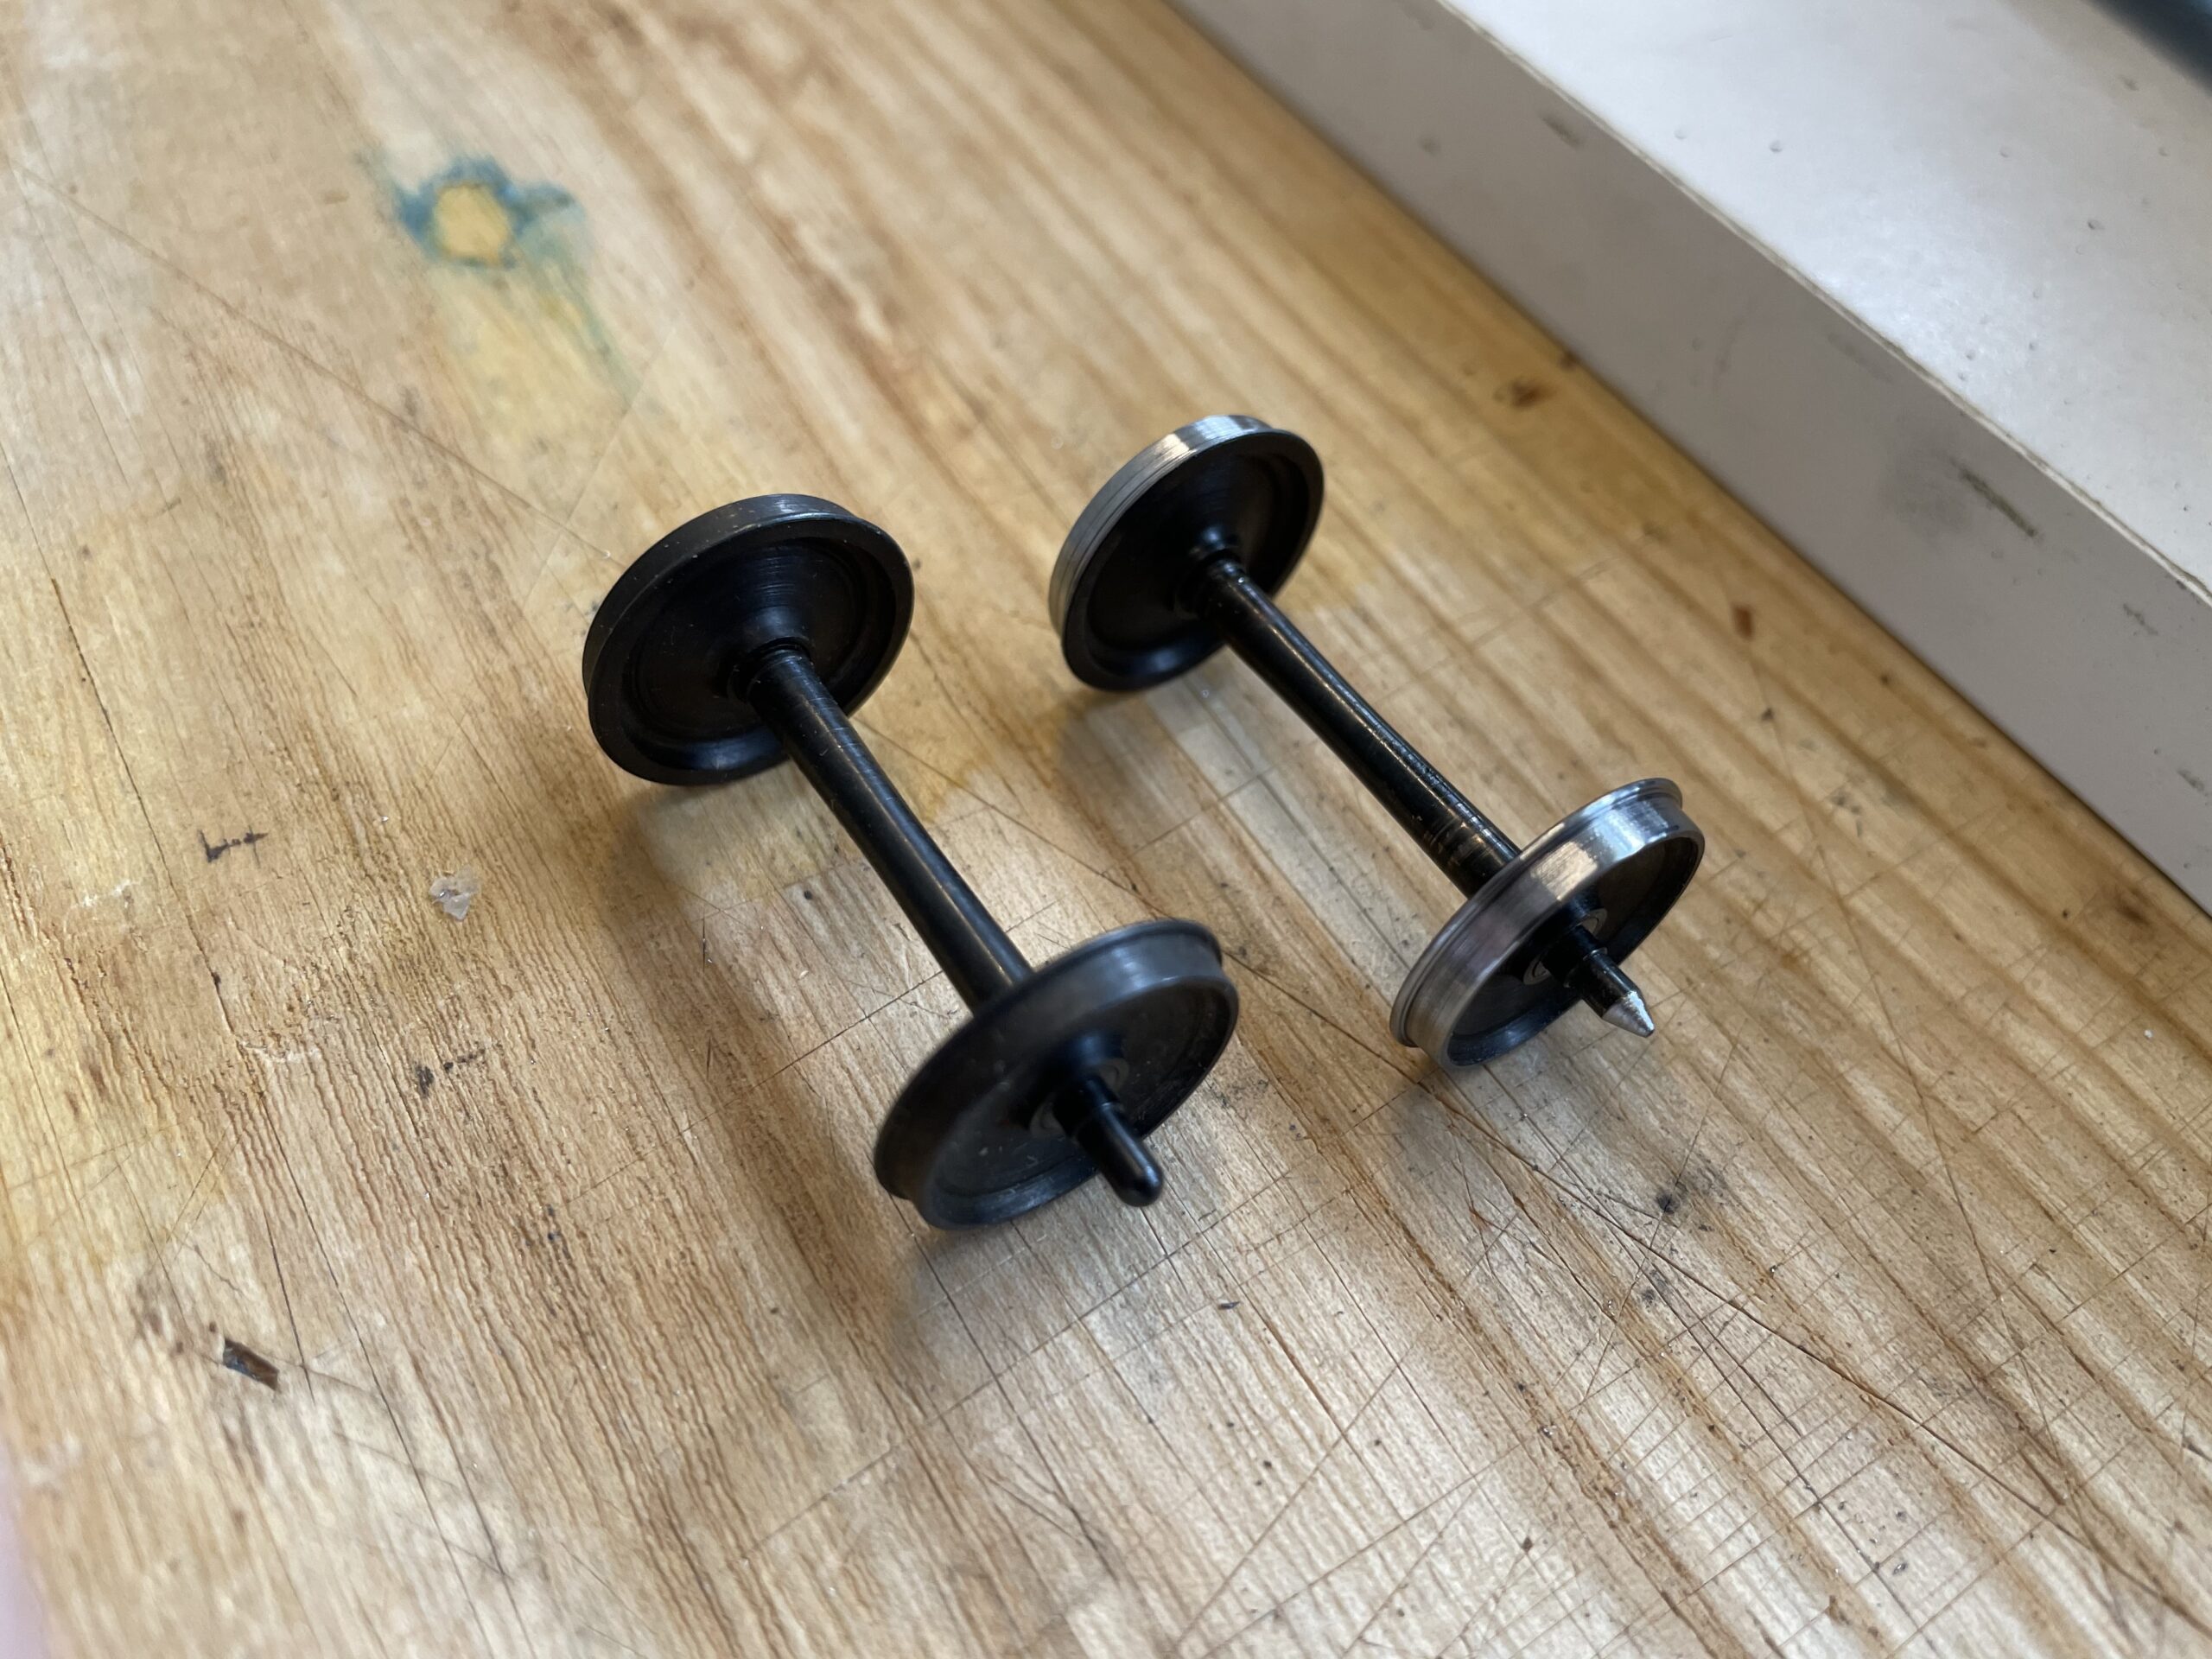
Here is the before and after of the Protocraft axels. They now drop into the Intermountain truck and it rolls great.
I tried cutting the point but that put forces on the axel in this set up which caused it to move. If I had used a collet and just held the axel then that would have worked. But I didn’t need close tolerances on the point, I just needed a point on the end of the axel.
I also want to mention that I said in the last post that the workbench would not stay as clean as it was. It didn’t.
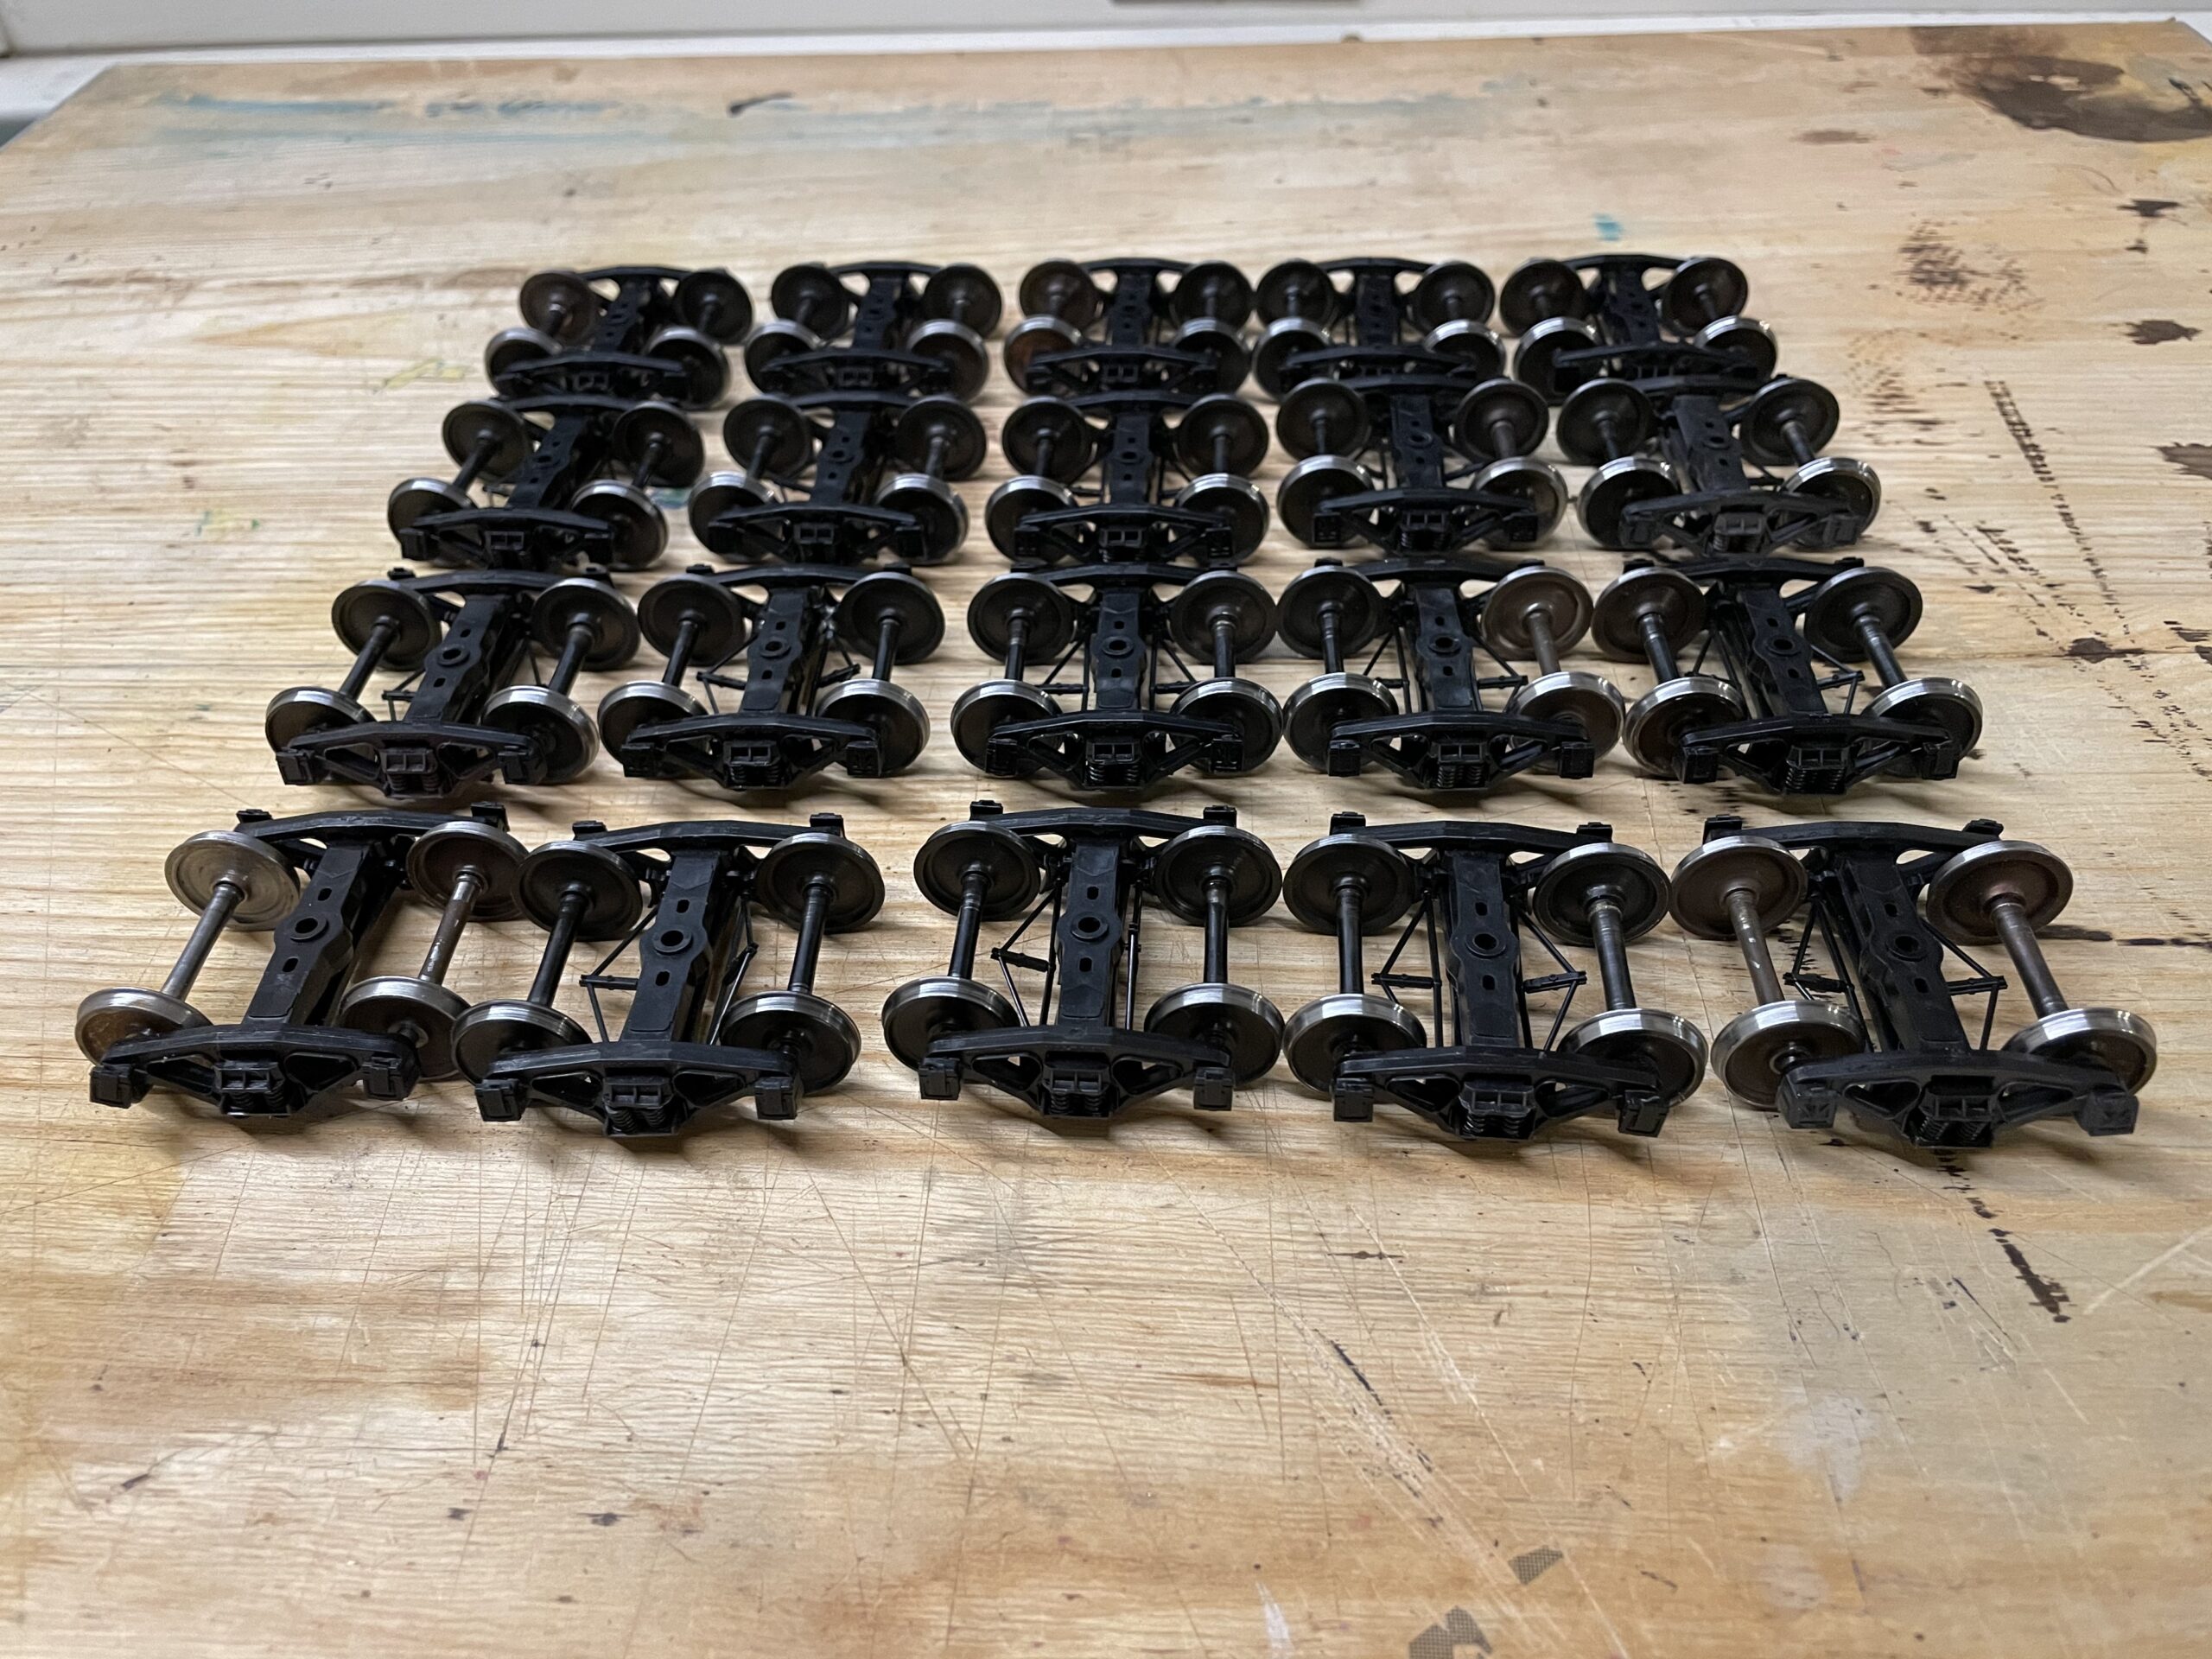
That worked so well, I built up ten pairs of trucks.
The imported trucks from Protocraft and RY Models are GREAT! I own more pairs of them than I want to admit. Sometimes, you just don’t want to put a $52 pair of trucks under a $20 freight car.
Putting away one Intermountain truck with San Juan plastic wheels led to this. But notice, I was good about putting away the lathe and I’m back to a clean workbench.
Now, what cars do I want to put these trucks under…..
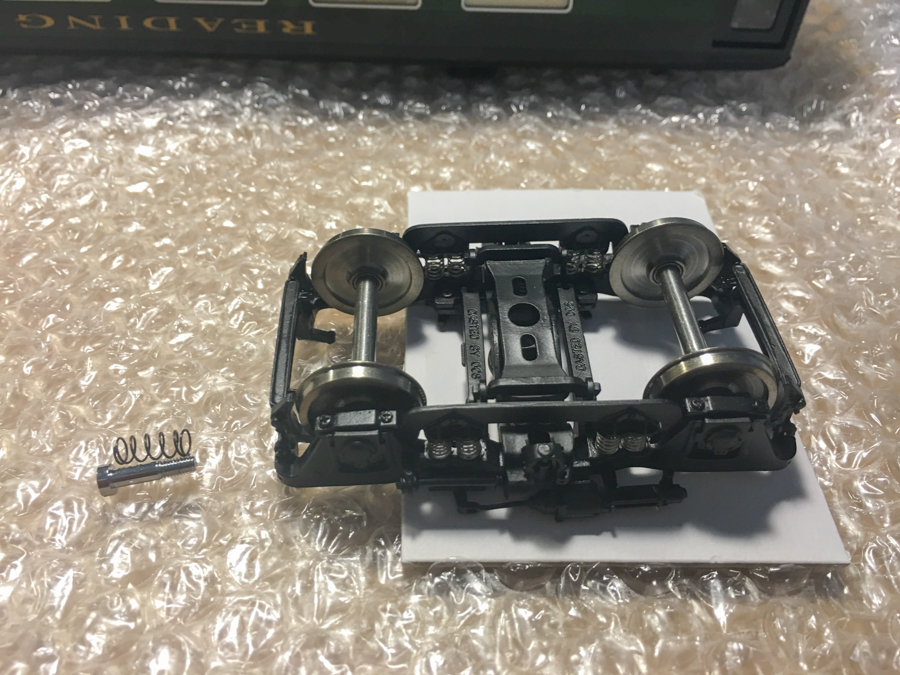
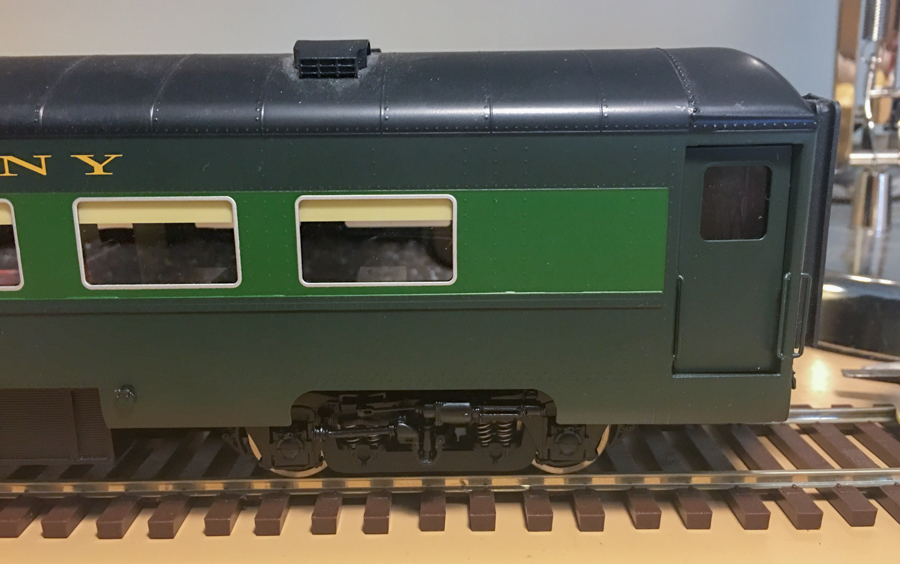
The seven SGL cars after I installed the Protocraft trucks.
A couple of years ago I picked up a 3-rail seven car set of the SGL Reading coaches for a very good price. It turns out that Protocraft had imported a General Casting Corps 41-N passenger truck which is what is under them. So it looked like the conversion would be rather simple.
Well, nothing is ever as simple as it might first appear. I test fit one set of trucks under a car and thought the car might be sitting a little high. Thinking I had to modify the 3-rail bolsters under the cars the project ground to a screeching halt. The box with the seven pairs of trucks sat on a shelf right next to the cars for a while (it sat long enough for me to have to dust off their roofs as I worked on them).
I just finished a cleaning project in my train-room, well I’m still still cleaning some parts of the room. So lets just say I cleaned a spot to put my old drafting table back in the train-room. Now, I can work on projects on a much wider area. Feeling inspired, I pulled one of the cars down and set it on top of the trucks again. I never did actually attach the trucks to the car. My thought was that I would figure out how much I would have to mill the bolster down to bring the cars down.
I wasn’t exactly sure how much that was so, out came the books. First couple of images were close but it was hard to tell. So, I went through the images I had on the computer. Again the car looked like it did in the photos. Cool, maybe I didn’t have to mill the bolsters after all.
The Precision Scale Company bolster screws fit nicely into the SGL bolsters and they actually fit the Protocraft trucks also. So, it was a simple matter of attaching the trucks using the Precision bolster screws and springs.
Next up for these cars is fitting couplers onto them. Since, they started out as 3-rail cars they don’t have any coupler mounting pads on them.
The original 3-rail truck screws in the bolster boss.
Protocraft General Casting Corps 41-N passenger truck inverted next to the precision Scale truck bolster screw and spring.
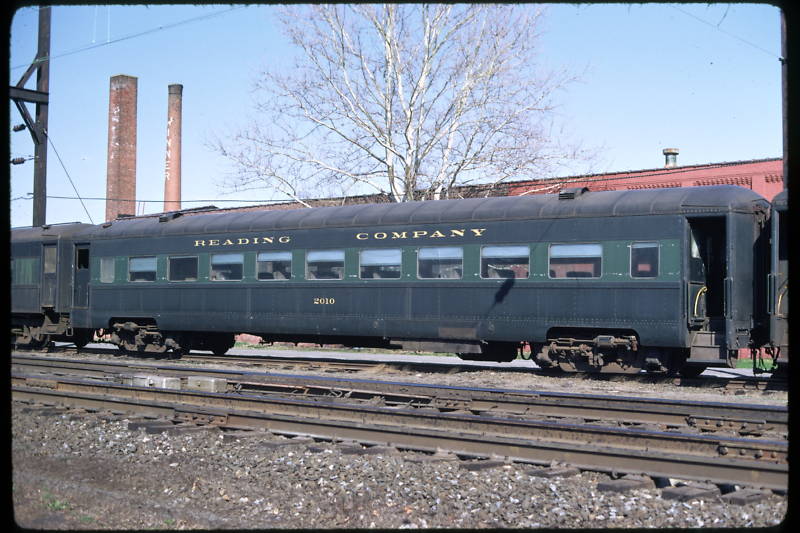
Close up view to compare to the prototype photo below it.
One of the prototype cars later in their service life in West Trenton, NJ.